You walk into your bathroom expecting a fresh start, but instead you're greeted by water spots, soap scum, and a faint musty smell. It doesn't have to be that way. A truly clean bathroom isn't about spending hours scrubbing—it's about working smarter, not harder.
These 23 steps are designed to reset your bathroom's shine in a single focused session.
Each step targets a specific trouble spot, using everyday tools and minimal elbow grease. By the end, you'll have a bathroom that looks and feels like new. No harsh chemicals, no complicated routines.
Just a straightforward, room-by-room approach that delivers visible results. Ready to transform your space? Let's dive in.
1. Clear the Clutter First
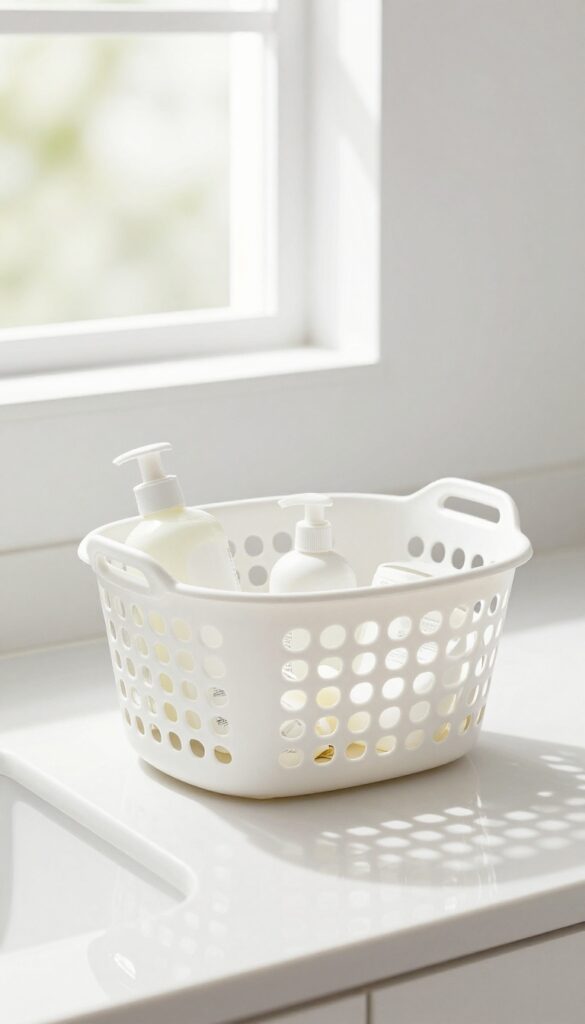
Before you can wipe down a single surface, you need to get the stuff out of the way. Toothbrushes, soap dispensers, shampoo bottles, decorative jars—everything sitting on your counters, shelves, and in the shower is just an obstacle. Removing it all at once gives you a blank canvas and ensures you won't miss a single spot.
Grab a laundry basket or a plastic bin and start moving items out of the bathroom. Don't worry about sorting yet—just get everything into the basket. This includes toiletries, cosmetics, razors, loofahs, and even the trash can if it's in the way.
Once the space is empty, you'll see exactly where the grime has built up. Plus, you can wipe down each item before putting it back, so everything comes out clean.
Why Emptying Matters
It's tempting to work around things, but that leads to missed corners and half-cleaned surfaces. When you clear everything out, you can spray and wipe freely without knocking over bottles or leaving dusty rings behind. It also gives you a chance to toss expired products or things you no longer use.
Where To Put Everything
A laundry basket works great because it's large and portable. Place it just outside the bathroom door or in a nearby hallway. If you're worried about mixing clean and dirty items, use a separate bin for toiletries and another for towels or bath mats.
The goal is to keep the bathroom completely bare.
Quick Sort While You Clear
As you pick up each item, give it a quick glance. Is it empty? Expired?
Something you haven't touched in months? Toss it now. This prevents clutter from creeping back in and makes your reset last longer.
A simple keep/toss/recycle decision takes seconds but pays off.
2. Spray and Soak the Toilet Bowl
The toilet bowl is often the most neglected spot because it requires a little patience. Instead of scrubbing immediately, give the cleaner time to break down stains and odors. This step lets you multitask—spray, walk away, and come back to a bowl that's much easier to clean.
Start by flushing the toilet to lower the water level. Then spray a generous amount of toilet bowl cleaner around the rim and down into the bowl, making sure to coat the sides. If you prefer a natural approach, mix equal parts baking soda and vinegar to create a fizzing paste.
Let it sit for at least five minutes while you move on to other tasks. The longer it soaks, the less scrubbing you'll need.
Why Letting It Sit Works
The active ingredients in cleaners need time to react with mineral deposits and bacteria. A quick scrub right after spraying misses the chance for chemical action. By soaking, you soften tough stains and kill germs more effectively.
Choosing The Right Cleaner
For heavy limescale, use a cleaner with hydrochloric acid. For daily maintenance, a mild bleach-based gel works fine. If you're eco-conscious, the baking soda and vinegar combo is effective and fume-free.
What To Do While It Soaks
Use the waiting time to wipe down the toilet exterior, clean the tank lid, or tackle the sink. This way, you're always moving forward without idle minutes.
3. Dust from Top to Bottom
Gravity works against you when you clean. Start at the ceiling and work your way down, or you'll just knock dust onto freshly wiped surfaces. This simple order saves time and keeps you from repeating steps.
Dust settles on everything, but most people ignore the high spots. Light fixtures, exhaust fan grilles, and the tops of cabinets collect a surprising amount of grime. A few minutes with the right tool makes a huge difference.
Hit The Ceiling First
Use an extendable duster or a microfiber cloth on a wand to reach ceiling corners and light fixtures. Cobwebs and dust bunnies hide up there. Don't forget the exhaust fan—it circulates air, so a dirty grille blows dust right back into the room.
Wipe Down High Shelves And Ledges
If you have open shelving or a ledge above the toilet, clear them off and give them a quick wipe. Dust accumulates fast in bathrooms because of humidity. A dry microfiber cloth picks up particles without spreading them around.
Don't Skip The Vents
Air vents and registers are dust magnets. Vacuum them with a brush attachment, then wipe with a damp cloth. This improves air quality and prevents dust from resettling on your clean surfaces.
4. Tackle the Mirror with a Streak-Free Method
Mirrors are the first thing you check before heading out, and a smudged one can ruin the whole clean look. But getting a streak-free shine isn't about expensive sprays—it's about technique. With the right tools and a simple homemade solution, you can make your mirror gleam in seconds.
Why Paper Towels Fail
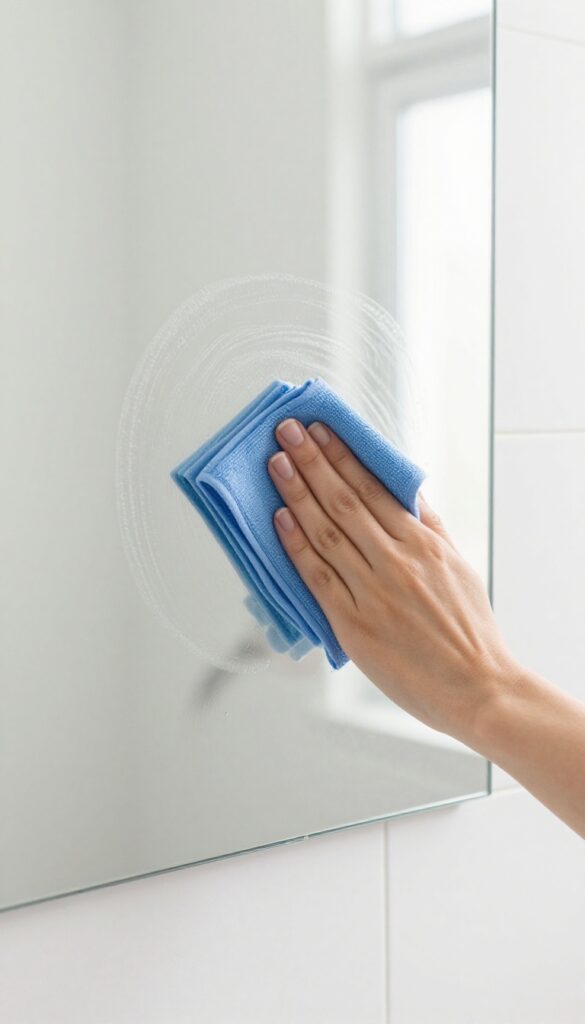
Paper towels seem convenient, but they leave behind tiny fibers and lint that create a hazy film. Worse, the chemicals in some paper towels can react with glass cleaners, causing streaks. Switch to a lint-free microfiber cloth—it traps dust and absorbs liquid evenly for a crystal-clear finish.
The Perfect Diy Solution
Mix one cup of water with a single drop of dish soap in a spray bottle. Shake gently—too many suds will leave residue. Spray lightly onto the mirror, then wipe with a dry microfiber cloth in a zigzag or S-pattern.
This prevents re-depositing dirt and cuts down on streaks.
Pro Tip: Work From Top To Bottom
Start at the top corner and wipe horizontally across, then move down. This way, any drips from the upper area are caught by the next pass. For stubborn spots like toothpaste splatters, let the solution sit for 10 seconds before wiping.
5. Wipe Down Countertops and Sinks
Countertops and sinks collect toothpaste splatters, hair product residue, and everyday grime. A quick wipe here makes the whole bathroom feel instantly cleaner. Focus on the details—faucet bases and drains are often overlooked but harbor the most buildup.
Start by clearing the countertop of all items. Spray your all-purpose cleaner or DIY vinegar-water mix (1: 1 ratio) generously over the surface. Let it sit for 30 seconds to break down soap scum and toothpaste.
Then wipe with a microfiber cloth, working from the back edges toward you. For the sink, spray the basin and scrub with a soft sponge, paying attention to the rim and drain area. Rinse with warm water and dry with a separate cloth to prevent water spots.
Don't forget the faucet—spray a cloth and wipe the handles, spout, and base, where grime loves to hide.
Tackle The Faucet Base
The area where the faucet meets the countertop is a magnet for hard water stains and gunk. Use an old toothbrush dipped in vinegar to scrub around the base. For stubborn buildup, wrap a vinegar-soaked paper towel around the base and let it sit for 10 minutes before scrubbing.
Rinse and dry.
Don't Forget The Drain
Around the sink drain, soap scum and toothpaste residue accumulate quickly. Spray cleaner directly into the drain opening and scrub with a small brush. If you have a pop-up stopper, remove it and clean separately.
Wipe the rim of the drain with a cloth to catch any leftover grime.
Polish For Shine
After cleaning, give the countertop and sink a final polish with a dry microfiber cloth. This removes any remaining streaks and restores a glossy finish. For stainless steel sinks, rub a tiny amount of mineral oil on a cloth and buff for a like-new sheen.
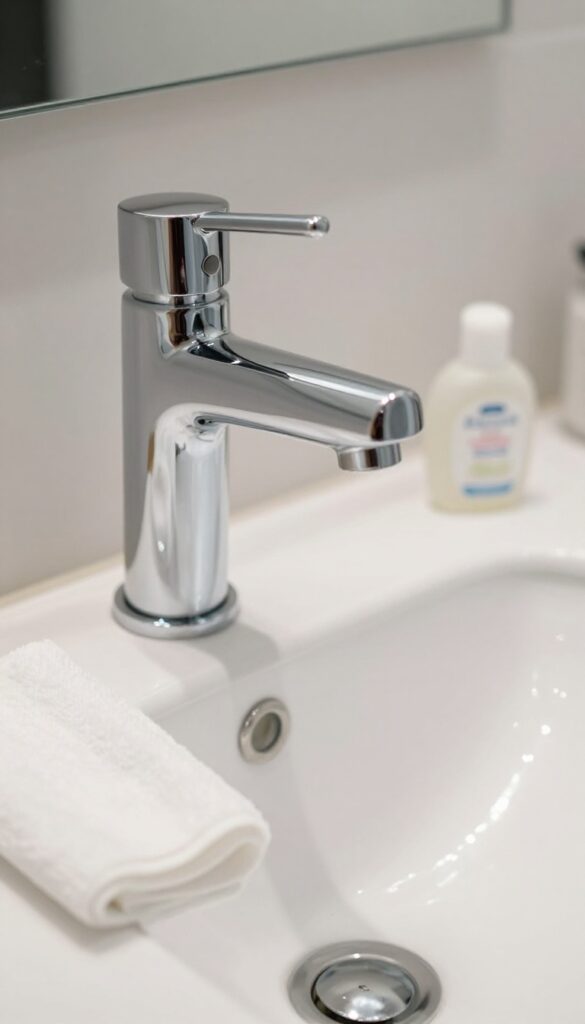
6. Scrub the Sink Faucet and Handles
Faucets and handles see a lot of action, but they rarely get the attention they deserve. Water spots, toothpaste splatters, and grime build up fast, making even a clean sink look dingy. A quick scrub with the right solution restores their shine without harsh chemicals.
The Vinegar-water Combo
Mix equal parts white vinegar and water in a spray bottle. Spray the faucet and handles generously, then let it sit for a minute. The acidity cuts through mineral deposits and water spots.
Wipe with a microfiber cloth—no rinsing needed. For chrome fixtures, this leaves a streak-free shine.
Reach The Tight Spots
The base of the faucet and the crevices around handles collect gunk. Dip an old toothbrush in the vinegar solution and scrub these areas. Pay extra attention to where the handle meets the base.
A few circular motions dislodge buildup that a cloth can't reach.
Tackle Stubborn Buildup
If you see crusty white deposits around the aerator or handle joints, soak a cloth in full-strength vinegar and wrap it around the area. Leave it for 10–15 minutes, then scrub with the toothbrush. For tough calcium spots, a paste of baking soda and vinegar works wonders.
Apply, let it fizz, then scrub and rinse.
7. Clean the Shower Doors or Curtain
Shower doors and curtains are magnets for soap scum, hard water stains, and mildew. A quick reset here makes the whole bathroom feel fresher. The approach depends on whether you have glass doors or a fabric curtain, but both can be handled in minutes.
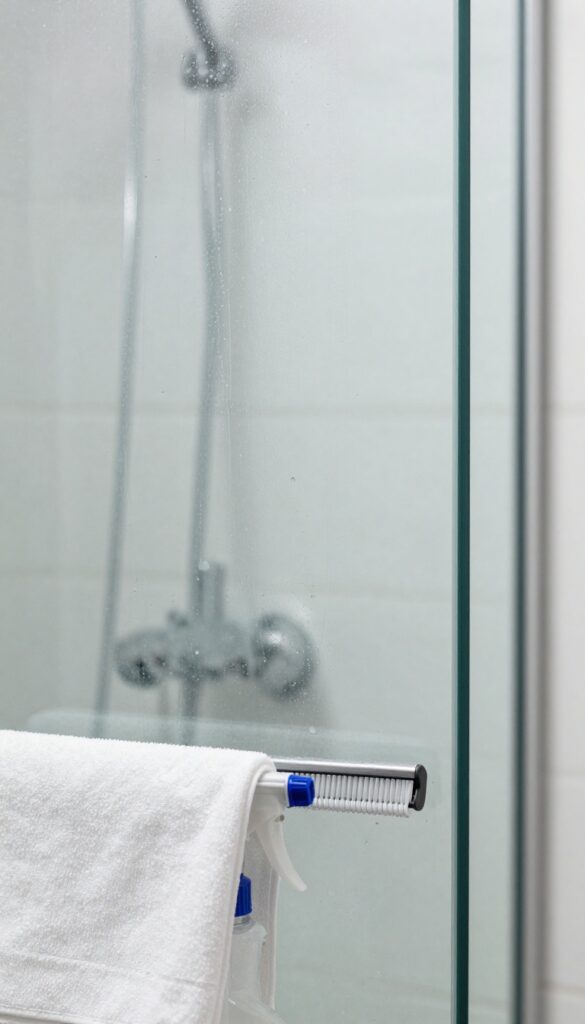
For glass doors, a simple vinegar rinse works wonders. Mix equal parts white vinegar and water in a spray bottle, spritz the doors, let sit for a few minutes, then wipe with a microfiber cloth. For stubborn spots, use a squeegee after each shower to prevent buildup.
Fabric curtains can go straight into the washing machine with a half cup of bleach (if the label allows) on a gentle cycle. Tumble dry low or hang to air dry.
Vinegar Rinse For Glass
Spray the vinegar solution generously on both sides of the door. Let it sit for 2–3 minutes to break down soap scum. Wipe with a clean microfiber cloth in circular motions.
Rinse with water if needed, then squeegee dry to avoid streaks.
Squeegee Routine
Keep a squeegee in the shower and use it after every use. It takes 10 seconds and prevents hard water stains from forming. For existing spots, a paste of baking soda and water applied with a soft sponge can lift them without scratching.
Washing Fabric Curtains
Remove the curtain and any plastic liner. Check the care label—most polyester curtains can handle bleach. Wash on a gentle cycle with warm water and a cup of white vinegar instead of bleach for a milder option.
Dry on low heat or hang to prevent wrinkles.
8. Spray and Wipe Shower Walls and Tub
Shower walls and tubs are where soap scum, hard water deposits, and mildew love to hang out. A quick targeted treatment can make them gleam again without heavy scrubbing. The key is letting the cleaner do the work before you wipe.
Start by spraying a bathroom cleaner or applying a baking soda paste directly onto the shower walls and tub surface. Let it sit for a few minutes to break down grime. Then, scrub with a non-abrasive sponge in circular motions, focusing on corners and edges.
Rinse thoroughly with warm water and wipe dry with a microfiber cloth to prevent water spots.
Choose Your Cleaner
A commercial bathroom spray works well for most messes. If you prefer a DIY option, mix baking soda with a little water to form a paste. For tough soap scum, add a splash of white vinegar.
Avoid abrasive cleaners that can scratch acrylic or fiberglass surfaces.
Let It Sit
After spraying, wait 3–5 minutes. This dwell time allows the cleaner to dissolve soap scum and loosen mineral deposits. Use this time to tidy up other areas or let the ventilation fan run to clear fumes.
Scrub Smart
Use a non-abrasive sponge or a soft-bristle brush. Work from top to bottom so drips don't land on already cleaned areas. Pay extra attention to tile grout and corners where mildew hides.
Rinse the sponge frequently to avoid spreading grime.
Rinse And Dry
Thoroughly rinse all surfaces with warm water. Leftover cleaner can leave a residue that attracts dirt. Finally, wipe everything dry with a microfiber cloth or a squeegee.
This step prevents water spots and keeps the shine longer.
9. Don't Forget the Showerhead
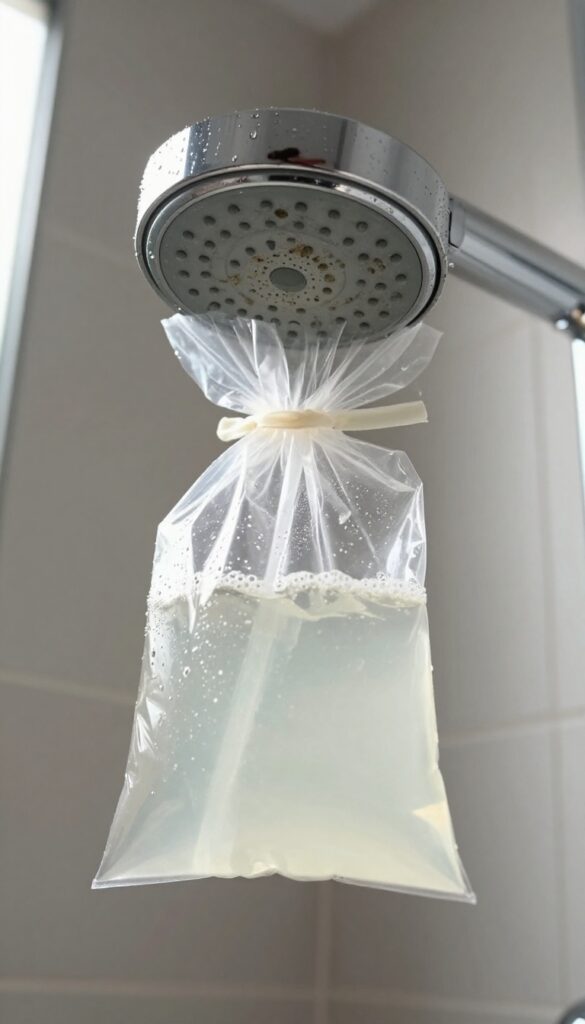
The showerhead is one of those spots that gets overlooked until the water starts spraying in weird directions or the pressure drops. Mineral buildup and grime can clog those tiny nozzles, making your shower feel weak and uneven. A quick vinegar soak restores flow and shine without any scrubbing.
Fill a plastic bag with white vinegar, secure it around the showerhead with a rubber band or zip tie, and let it soak for 30 minutes. Remove the bag, run the water for a minute to flush out loosened deposits, then wipe the surface with a cloth. For stubborn buildup, let it soak longer or scrub gently with an old toothbrush.
Why Vinegar Works
White vinegar is mildly acidic, which dissolves alkaline mineral deposits like calcium and lime scale. It's cheap, non-toxic, and safe for most showerhead finishes. Just avoid using it on brass or unsealed natural stone—test a small spot first.
How To Secure The Bag
Use a strong rubber band or a plastic zip tie to hold the bag in place. Make sure the showerhead is fully submerged. If the bag leaks, double-bag it or use a larger bag.
Let it hang naturally—gravity helps keep the vinegar in contact with the nozzles.
After The Soak
Remove the bag carefully to avoid spills. Turn on the hot water for a minute to flush out any loosened debris. Wipe the exterior with a microfiber cloth to remove residue.
For a final polish, spray a little glass cleaner and buff dry.
10. Scrub Grout Lines with a Brush
Grout lines are like the forgotten corners of your bathroom—they collect dirt, soap scum, and mildew until they look dingy and dark. But you don't need harsh chemicals or a professional cleaner to bring them back to life. A simple paste of baking soda and hydrogen peroxide, plus a little elbow grease, does the trick.
Mix Your Cleaning Paste
Combine equal parts baking soda and hydrogen peroxide in a small bowl until you get a thick, spreadable paste. The baking soda acts as a gentle abrasive, while the hydrogen peroxide whitens and disinfects. For extra cleaning power, add a drop of dish soap.
Apply And Let It Fizz
Use an old toothbrush or a grout brush to work the paste into the grout lines. Let it sit for 5–10 minutes—you'll see it start to fizz and bubble, which means it's lifting the grime. This dwell time is key for breaking down tough stains.
Scrub And Rinse
After the paste has done its work, scrub the grout lines firmly with the brush. Focus on areas that look especially dark or stained. Then rinse thoroughly with warm water.
Wipe away any residue with a damp cloth, and you'll see a noticeable difference in the brightness of your tile.
11. Clean the Toilet Exterior
The toilet exterior is a high-touch surface that collects germs, dust, and grime. A quick wipe-down not only makes it look better but also keeps your bathroom more hygienic. Focus on the tank, lid, base, and flush handle—these are the spots people touch most.
Start With The Tank And Lid
Spray a disinfectant cleaner onto a microfiber cloth—never directly onto the toilet to avoid drips. Wipe the top of the tank, the lid, and the sides. Pay extra attention to the lid edges where dust settles.
Don't Skip The Base
The area where the toilet meets the floor is a magnet for dirt and urine splashes. Use a disinfectant wipe or a cloth with all-purpose cleaner to scrub around the base. Get into the crevices with an old toothbrush if needed.
Flush Handle And Hinges
The flush handle is one of the germiest spots in any bathroom. Wipe it thoroughly with a disinfectant wipe. Also clean the hinge area where the lid attaches—it collects grime over time.
12. Scrub the Toilet Bowl Inside
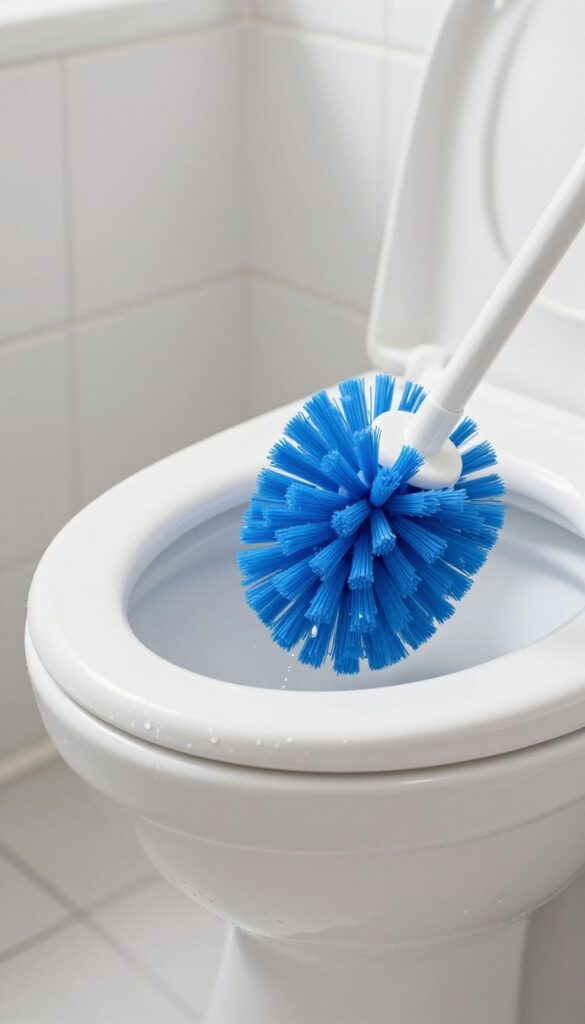
The toilet bowl is where stains, bacteria, and odors hide if you don't stay on top of it. A quick scrub keeps everything fresh and prevents buildup that becomes harder to remove later. This step takes less than two minutes but makes a huge difference in how clean your bathroom feels.
Grab your toilet brush and give the bowl a thorough scrub, focusing on the rim and the drain area. The rim is where grime and mineral deposits accumulate, so make sure the bristles reach under the edge. Flush to rinse away loosened debris and cleaner.
Target The Rim First
The area under the rim is a prime spot for mold and limescale. Angle your brush upward to scrub the hidden surfaces. A few firm swipes around the entire rim will dislodge buildup that causes odors.
Don't Forget The Drain
The drain at the bottom of the bowl collects residue and can develop stains. Scrub in a circular motion to clean the opening and the sides. This helps prevent rings from forming.
Flush And Inspect
After scrubbing, flush the toilet to wash away everything. Check the bowl for any remaining stains. If you see stubborn spots, a pumice stone or a specialized cleaner can handle them without scratching the porcelain.
13. Disinfect the Trash Can
The trash can is one of the most overlooked spots in the bathroom, yet it handles everything from used cotton swabs to empty product bottles. Over time, it collects grime, bacteria, and odors that can linger even after you take out the bag. Giving it a proper disinfecting session is a small step that makes a big difference in how fresh the whole room feels.
Start by removing the liner and any debris stuck to the bottom. Take the can outside or place it in the bathtub for easy cleanup. Spray the inside and outside thoroughly with a disinfectant spray or a mixture of bleach and water.
Let it sit for a few minutes to kill germs, then scrub with a brush or sponge, especially around the rim and handles. Rinse well and let it air dry completely before putting in a new liner. This simple routine prevents musty smells from creeping back into your freshly cleaned bathroom.
Why The Trash Can Needs Special Attention
Bathroom trash cans are constantly exposed to moisture, humidity, and organic waste. Even with a liner, small spills and leaks can create a breeding ground for bacteria and mold. A quick weekly disinfect keeps odors at bay and maintains a hygienic environment.
Plus, a clean can makes the whole bathroom feel more polished.
Choose The Right Disinfectant
Not all cleaners are created equal. For plastic cans, a diluted bleach solution (one part bleach to nine parts water) works wonders. If you prefer something gentler, use a commercial disinfectant spray or a vinegar-and-water mix.
Avoid harsh abrasives that could scratch the surface. Always test a small area first if your can is made of a delicate material.
Drying Is Non-negotiable
After rinsing, shake off excess water and let the can dry upside down in a well-ventilated area or outside in the sun. Sunlight naturally helps kill remaining bacteria and eliminates moisture. Never put a new liner into a damp can—moisture trapped underneath can lead to mold growth and unpleasant smells.
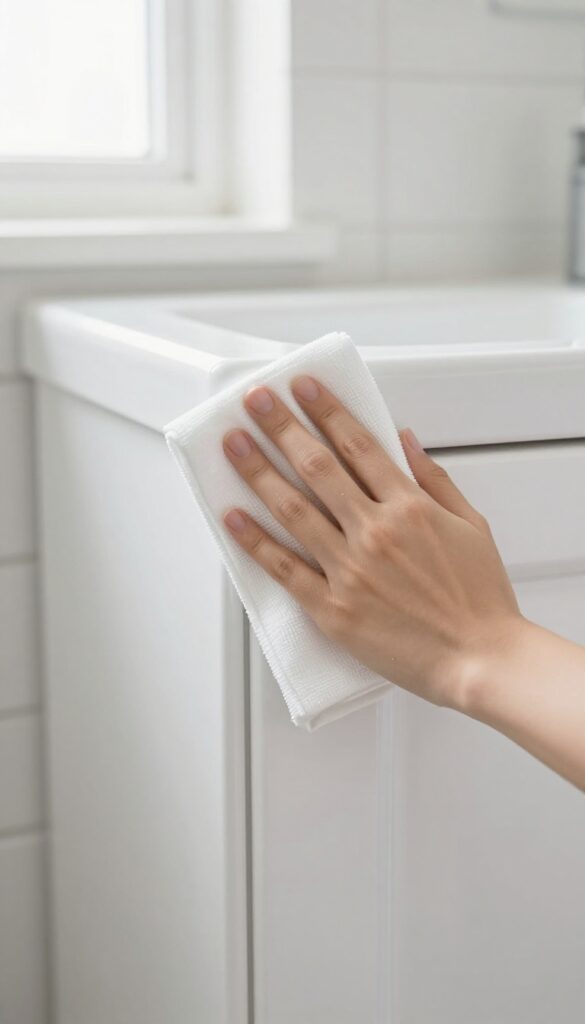
14. Wipe Down Cabinet Doors and Drawers
Cabinet fronts and drawer faces are some of the most touched surfaces in the bathroom, yet they rarely get a proper wipe down. Fingerprints, toothpaste splatters, and dust buildup can make even a clean bathroom look messy. A quick once-over with a damp cloth and mild soap is all it takes to restore their shine.
Mix a few drops of dish soap with warm water. Dip a soft microfiber cloth, wring it out well, and wipe down all cabinet doors and drawer fronts, paying attention to handles and edges where grime collects. Rinse the cloth frequently to avoid spreading dirt.
Follow up with a dry cloth to prevent water spots and moisture damage, especially on wood surfaces.
Don't Forget The Hardware
Knobs and pulls are magnets for grease and hand oils. Use a cotton swab dipped in soapy water to clean around the base of each handle. Dry immediately with a soft cloth to avoid tarnishing.
For metal finishes like brass or chrome, a dedicated metal polish can restore extra shine.
Check For Sticky Spots
Over time, cabinet surfaces can develop a sticky film from hairspray, lotion, or other products. If you feel resistance when wiping, add a splash of white vinegar to your soapy water. The vinegar cuts through residue without damaging most finishes.
Test on an inconspicuous area first.
Work Top To Bottom
Start with the upper cabinets and work your way down to the lower drawers. That way, any drips or dust that fall will be cleaned up as you go. This simple order prevents re-soiling areas you've already wiped.
15. Organize Medicine Cabinet Contents
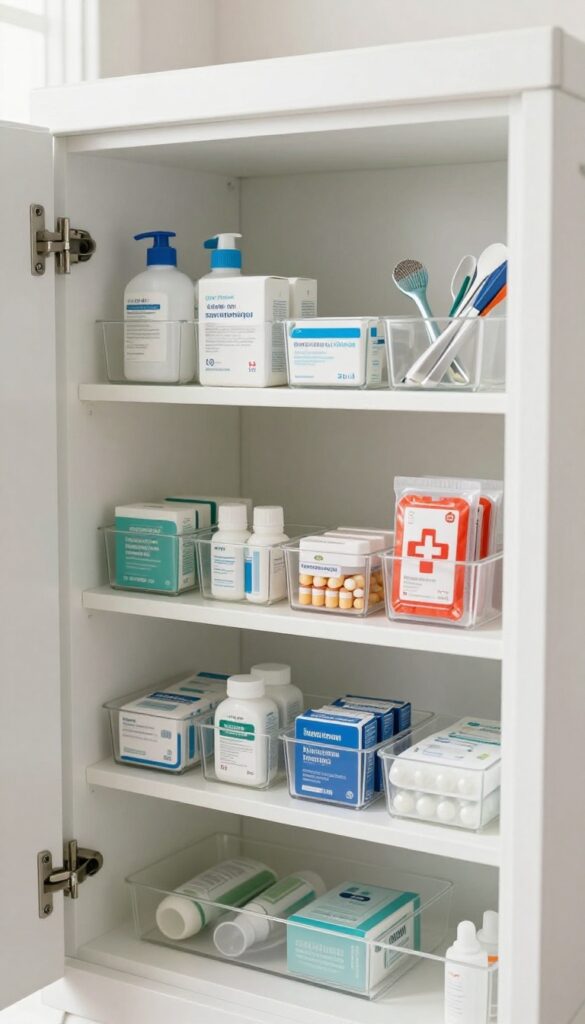
The medicine cabinet is a magnet for expired pills, half-used tubes, and mystery containers. It's also one of the quickest wins in your bathroom reset. By clearing out the old and arranging the useful, you'll gain not just space but also peace of mind—no more fumbling for a bandage while dodging falling bottles.
Start by emptying everything onto the counter. Check every label for expiration dates—toss anything past its prime, including old prescriptions (check local disposal guidelines). Wipe down the shelves with a damp microfiber cloth and a gentle cleaner.
Then group remaining items by category: first aid, daily medications, grooming tools. Use small bins or trays to keep like items together. Return only what you actually use regularly.
Store rarely used items elsewhere.
Toss And Sort
Pull everything out and lay it on the counter. Check expiration dates on medicines, ointments, and makeup. Discard empty or nearly empty containers.
Recycle cardboard boxes. This step alone often frees up 30–50% of your cabinet space.
Wipe And Refresh
With the cabinet empty, spray shelves with a gentle all-purpose cleaner or a vinegar-water mix. Wipe dry with a clean cloth. Don't forget the inside of the door and any sticky residue from old labels.
Let it air out for a minute before restocking.
Arrange For Easy Access
Place daily-use items at eye level—toothpaste, floss, pain relievers. Store less frequent items like extra razors or first aid supplies on lower or higher shelves. Use clear containers or small baskets to corral small items.
Label bins if you share the cabinet with others.
16. Clean the Exhaust Fan Cover
Your bathroom exhaust fan works hard to pull out moisture and odors, but the cover itself can become a dust trap. A dirty cover not only looks bad but can also reduce airflow and strain the motor. Giving it a quick clean is one of those small tasks that makes a big difference.
Remove And Vacuum
Start by turning off the fan at the switch or breaker. Most covers simply pop off with a gentle tug or by squeezing the sides. Use your vacuum's brush attachment to suck away loose dust and debris from both the cover and the opening behind it.
Wash With Soapy Water
Fill a small basin with warm water and a few drops of dish soap. Submerge the cover and let it soak for a few minutes. Use a soft sponge or cloth to wipe away any stubborn grime.
Rinse thoroughly under running water.
Dry And Reattach
Shake off excess water and dry the cover with a clean towel. Let it air dry completely for a few minutes to prevent any moisture from dripping back into the fan. Once dry, snap the cover back into place and turn the fan back on.
17. Wash the Bathroom Rug or Mat
Bathroom rugs and mats trap moisture, hair, and soap residue, which can lead to odors and mildew if ignored. A quick wash restores their freshness and extends their life. Here's how to do it right without damaging the fibers.
Check The Care Label First
Before tossing your rug in the wash, flip it over and check the care tag. Most cotton and synthetic mats are machine-washable, but rubber-backed or delicate ones may require hand washing or spot cleaning. Following the label prevents shrinkage or peeling.
Shake Off Loose Debris
Take the rug outside and give it a good shake to remove hair, dust, and crumbs. This step prevents clogs in your washing machine and helps the detergent work more effectively on stains.
Machine Wash On Gentle Cycle
Use warm water and a mild detergent. Add a half cup of white vinegar to the rinse cycle to neutralize odors and soften the fibers. Avoid bleach, which can discolor or weaken the material.
Dry Properly
Air drying is best to prevent shrinkage, but you can tumble dry on low heat if the label allows. Make sure the rug is completely dry before placing it back on the floor to avoid mold growth.
18. Wipe Baseboards and Door Frames
Baseboards and door frames are like the unsung heroes of a clean bathroom—they frame the room but rarely get the attention they deserve. Over time, they collect dust, scuff marks, and even toothpaste splatters. Giving them a quick wipe-down makes the whole space feel more polished and complete.
Grab a damp microfiber cloth or a magic eraser and run it along the top edges of baseboards and around door frames. Pay extra attention to corners where dust bunnies love to hide. For stubborn scuffs, a gentle rub with a magic eraser usually does the trick without damaging the paint.
Finish by drying with a clean cloth to prevent water spots.
Why Baseboards Matter
Baseboards act as a barrier between your walls and floor, catching everything from dust to cleaning splashes. When they're dirty, they make an otherwise clean bathroom look neglected. A quick wipe can instantly elevate the room's overall cleanliness.
Door Frames: The Touch Points
Door frames collect fingerprints and grime from daily use, especially around the handle area. Use a damp cloth to wipe them down, and don't forget the top edge where dust settles. A clean door frame makes entering and exiting the bathroom feel fresher.
Corners And Crevices
Corners are dust magnets. Use a small brush or an old toothbrush to dislodge buildup before wiping. A magic eraser can also reach into tight spots.
Taking an extra minute here ensures no hidden grime remains.
19. Clean Inside the Drawers and Cabinets
Drawers and cabinets are the hidden workhorses of your bathroom. They store everything from toothpaste to spare towels, but they also collect dust, hair, and mystery crumbs over time. A quick interior refresh keeps your supplies clean and your space feeling fresh.
Start by removing everything from one drawer or cabinet at a time. Use a handheld vacuum with a crevice tool to suck up crumbs, dust, and stray hairs from the corners. Then wipe down all surfaces with a damp microfiber cloth and a gentle cleaner.
Let everything dry completely before putting items back—this prevents moisture from getting trapped and causing odors or mildew.
Declutter As You Go
While everything is out, take a moment to toss expired products, empty bottles, and items you never use. Group like items together (hair tools, skincare, first aid) so restocking feels organized. This also makes future cleanings faster.
Don't Forget The Hardware
Drawer pulls and cabinet knobs collect grime from daily use. Wipe them down with a disinfecting wipe or a cloth with a dab of rubbing alcohol. For crevices, use an old toothbrush to get into the tiny grooves.
Line Shelves For Easy Maintenance
Consider adding shelf liners or drawer organizers. They catch spills and make it easy to wipe clean next time. If you don't have liners, a quick coat of clear shelf paper works wonders.
20. Polish Chrome Fixtures
Chrome faucets and handles are like the jewelry of your bathroom—they catch the light and draw the eye. But water spots, fingerprints, and hard-water stains can dull their sparkle fast. A quick polish brings back that mirror-like shine without any heavy scrubbing.
You don't need expensive specialty cleaners to make chrome gleam. A soft microfiber cloth and a tiny dab of baby oil work wonders. The oil fills microscopic scratches and repels future water spots, so your fixtures stay cleaner longer.
For stubborn buildup, a dedicated chrome polish or a vinegar-water spray can break down mineral deposits before buffing.
Why Baby Oil Works
Baby oil is mostly mineral oil, which is gentle on chrome but effective at dissolving light grime. It leaves a thin protective layer that makes water bead up and roll off instead of leaving spots. Plus, it's cheap and already in most homes.
Step-by-step Polishing
Start by wiping the fixture with a damp cloth to remove loose dust. Apply a single drop of baby oil to a clean microfiber cloth. Rub the chrome in small circles, covering every surface.
Flip the cloth to a dry section and buff until the shine appears. For intricate handles, use a cotton swab dipped in oil to reach crevices.
When To Use A Dedicated Polish
If your chrome has hard-water stains or etching that baby oil can't fix, switch to a chrome-specific polish. These contain mild abrasives that gently remove mineral deposits. Apply with a damp sponge, let it haze, then buff with a dry cloth.
Always test in an inconspicuous spot first.
21. Freshen the Air Naturally
Artificial air fresheners might smell nice at first, but they often leave a chemical residue on surfaces and can irritate sensitive noses. Instead of masking odors, tackle them at the source with natural alternatives that actually absorb smells and leave the air genuinely fresh. A couple of simple swaps can make your bathroom smell clean without the synthetic coating.
Baking Soda: The Odor Sponge
Place a small open bowl of baking soda on a shelf or under the sink. It silently absorbs moisture and neutralizes musty smells. Replace it every month or so, and you can even mix in a few drops of your favorite essential oil for a light scent boost.
Essential Oil Diffuser: Gentle Aroma
A few drops of lemon, tea tree, or lavender oil in a diffuser can freshen the air without harsh chemicals. Run it for 15 minutes after cleaning or while you get ready. It adds a spa-like feel and helps combat lingering odors naturally.
Ventilation First, Scents Second
Before adding any freshener, open a window or turn on the exhaust fan for a few minutes. Stale air gets pushed out, and natural airflow does half the work. Then your baking soda or diffuser can handle the rest without fighting against trapped humidity.
22. Restock Essentials
After all that scrubbing and polishing, the finishing touch is restocking your bathroom essentials. A clean space feels incomplete without fresh towels, full soap dispensers, and a spare roll of toilet paper within reach. This final step transforms your hard work into a welcoming, ready-to-use room.
Restocking is the easiest step of the whole reset, but it makes the biggest visual impact. Start by refilling any empty soap dispensers with your favorite hand soap. Replace toilet paper rolls on all holders, and tuck a few extra rolls in a decorative basket or under the sink.
Fold clean, fluffy towels and hang them neatly—consider rolling them for a spa-like look. Finally, check for any other daily-use items like tissues or cotton swabs and top those off too. A fully stocked bathroom feels complete and instantly more inviting.
Refill And Replace
Walk through your bathroom and note anything that's running low. Soap dispensers, lotion bottles, and toilet paper holders are the obvious ones. Don't forget the little things like a fresh box of tissues or a new toothbrush holder if yours is looking tired.
Replacing these small items gives the room a polished, cared-for feel.
Fresh Towels, Fresh Vibe
Nothing says clean like a stack of freshly laundered towels. Fold them neatly or roll them for a compact, elegant display. If you have space, arrange them by size—hand towels on the counter, bath towels on the rack.
A matching set of towels in a neutral or soft color instantly elevates the room's look.
Hidden Storage Check
While you're at it, peek inside cabinets and drawers. Toss any expired products or empty bottles. Organize what's left so everything has a place.
A tidy storage area means you'll never scramble for a spare roll or a fresh razor again. It's the behind-the-scenes organization that keeps your bathroom functional long after the reset.
23. Do a Final Walk-Through
You've scrubbed, polished, and organized—now it's time to put on your inspector hat. A final walk-through catches those small but noticeable flaws that can undermine all your hard work. This last lap isn't just about checking boxes; it's about stepping back and seeing your bathroom the way a guest would.
A few minutes of focused attention can turn a good clean into a great one.
Check For Streaks And Smudges
Grab a dry microfiber cloth and scan mirrors, glass shower doors, and chrome fixtures from different angles. Natural light is your best friend here—it reveals every streak. A quick buff with a dry cloth usually does the trick.
Don't forget the faucet base and the back of the toilet tank where water spots linger.
Look For Missed Spots
Crouch down and check the corners where the floor meets the baseboards, the area behind the toilet, and the edges of the vanity. These are prime hiding spots for dust bunnies and dried toothpaste splatters. A damp paper towel or a disinfectant wipe can handle most of them in seconds.
Tidy Up Clutter
Return any products or tools that wandered off during cleaning. Straighten the towels, fluff the bath mat, and align the soap dispenser. A clear countertop instantly makes the room feel more polished.
If you have a small trash can, make sure it's empty and the liner is tucked in.
Adjust The Lighting And Enjoy
Turn on all the lights and open the curtains or blinds if you have them. Good lighting highlights your work and makes the space feel fresh and inviting. Take a moment to appreciate the sparkle—you earned it.
A deep breath and a smile are the final touches.
FAQ
How often should I do a deep bathroom clean?
A thorough reset like this works well once a week. For high-traffic bathrooms, a quick daily wipe-down keeps buildup at bay.
Can I use vinegar on all surfaces?
Vinegar is safe for glass, chrome, and most tiles, but avoid it on natural stone like marble or granite—it can etch the surface.
What's the best way to prevent soap scum?
Squeegee shower walls after each use and wipe down fixtures. A weekly spray of vinegar-water also helps break down residue.
How do I clean a showerhead without removing it?
Fill a plastic bag with white vinegar, secure it over the showerhead with a rubber band, and let it soak for 30 minutes. Then remove and run water.
What should I do about mold in grout?
Apply a paste of baking soda and hydrogen peroxide, let it sit for 10 minutes, scrub with a brush, and rinse. For persistent mold, consider a grout sealer.
Conclusion
These 23 steps prove that a sparkling bathroom doesn't require a full day of scrubbing. By following this quick reset routine, you can maintain a fresh, clean space with minimal effort each time.
Start with the steps that target your biggest trouble spots, then build the habit. Consistency is key, and soon you'll have a bathroom that shines without the overwhelm.


