
A cluttered cabinet of cleaning supplies isn't just an eyesore—it's a hazard. Spills, leaks, and accidental mix-ups can happen when bottles are crammed together. The right storage system changes everything: you'll find what you need instantly, keep kids and pets safe, and make your cleaning routine smoother.
These 25 ideas range from simple shelf adjustments to clever DIY solutions. Each one focuses on both practicality and safety, so your home stays tidy without the risk.
Whether you have a tiny apartment or a spacious pantry, there's a storage fix here for you. Let's dive into the ideas that will transform how you store your cleaning products.
1. Use a Lockable Cabinet for Toxic Cleaners
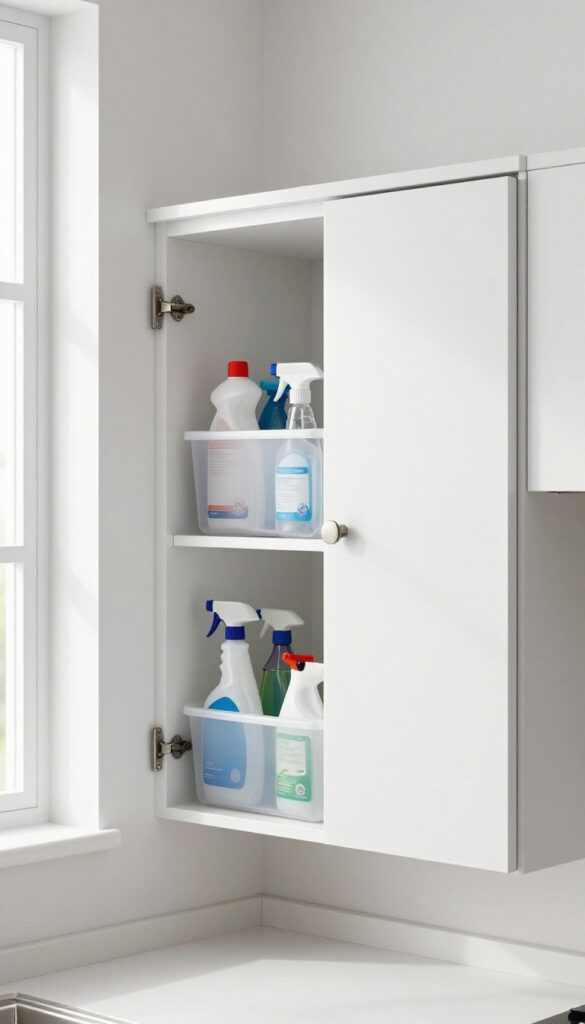
Bleach, ammonia, and drain cleaners are no joke. Storing them within easy reach of little hands or curious pets is an accident waiting to happen. A dedicated lockable cabinet gives you peace of mind while keeping these heavy-duty products organized and out of harm's way.
Start by choosing a cabinet that's high up or low down—whichever works best for your space—but make sure it has a latch or lock that actually works smoothly. Magnetic locks are great because they're invisible from the outside and easy for adults to open with a key or magnet. For cabinets near the floor, a sliding bolt lock adds an extra layer of security.
Inside, use a sturdy plastic bin or tray to catch drips and prevent bottles from tipping over. Label the bin clearly so everyone in the household knows it's the "harsh chemicals" zone. This system keeps your most dangerous supplies contained and controlled, reducing the risk of spills or mix-ups.
Choosing The Right Lock
Not all locks are created equal. For cabinets with handles, a simple hook-and-eye latch works fine. For push-to-open doors, adhesive magnetic locks are a clean solution.
Avoid locks that require tools to open every time—you want easy access for yourself, not for kids.
Organizing Inside The Cabinet
Use a shallow plastic bin to group similar items together. Keep bleach separate from ammonia to avoid dangerous fumes if something leaks. Store spray bottles upright in a dish rack or a small crate to prevent tipping.
Add a microfiber cloth or small towel at the bottom to absorb any accidental drips.
Where To Place The Cabinet
Ideally, put this cabinet in a low-traffic area like a laundry room or under the kitchen sink (with a lock). Avoid storing toxic cleaners in the same cabinet as food or dishes. If you have a pantry, designate a high shelf with a lock for extra safety.
2. Install a Wall-Mounted Rack for Spray Bottles
Counter space is prime real estate in any home, and cleaning supplies tend to hog it. A wall-mounted rack frees up that space while keeping your spray bottles organized and accessible. Plus, it gets bottles off the floor and away from curious little hands or pets.
Mounting a rack on the wall is a simple weekend project that pays off every day. You can find ready-made racks at hardware stores or online, or build your own with a wooden board and some hooks. The key is to place it in a spot that's convenient—like inside a pantry door, above a laundry sink, or in a utility closet.
Make sure it's securely anchored to wall studs or use heavy-duty drywall anchors to handle the weight of multiple bottles. Once installed, you'll never have to dig through a cluttered cabinet again.
Choose The Right Rack
Look for a rack with adjustable hooks or slots to fit different bottle sizes. Some racks are designed specifically for spray bottles with trigger handles, while others have open cubbies. Measure your tallest bottle before buying to ensure a good fit.
A rust-resistant finish is a must, especially if the rack is in a damp area like a laundry room.
Install At The Right Height
Mount the rack at a height that's easy for adults to reach but out of children's reach. A good rule of thumb is to place it at least 4 feet off the ground. If you have a dedicated cleaning caddy, you can hang it next to the rack so everything is in one place.
Label And Rotate
Once bottles are on the rack, label each one clearly. Use a label maker or simple tape and marker. This prevents mix-ups and makes it easy to spot when a product is running low.
Rotate your stock so older bottles get used first, keeping your cleaning arsenal fresh.
3. Repurpose a Shoe Organizer for Under-Sink Storage
That flimsy shoe organizer you were about to donate? It's a perfect fit for the back of your under-sink cabinet door. Clear pockets let you see every bottle at a glance, and the vertical layout keeps items from toppling over.
This trick turns dead space into prime real estate for your cleaning stash.
Shoe organizers are cheap, lightweight, and easy to install. Just hang one on the inside of a cabinet door using the included hooks or adhesive strips. The clear pockets are ideal for spray bottles, scrub brushes, and gloves.
You'll never have to dig through a dark cabinet again.
Choose The Right Organizer
Look for a clear, over-the-door shoe organizer with pockets at least 4 inches deep. Avoid fabric or opaque ones—you want to see what's inside. A 12-pocket model fits most standard under-sink cabinets without blocking the door from closing.
Sort By Frequency Of Use
Keep daily essentials like all-purpose cleaner and dish soap in the top pockets. Store heavy or rarely used items like bleach or floor polish in the bottom pockets. This keeps weight low and prevents the door from sagging.
Safety First
Never store hazardous chemicals in the shoe organizer if you have curious kids or pets. Instead, use the pockets for sponges, gloves, and microfiber cloths. Keep dangerous products in a locked cabinet above or in a high shelf.
4. Use Clear Bins with Labels for Grouping
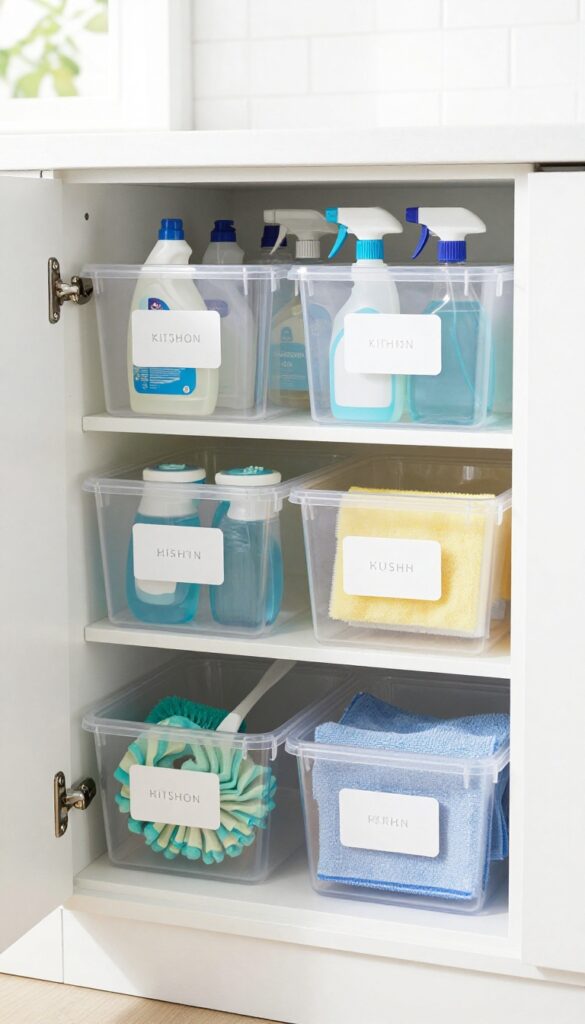
Grouping similar cleaning products together makes them easier to find and grab. Clear bins let you see what's inside without opening anything, so you can quickly spot the glass cleaner or the bathroom spray. Adding labels takes it a step further, so everyone in the household knows exactly where things go.
Start by sorting your cleaning supplies into categories like kitchen, bathroom, all-purpose, and specialty (like oven cleaner or stainless steel polish). Then pick clear plastic bins that are sturdy and fit your cabinet or shelf space. Place each category in its own bin, and attach a waterproof label on the front.
This system keeps bottles upright, contains leaks, and makes restocking a breeze.
Choose The Right Bins
Not all clear bins are equal. Look for ones with reinforced corners and a smooth interior that's easy to wipe down. Measure your shelf depth and height before buying.
Stackable bins can double your vertical space, but avoid tall bins that hide smaller bottles in the back.
Label Like A Pro
Use a label maker or simple adhesive labels and a permanent marker. For a cleaner look, print labels in a consistent font. Stick them on the front of the bin at eye level.
If you rearrange categories, just peel off and relabel.
Maintain The System
Once a month, pull out each bin and check for leaks or expired products. Wipe down the bin interior with a disinfectant wipe. Return everything to its labeled home.
This habit keeps your storage tidy and safe over time.
5. Store Bleach and Ammonia Separately
Mixing bleach and ammonia creates toxic chloramine gas, which can cause serious respiratory issues. Even a small spill or leak near each other can lead to dangerous fumes. That's why keeping these two chemicals in completely separate areas is a non-negotiable safety rule.
Bleach and ammonia are common household cleaners, but they should never be stored near each other. The risk of accidental mixing—whether from a leak, a spill, or someone grabbing the wrong bottle—is too high. Designate distinct zones for each, ideally in different cabinets or on different shelves.
If space is tight, use a plastic bin with a lid for one of them to contain any leaks. Label the bins clearly so everyone in the household knows which is which.
Why Separation Matters
When bleach and ammonia combine, they produce chloramine gas, which can cause coughing, nausea, and even pneumonia. Even small amounts can be harmful, especially in a poorly ventilated space. Keeping them apart reduces the chance of accidental mixing, whether from a drip, a knock-over, or a confused grab in the dark.
Best Practices For Storage
Store bleach in its original container, tightly sealed, in a cool, dry place away from direct sunlight. Ammonia should also stay in its original bottle. Use separate shelves or cabinets, and if you must store them in the same closet, put one in a sealed plastic bin.
Avoid storing either near heat sources or other reactive chemicals like vinegar or hydrogen peroxide.
What To Do In Case Of A Spill
If you accidentally mix bleach and ammonia, immediately leave the area and ventilate it by opening windows and doors. Do not inhale the fumes. Call poison control or your local emergency number for guidance.
Never try to clean up the mixture yourself. Prevention is key, but knowing what to do in an emergency can save lives.
6. Install a Pull-Out Shelf in Deep Cabinets
Deep cabinets are notorious for swallowing bottles whole. You shove a spray cleaner to the back, and next time you need it, you're playing a game of blind retrieval—knocking over everything in your path. A pull-out shelf changes that completely.
It slides forward, giving you full access to every item without the acrobatics. No more spills, no more forgotten products lurking in the dark.
Installing a pull-out shelf is a straightforward upgrade that pays off immediately. You can buy a ready-made sliding shelf kit or build a simple DIY version with a wooden board and drawer slides. Either way, the result is a cabinet that works with you, not against you.
Here's how to make it happen and why it's worth the effort.
Measure First, Buy Second
Before you order anything, grab a tape measure. Measure the depth, width, and height of your cabinet interior. Standard pull-out shelves come in common sizes, but you might need to trim a board if your space is odd.
Also check the clearance in front of the cabinet—if there's an island or a door swing, make sure the shelf can slide out fully without hitting anything.
Pick The Right Slides
Drawer slides come in two main types: side-mount and under-mount. For a pull-out shelf, side-mount slides are easier to install and more forgiving. Choose slides rated for at least 50 pounds to handle heavy jugs of cleaner.
Full-extension slides let you access the very back of the shelf, which is the whole point. Soft-close is a nice bonus, but not essential for a utility cabinet.
Secure The Shelf Surface
Once the slides are attached to the cabinet sides, mount your shelf board. Use a piece of 3/4-inch plywood or a pre-finished melamine board—both are sturdy and easy to clean. Add a small lip or edge banding to prevent bottles from sliding off when you pull the shelf out.
If you want to get fancy, drill a few holes for drainage or use a non-slip liner.
Organize With Purpose
With the shelf installed, group your cleaning products logically. Keep daily-use sprays and wipes at the front, and heavier or less-used items like floor cleaners and stain removers toward the back. Use small bins or dividers to keep bottles upright.
You'll be amazed how much easier it is to grab what you need—and how much less you knock over.
7. Use a Tiered Spice Rack for Small Bottles
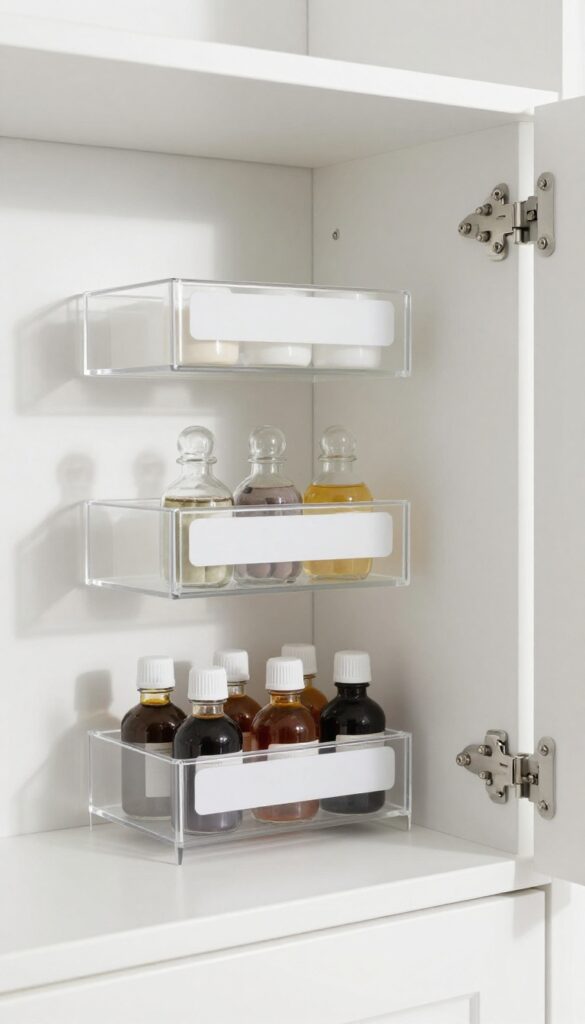
Small bottles of essential oils, spray refreshers, or mini cleaning concentrates often get lost in deep cabinets. A tiered spice rack solves that by lifting each bottle into view. You can grab the one you need without shuffling through a jumble of containers.
It's a simple, low-cost upgrade that makes a big difference in daily use.
A tiered rack turns a messy shelf into an organized display. Each bottle sits at a slight incline, so labels face forward. No more pulling everything out to find the lemon oil or the glass cleaner concentrate.
Plus, the rack itself takes up minimal space—perfect for narrow cabinets or countertops.
Choose The Right Rack
Look for a rack with two or three tiers and a sturdy base. Metal or clear acrylic options work best because they resist moisture and are easy to wipe down. Make sure the risers are tall enough to accommodate your tallest bottle.
Measure your cabinet depth before buying to avoid a rack that sticks out.
Group By Use Or Frequency
Arrange bottles by category: all-purpose cleaners on one tier, glass cleaners on another, and specialty oils on the third. Or sort by how often you use them—daily items on the front tier, weekly ones behind. This logic keeps your routine fast and frustration-free.
Label The Tiers For Extra Safety
Add small labels to the edge of each tier, especially if you have kids or housemates. A simple "Daily Sprays" or "Essential Oils" sticker helps everyone put things back in the right spot. It also prevents accidental grabs of the wrong bottle when you're in a hurry.
8. Hang a Pegboard Inside a Pantry Door
That empty space behind the pantry door is prime real estate for cleaning storage. A pegboard mounted there turns wasted inches into a customizable organizer that keeps bottles, brushes, and dusters off shelves and within easy reach. You can adjust the layout anytime as your supply collection changes.
Pegboards work because they let you see everything at a glance. No more digging through a dark cabinet to find the glass cleaner or wondering where you put the scrub brush. Hooks hold spray bottles by their trigger handles, and small baskets corral sponges or microfiber cloths.
Just make sure the pegboard is securely anchored to the door—use screws into the door material, not just adhesive strips, especially for heavier items.
Choose The Right Pegboard
Standard tempered hardboard pegboards are cheap and easy to cut to size. Look for one with 1/4-inch holes, which fit most common hooks and accessories. If your door is metal or hollow, use toggle bolts or heavy-duty adhesive hooks rated for the weight.
For a painted finish, seal the board with clear polyurethane to protect against moisture and drips.
Arrange For Safety And Flow
Keep frequently used items like all-purpose spray and glass cleaner at eye level. Store heavier bottles lower to keep the center of gravity stable. Place toxic or hazardous products on higher hooks out of reach of kids and pets.
Use color-coded hooks or labels to quickly identify each product—red for bathroom cleaners, blue for glass, green for all-purpose.
Add Trays And Baskets For Small Items
Pegboard baskets or small metal bins clip right onto the board and are perfect for holding sponges, scrub pads, gloves, or small concentrate bottles. You can also attach a small wire shelf for a single row of larger spray bottles. This keeps everything from falling off when the door swings open.
9. Store Cleaning Wipes in a Dispenser Box
Disinfectant wipes are a go-to for quick cleanups, but their bulky canisters can clutter countertops and get lost in cabinets. A dedicated dispenser box keeps them accessible and tidy, so you can grab one without fumbling. Plus, it prevents the wipes from drying out and makes the container blend in with your decor.
A dispenser box designed for wipes sits neatly on the counter, ready for action. It holds the canister securely and allows you to pull out one wipe at a time. This setup is perfect for high-traffic areas like the kitchen or bathroom, where spills and messes happen often.
You'll save time and avoid the frustration of a stuck or torn wipe.
Choose The Right Dispenser
Look for a dispenser with a weighted lid or a silicone opening that keeps wipes moist. Some models have a non-slip base to prevent sliding. Clear or neutral-colored dispensers blend in easily, while fun patterns can add a pop of personality.
Placement Tips For Maximum Convenience
Put the dispenser near where you use wipes most: next to the sink, on the kitchen island, or by the changing table. Keep it out of direct sunlight to prevent drying. If you have small children, place it high enough to be out of reach but still easy for adults to grab.
Refill Without The Mess
When the canister runs low, simply pull it out of the dispenser and replace it with a new one. Some dispensers have a top-loading design so you don't have to remove the entire box. This keeps the counter clean and the process hassle-free.
10. Use a Caddy for Portable Storage
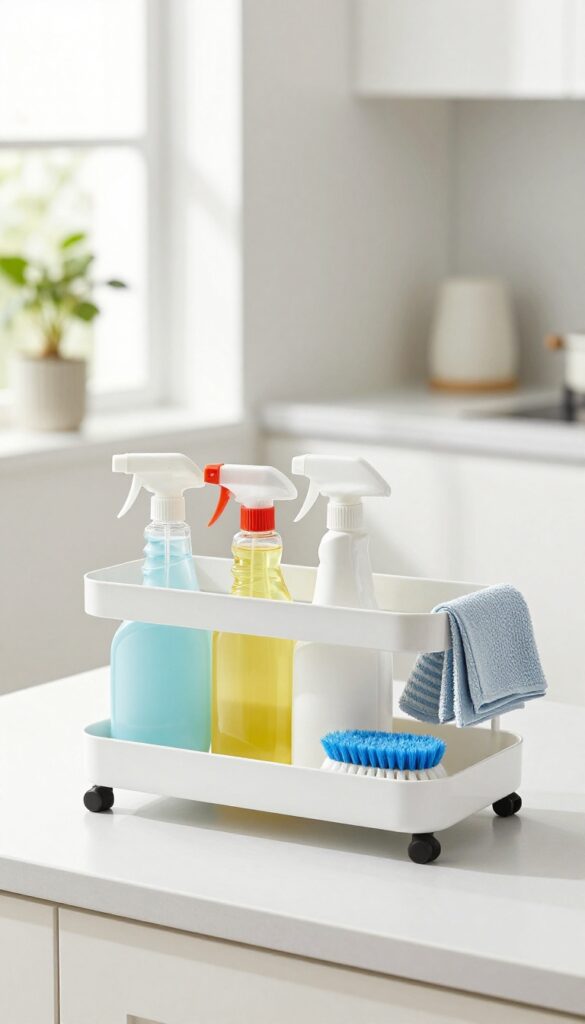
A cleaning caddy is one of those tools you didn't know you needed until you try it. Instead of running back and forth to grab supplies from different rooms, you load everything into one portable carrier. It keeps bottles upright, prevents leaks from spreading, and saves time during deep cleans or quick touch-ups.
Plus, it makes it easy to keep dangerous products out of reach when not in use.
A caddy lets you carry supplies from room to room. Keep it stocked with essentials for quick cleanups. Choose one with compartments to separate sprays, scrub brushes, and cloths.
That way, you're not digging through a pile every time you need a glass cleaner. Look for caddies with a sturdy handle and a wide base to prevent tipping. Plastic or metal options are easy to wipe down after use.
What To Pack In Your Caddy
Start with the basics: an all-purpose cleaner, glass spray, a disinfectant, and a scrub brush. Add microfiber cloths, a sponge, and gloves. If you have pets or kids, include a pet-safe or child-safe cleaner for accidents.
Keep a small trash bag rolled up in the bottom for quick pickups. The goal is to have everything you need for a full room clean without returning to the cabinet.
Caddy Safety Tips
Never mix chemicals in the caddy—keep each product in its original labeled container. If a bottle leaks, the caddy catches the spill rather than ruining your cabinet. Store the caddy on a high shelf or in a locked closet when not in use, especially if you have curious little ones.
Choose a caddy with a lid or a handle that can be tucked away to prevent access.
11. Keep Powdered Cleaners in Airtight Containers
Powdered detergents and cleansers are great for tackling tough grime, but they come with their own set of storage challenges. Left in their original boxes or bags, they can easily clump from humidity or spill when you're not careful. Transferring them to airtight containers solves both problems and keeps your cabinet tidy.
Airtight containers lock out moisture, so your powders stay free-flowing and ready to use. They also prevent accidental spills—no more sweeping up a mess of baking soda or laundry detergent from the shelf. Plus, clear containers let you see at a glance how much you have left, so you never run out mid-project.
Choose The Right Container
Look for containers with a wide mouth for easy scooping and a tight seal to keep moisture out. Glass jars with rubber gaskets or BPA-free plastic canisters work well. Avoid containers that are too tall—you want to be able to reach in without knocking things over.
Labels are a must: write the product name and any safety warnings clearly on the side.
Store In A Cool, Dry Spot
Even with airtight containers, placement matters. Keep powdered cleaners away from heat sources like radiators or direct sunlight, which can degrade the powder. A low, stable shelf in a cool pantry or under-sink cabinet works best.
If you live in a humid climate, toss a silica gel packet into the container for extra moisture protection.
Avoid Cross-contamination
Never use the same scoop for different powders—you don't want bleach residue in your laundry detergent. Dedicate a scoop or spoon to each container, or use disposable ones. Also, keep powdered cleaners separate from liquid ones to prevent accidental mixing if a bottle leaks.
A simple divider or separate shelf does the trick.
12. Install a Magnetic Strip for Metal Tools
Metal scrubbers, tweezers, and small tools often end up lost in drawers or rusting in damp cabinets. A magnetic strip gives them a dedicated home where they stay visible and dry. It's a simple, low-cost solution that works in a closet, under a sink, or even on the side of a shelf.
Magnetic strips are typically used for knives in the kitchen, but they're just as handy for cleaning gear. Choose a strip strong enough to hold heavier items like steel wool pads or metal scrapers. Mount it on a wall or inside a cabinet door, away from moisture sources to prevent rust.
Arrange tools with space between them so you can grab each one without knocking others off. For smaller items like tweezers or seam rippers, attach a small magnet to the back of the tool itself if the strip isn't strong enough.
Where To Mount It
The best spots are inside a cabinet door under the sink, on the wall of a utility closet, or on the side of a shelving unit. Avoid areas directly above sinks or near steam sources. If you mount it on a door, check that the door closes fully without hitting the tools.
What To Store
Steel wool pads, metal scrub brushes, tweezers, small pliers, scissors, and metal bottle openers all work well. Avoid storing anything that could leak or drip onto the strip, as liquid can weaken the magnet over time.
Safety Tips
Keep the strip out of reach of children, as metal tools can be sharp. Check the magnet strength periodically—if tools start slipping, replace the strip. For extra security, use a strip with a lip or edge that prevents items from sliding off.
13. Store Mops and Brooms with Gripper Clips

Mops and brooms are notorious for toppling over in closets or leaning against walls, taking up floor space and getting damaged. Gripper clips offer a simple, low-cost fix that keeps them upright and out of the way. By mounting these clips on a wall or inside a cabinet door, you can hang each tool securely and free up valuable floor area.
Gripper clips are small plastic or metal brackets that hold the handle of a mop or broom firmly in place. They install with screws or adhesive strips, so you can put them almost anywhere. This keeps your cleaning tools organized, prevents handles from getting scratched, and stops heads from collecting dust or moisture on the floor.
Easy Installation Anywhere
You don't need a full workshop to set these up. Most gripper clips come with adhesive backing or simple screw holes. Stick them to the inside of a pantry door, along a garage wall, or in a utility closet.
Just make sure the surface is clean and dry before applying. For heavier mops, use screws for extra hold.
Prevent Damage And Mess
When mops and brooms rest on the floor, the bristles or mop heads can get crushed, bent, or dirty. Hanging them keeps the cleaning surfaces in good shape and allows them to air dry properly, reducing mildew and odors. It also keeps the floor clear, making it easier to sweep or mop without obstacles.
Maximize Vertical Space
Vertical storage is a game-changer in small spaces. By using the wall, you reclaim floor area for other items. You can even stack multiple clips vertically to store several tools in a narrow strip of wall.
This works especially well in tight laundry rooms or broom closets where every inch counts.
14. Use a Lazy Susan for Corner Cabinets
Corner cabinets are notorious for swallowing up bottles and sprays, turning them into forgotten relics. A lazy Susan changes that by bringing everything into easy reach with a simple spin. No more digging around or buying duplicates because you couldn't find the original.
A rotating tray turns wasted corner space into prime real estate for your cleaning supplies. It keeps bottles organized and accessible, so you can grab what you need without moving a dozen items. Plus, it reduces the risk of spills from overreaching or knocking things over.
Choose The Right Size
Measure your cabinet's depth and width before buying a lazy Susan. A too-small tray wastes space, while an oversized one won't spin freely. Look for a tiered model if you have tall bottles and small items—it doubles your storage without sacrificing rotation.
Group By Frequency Of Use
Place everyday cleaners like all-purpose spray and glass cleaner on the top tier or front of the tray. Reserve the bottom or back for occasional-use items like oven cleaner or floor polish. This way, you spin less and grab more.
Secure Tall Bottles
Tall bottles can tip over during rotation. Use small non-slip shelf liners or adhesive grips on the tray to keep them upright. Alternatively, store tall items on the outer edge where they have more support.
15. Keep Hydrogen Peroxide in a Dark Bottle
Hydrogen peroxide is a powerful disinfectant and stain remover, but it's also sensitive to light. Exposure to sunlight or bright indoor lighting causes it to break down into water and oxygen, making it ineffective. That's why storing it in a dark, opaque bottle is essential for maintaining its strength.
Most hydrogen peroxide comes in a brown or opaque plastic bottle for this reason. But if you transfer it to another container or buy it in bulk, make sure the new bottle blocks light. A simple amber glass bottle or a dark spray bottle works perfectly.
Don't forget to label it clearly. Hydrogen peroxide looks just like water, so a bold label prevents accidental misuse. Keep it in a cool, dark cabinet away from heat sources for maximum shelf life.
Hydrogen peroxide is a powerhouse cleaner and disinfectant, but it degrades quickly when exposed to light. Storing it in a dark bottle preserves its potency, so it actually works when you need it. Here's how to do it right.
Why Light Hurts Hydrogen Peroxide
Hydrogen peroxide is naturally unstable. Light speeds up its decomposition into water and oxygen gas. That's why the brown bottle isn't just for looks—it filters out UV rays that cause breakdown.
If you store it in a clear bottle, you'll lose effectiveness in days. Always keep it in its original container or a dedicated opaque bottle.
Best Bottle Choices
Amber or cobalt glass bottles are ideal because they block light completely. Dark plastic spray bottles work too, especially if you use hydrogen peroxide for cleaning. Avoid metal containers, as hydrogen peroxide can corrode some metals.
Stick with glass or high-density polyethylene (HDPE) plastic that is opaque or dark-colored.
Labeling And Storage Tips
Hydrogen peroxide is colorless and odorless, so it's easy to mistake for water. Use a permanent marker or a label maker to write "Hydrogen Peroxide" clearly. Add a warning like "Do Not Drink" if kids or guests might access it.
Store it in a cool, dark cabinet—not under the sink where heat from pipes can accelerate breakdown.
16. Designate a High Shelf for Pet-Hazardous Items
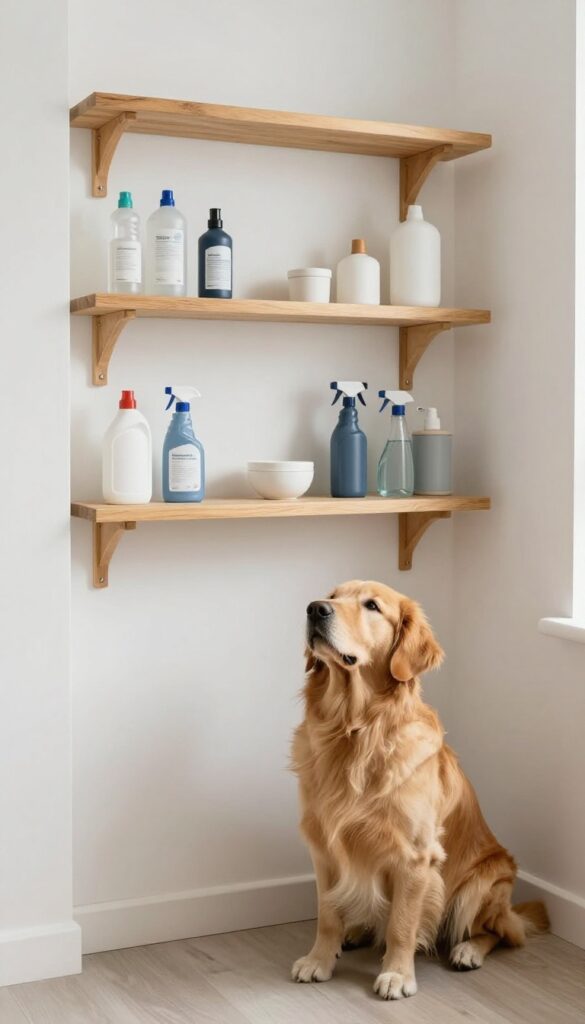
Pets are curious by nature, and a low cabinet full of colorful bottles can be irresistible. Many common cleaning products contain chemicals that are toxic to dogs and cats, even in small amounts. The safest approach is to store these items completely out of reach—not just behind a door, but up high where paws and noses can't explore.
A high shelf in a laundry room, pantry, or garage is ideal. If you have a cabinet above counter height, that works too. The key is that the shelf is not accessible to your pet even if they jump or stand on hind legs.
For extra security, use a cabinet with a childproof latch or a magnetic lock. This keeps curious pets safe and gives you peace of mind.
Which Products Are Most Dangerous?
Not all cleaners are equally hazardous. Bleach, ammonia, drain cleaners, and oven sprays are highly toxic. Also watch out for laundry pods, which look like toys and can cause serious harm if chewed.
Even natural cleaners with essential oils can be dangerous for cats. Make a list of your most toxic products and commit to storing them on that high shelf.
How High Is High Enough?
A shelf at least 5 feet off the ground is a good starting point for most dogs. Cats are more agile, so consider a closed cabinet with a latch instead. If you have a particularly athletic pet, a locked cabinet is the only foolproof option.
Measure your pet's vertical reach and add a foot for safety.
Label And Separate For Extra Safety
Use a permanent marker or label maker to mark the shelf "Pet Hazard" so everyone in the household knows. Keep these items separate from pet-safe products like vinegar or baking soda. This prevents accidental mix-ups when you're in a hurry.
A simple bin or basket on the high shelf can keep bottles organized and prevent them from falling.
17. Use a Tension Rod to Hang Spray Bottles
Under-sink cabinets are notorious for chaos. Bottles get shoved to the back, fall over, and leak. A tension rod changes that by giving spray bottles a dedicated hanging spot.
It's a simple fix that keeps them upright and easy to grab.
Install a tension rod horizontally under your sink, positioned low enough so spray bottles can hang by their triggers. Adjust the rod to fit snugly between the cabinet walls. Then simply hook each bottle's trigger over the rod.
This keeps bottles off the cabinet floor, preventing spills and making the most of vertical space. You can fit several bottles side by side, and removing one is as easy as lifting it off.
Choosing The Right Rod
Pick a tension rod that's strong enough to hold the weight of full bottles. Look for one with rubber ends to grip the cabinet walls without slipping. Measure your cabinet width first and choose a rod that extends a few inches beyond that for a secure fit.
Arranging Bottles For Balance
Hang heavier bottles near the center of the rod to distribute weight evenly. Lighter ones can go on the ends. If the rod starts to sag, reposition the bottles or add a second rod for extra support.
Keep similar-sized bottles together for a neat look.
Safety And Maintenance Tips
Check the rod periodically to ensure it hasn't loosened. Avoid hanging bottles with damaged triggers that might slip off. If you have small children, place the rod high enough that bottles are out of reach, or use a childproof lock on the cabinet.
18. Store Vinegar and Baking Soda Separately
Vinegar and baking soda are two of the most versatile non-toxic cleaners, but they don't play well together until you want them to. When stored side by side, a leak or spill can trigger a fizzy reaction that makes a mess and reduces their effectiveness. Keep them in separate zones to avoid accidental chemistry experiments.
Separating these two common staples is simple and prevents a bubbly disaster. Use different cabinets or shelves, and make sure each container is sealed tight. This small step keeps your cleaning routine safe and your supplies ready for action.
Why Separation Matters
Vinegar is acidic and baking soda is alkaline. When they mix, they neutralize each other, creating carbon dioxide gas and water. That fizz might be fun for a volcano project, but it's a waste of your cleaning power.
A leaky bottle of vinegar near an open box of baking soda can ruin both products.
Best Storage Spots
Designate a high shelf for vinegar and a low bin for baking soda, or vice versa. Keep baking soda in its original box inside a sealed container to prevent moisture. Vinegar can stay in its bottle, but make sure the cap is tight.
Avoid storing them under the sink together where spills are more likely.
Labeling And Accessibility
Clear labels help everyone in the household know where each belongs. Use a permanent marker or a label maker to mark "Vinegar" and "Baking Soda" on shelves or bins. This also prevents grabbing the wrong one when you're in a hurry.
Keep them within easy reach but separated by at least one shelf or a divider.
19. Use a Drawer Organizer for Cleaning Cloths
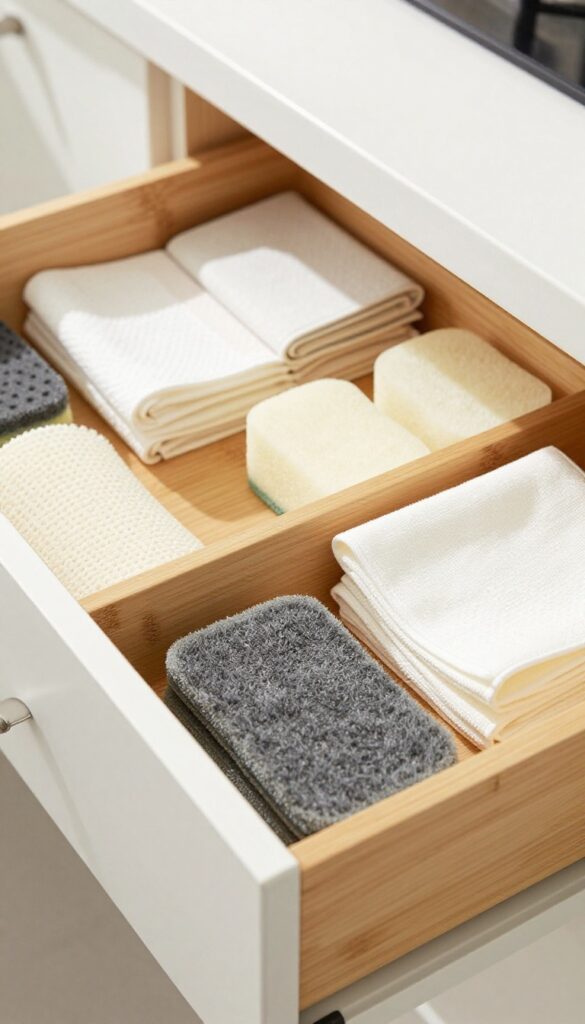
Cleaning cloths, sponges, and scrub pads often end up in a tangled heap under the sink. A simple drawer organizer changes that. By dividing a drawer into dedicated sections, you keep each type of cloth separate and easy to grab.
A drawer organizer turns a messy pile into a neat, accessible system. Assign one slot for microfiber cloths, another for sponges, and a third for scrub pads. This way, you never mix a greasy rag with a clean glass cloth.
It also speeds up your cleaning routine—no more digging through a jumble to find what you need.
Choose The Right Drawer
Pick a drawer near your cleaning station, like under the sink or in a laundry room. Measure the depth to ensure the organizer fits without sticking. A shallow drawer works best for cloths and sponges; deeper ones can hold bottles too.
Pick An Organizer Style
Adjustable bamboo dividers are sturdy and look nice. Plastic modular bins are cheap and easy to clean. For a custom fit, use small baskets or even repurposed takeout containers.
Just make sure each compartment is wide enough to grab cloths easily.
Label For Quick Access
Use a label maker or simple tape to mark each section: “Microfiber, ” “Sponges, ” “Scrub Pads. ” This helps everyone in the household put things back in the right spot. It also reminds you to replace worn items before they get mixed in.
20. Label All Bottles with Permanent Marker
Even if the original label is intact, adding a clear, permanent label with the product name prevents dangerous mix-ups. A quick glance at a bold label saves time and keeps everyone safe.
Original labels can fade, peel, or get covered in drips. A permanent marker and some painter's tape or a label maker give each bottle a durable, readable ID. This simple step is especially important if you decant products into different containers or store them in a dark cabinet where labels are hard to read.
It also helps family members or guests quickly identify what they need without guessing.
Where To Label
Label the side of the bottle that faces you when it's stored. If bottles are stacked or stored sideways, put a label on the top as well. Avoid placing labels over the original label if it's still legible; instead, stick it on a clean, dry area.
What To Include
Write the product name clearly in large letters. For extra safety, add a one-word warning like "Toxic" or "Caution" for harsh chemicals. You can also note the purchase date so you know when to replace it.
Best Labeling Tools
Permanent markers work on most surfaces, but they can smear if the bottle gets wet. For a more durable solution, use a label maker with waterproof tape or write on a piece of clear packing tape and stick it on. Avoid paper labels that can disintegrate.
21. Store Concentrates in Squeeze Bottles
Concentrated cleaning solutions are powerful and economical, but they're also easy to overuse or spill. Transferring them to labeled squeeze bottles solves both problems. You get precise dispensing and a safer, more controlled application every time.
Squeeze bottles give you fingertip control over how much concentrate you use, reducing waste and accidental splashes. They're especially handy for thick liquids like laundry detergent or all-purpose cleaner concentrates. Plus, the narrow tip lets you target stains or fill small compartments without mess.
Why Squeeze Bottles Work
Unlike pour spouts or open caps, squeeze bottles release product only when you apply pressure. That means no sudden gushes or drips. The controlled flow is perfect for pretreating stains, filling spray bottles, or adding a small amount to a bucket.
Labeling For Safety
Always label squeeze bottles clearly with the product name and dilution ratio. Use waterproof labels or a permanent marker on the bottle itself. This prevents anyone from mistaking a concentrated cleaner for something harmless.
Best Bottles To Use
Look for opaque or translucent HDPE squeeze bottles with a flip-top or nozzle cap. Avoid glass, which can break. Choose a size that matches your usage—8 oz for small batches, 16 oz for frequently used concentrates.
22. Use a Bucket for Bulk Storage
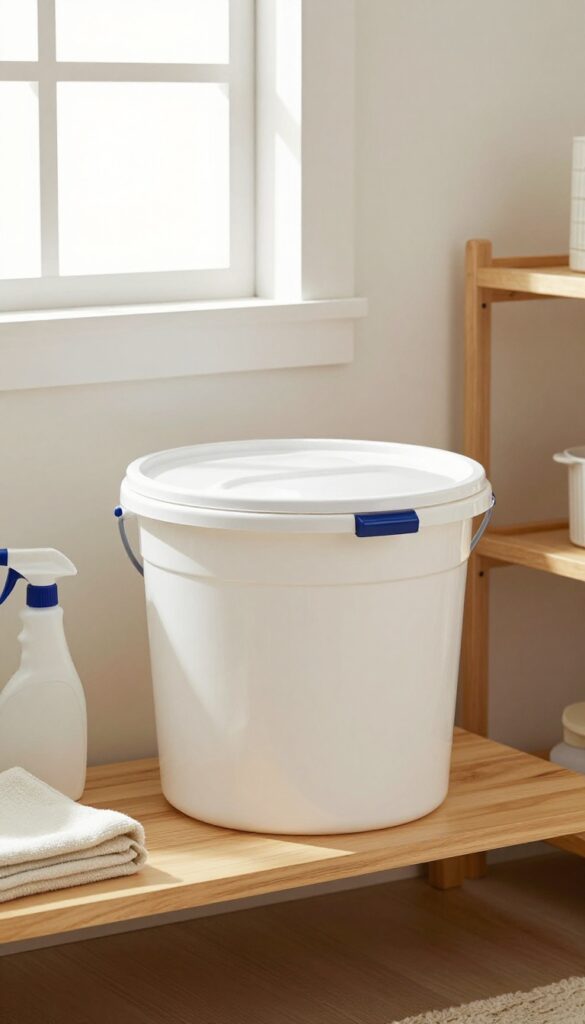
Large containers of detergent, bleach, or fabric softener are awkward to handle and prone to leaking. A sturdy bucket with a lid solves both problems. It corrals drips, makes carrying easier, and keeps heavy jugs from toppling over.
Choose The Right Bucket
Look for a food-grade 5-gallon bucket with a snap-on lid. The lid is essential—it keeps dust out and contains any leaks. A bucket with a handle makes it simple to haul heavy containers from the laundry room to the kitchen or garage.
Set It Up Safely
Place the bucket on a low, stable shelf or directly on the floor. If you store multiple buckets, label each one clearly with the product inside. Never mix different chemicals in the same bucket—even if they're sealed, a leak could cause a dangerous reaction.
Bonus Uses
Use the same bucket to store spray bottles upright, or keep cleaning cloths and gloves inside alongside the bulk containers. When the bucket is empty, it doubles as a mop bucket or a seat for reaching high shelves.
23. Install a Shelf Above the Washing Machine
That empty wall above your washer is prime real estate. Most laundry rooms have unused vertical space right where you need it most. A sturdy shelf mounted above the machine keeps detergents, stain removers, and fabric softeners within easy reach but safely off the floor and away from curious hands.
Mounting a shelf above the washing machine is a straightforward weekend project that pays off every laundry day. Choose a shelf deep enough to hold standard bottles without them teetering on the edge. A lip or guard rail adds extra security against accidental knocks.
Use heavy-duty anchors rated for the combined weight of your supplies.
Choosing The Right Shelf Material
Avoid materials that can warp or rust in humid laundry rooms. Sealed wood, powder-coated metal, or high-density plastic are good options. Wire shelving allows air circulation and lets drips fall through, but you'll want a solid shelf for smaller bottles that could tip between wires.
Safety Considerations
Make sure the shelf doesn't interfere with the washer lid opening fully. Position it high enough that children can't reach the products, but low enough that you can grab a bottle without stretching. Use anti-slip shelf liners to keep bottles from sliding during spin cycles.
Organizing Your Shelf
Group products by frequency of use. Keep everyday detergent and softener at the front, specialty stain removers and bleach alternatives toward the back. Use small bins or baskets for pods, dryer sheets, and smaller items so they don't get lost.
Add a small caddy for immediate-use items like a pre-treat pen or lint roller.
24. Keep a Fire Extinguisher Nearby
Some cleaning products are highly flammable—think aerosol sprays, rubbing alcohol, and certain polishes. Storing them safely means more than just keeping them upright. Having a fire extinguisher within reach adds a critical layer of protection.
Choose The Right Extinguisher
Not all fire extinguishers are created equal. For home use, a multi-purpose ABC extinguisher handles fires from flammable liquids, electrical equipment, and ordinary combustibles. Look for a compact model that's easy to mount on a wall or store under the sink.
Mount It, Don't Bury It
An extinguisher is useless if you can't grab it quickly. Install a mounting bracket on the wall near your cleaning supply area—ideally by the door so you can escape if needed. Keep it at eye level, not behind bottles or under piles of rags.
Check It Regularly
An extinguisher that's expired or has low pressure won't help. Check the gauge monthly to ensure it's in the green zone. Replace or recharge it according to the manufacturer's instructions, usually every 5 to 15 years.
25. Rotate Stock by Expiration Date
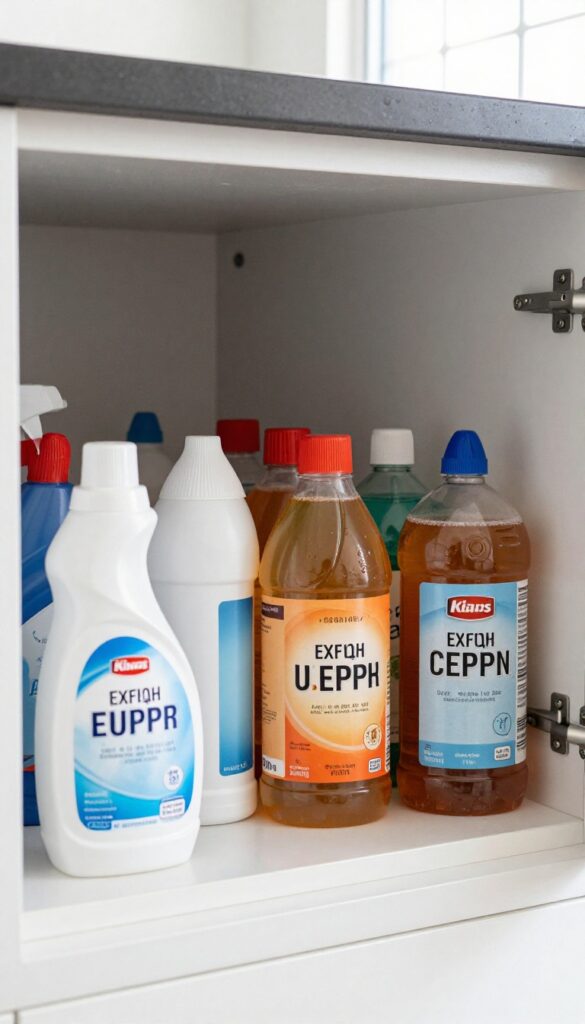
Cleaning products don't last forever. Many lose potency or break down over time, making them less effective—or even unsafe. A simple rotation system keeps your stash fresh and functional.
By checking expiration dates and moving older bottles to the front, you ensure you use them before they go bad. It's a small habit that prevents waste and keeps your cleaning routine efficient.
Start by pulling everything out of your cabinet. Check each bottle's label for a printed expiration date or a period-after-opening symbol (like a jar with a number inside). Sort products into two piles: those still good and those past their prime.
Place the soon-to-expire items front and center so you grab them first. Group products by type or frequency of use to make rotation even easier. For example, keep all-purpose cleaners together and rotate within that group.
Dispose of expired products properly. Many cleaning chemicals shouldn't go down the drain or in the trash—check local guidelines. Some can be taken to hazardous waste facilities.
Getting rid of old stuff frees up space and reduces risk.
How To Read Expiration Dates
Not all cleaning products have obvious dates. Look for a small printed code on the bottom or back of the bottle. Common formats include "EXP 2025" or a symbol with a number like "12M" meaning 12 months after opening.
If there's no date, a good rule of thumb is to replace products after two years.
Setting Up A Rotation System
Use a simple first-in, first-out approach. When you buy a new bottle, place it behind the older one. You can also use a marker to write the purchase date on the label.
For multi-product categories like window cleaners or disinfectants, organize them in rows by expiration month.
What To Do With Expired Products
Never mix expired products together. Check with your local waste management for drop-off events or guidelines. Some municipalities accept them on specific days.
Avoid pouring down drains unless the label says it's safe—many chemicals can harm plumbing or the environment.
FAQ
Should I store cleaning products in original containers?
Yes, always keep products in their original containers with labels intact. If you transfer to a different bottle, label it clearly with the product name and safety warnings.
Is it safe to store cleaning products under the sink?
It can be safe if the area is dry, well-ventilated, and childproofed. Use bins to contain leaks and avoid storing incompatible chemicals together.
What is the best way to store spray bottles?
Store spray bottles upright to prevent leaks. Use a rack or tension rod to keep them organized and easily accessible.
How often should I declutter my cleaning supplies?
Go through your supplies every three to six months. Discard expired products, consolidate duplicates, and reorganize as needed.
Conclusion
Organizing your cleaning products doesn't have to be complicated. With these 25 ideas, you can create a system that keeps your home tidy and your family safe. Start with one or two changes that fit your space best.
Remember, the goal is to make cleaning easier while preventing accidents. A little effort upfront saves time and worry later. Your cleaning routine will feel smoother, and your home will be safer for everyone.


