
You shouldn't have to wrestle with a cascade of bottles every time you need to wipe down a counter. A well-organized cleaning stash saves time and frustration. These 23 ideas focus on making your supplies instantly accessible.
No more digging through dark cabinets or buying duplicates because you can't find what you own. Each tip is designed to streamline your routine and keep your cleaning tools visible and within reach.
From simple caddies to clever wall-mounted racks, there's a solution here for every space and budget. Let's make your cleaning products work for you, not against you.
1. Use a Tension Rod Under the Sink
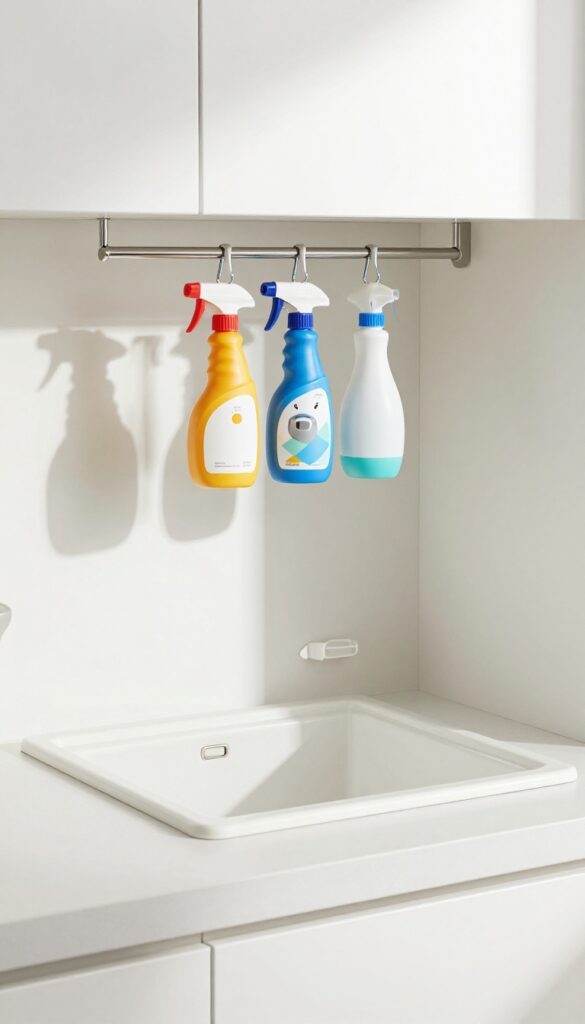
That space under your sink is prime real estate, but it often turns into a black hole of bottles and sponges. A simple tension rod can change all that. Hang spray bottles upside down from the rod so they're easy to grab and ready to use—no more digging through a messy pile.
This trick works best with bottles that have a trigger sprayer and a hook or loop on the handle. If your bottles don't have a built-in hook, you can attach small carabiners or shower hooks to the trigger. The tension rod should be placed near the front of the cabinet so the bottles hang freely without blocking the plumbing.
You can also use a second rod behind the first for double the storage. This method keeps bottles visible, prevents leaks from pooling in the nozzle, and frees up floor space for larger items like a trash can or cleaning caddy.
What You'll Need
Grab a tension rod that fits your cabinet width (most are adjustable), a few shower curtain rings or carabiners, and your spray bottles. That's it. No drilling or permanent installation required.
How To Set It Up
First, remove everything from under the sink. Wipe down the area and measure the width of the cabinet. Adjust the tension rod to fit snugly between the side walls.
Attach the hooks or carabiners to the spray bottle triggers, then hang them from the rod. Arrange bottles in order of use frequency—most-used ones in front.
Pro Tips For Best Results
Use a rod with rubber ends to prevent slipping. If your cabinet is very deep, consider placing the rod closer to the door for easy reach. For extra stability, you can use two rods side by side.
Also, check that the bottles hang straight—angled bottles might drip onto the cabinet floor.
2. Repurpose a Shoe Organizer on the Pantry Door
That over-the-door shoe organizer you’re not using? It’s a perfect home for cleaning supplies. Clear pockets let you see every bottle and sponge at a glance, so you can grab what you need without rummaging.
Hang it on the back of a pantry door, a linen closet door, or even a laundry room door to turn wasted vertical space into a cleaning command center.
This trick works best with a clear, pocketed organizer designed for shoes. The pockets are just the right size for spray bottles, scrub brushes, and gloves. You can group items by task—all-purpose cleaners in one row, bathroom products in another—so everything has a place.
Plus, it keeps supplies off counters and out from under sinks, freeing up valuable storage for other things.
What To Store In Each Pocket
Use the bottom pockets for heavier bottles like floor cleaners or bleach. Mid-level pockets are great for daily spray cleaners and microfiber cloths. Top pockets can hold smaller items like scrub brushes, gloves, or sponges.
This keeps weight balanced and makes the most-used items easiest to reach.
Picking The Right Organizer
Look for a shoe organizer with clear, breathable mesh or transparent plastic pockets. Mesh allows air circulation, which is helpful for damp sponges or gloves. Make sure the pockets are deep enough to hold standard spray bottles without them tipping out.
A 24-pocket version gives you plenty of room without being too bulky.
Installation Tips
Most over-the-door organizers fit standard doors, but check the thickness first. If your door is extra thick, you might need an adjustable hanger. For a more permanent setup, use adhesive hooks on the door instead of the over-the-door hanger.
This prevents the organizer from swinging when you grab items.
3. Install a Pegboard in the Utility Closet
If your utility closet is a jumble of spray bottles and dusters, a pegboard can turn that chaos into a tidy, customizable storage wall. Pegboards are cheap, easy to install, and let you rearrange hooks and shelves whenever your cleaning arsenal changes. You can hang everything from heavy sprayers to lightweight dusters, keeping them off the floor and within arm's reach.
A pegboard transforms a cramped closet into a highly efficient cleaning station. By mounting one on the back wall or door, you free up floor space for a mop bucket or vacuum. The key is to plan your layout before you start hammering: group similar items together and leave room for future additions.
Use a mix of hooks, baskets, and small shelves to accommodate different tool shapes and sizes.
Choose The Right Pegboard And Hardware
Standard pegboards come in 4×8-foot sheets, but you can buy smaller pre-cut panels. For heavy loads, opt for a 1/4-inch thick board with metal inserts. Use wall anchors if you're mounting on drywall, or screw directly into studs for maximum support.
Don't forget pegboard hooks—buy an assortment pack with straight hooks, loop hooks, and basket brackets to handle various items.
Organize By Frequency Of Use
Place everyday essentials like all-purpose spray and microfiber cloths at eye level. Reserve lower hooks for heavy bottles and floor cleaners, and use higher spots for seldom-used tools like carpet cleaners or ceiling dusters. This setup saves you from bending or stretching every time you need a quick clean.
Add Small Bins For Sponges And Scrub Brushes
Attach small wire bins or plastic containers to the pegboard to corral loose items like sponges, scrub brushes, and gloves. Label each bin if you share the closet with others. This keeps small accessories from falling behind the board and makes restocking a breeze.
Incorporate A Drip Tray For Wet Tools
Place a shallow tray or baking sheet on a lower shelf to catch drips from spray bottles or wet mop heads. This protects the pegboard and closet floor from water damage. You can even add a small hook for a microfiber mop head so it air-dries without creating a mess.
4. Group Products by Room in Clear Bins
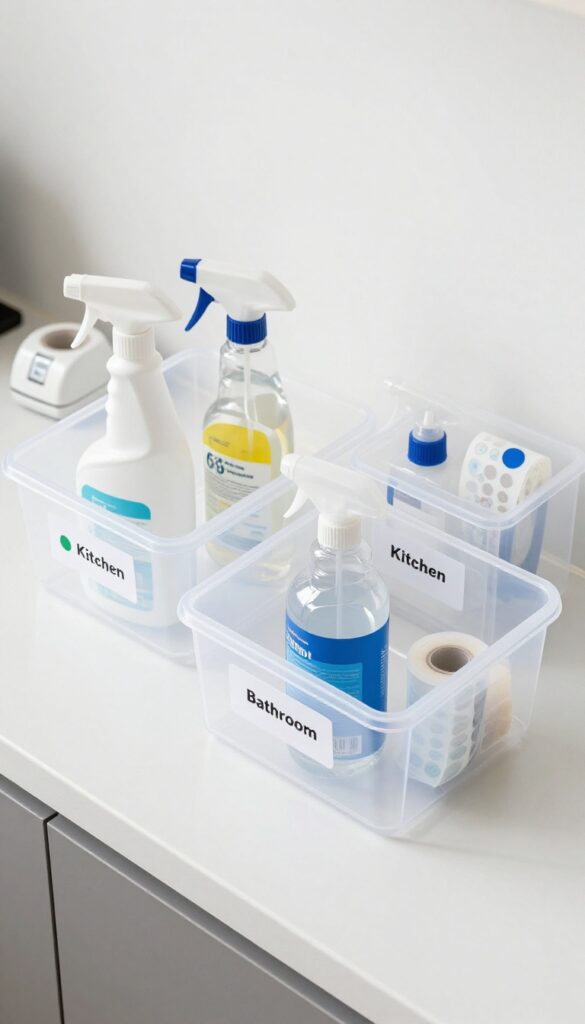
Mixing all your cleaning products together in one giant caddy or under-sink basket is a recipe for frustration. You end up moving bottles around just to find the glass cleaner, and the kitchen degreaser somehow winds up in the bathroom. A smarter system is to separate supplies by room using clear bins.
That way, you grab the bin for the space you're about to clean and go.
Clear bins let you see everything at a glance, so you never have to dig through a pile of mismatched bottles. Label each bin by room—kitchen, bathroom, living areas, and maybe a separate one for glass and mirrors. When you're ready to tackle a specific area, you just pull that bin and get to work.
No more hauling a dozen products from room to room or forgetting what you already have.
Choose The Right Size Bins
Not all clear bins are created equal. For under-sink storage, go with shallow, wide bins that slide out easily. For a closet or shelf, stackable bins with handles work well.
Make sure the bin is tall enough to hold spray bottles upright, but not so deep that small items get lost at the bottom. Measure your space before buying.
Label Clearly And Consistently
Use a label maker or simple adhesive labels with a permanent marker. Write the room name in large, legible letters. If you share your home with others, add a small icon or color code (like a blue dot for bathroom, green for kitchen) so everyone can put things back in the right bin.
Consistent labeling keeps the system intact.
Keep A Master Caddy For Multi-room Tasks
Some cleaning tasks, like dusting or vacuuming, touch multiple rooms. Keep a small portable caddy stocked with all-purpose cleaner, microfiber cloths, and a duster. That way, you can move through the house without carrying multiple bins.
The room-specific bins stay put for deep cleaning sessions.
5. Use a Lazy Susan for Corner Cabinets
Corner cabinets are notorious for swallowing bottles whole. A lazy Susan changes that by putting every product within easy reach. Just give it a spin, and you'll never lose a spray bottle in the back again.
A spinning turntable makes the most of deep or awkward cabinets. It works especially well under the sink or in a pantry corner where items tend to pile up. With a lazy Susan, you can see and grab what you need without rearranging everything.
Choose The Right Size
Measure your cabinet before buying. A standard 12-inch turntable fits most under-sink spaces, but you might need a smaller one for tight corners. Look for a non-slip surface or add a liner to keep bottles from sliding.
Group By Frequency Of Use
Place daily essentials like all-purpose cleaner and glass spray on the lazy Susan. Store less-used items like floor cleaners or specialty stain removers elsewhere. This keeps your most-used products front and center.
Layer With A Second Tier
If you have tall bottles, a single-tier lazy Susan works best. For shorter items like scrub brushes and small bottles, a two-tier turntable doubles your space. Just make sure the cabinet height allows clearance for both levels.
6. Hang a Magnetic Strip for Metal Tools
Metal scrubbers, tweezers, and small clippers tend to disappear into the depths of drawers. A magnetic strip inside a cabinet door keeps them visible and within arm's reach. It's a zero-effort way to reclaim lost real estate.
A magnetic strip is one of those deceptively simple upgrades that changes how you grab your go-to tools. No more fishing around for that steel wool pad or wondering where the seam ripper went. Just stick it on the strip and it stays put until you need it again.
Where To Install
The inside of a cabinet door above your sink or under the main cleaning caddy works best. Make sure the strip is mounted securely with strong adhesive or screws so it can hold the weight of multiple metal items.
What To Store
Steel wool pads, metal scrubbers, tweezers, small clippers, and even metal bottle openers if you keep them with cleaning supplies. Avoid storing anything that could rust or drip onto the strip—stick to dry tools only.
Pro Tip For Longevity
Wipe the strip down occasionally with a dry cloth to prevent dust buildup. If you notice rust forming on any tool, remove it immediately to keep the strip clean and magnetic.
7. Store Spray Bottles in a Wine Rack
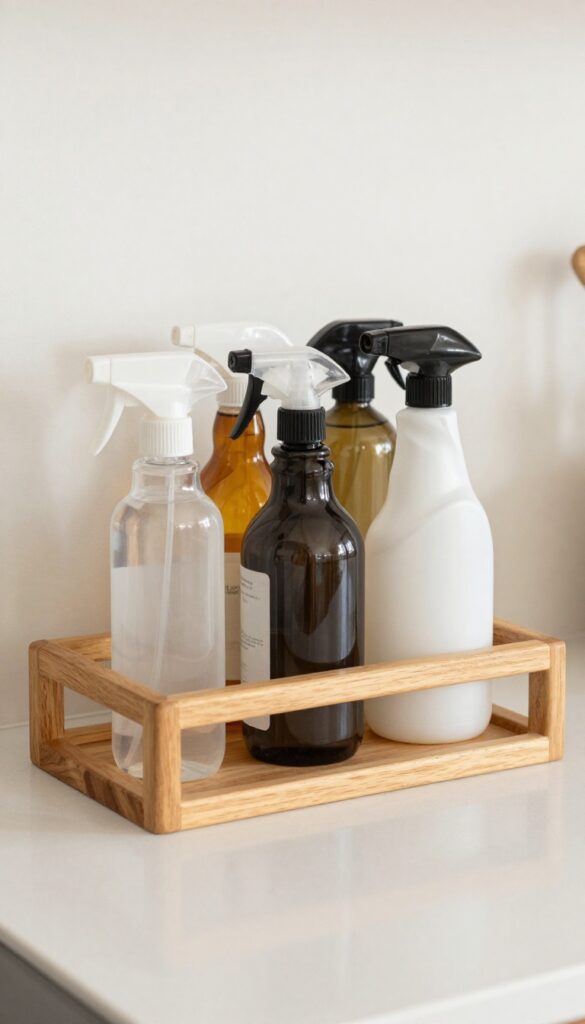
A countertop wine rack does more than hold vino. Its slotted design keeps spray bottles upright and separated, turning a jumble into a mini cleaning bar. This trick works especially well for daily-use sprays like all-purpose cleaner, glass cleaner, and disinfectant.
Wine racks are built to cradle bottles securely, so they naturally prevent spray bottles from tipping over. Plus, the open design lets you see labels at a glance. No more grabbing the wrong bottle mid-scrub.
Choose The Right Rack
Look for a wine rack with wide slots—some are too narrow for trigger sprayers. A wooden or metal cube-style rack (holds 6 to 12 bottles) works best. Avoid wire racks that might scratch bottle surfaces.
Place It Where You Clean Most
Set the rack on your kitchen counter near the sink, or on a laundry room shelf. You want it within arm’s reach for quick grab-and-go. If your space is tight, a small 4-bottle rack fits on a windowsill.
Keep It Simple And Rotate Stock
Only store your most-used sprays in the rack—limit to 6 to 8 bottles. Rotate seasonal cleaners (like window wash in spring) in and out. This prevents clutter and keeps the rack functional.
8. Use a Tiered Shelf for Cans and Bottles
Tired of playing Tetris every time you grab a spray cleaner? A tiered shelf—or stackable risers—creates stadium seating for your bottles and cans. This simple upgrade lets you see every product at a glance, so nothing gets buried or forgotten.
Tiered shelves are a game-changer for under-sink cabinets, pantry shelves, or any deep storage area. They elevate items in the back so you can reach them without pulling everything out. Plus, they keep bottles upright and prevent leaks from mixing.
Choose The Right Risers
Look for adjustable or modular risers that fit your shelf width. Clear acrylic ones keep things visible, while wire or bamboo options add a bit of style. Make sure the risers are sturdy enough to hold heavy bottles without wobbling.
Group By Frequency Of Use
Place your most-used sprays and cleaners on the front row of the tiered shelf. Reserve the back row for backups or less frequently used items like floor cleaners or specialized stain removers. This way, you grab what you need without shifting everything around.
Combine With Bins For Small Items
If you have small bottles, sponges, or scrub brushes, nestle a small bin on one of the tiers. That keeps everything contained and prevents tiny items from sliding off. Label the bin if you share the space with others.
9. Keep a Caddy for Each Floor
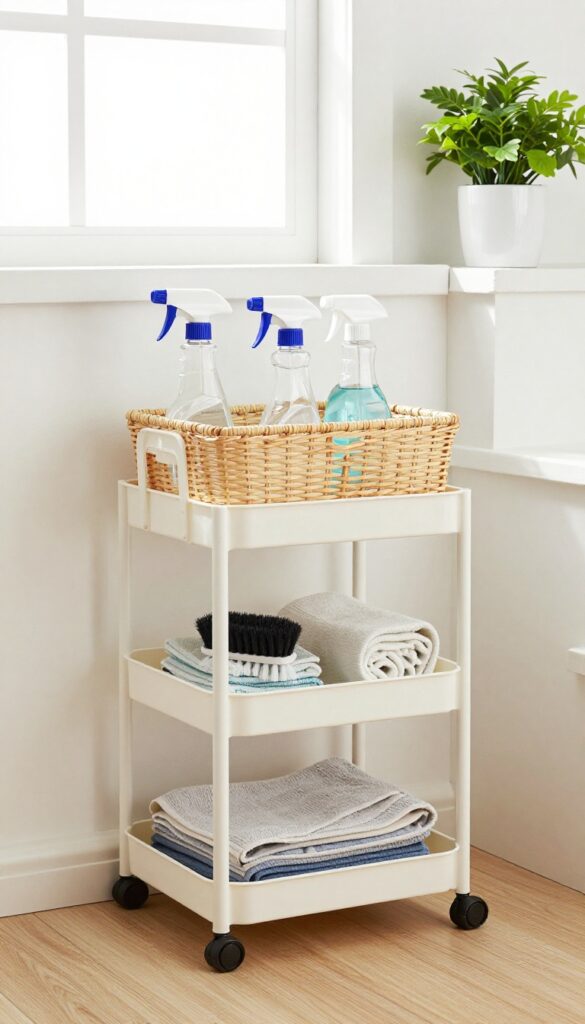
Running up and down stairs for a forgotten spray bottle wastes time and energy. A dedicated caddy per floor solves that by keeping essentials exactly where you need them. No more hunting for supplies mid-clean.
Assigning a caddy to each level means you always have the basics within arm's reach. It's a simple system that prevents clutter and saves steps. Here's how to set it up without overcomplicating things.
Choose The Right Caddy
Pick a sturdy, portable caddy with a handle. A divided tote or a bucket with compartments works best—you want to carry it easily from room to room on that floor. Avoid oversized ones that tempt you to overfill.
Stock For That Floor's Needs
Think about what you actually clean on each level. For the main floor, include all-purpose spray, glass cleaner, and a microfiber cloth. Upstairs, add bathroom-specific products.
Keep it minimal—just the essentials.
Store The Caddy Out Of Sight
Tuck each caddy in a logical spot: under the kitchen sink for the main floor, in a linen closet upstairs, or in a hall closet. The goal is easy access without visual clutter. A hook inside a cabinet door works too.
10. Add a Slim Rolling Cart Between Appliances
That narrow gap between your fridge and counter or stove and island is prime real estate for a rolling cart. A slim cart slides right into that unused space and pulls out whenever you need a spray bottle or a rag. It keeps daily cleaners within arm’s reach without cluttering your countertops.
A slim rolling cart is one of those ideas that feels obvious once you see it. The key is measuring the gap first—most standard gaps are around 4 to 6 inches wide. Look for a cart with wheels that lock so it stays put when you don’t need it.
Use the top tier for all-purpose spray and glass cleaner, the middle for scrub brushes and sponges, and the bottom for extra rags and gloves. You’ll never have to walk to a cabinet just to grab a cleaner again.
Choosing The Right Cart
Measure the width, depth, and height of your gap before shopping. A cart that’s too wide won’t fit, and one that’s too tall might block outlets or hinges. Look for a cart with wire shelves (easy to clean) or solid shelves that can hold small bottles without tipping.
Casters should be smooth and lockable so the cart doesn’t roll away when you bump it.
What To Store On Each Shelf
Top shelf: daily spray cleaners (all-purpose, glass, disinfectant) and a microfiber cloth. Middle shelf: scrub brushes, a small dustpan, and a handheld sprayer. Bottom shelf: a stack of cleaning rags, a pair of rubber gloves, and a small caddy for specialty items like stainless steel polish.
Keep the most-used items on top so you can grab them without bending.
Maintenance And Customization
Wipe down the cart shelves occasionally to prevent dust buildup. If the cart wobbles, adjust the wheels or add a small non-slip mat under the bottom shelf. You can also add a small hook on the side for a dustpan or a hanging spray bottle.
Label the shelves if you share the space with family members.
11. Use Drawer Dividers for Small Items
A cluttered drawer full of sponges, brushes, and gloves can turn a quick cleaning session into a frustrating search. Drawer dividers solve this by giving every small tool its own dedicated spot. You'll grab what you need without rummaging, and everything stays tidy.
Adjustable dividers let you customize the layout as your collection changes. Start by measuring your drawer depth and width, then choose expandable or interlocking dividers that fit snugly. Group items by type: sponges in one compartment, scrub brushes in another, and gloves rolled up in a third.
This system keeps damp items from touching dry ones and makes restocking a breeze.
Why Dividers Beat Piles
Without dividers, small items shift around and hide beneath each other. Dividers create permanent homes, so you always know where the bottle brush is. They also prevent mildew by allowing air circulation between items.
Choosing The Right Dividers
Look for expandable plastic or bamboo dividers that adjust to your drawer size. For deep drawers, stackable trays add a second layer. Clear dividers let you see contents at a glance, while solid ones hide clutter.
Quick Setup Steps
Empty the drawer and wipe it clean. Place dividers to create compartments based on your item sizes. Tuck in sponges upright, brushes handle-down, and gloves flat.
Adjust spacing until everything fits without crowding.
12. Hang a Tension Rod Inside a Cabinet for Cloths
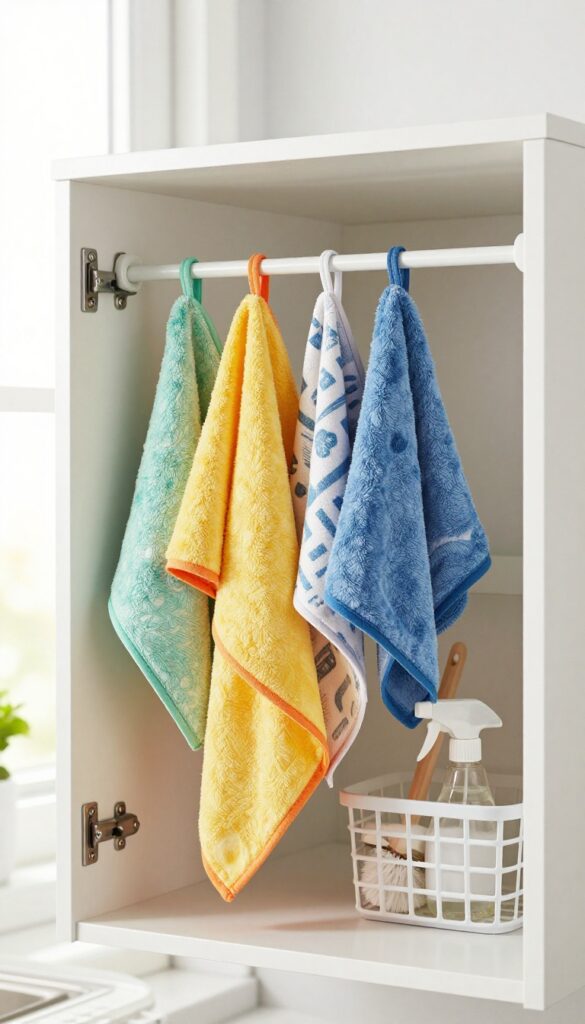
Microfiber cloths are workhorses, but they can turn into a damp, tangled mess if you just toss them in a drawer. A small tension rod inside a cabinet door gives them a dedicated spot to hang and air dry. It's a zero-footprint solution that keeps cloths ready to grab.
Installing a tension rod is a five-minute project. Measure the inside width of your cabinet, pick a rod that fits snugly, and pop it in place. Drape cloths over the rod so they hang freely.
This keeps them dry, prevents mildew, and makes it easy to see which ones are clean. You can even use the space below for a spray bottle or scrub brush.
Choose The Right Rod
Look for a lightweight tension rod about 1/2 to 3/4 inch thick. Avoid heavy curtain rods that might slip. A spring-loaded rod with rubber ends grips cabinet walls without damaging them.
Measure twice to ensure a tight fit.
Organize By Use
Dedicate one side of the rod for glass cloths and the other for general-purpose cloths. Use small binder clips or clothespins to label each cloth if you have multiple types. This way you never grab a greasy rag for a mirror.
Maximize The Space Below
The area under the rod is perfect for a narrow bin or a small basket. Store microfiber cloths that are still folded, or keep a spray bottle of all-purpose cleaner there. Everything you need for a quick wipe-down is in one spot.
13. Label Everything with a Label Maker
Labels are the unsung heroes of organization. A clear, consistent label on every bin, shelf, and spray bottle means no more guessing or grabbing the wrong product. It also trains everyone in the house to return items to their proper home.
Invest in a simple label maker or use printable labels—either way, the payoff is huge.
Labeling transforms a chaotic cabinet into a system that works on autopilot. When each bottle has a label, you grab the all-purpose cleaner without reading the fine print. Family members and guests can put things back correctly, reducing clutter and frustration.
Plus, labels make inventory checks a breeze—you see at a glance what's running low.
Label Categories For Quick Scanning
Group your labels by category: all-purpose cleaners, glass cleaners, disinfectants, floor cleaners, and specialty products. Use a consistent font size and color scheme. For example, black text on white labels for everyday items, and red accents for toxic or bleach-based products.
This visual system speeds up retrieval and prevents accidents.
Where To Place Labels For Maximum Impact
Stick labels on the front of spray bottles, the front edge of shelves, and the side of bins that faces you. For clear bins, label the bin itself, not the lid, so you see it when the bin is on a shelf. On shelves, place labels at eye level or slightly below.
This way, you don't have to crouch or squint.
Labeling For Multi-product Storage
If you store multiple products in one bin, label the bin with a general category like "Kitchen Cleaners" and then label each bottle individually. For refillable bottles, include the dilution ratio on the label (e. g. , "1: 10 water to concentrate"). This prevents mix-ups and ensures consistent results.
14. Use a Wall-Mounted Soap Dispenser for All-Purpose Cleaner
If you're constantly fumbling with spray bottles or leaving sticky rings on your countertops, a wall-mounted soap dispenser for all-purpose cleaner is a game-changer. It keeps your most-used cleaner right where you need it—above the sink—and eliminates the need for bulky bottles taking up space. Plus, refilling is as easy as pouring in more solution, and you'll never have to hunt for the right bottle again.
Mounting a dispenser near the sink means you can grab a squirt with one hand while holding a sponge in the other. No more twisting caps or searching for the spray nozzle. It's especially handy if you clean as you cook—just a quick pump and wipe, and you're done.
The dispenser also keeps your countertops clutter-free, giving you more room for prep work or decor.
Choose The Right Dispenser
Look for a heavy-duty dispenser with a metal pump mechanism—plastic pumps can wear out quickly with daily use. Opt for a clear or translucent reservoir so you can see when it's running low. Some models come with wall anchors and adhesive strips for easy installation without drilling, but if you're mounting on tile or stone, use a strong adhesive or drill with a masonry bit.
Label And Refill With Ease
To avoid confusion, label the dispenser clearly with a permanent marker or a vinyl decal that says "All-Purpose Cleaner. " Keep a backup bottle of your favorite cleaner under the sink for quick refills. You can even mix your own solution with vinegar, water, and a few drops of essential oil—just make sure it's compatible with the dispenser's materials.
Placement Tips For Maximum Convenience
Mount the dispenser on the wall directly above your kitchen sink or next to the faucet. This keeps it within easy reach for wiping counters, stovetops, and even the sink itself. If you have a double sink, position it between the two basins.
Avoid placing it too close to the stove where heat or grease could affect the pump.
15. Store Vacuum Attachments in a Pencil Cup
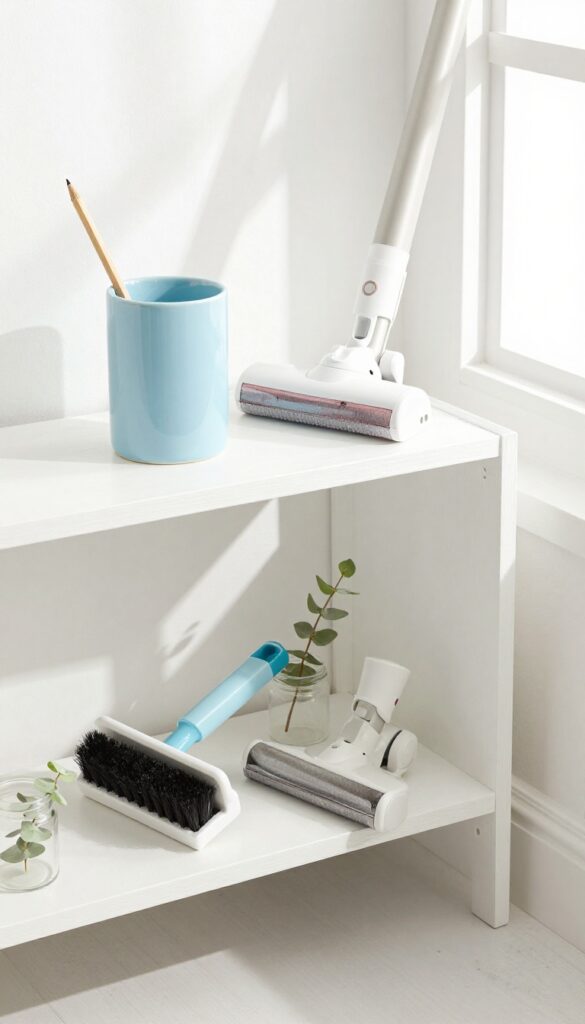
Vacuum attachments are easy to lose or leave scattered around the house. A simple pencil cup keeps them upright and accessible. This trick works for small crevice tools, brushes, and upholstery nozzles.
Place a sturdy cup or container inside your cleaning closet or on a shelf. Stand each attachment upright so you can grab the one you need without digging. This method also prevents dust from settling inside the tools.
Choose The Right Container
A wide-mouthed pencil cup or a small mason jar works well. Make sure it's heavy enough to stay put when you pull out a tool. A ceramic or metal cup adds weight and looks tidy.
Keep It Accessible
Position the cup near your vacuum or on a shelf at eye level. This way you can quickly swap attachments during cleaning. Avoid tucking it away in a deep cabinet where you'll forget about it.
16. Use a Basket for Rags and Sponges
A simple woven basket on the counter holds clean rags and sponges, making them easy to grab. No more rummaging through drawers or hunting for a dry cloth when you need it. This low-effort solution keeps your most-used tools visible and ready.
A basket dedicated to cleaning cloths and sponges eliminates clutter and speeds up your routine. Choose a basket with an open weave so air circulates, preventing musty smells. Keep it near your sink or cleaning caddy for quick access.
Pick The Right Basket
Go for a sturdy basket with a flat base so it won't tip over. Woven seagrass or wire baskets work well because they allow airflow. Avoid solid plastic bins that trap moisture and lead to mildew.
Keep It Stocked And Fresh
Rotate rags and sponges regularly. Toss used ones into a separate laundry basket or bin. Wash reusable cloths weekly and replace sponges every two weeks to keep your basket smelling clean.
Where To Place It
Set the basket on your kitchen counter near the sink or on a shelf just above your cleaning supplies. If counter space is tight, mount a small basket under a cabinet using hooks or adhesive strips.
17. Install a Hanging Shelf Under the Sink
The space under your sink is often a black hole of cleaning supplies. A hanging shelf changes that by adding a second level without interfering with the plumbing. It's a simple way to double your storage and keep bottles from toppling over.
A wire shelf that hangs from the existing pipes gives you an instant tier. You can store spray bottles on top and larger containers below. No drilling required, just hook it onto the drainpipe or supply lines.
Choose The Right Shelf
Look for an adjustable shelf that fits your cabinet width. Most are made of coated wire to resist moisture. Measure the space around your pipes first to ensure a snug fit without blocking access to shut-off valves.
Organize By Frequency
Use the top shelf for daily-use items like all-purpose cleaner and glass spray. Reserve the bottom for backups or bulky bottles. Group similar products together so you can grab what you need without shuffling.
Keep It Accessible
Avoid stacking items too high. Leave enough room to reach the shelf without knocking things over. A small bin on the shelf can corral sponges and scrub brushes, keeping them dry and easy to grab.
18. Use a Magazine Holder for Spray Bottles
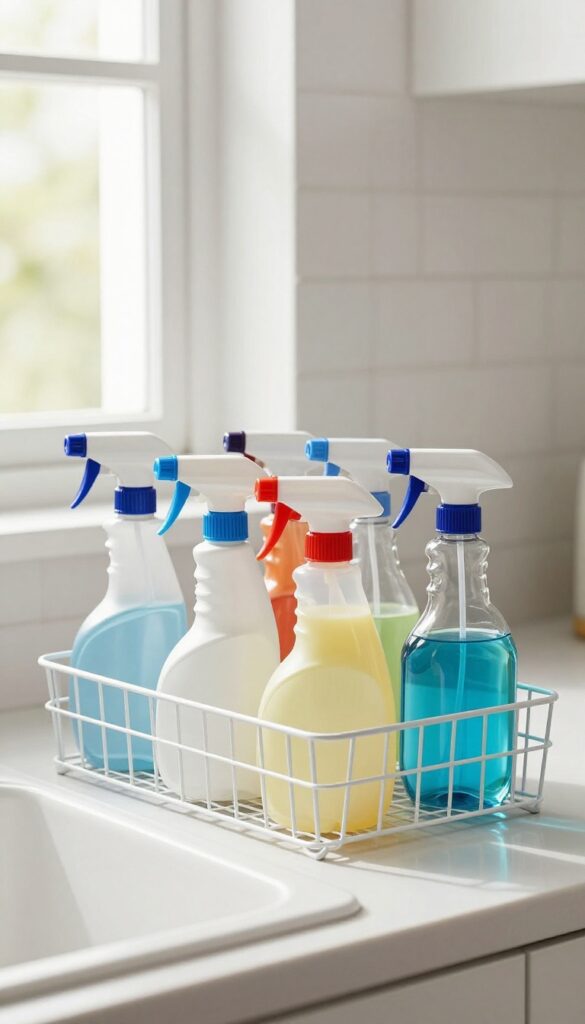
Spray bottles are notorious for tipping over and rolling around in cabinets. A simple magazine holder can solve that problem. By storing them sideways, you keep them upright and easy to grab without the mess.
A magazine holder is the perfect size for most spray bottles. It corrals them so they don't fall over when you reach for one. Plus, you can slide the whole holder out to access bottles in the back.
Choose The Right Holder
Look for a sturdy metal or plastic magazine holder with an open front. Avoid flimsy ones that might buckle under the weight. A wire mesh holder works well because it's breathable and easy to clean.
Placement Tips
Put the holder under the sink, on a shelf, or inside a cabinet. If you have multiple holders, label them by category—like all-purpose, glass cleaner, and disinfectant. This makes grabbing the right bottle quick.
Keep It Accessible
Store the holder near where you clean most often. For example, keep one under the kitchen sink for daily sprays and another in the laundry room for stain removers. The sideways orientation also prevents leaks from pooling.
19. Keep a Trash Can Liner Dispenser Under the Sink
Trash can liners have a way of hiding when you need them most. You pull open the cabinet, and the roll has rolled to the back, or the box is crushed under a bottle of bleach. A simple dispenser mounted inside the cabinet door solves that forever.
Mounting a liner dispenser under the sink is one of those small upgrades that pays off every single day. You open the cabinet, grab a liner, and close the door. No digging, no frustration.
It keeps the liners off the floor of the cabinet, freeing up space for larger bottles or a small trash can for recycling. Plus, it prevents the roll from getting wet if a bottle leaks.
Pick The Right Dispenser
You have options. Adhesive-mounted plastic dispensers are cheap and easy to install. They hold a standard roll of 30 to 45 liners.
If you prefer something sturdier, a metal or heavy-duty plastic dispenser with screws will last longer. Make sure the dispenser fits the width of your liner roll. Some are designed for specific brands, but most work with generic rolls.
Install It Properly
Clean the cabinet door with rubbing alcohol before sticking on an adhesive dispenser. Let it dry completely. Press firmly for 30 seconds.
For screw-mounted dispensers, drill pilot holes to avoid splitting the wood. Place the dispenser at a height where you can easily pull a liner without bending too much. Usually, mid-door works best.
Bonus: Double Up For Recycling
If you have a two-door cabinet, mount a dispenser on each door. One for kitchen trash liners, one for recycling bags. Or use one for small trash bags and the other for larger ones.
This keeps everything organized and prevents mix-ups. You'll never grab a tiny liner when you need a big one again.
20. Use a Spice Rack for Small Cleaners
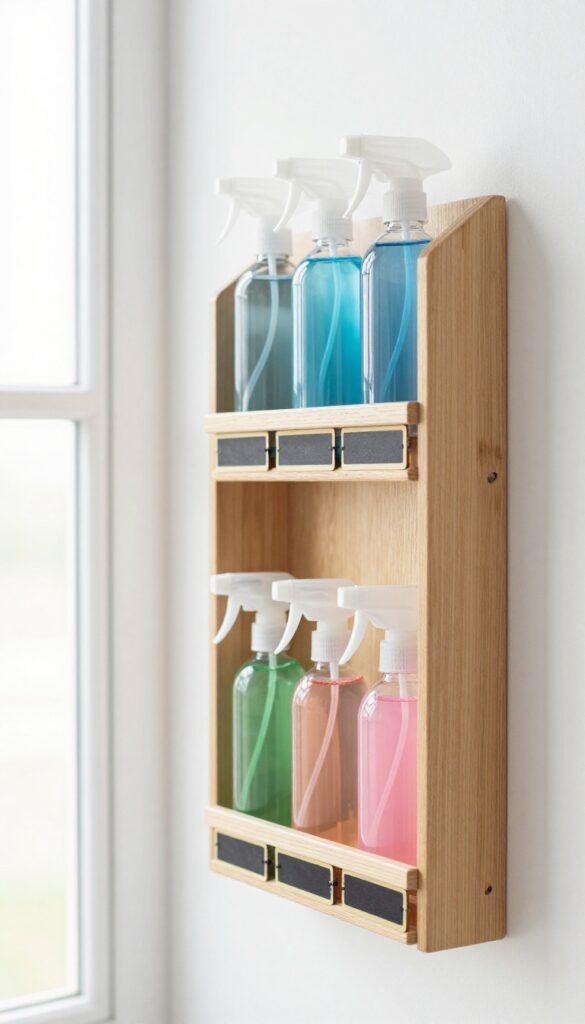
Tiny bottles of specialty cleaners—like glass polish, stainless steel spray, or leather wipes—tend to get lost in deep cabinets. A wall-mounted spice rack solves that by giving each small bottle a visible spot. It keeps them upright, organized, and easy to grab without rummaging.
Mount a simple wooden or metal spice rack on the wall near your cleaning station or inside a cabinet door. Arrange bottles by frequency of use or by surface type. This trick works especially well in laundry rooms, pantries, or under-sink areas where counter space is tight.
Choose The Right Rack
Look for a rack with adjustable or tiered shelves so taller bottles fit comfortably. Magnetic racks work on metal surfaces, while adhesive strips or screws secure them to drywall. A rack with a front lip prevents bottles from sliding off.
Label For Quick Identification
Use small chalkboard labels or a label maker to mark each bottle’s purpose. Group similar products—like all glass cleaners on one shelf—so you can grab what you need without reading every label.
Mind The Weight Limits
Avoid overloading the rack. Stick to lightweight spray bottles or squeeze bottles. Heavy glass containers might strain the mount.
If in doubt, use a stud finder or opt for a sturdier over-the-door rack instead.
21. Store Mops and Brooms with a Wall Gripper
Long-handled tools like mops and brooms are notorious for cluttering corners or falling over in closets. A wall gripper or clip system keeps them upright, organized, and off the floor. This simple solution frees up floor space and makes grabbing the right tool effortless.
Wall grippers are inexpensive, easy to install, and work in any room—from laundry rooms to garages. They hold handles securely without damaging them, and you can arrange multiple grippers in a row for a neat lineup. No more tangled handles or leaning brooms.
Choose The Right Gripper
Look for grippers with adjustable tension or rubberized grips to accommodate different handle thicknesses. Some models use a spring-loaded clip, while others rely on a simple hook-and-loop strap. Both work well, but clips are quicker for one-handed access.
Install At The Right Height
Mount grippers at a height that keeps handles off the floor but still within easy reach—usually about 12 to 18 inches from the floor. For shorter tools like a dustpan or scrub brush, install lower. Test the placement before drilling to ensure the tool hangs straight.
Group By Frequency Of Use
Arrange your most-used tools—like a broom and dustpan—closest to the door or in the most accessible spot. Reserve outer positions for less frequently used items like a floor mop or squeegee. This setup saves time and keeps your workflow smooth.
22. Use a Shower Caddy for Tub Cleaners
Bathtub cleaners often end up scattered along the tub edge or buried under the sink. A simple shower caddy changes that by keeping everything right where you need it—within arm's reach during bath time. This trick works especially well if you clean the tub regularly and hate hunting for supplies.
A shower caddy hung over the tub spout or shower head creates a dedicated spot for tub-specific products. Choose a rust-proof metal or plastic caddy with drainage holes to prevent water pooling. Load it with your go-to tub cleaner, a scrub brush, and maybe a squeegee.
The caddy keeps bottles upright and accessible, so you can grab and spray without bending or digging.
Pick The Right Caddy
Look for a caddy that fits your tub spout or shower arm securely. Over-the-spout models are great for clawfoot tubs, while over-the-shower-head caddies work in standard showers. Make sure it has enough depth to hold standard spray bottles without tipping.
What To Store In It
Reserve the caddy for tub cleaners only—avoid mixing in shampoo or body wash to keep the focus on cleaning. Include a daily shower spray, a mild abrasive cleaner, and a scrub brush with a handle. If you have a glass shower door, add a squeegee for quick drying.
Maintenance Tips
Rinse the caddy every few weeks to prevent cleaner residue buildup. If it's plastic, check for cracks from weight or sun exposure. Metal caddies should be dried occasionally to avoid rust.
Replace any rusted or broken caddies promptly to keep your setup safe and tidy.
23. Create a Cleaning Station in a Laundry Room
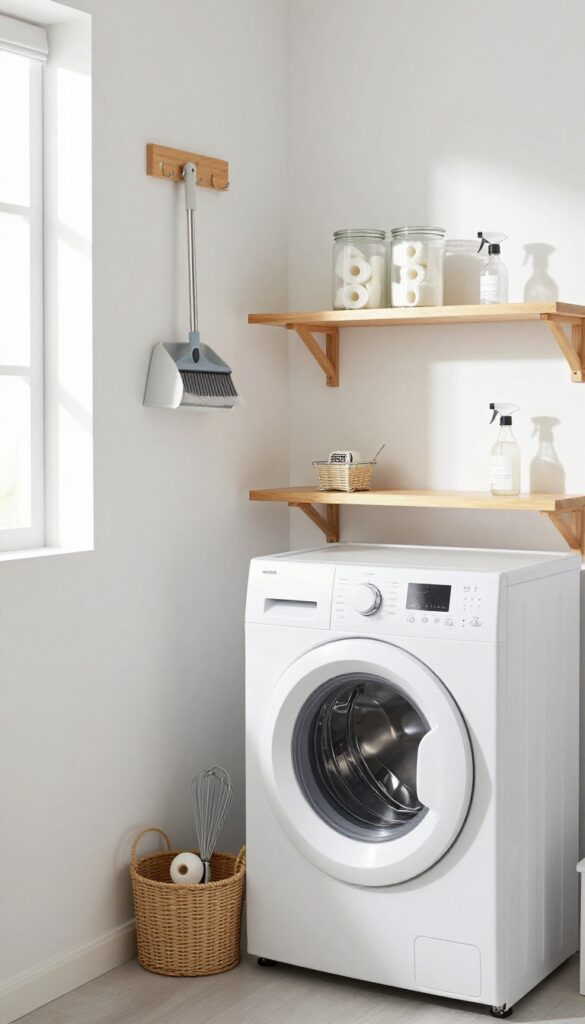
If your laundry room already has a washer and dryer, you're halfway to a dedicated cleaning station. A small shelf, a caddy, and a hook strip can turn an unused corner into a command center for laundry-area cleaning supplies. This setup keeps stain removers, fabric fresheners, and lint rollers right where you need them—no more searching the whole house.
Your laundry room is the natural home for cleaning products that target clothes and fabrics. By creating a small station, you avoid cluttering the countertop and ensure everything has a place. This idea works even in tight spaces, using vertical storage and compact organizers.
Shelf For Daily Essentials
Mount a sturdy shelf above or beside the washer. Keep stain pretreatment sprays, laundry boosters, and a small bowl for loose items like dryer sheets. This keeps the counter clear and makes grabbing what you need a one-handed task.
Caddy For Portable Supplies
Use a handled caddy to hold items you might carry to other rooms—like a fabric refresher, a lint roller, or a spot cleaner. When you need to treat a stain on a couch or carpet, just grab the caddy and go.
Hook Strip For Tools
Install a strip of hooks on the wall or cabinet door. Hang a small dustpan, a whisk broom, or a microfiber cloth dedicated to the laundry area. This keeps frequently used tools visible and off surfaces.
FAQ
What is the best way to organize cleaning products under the sink?
Use tension rods to hang spray bottles, add a small wire shelf for stacking, and store loose items in clear bins. This keeps everything visible and easy to grab.
How do I store cleaning products in a small apartment?
Maximize vertical space with over-the-door organizers, wall-mounted racks, and slim rolling carts that fit between appliances. Use caddies to move supplies from room to room.
Should I keep all cleaning products in one place?
It's best to group products by room or use a central caddy system. This way you can grab what you need quickly without carrying everything around.
How do I prevent cleaning bottles from leaking in storage?
Store bottles upright, check that nozzles are tightly closed, and use trays or bins to catch any drips. Avoid storing them on their sides.
What is the easiest way to organize cleaning cloths?
Fold cloths and store them in a basket or drawer with dividers. You can also hang them on a small tension rod inside a cabinet so they dry and stay tidy.
Conclusion
A well-organized cleaning stash means less hunting and more cleaning. Pick the ideas that fit your space—whether it's a lazy Susan for sprays or a caddy for go-to supplies. Start with one corner and build from there.
Before you know it, you'll have a system that actually works for you. No more digging through clutter when you just want to wipe down the counters.


