
Opening your cleaning cabinet only to have bottles tumble out is frustrating. That jumble of spray cleaners, sponges, and scrub brushes wastes time and creates stress. A well-organized cabinet saves you minutes every day and makes chores feel less like a battle.
The good news is you don't need a huge budget or a professional organizer. Simple tweaks like using risers, hooks, and clear bins can transform any cabinet. These 20 ideas target common pain points so you can grab what you need and get back to cleaning.
Whether you have a tiny under-sink space or a dedicated closet, there's a solution here for you. Let's dive into the most effective ways to tame your cleaning supplies.
1. Install a Tension Rod for Spray Bottles
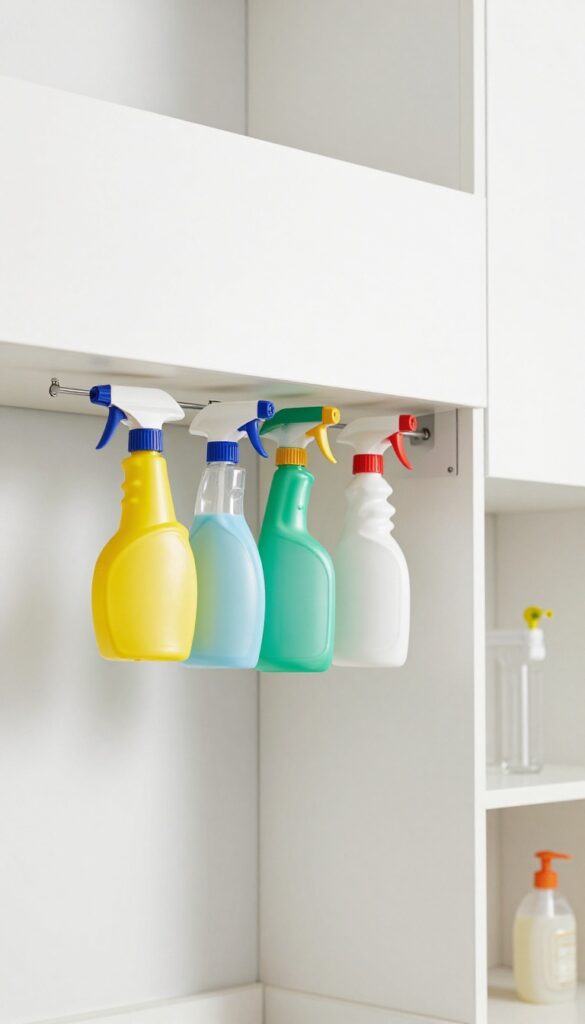
A tension rod isn't just for shower curtains. Wedge one under your sink, and you've got an instant hanging rack for spray bottles. Hooking them upside down stops nozzles from clogging and frees up valuable shelf space for other supplies.
This simple hack works in any cabinet, no drilling required. Just twist the rod into place, then hang bottles by their trigger handles. You'll be amazed at how much room it creates and how much easier it is to grab the cleaner you need.
Choosing The Right Rod
Look for a tension rod that extends at least an inch longer than your cabinet's width. A spring-loaded rod with rubber ends grips best and won't slip. For heavy bottles, choose a metal rod over a plastic one.
Arranging Your Bottles
Hang bottles by size, with the most-used ones in front. Make sure the nozzles point downward and don't touch the bottom of the cabinet. Leave a little space between each bottle so you can grab them easily.
Bonus Tip: Dual Rods
If you have a deep cabinet, install two rods—one in front and one in back. The front row holds daily cleaners, and the back row stores backups or seasonal products. This doubles your hanging capacity without clutter.
2. Use Stackable Bins for Like Items
Grouping similar products together is one of the simplest ways to bring order to a messy cabinet. When you sort all-purpose cleaners, glass sprays, and disinfectants into separate stackable bins, you instantly know where each category lives. Labeling each bin means you never have to hunt for the right product again—just grab the bin and go.
Stackable bins make the most of vertical space, especially in deep cabinets where single-layer storage leads to piles. Clear bins let you see contents at a glance, while colored bins add a fun pop and help with quick identification. The key is to group by function: all glass cleaners in one bin, all multi-surface sprays in another, and all disinfectants in a third.
That way, when you're tackling windows, you reach for the glass bin without digging through bleach bottles.
Choose The Right Bin Size
Measure your cabinet depth and height before buying bins. Standard under-sink cabinets fit bins around 10–12 inches deep. Opt for bins that are wide enough to hold typical spray bottles but not so large that they become heavy.
Stackable bins with handles make lifting easier, and those with snap-tight lids prevent spills if a bottle leaks.
Label Like A Pro
Use a label maker or simple chalkboard stickers to mark each bin. Write the category in large, clear letters—'Glass Cleaners, ' 'All-Purpose Sprays, ' 'Disinfectants. ' If you share the cabinet with family, include small icons (like a window or a germ icon) for quick recognition. Labels keep everyone accountable and make restocking a breeze.
Rotate And Maintain
Once a month, pull out each bin and check for expired or empty bottles. Wipe down the bin interiors with a damp cloth to catch drips. Rotate products so older ones are used first.
This habit prevents your cabinet from turning into a graveyard of half-used cleaners and keeps your system working long-term.
3. Add a Door-Mounted Caddy
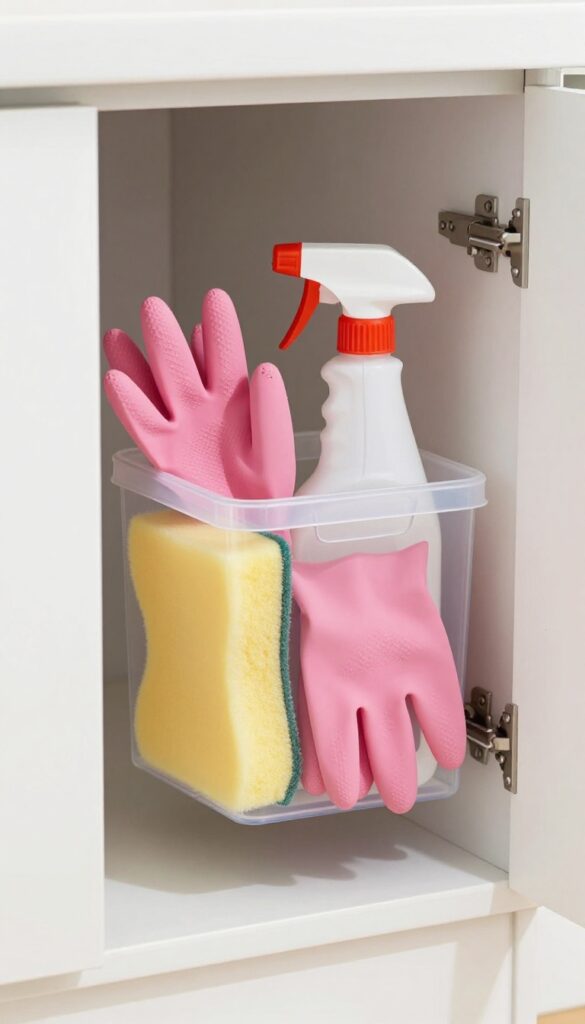
That empty space on the inside of your cabinet door is prime real estate. A door-mounted caddy turns unused square footage into a grab-and-go station for your most-used tools. Sponges, gloves, and small brushes stay visible and within reach, so you don't have to dig through a pile to find what you need.
Most caddies hang over the door or stick with adhesive hooks, so installation takes minutes. No drilling or measuring required. And since they keep items off the shelf, you free up room for larger bottles and spray cleaners below.
Pick The Right Caddy
Look for a caddy with deep pockets or adjustable compartments. Mesh or clear plastic lets you see contents at a glance. Avoid wire racks that let small items slip through.
Measure your door clearance first—some caddies are bulky and might prevent the door from closing fully.
What To Store In It
Reserve the caddy for items you reach for daily: a scrubbing brush, rubber gloves, a microfiber cloth, and a spray bottle of all-purpose cleaner. Keep sponges in a ventilated pocket so they dry between uses. Avoid storing heavy bottles or chemicals that could cause the caddy to sag or detach.
Maintenance Tips
Wipe down the caddy every few weeks to prevent grime buildup. If it's removable, toss it in the dishwasher or wash by hand. Check adhesive hooks monthly—heat and humidity can weaken the bond over time.
Replace them if they start to peel.
4. Install Pull-Out Drawers or Baskets
Deep cabinets are notorious for swallowing supplies whole. You shove a bottle of all-purpose cleaner to the back and never see it again until you move out. Sliding pull-outs change that entirely by bringing everything to you.
Pull-out drawers or wire baskets turn dark, deep cabinets into organized, accessible storage. No more kneeling and groping in the dark. You simply pull the drawer forward and see every item at a glance.
This system works especially well under the sink or in tall pantry-style cabinets where items tend to pile up.
Choose The Right Hardware
Look for heavy-duty sliding baskets or drawer kits that can handle the weight of cleaning bottles. Measure your cabinet depth and width carefully. Many options are adjustable and can be installed with just a screwdriver.
Consider full-extension slides so you can access items all the way at the back.
Organize By Frequency Of Use
Place daily-use items like spray cleaners and sponges in the front basket. Reserve the back or lower baskets for backups, heavy-duty cleaners, and tools you use less often. This way you're not pulling out everything just to grab one bottle.
Add Dividers For Stability
Inside each basket, use small plastic dividers or tension rods to keep bottles upright. Without them, bottles can tip over when you slide the drawer in and out. Dividers also help group similar items, like all glass cleaners together.
5. Use a Lazy Susan for Sprays and Bottles
A turntable makes every bottle reachable with a spin. Perfect for corner cabinets or deep shelves where items get lost. No more digging to the back or pulling everything out to find the glass cleaner.
A lazy Susan is one of those simple tools that instantly upgrades a messy cabinet. It keeps spray bottles upright and accessible, so you can grab what you need without knocking things over. Choose a sturdy, non-slip turntable that can hold the weight of full bottles.
For under-sink cabinets, a smaller diameter works best to leave room for other items. Group all your all-purpose cleaners, glass sprays, and disinfectants on one turntable. That way, a quick spin reveals every option.
If you have a deep cabinet, use two lazy Susans—one for sprays and one for bottles like bleach or floor cleaner. This keeps everything organized and easy to reach.
Pick The Right Size And Material
Measure your cabinet depth and height before buying. A 12-inch turntable fits most standard cabinets. Look for one with a raised lip or non-slip surface to prevent bottles from sliding off.
Metal or heavy-duty plastic lasts longer than cheap acrylic.
Group By Frequency Of Use
Place your most-used sprays—like daily cleaner and glass spray—on the lazy Susan. Store heavy-duty or seasonal cleaners elsewhere. This keeps your daily routine fast and prevents the turntable from becoming overloaded.
Combine With A Tiered Shelf
If your cabinet has adjustable shelves, install a short shelf above the lazy Susan. Use it for sponges, scrub brushes, or extra cloths. This maximizes vertical space and keeps everything within arm's reach.
6. Hang a Pegboard on the Inside Door
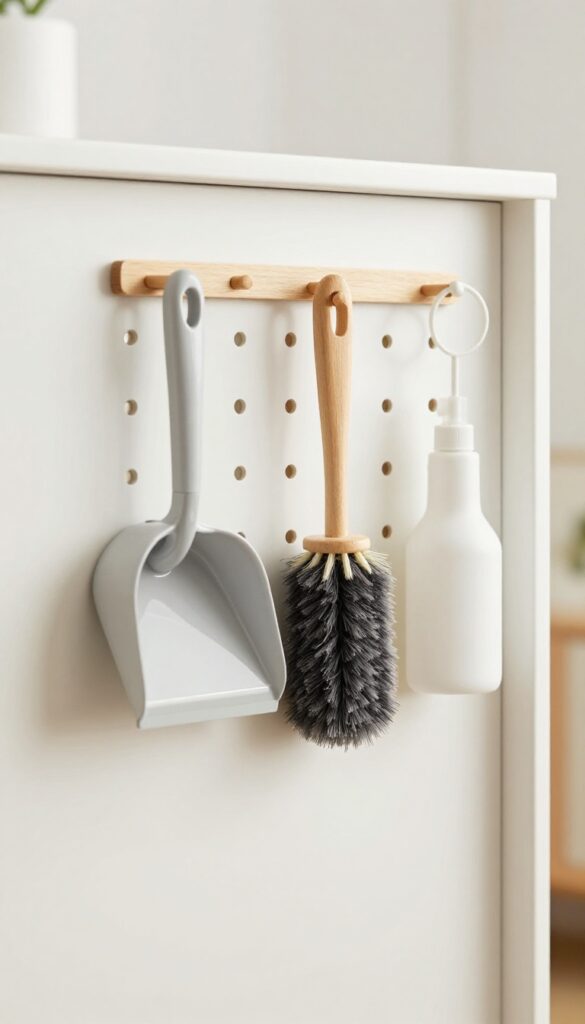
That inside door panel is wasted space if it's just sitting there blank. A small pegboard turns it into a vertical organizer for all your lightweight tools. You'll free up shelf space and keep frequently used items within easy reach.
Pegboards are incredibly versatile and easy to install. You can buy a pre-cut board or cut one to fit your door. Use small hooks to hang dusters, brushes, dustpans, and even spray bottles with a loop.
Everything stays visible and off the shelf.
Choose The Right Pegboard
Look for a thin pegboard (about 1/4 inch thick) that won't add too much weight to the door. Hardboard or plastic versions work well. Measure the door panel first and cut the board to fit inside the frame.
You can also buy adhesive pegboard tiles if you don't want to drill.
Mount It Securely
Use strong adhesive strips or small screws to attach the pegboard to the door. If you rent, adhesive strips are a great no-damage option. Make sure the board is level and the hooks are snug.
Test the door swing to ensure nothing interferes.
Organize With Hooks And Accessories
Use a mix of hook sizes: small hooks for dusters and brushes, larger ones for dustpans and spray bottles. Add a small shelf or cup for sponges and scrub brushes. Group items by frequency of use so the most needed tools are at eye level.
7. Store Mop Heads and Brooms with Clips
Long-handled tools like mops and brooms are notorious for falling over and creating a tangled mess. Adhesive clips or hooks mounted inside the cabinet keep them upright and easy to grab. This simple fix frees up floor space and prevents that annoying clatter every time you open the door.
Choose The Right Clips
Look for heavy-duty adhesive clips rated for the weight of your tools. Broom clips or utility hooks with a grippy rubber lining work best. Make sure the adhesive is strong enough for your cabinet material — some may need a dab of super glue for extra hold.
Placement Tips
Mount clips about halfway up the inside of the cabinet door or on the side wall. Space them wide enough to fit the handle thickness. For extra stability, use two clips per tool — one near the top and one near the bottom.
What To Store This Way
Brooms, mops, dusters, and even long-handled dustpans all benefit. If you have a vacuum wand, clips can hold it vertically too. Avoid storing wet mops directly after use — let them dry first to prevent mildew on the handle.
8. Use Clear Acrylic Risers for Cans
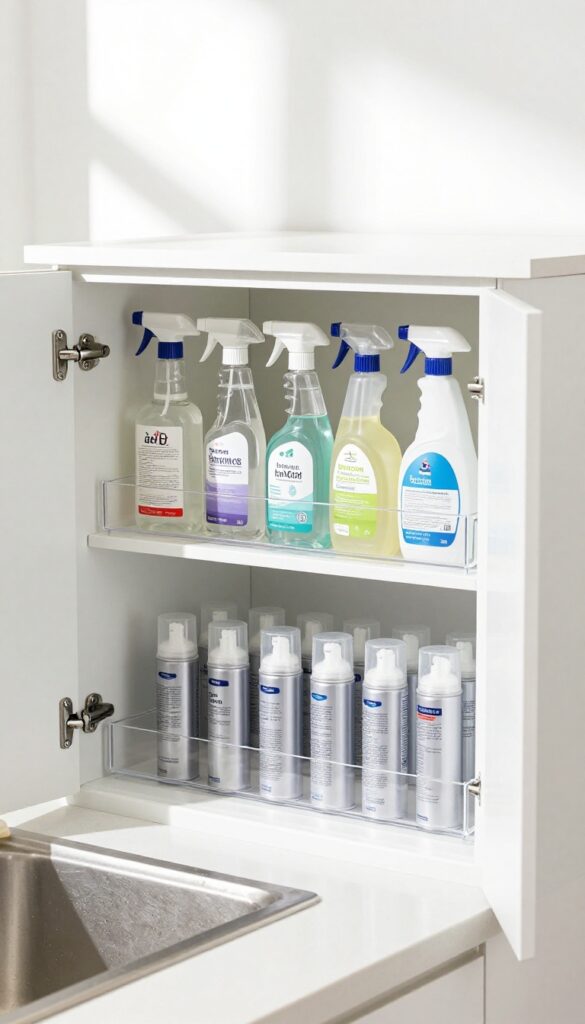
Aerosol cans and spray bottles are some of the trickiest items to store. They're tall, they roll around, and they hide behind one another. Clear acrylic risers solve that by creating two tiers in your cabinet.
You can place shorter cans in front and taller bottles in back, so every can is visible and reachable.
Risers are a simple but transformative tool for any cleaning cabinet. They lift the back row of cans so nothing gets lost. You can find them in various sizes to fit your cabinet depth.
Clear acrylic keeps the look clean and lets you see labels even from the back. No more knocking over cans to find the one you need.
Choose The Right Size
Measure your cabinet depth before buying risers. Standard risers are about 6 inches deep, but you can find narrower or wider options. Make sure the riser is sturdy enough to hold multiple cans without wobbling.
A good fit means the riser sits flush and doesn't slide around.
Arrange By Frequency Of Use
Place your most-used cans on the front tier for easy grabbing. Keep backups or less frequent items on the back tier. This way you're not constantly reaching over the riser.
It also helps you see when you're running low on a particular product.
Combine With Bins For Small Items
If you have small aerosol cans or travel-sized bottles, put them in a small clear bin on the riser. That keeps them from tipping over and makes the tier even more functional. The bin can slide out easily for quick access.
9. Keep a Small Trash Bin Inside
You’re scrubbing the sink and reach for a paper towel to wipe a drip. Then you have to walk across the room to toss it. A tiny trash can right inside the cabinet solves that.
It catches used wipes, empty bottles, and other debris while you clean, keeping your workflow smooth.
A slim, open-top bin fits neatly under the sink or on a shelf. No lid means you can drop trash one-handed. Empty it weekly or as needed.
This small addition cuts down on trips to the main trash can and keeps your cleaning area self-contained.
Choose The Right Size
Measure your cabinet floor space before buying. A bin that’s too wide will crowd out supplies. Look for a rectangular or slim-profile bin that slides in beside your bottles.
About 5 to 8 inches wide is usually perfect for under-sink cabinets.
Line It For Easy Cleanup
Use a small grocery bag or a mini trash bag as a liner. That way you can lift out the whole bag and toss it when it’s full. No messy residue inside the bin.
If you prefer reusable, wash the bin monthly with disinfectant.
Mount It On The Door
If floor space is tight, attach a small bin to the inside of the cabinet door with adhesive hooks or a wire rack. This keeps trash off the floor and within easy reach. Just make sure the door closes fully without obstruction.
10. Use a Magnetic Strip for Metal Tools
Tweezers, scissors, and small metal tools can easily get lost in a cluttered drawer. A magnetic strip on the inside wall of your cabinet keeps them visible and within reach. This simple hack eliminates rattling and makes it easy to grab the right tool without digging.
Magnetic strips are inexpensive and easy to install. Choose a strong strip rated for tools, peel off the adhesive backing, and press it onto a clean, dry cabinet wall. You can also screw it in for extra hold.
Arrange your metal tools so they’re easy to see and grab—group similar items like scissors together for quick access. This works great for under-sink cabinets or a cleaning closet door.
What To Store
Stick with lightweight metal items: tweezers, small scissors, seam rippers, metal nail files, and even small screwdrivers. Avoid heavy tools like hammers or large pliers, as they might pull the strip off the wall. If you have a lot of items, use multiple strips or a longer one.
Installation Tips
Clean the surface with rubbing alcohol before applying the strip. Let it cure for 24 hours before loading tools. For a stronger hold, use screws instead of adhesive.
Position the strip where it’s easy to reach but out of the way of other items in the cabinet.
Alternative Uses
A magnetic strip isn’t just for tools. Use it to store metal spice jars, bobby pins, or even small kitchen utensils. In a cleaning cabinet, it can also hold metal clips or a small magnetic hook for hanging a scrub brush.
11. Store Vacuum Attachments in a Basket
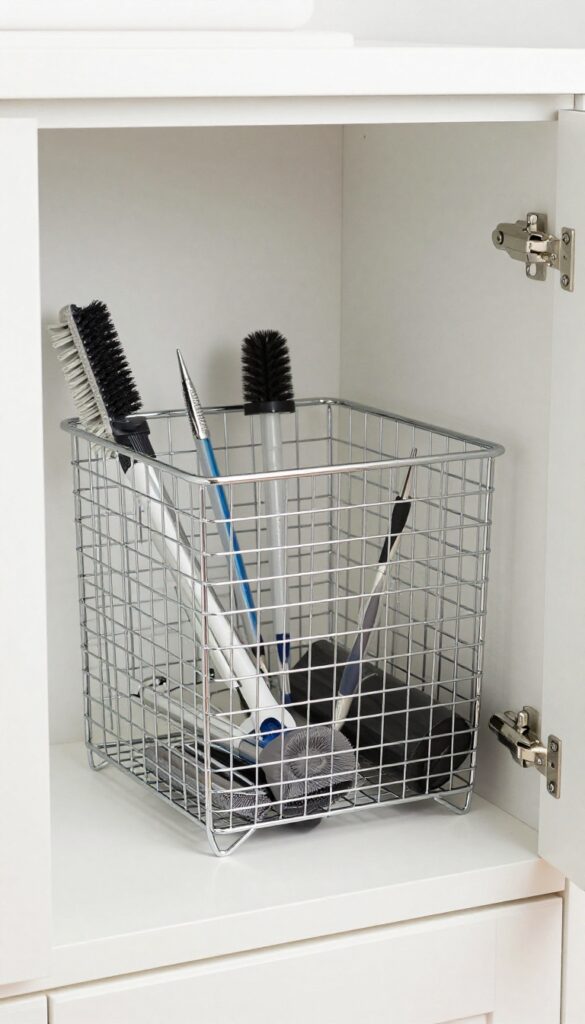
Vacuum attachments have a way of disappearing just when you need them. That crevice tool for the car or the brush for baseboards always seems to be hiding behind something. A small basket keeps every piece corralled and visible, so you can grab the right attachment in seconds.
Choose a basket that fits your cabinet shelf or floor space. A rectangular bin works best for long crevice tools, while a round or square basket handles bulkier brush heads. Line the basket with a non-slip mat to keep attachments from sliding around when you open the door.
Pick The Right Basket
Look for a basket with low sides so you can see everything at a glance. Wire baskets offer ventilation and let dust fall through, while solid plastic bins are easy to wipe clean. Measure your tallest attachment to make sure the basket is deep enough.
Group By Frequency Of Use
Place the attachment you use most often, like the standard floor head, on top or in a separate smaller basket. Store specialty tools, such as the upholstery brush or dusting brush, together in the main basket. This way you never have to dig through rarely used pieces.
Label For Quick Identification
Attach a small label to the basket or use a permanent marker on the basket itself. Write "Attachments" or list the specific tools inside if you have multiple baskets. A simple label saves time and keeps everyone in the household putting things back in the right spot.
12. Add Shelf Dividers for Tall Bottles
Tall spray bottles are notorious for tipping over when you grab one from the back. Shelf dividers keep them upright and separated, so you can pull out any bottle without causing a domino effect. They also create natural categories—all-purpose cleaners on one side, glass sprays on the other—without needing extra bins.
Install adjustable metal or plastic dividers on your cabinet shelves. Measure the height of your tallest bottle and set the divider height accordingly. Position them to create narrow slots that hold bottles snugly.
This prevents leaning and makes it easy to slide bottles in and out. For under-sink cabinets, use tension-rod dividers that don’t require drilling.
Why Dividers Work Better Than Bins
Bins can hide bottles and create dead space. Dividers keep everything visible and accessible. You can see each bottle at a glance and grab the one you need without digging.
They also maximize vertical space because bottles stand upright rather than being stacked.
Best Divider Types For Cleaning Cabinets
Look for adjustable wire dividers that expand to fit your shelf width. Plastic-coated metal is durable and easy to clean. Tension rods work well for narrow spaces.
For a DIY option, cut a piece of plywood to size and secure it with L-brackets.
How To Arrange Bottles With Dividers
Group bottles by use: kitchen cleaners together, bathroom sprays together, and floor cleaners together. Place the most frequently used items at the front. If you have multiple shelves, dedicate one shelf to tall bottles with dividers and use the other shelves for smaller items.
13. Use a Soap Dispenser for All-Purpose Cleaner
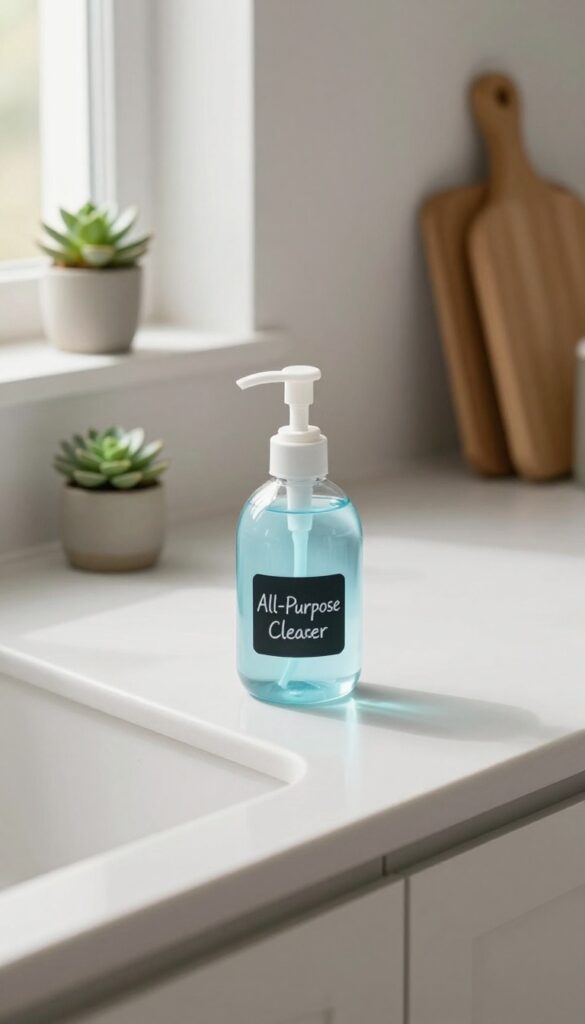
A countertop soap dispenser isn't just for hand soap. Fill one with your favorite diluted all-purpose cleaner and keep it right next to the sink. This simple swap puts a cleaning bottle within arm's reach for quick wipe-downs without opening the cabinet every time.
Why It Works
Most spray bottles are bulky and don't fit well on a crowded counter. A slim soap dispenser takes up minimal space and blends in with your kitchen decor. Plus, the pump action gives you just the right amount of cleaner—no overspray or wasted product.
Best Dispenser Types
Look for a clear glass or plastic dispenser so you can see the liquid level. A pump with a wide mouth makes refilling easy. Avoid foam dispensers unless you're using a foam-compatible cleaner.
Standard pump dispensers work with most diluted all-purpose cleaners.
How To Set It Up
Mix your all-purpose cleaner according to the bottle's dilution instructions. Pour it into the dispenser using a funnel to avoid spills. Label the dispenser with a small sticker or chalk marker so everyone knows what's inside.
Place it near the sink or on a caddy for easy access.
Maintenance Tips
Rinse the dispenser every few refills to prevent buildup. If you switch cleaner types, wash thoroughly first. Keep the pump mechanism clean by running warm water through it occasionally.
This keeps the dispenser working smoothly for months.
14. Label Everything with a Label Maker
Labels are the unsung heroes of organization. When every bin, shelf, and bottle has a clear label, anyone in the household can find and return items without guesswork. No more wondering if the glass cleaner goes on the left or right.
A label maker is a small investment that pays off in daily convenience. Start by grouping your supplies by category—all-purpose cleaners, glass cleaners, disinfectants, and so on. Then print labels for each bin or shelf.
For spray bottles, use waterproof labels or a permanent marker directly on the bottle. This system is especially helpful if multiple people use the cabinet or if you have kids who help with chores.
Choose The Right Labels
Not all labels are created equal. For shelves and bins, use removable labels so you can rearrange later. For bottles, opt for waterproof, oil-resistant labels that won't peel off from moisture.
A simple label maker with clear tape works great for most surfaces.
Label Both Sides Of Bins
If you use clear bins, label the front and the top. That way, you can see what's inside whether the bin is on a shelf or pulled out. This small step saves time when you're in a hurry.
Keep A Master List
Stick a small index card or laminated list on the inside of the cabinet door. List every category and its location. This acts as a quick reference and helps you remember where everything goes when you're putting away supplies.
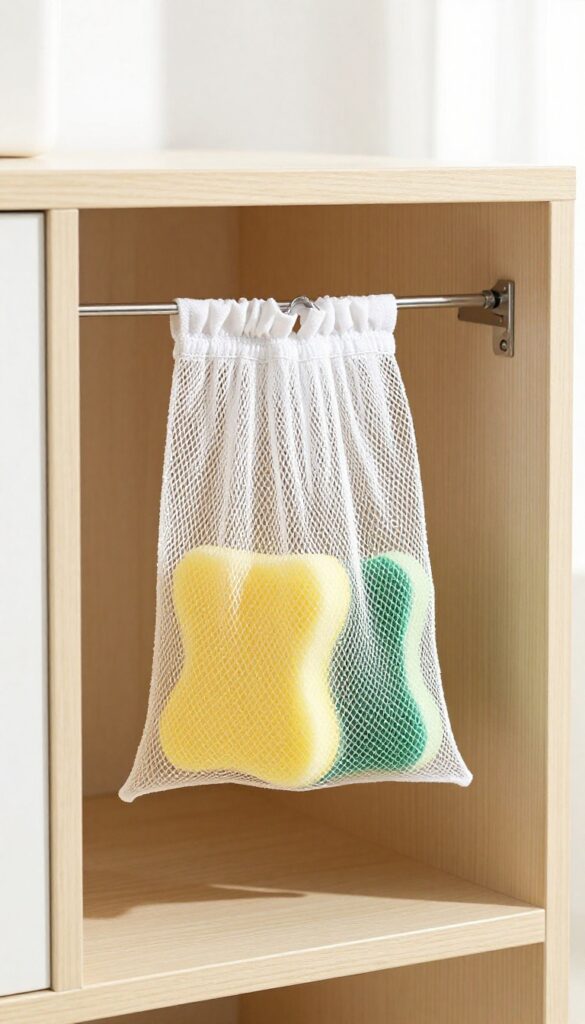
15. Store Sponges and Scrubbers in a Mesh Bag
A wet sponge left in a puddle is a breeding ground for bacteria and mildew. That smell you sometimes get from under the sink? It's often from a soggy sponge that never dries out.
The fix is simple: hang a mesh bag on a hook inside your cabinet door. Toss your sponges and scrubbers in after each use, and they'll air dry quickly instead of sitting in stagnant water. This small change keeps your cabinet fresher and your sponges lasting longer.
Mesh bags allow air to circulate freely around damp items. When you hang the bag, gravity helps water drip away instead of pooling at the bottom. This reduces the moisture that mildew loves.
Plus, the bag keeps sponges contained so they don't roll around or touch other surfaces. You can use a small mesh laundry bag or a purpose-made produce bag with a drawstring. Hang it from a simple adhesive hook or a screw-in hook on the inside of the cabinet door.
Make sure the bag is high enough that the bottom doesn't touch the shelf or any stored items. For extra freshness, toss the bag itself in the wash every few weeks.
Choose The Right Mesh Bag
Look for a bag with small enough holes that scrubbers won't poke through. A fine mesh bag works best for sponges, while a slightly larger mesh can hold brushes. Drawstring bags are convenient because you can cinch them closed.
Avoid bags with zippers or hard closures that could rust or break. A simple cotton or synthetic mesh bag is fine—just make sure it's machine washable.
Placement Tips For Best Airflow
Hang the bag near the front of the cabinet door so it gets some air movement when the door is open. Avoid placing it directly above a trash can or damp area. If your cabinet is deep, consider installing a hook on the side wall instead.
The key is to let air reach the bag from all sides. If your cabinet is small, a single hook centered on the door works well.
Maintenance And Rotation
Replace sponges regularly—every two weeks is a good rule. The mesh bag helps extend their life, but it's not a miracle worker. Wash the bag in hot water with bleach or vinegar once a month to kill any lingering bacteria.
Keep a spare bag ready so you can swap them out. If you notice any musty smell from the bag itself, it's time for a wash.
16. Use a Tiered Spice Rack for Small Bottles
Small bottles are the worst offenders when it comes to cabinet clutter. Essential oils, polish, and tiny spot cleaners get pushed to the back and forgotten. A tiered spice rack changes that by giving every little bottle its own visible spot.
A small tiered rack holds little bottles of essential oils, polish, or spot cleaner. Makes them easy to see and grab. No more digging through a pile of mismatched containers.
Pick The Right Size
Measure your cabinet shelf first. A two-tier rack works for most under-sink spaces. If you have taller bottles, look for a three-tier option with adjustable height.
Group By Use
Keep cleaning oils together on one tier and polishes on another. That way you grab the right bottle without reading every label. It also prevents cross-contamination.
Label The Rack
A small label on the front of each tier tells you what's inside. Use a label maker or simple chalk stickers. This is especially helpful if you share the cabinet with family members.
17. Keep a Microfiber Cloth Roll in a Basket
Microfiber cloths are indispensable for dusting, wiping, and polishing, but they often end up in a messy pile. Rolling them and storing them upright in a small basket is a game-changer. Not only does it keep them tidy, but it also lets you grab one without disturbing the rest.
This method works because rolled cloths stay neatly stacked and visible. You can easily see when you're running low and grab a fresh one in seconds. Plus, it frees up drawer space and adds a touch of order to your cabinet.
How To Roll Microfiber Cloths
Start by folding each cloth in half lengthwise, then roll it tightly from one end to the other. Secure with a small rubber band or simply tuck the end under. Aim for uniform rolls so they stand upright without toppling.
Choosing The Right Basket
Pick a basket that's wide enough to hold several rolls but not so deep that you lose cloths at the bottom. A rectangular or square basket works best. Mesh or wire baskets allow airflow, which helps cloths dry between uses.
Where To Place The Basket
Keep the basket on a shelf or in a drawer near your cleaning supplies. Under the sink or on a utility cart are ideal spots. You can even place it on a countertop for quick access during cleaning sessions.
18. Install a Small Hook for Rubber Gloves
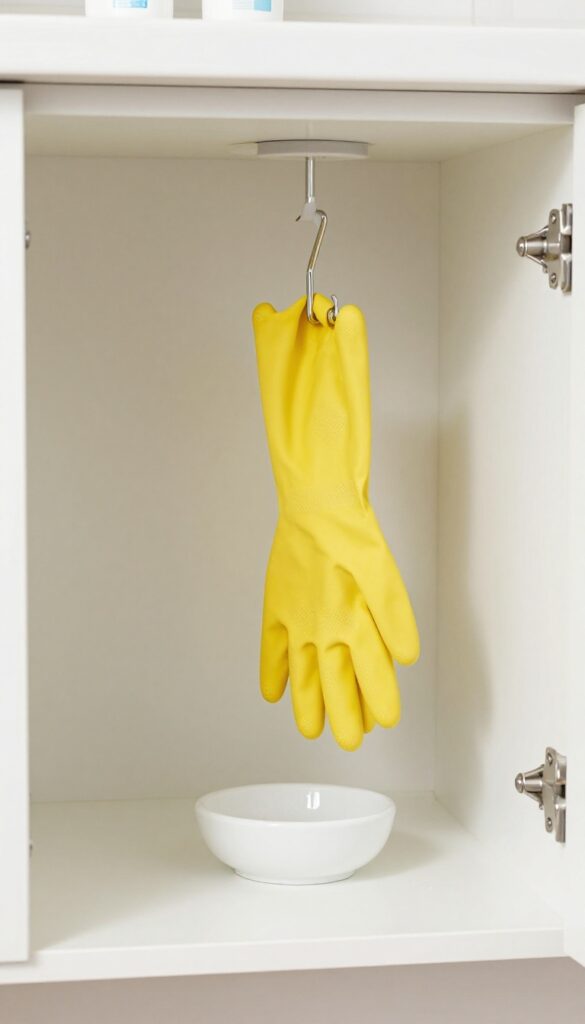
Rubber gloves are essential for tough cleaning jobs, but they often end up crumpled in a corner or lost under the sink. A simple hook gives them a dedicated home where they can air dry properly. No more musty smell or frantic searching when you need them.
A small adhesive hook inside the cabinet door or on the side wall is all it takes. Hang the gloves by the cuff so air circulates inside. This keeps them dry and ready for the next use.
It also frees up shelf space for other supplies.
Choose The Right Hook
Go for a sturdy adhesive hook that can hold wet gloves without peeling off. Command hooks work well because they remove cleanly. Place it high enough so the gloves don't touch the bottom of the cabinet.
Pair With A Drip Tray
If your gloves drip water after washing, put a small tray or mat underneath. This catches drips and protects your cabinet floor. A soap dish or a silicone coaster works perfectly.
19. Use a Divided Caddy for Cleaning Kits
A divided caddy keeps your cleaning supplies organized by room or task. Instead of hunting for the right spray or brush, you grab the entire caddy and get to work. It’s a simple system that saves time and reduces clutter.
Choose The Right Caddy
Look for a caddy with multiple compartments of varying sizes. A handle makes it easy to carry from room to room. Clear plastic lets you see what’s inside without opening lids.
Assemble Room-specific Kits
Stock each caddy with the cleaners and tools you need for a specific area. For the kitchen, include all-purpose cleaner, dish soap, a sponge, and a scrub brush. For the bathroom, add glass cleaner, toilet bowl cleaner, and a grout brush.
Label the caddy or use color-coded bins.
Store Caddies Within Reach
Place the caddies on a shelf or in a cabinet near the area they serve. Keep them accessible so you can grab and go. If you have limited space, stack them or hang them on a pegboard.
20. Add a Slim Rolling Cart for Extra Storage
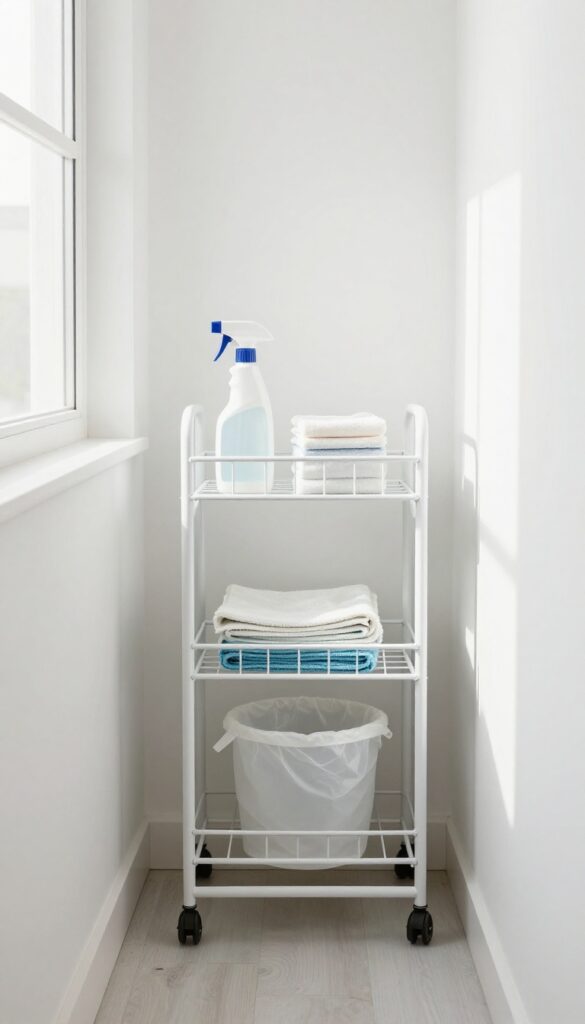
That narrow gap beside your cleaning cabinet is wasted space. A slim rolling cart slides right into that void, giving you extra storage without taking up floor area you don't have. It holds overflow supplies and can be wheeled to wherever you're cleaning.
Choose The Right Width
Measure the gap before you shop. Standard slim carts are around 6 to 12 inches wide, but you can find narrower ones. Leave an inch of clearance so the cart rolls freely without scraping the cabinet or wall.
Organize By Task Or Frequency
Use the top tier for daily-use items like all-purpose spray and microfiber cloths. The middle shelf can hold weekly cleaners, and the bottom tier is perfect for heavy bottles or a small trash bag. This way you grab what you need without digging.
Make It Mobile
The real magic is mobility. When you're cleaning the kitchen, roll the cart over. When you move to the bathroom, it comes along.
No more carrying armfuls of supplies back and forth. Just wheel and go.
FAQ
How often should I declutter my cleaning cabinet?
Every three to six months. Check for expired products, empty bottles, and duplicates. Toss anything you haven't used in a year.
What's the best way to store cleaning wipes?
Keep them in a dispenser or a sealed container to prevent drying out. Store upright so they're easy to pull out one at a time.
Can I organize a cleaning cabinet without buying anything?
Yes. Repurpose shoeboxes, mason jars, and cardboard dividers. Use tension rods you already have or make labels with masking tape.
How do I prevent cleaning bottles from leaking?
Store spray bottles upright and check nozzle seals. Use a drip tray or a small bin under bottles to catch any leaks.
Should I store cleaning supplies under the sink?
It's fine as long as the space is dry and well-ventilated. Avoid storing harsh chemicals near pipes that could leak.
Conclusion
An organized cleaning cabinet doesn't just look good—it saves you time and frustration every single day. By implementing even a few of these ideas, you'll turn a chaotic space into a streamlined command center for your chores. Start with the one idea that bothers you most, whether it's fallen bottles or lost attachments.
Small changes add up, and soon you'll wonder why you didn't do it sooner. Your cleaning routine will thank you.


