
A clean home doesn't happen by accident. It takes a little planning and the right system to keep clutter at bay without burning out. Whether you're a busy parent, a working professional, or just someone who wants to spend less time scrubbing, a cleaning planner can be your secret weapon.
These 25 ideas range from simple daily habits to seasonal resets. Each one is designed to fit into real life, not a perfect Pinterest board. Pick what works for you and leave the rest.
Ready to stop chasing messes and start staying ahead? Let's dive into the strategies that will change how you clean.
1. Start with a Weekly Overview
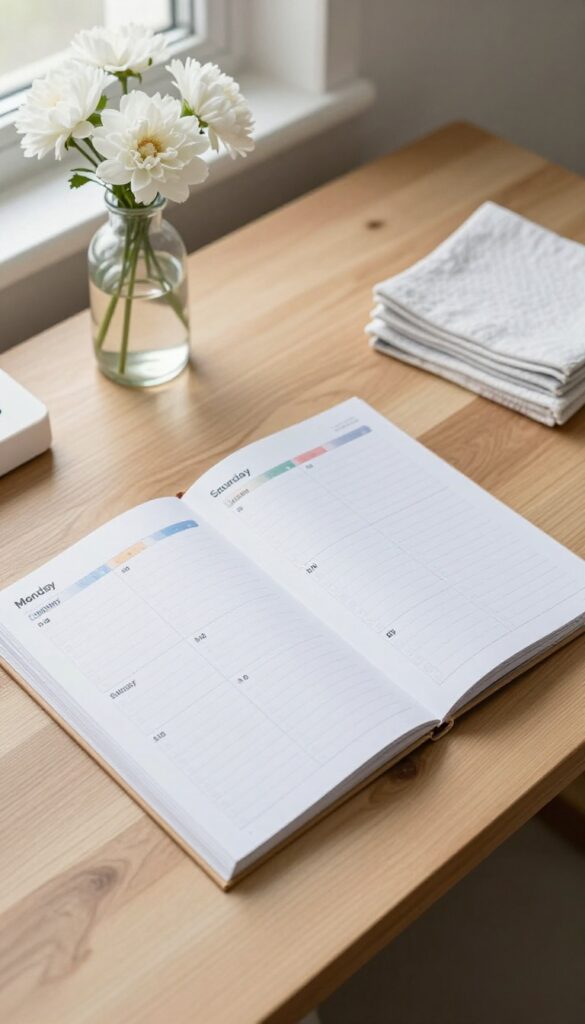
A cleaning planner works best when you see the big picture first. Instead of diving into random tasks, map out your week so every room gets attention without last-minute panic. This approach turns chaos into a rhythm that feels almost automatic.
A weekly overview is your command center. It shows what needs doing and when, so you never wake up wondering where to start. The goal is to spread the workload evenly, not cram everything into Saturday morning.
Choose Your Zones
Divide your home into zones—like kitchen, living room, bedrooms, bathrooms, and home office. Assign one zone per weekday. Monday might be kitchen deep-clean, Tuesday living room dusting and vacuuming.
This keeps each day focused and manageable.
Set A Time Limit
Give each zone a realistic time block, say 15 to 30 minutes. Use a timer if needed. Knowing you only have half an hour prevents burnout and helps you stay on task.
You can always do more if time allows.
Leave Room For Flexibility
Life happens. A good weekly overview has a catch‑all day (like Saturday) for missed tasks or unexpected messes. This buffer keeps your plan from falling apart when things get busy.
2. Use a Daily 15-Minute Tidy
A quick daily reset can work wonders for keeping your home under control. The 15-minute tidy is a simple habit that stops messes from snowballing and saves you from marathon cleaning sessions later. It’s not about deep cleaning—just a fast pickup that makes your space feel instantly better.
Set a timer and focus on high-traffic areas like the living room, kitchen, or entryway. Grab a laundry basket for items that belong in other rooms and return them during your tidy. This small investment of time each evening ensures you wake up to a clean slate, reducing stress and making mornings smoother.
What To Tackle In 15 Minutes
Start with visible clutter: throw pillows, blankets, magazines, and dishes. Wipe down counters and tables quickly. Sweep or vacuum the main floor area.
The goal isn’t perfection—it’s making the room look lived-in but tidy.
Make It A Family Affair
Get everyone involved by assigning quick tasks. Kids can put away toys, while partners handle dishes. Play upbeat music or set a fun challenge to keep it light.
A shared effort builds consistency and makes the habit stick.
Evening Routine Integration
Pair your tidy with another nightly habit, like making tomorrow’s lunch or brushing teeth. This anchoring helps you remember and turns the tidy into an automatic part of your wind-down. Over time, it becomes second nature.
3. Create a Monthly Deep Clean Checklist
Weekly cleaning keeps things tidy, but some tasks only need a monthly visit. A deep clean checklist helps you spread out bigger jobs so nothing gets neglected. Pick one or two items each month and watch your home stay fresh without a marathon cleaning session.
Deep cleaning doesn't have to be overwhelming. By breaking it into monthly chunks, you can maintain a high standard without burning out. Focus on areas that collect dust and grime over time.
What To Include
Think of tasks you rarely do: washing windows, cleaning the oven, scrubbing baseboards, or vacuuming under furniture. Also consider appliances like the refrigerator coils, dishwasher filter, and washing machine drum. These jobs take more time but don't need frequent attention.
How To Schedule
Assign one or two deep tasks to each month. For example, January: clean oven and microwave. February: wash all windows and window tracks.
March: scrub baseboards and doors. Use a calendar or planner to track what's done and what's next. Rotate tasks so everything gets tackled at least once a year.
Tips For Success
Keep your checklist visible—on the fridge or in your planner. Set a reminder on your phone. Don't try to do all tasks in one day; spread them across a week.
Enlist family members to help with bigger jobs. Reward yourself after completing a month's tasks to stay motivated.
4. Implement a Seasonal Reset

Every three months, life shifts. The weather changes, your wardrobe needs swapping, and dust seems to settle in new places. A seasonal reset is your chance to hit pause and give your home a deeper clean without waiting for spring.
Think of it as a mini-makeover for your space. You'll rotate seasonal items, donate what you no longer use, and wipe down areas that daily cleaning skips. It keeps your home feeling fresh and prevents clutter from piling up over months.
A seasonal reset doesn't have to be a weekend-long ordeal. With a simple checklist, you can knock it out in a few focused hours. Start by scheduling your reset around the solstices or the first weekend of each new season—whatever sticks.
The key is consistency, not perfection. Break the reset into three phases: declutter, deep clean, and refresh. Declutter by going through closets, drawers, and storage bins.
Deep clean overlooked spots like baseboards, window tracks, and behind appliances. Refresh by swapping out linens, decor, and seasonal gear. This rhythm keeps your home organized year-round.
Create A Seasonal Checklist
A checklist prevents you from forgetting tasks. For each season, list specific areas to tackle: spring might focus on windows and patios, fall on heating vents and gutters. Keep the list on your phone or print it out.
Cross off items as you go—it's satisfying and keeps you on track.
Rotate And Donate
When you pull out seasonal items, take a hard look at what you actually use. If you didn't wear that sweater last winter or use that beach towel last summer, donate it. Rotate storage bins to keep current-season items accessible.
This habit alone cuts clutter significantly over time.
Deep Clean One Zone Per Season
Instead of deep cleaning the whole house each season, pick one zone to go deep. Spring: kitchen cabinets. Summer: bathrooms.
Fall: living room upholstery. Winter: bedroom closets. Over a year, every area gets attention without overwhelming you.
5. Design a Laundry Routine That Works
Laundry has a way of piling up until it feels like a full-time job. Setting a simple routine takes the guesswork out of wash day and keeps clothes from taking over your space. You don't need a complex system—just a few consistent steps that fit your schedule.
Pick one or two days a week for laundry and stick to them. If you have a large family, you might need three days. The key is to make it predictable so you never face a mountain of clothes.
Break the process into four clear steps: sort, wash, fold, and put away. Each step gets its own time slot, even if it's just 15 minutes. For example, sort loads the night before, start the first load in the morning, fold while watching TV, and put away before bed.
This prevents laundry from becoming a weekend-long chore.
Choose Your Laundry Days
Look at your weekly calendar and block out specific days for laundry. Maybe Wednesday and Saturday work best. Treat these appointments like any other commitment.
If you miss a day, don't double up—just catch it next time. Consistency matters more than perfection.
Create A Sorting Station
Set up bins or baskets for lights, darks, and delicates right in your laundry room or closet. This makes sorting a two-second task instead of a hassle. You can even add a bin for items that need special care, like hand-wash or stain treatment.
Fold And Put Away Immediately
The biggest laundry trap is letting clean clothes sit in the basket. Fold as soon as they're dry, or at least within the same day. Put everything away right after folding.
If you're short on time, set a timer for 10 minutes and see how much you can finish.
6. Build a Cleaning Caddy for Each Floor
If you're constantly running back and forth for supplies, a cleaning caddy solves that. Keep one on each floor stocked with the essentials so you're never hunting for a spray bottle or a fresh cloth. It's a small setup that saves serious time.
A cleaning caddy turns a chore into a quick grab-and-go mission. Instead of gathering items from under the sink, the laundry room, and the garage, you have everything in one portable bucket. This works especially well in multi-story homes where supplies tend to migrate to the main floor.
What To Put In Your Caddy
Start with the basics: an all-purpose cleaner, a glass cleaner, microfiber cloths (at least three), a scrub brush, and a pair of gloves. Add a small dustpan and brush for quick pickups. For bathrooms, toss in a toilet brush and a dedicated disinfectant.
Keep it lean—if the caddy gets too heavy, you won't want to carry it.
Where To Store Each Caddy
Stash one under the kitchen sink for the main floor, another in a hall closet upstairs, and a third in the laundry room or basement. The key is visibility: if it's hidden behind a pile of junk, you won't use it. A clear bin or a caddy with a handle makes it easy to spot and grab.
How To Keep It Stocked
Set a reminder every month to check your caddies. Refill any empty bottles, swap out worn cloths, and toss expired products. If you notice you're always running out of a certain cleaner, buy a backup and store it nearby.
A well-maintained caddy makes cleaning feel effortless.
7. Use a Chore Chart for the Whole Family
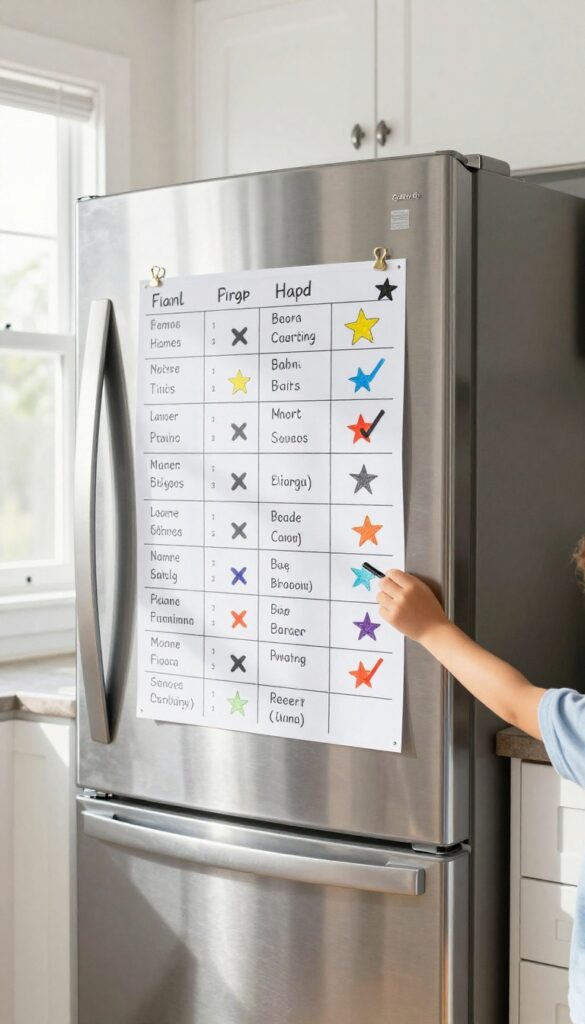
Cleaning doesn't have to fall on one person. A family chore chart spreads the load and teaches responsibility at the same time. When everyone knows their tasks, the house stays cleaner and resentment stays lower.
A visual chart makes expectations clear and gives kids a sense of accomplishment as they check off completed chores. It also frees up your time for deeper cleaning or just relaxing.
Make It Visual And Accessible
Place the chart where everyone can see it, like on the fridge or a hallway wall. Use magnets, dry-erase markers, or printable stickers so kids can easily mark their progress. A simple grid with names and tasks works best.
Assign Age-appropriate Tasks
Young children can handle simple jobs like putting toys away or wiping tables. Older kids can vacuum, do dishes, or take out trash. Rotate tasks weekly to keep things fair and teach a variety of skills.
Build Teamwork With Rewards
Consider a family reward for completing all chores by a certain day, like a movie night or a special dessert. This encourages cooperation and makes cleaning feel less like a punishment.
8. Plan Your Cleaning Around Your Energy Levels
Not all cleaning tasks are created equal, and neither are your energy levels throughout the day. Instead of forcing yourself to scrub grout when you're dead tired, work with your natural rhythm. This approach makes cleaning feel less like a chore and more like a flow.
Match Tasks To Your Energy Peaks
Identify when you have the most energy—maybe it's right after coffee or mid-morning. Save heavy-duty tasks like mopping floors, scrubbing bathrooms, or cleaning the oven for those high-energy windows. For low-energy times, stick with lighter jobs like dusting, folding laundry, or wiping counters.
You'll get more done without burning out.
Create A Flexible Daily Schedule
Rather than a rigid timetable, assign each task a time of day based on how you typically feel. For example, Monday mornings might be for vacuuming (high energy), while Wednesday evenings are for tidying up clutter (low energy). This flexibility means you can adapt when your energy unexpectedly shifts.
Use A Simple Energy Rating System
Label each cleaning task with an energy level: low, medium, or high. Then, at the start of each day, check in with yourself and pick tasks that match. If you're dragging, do only low-energy tasks.
If you're buzzing, tackle the high-energy ones. This keeps you consistent without guilt.
9. Keep a Running Shopping List for Supplies
Nothing derails a cleaning session faster than running out of all-purpose spray or realizing you're fresh out of scrub brushes. A running shopping list for cleaning supplies solves that problem before it starts. Keep a dedicated list—on your phone, a whiteboard, or a sticky note—and add items the moment you notice they're low.
That way, you never have to make a frantic trip to the store mid-chore.
A running list is simple but powerful. It turns a reactive habit into a proactive one. Instead of waiting until you're out of something, you jot it down when you use the last bit.
This small shift saves time, money, and mental energy. You'll always have what you need, and you'll avoid buying duplicates because you forgot what was already in the cabinet.
Where To Keep Your List
Choose a spot that's easy to see and update. A magnetic notepad on the fridge works great. A shared digital list on your phone, like a notes app or a grocery app, is even better because you can add items on the go.
If you have family members, make sure everyone knows where the list lives and feels free to add to it.
What To Include
Think beyond just sprays and wipes. Add things like microfiber cloths, scrub brushes, gloves, trash bags, and even small appliances like a vacuum filter or mop heads. If you use a cleaning caddy, note when a product is running low so you can restock before it's empty.
Also, consider adding seasonal items like window cleaner in spring or de-icer for winter entryways.
When To Shop
Set a regular shopping day—once a week or every two weeks—and check your list before you go. If you're the type who shops online, add items to your cart as soon as you add them to the list. That way, you can place the order when you're ready without forgetting anything.
The key is consistency: make it a habit to review and restock on schedule.
10. Set Up a Command Center for Paper Clutter
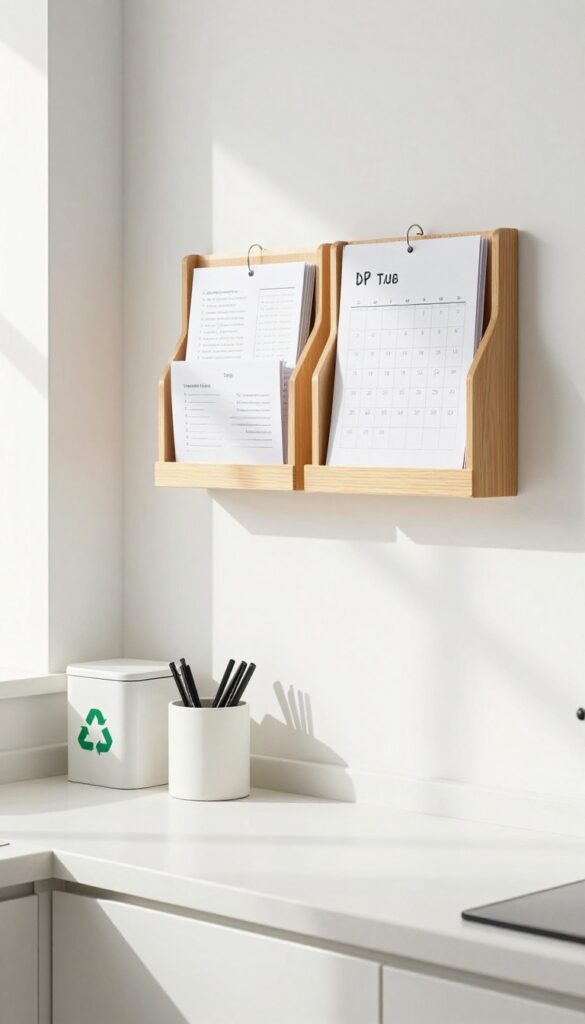
Paper clutter is one of those things that multiplies when you're not looking. A single envelope turns into a stack, and before you know it, your kitchen counter is buried under school flyers, bills, and catalogs. A command center gives every piece of paper a home, so you can process it quickly and keep surfaces clear.
Designate a spot—maybe a wall in the kitchen or a corner of the mudroom—where all incoming paper lands. Use a wall-mounted file organizer, a small desk, or even a tiered tray. The key is to make it the only place paper lives until it's dealt with.
Sort daily into categories: action (bills to pay, forms to sign), file (receipts, warranties), and recycle. Once a week, clear out anything that's no longer needed. This system stops piles from forming and keeps your countertops clean.
Choose Your Hub Location
Pick a spot near the main entry or kitchen, where mail naturally arrives. A wall-mounted organizer saves counter space, while a small table gives you room to sort. Make sure there's a pen holder, a small trash bin, and a recycling bag nearby so you can act immediately.
Create A Simple Sorting Routine
Set aside five minutes each day to go through the command center. Open envelopes, toss junk mail, and place bills in a “to pay” slot. School papers go into a folder for each child.
This daily habit prevents buildup and makes it easy to find what you need.
Add A Family Calendar
Hang a dry-erase calendar or a bulletin board above the command center. Write appointments, deadlines, and events. This keeps the whole family on the same page and reduces the number of loose papers floating around.
11. Create a 10-Minute Morning Reset
Mornings set the tone for the whole day. Instead of rushing out the door leaving beds unmade and counters cluttered, a quick 10-minute reset can make your home feel calm and ready for whatever comes. This small habit keeps mess from piling up and gives you a fresh start every single day.
The idea is simple: each morning, spend just ten minutes doing three key tasks. Make the beds, wipe down kitchen and bathroom counters, and fluff the pillows on sofas or chairs. That's it.
No deep cleaning, no rearranging—just a quick tidy that makes the space look intentional and cared for. Over time, this becomes automatic, and the payoff is huge: you walk into a neat home after work instead of a chaotic one.
Why Ten Minutes Works
Ten minutes is short enough to fit into even the busiest morning routine. It's not overwhelming, so you're more likely to stick with it. And because it's consistent, the mess never gets a chance to snowball.
Think of it as a daily reset button for your home.
What To Focus On
Target the areas that have the biggest visual impact. Beds are usually the centerpiece of a bedroom, so making them instantly makes the room look put together. Counters in the kitchen and bathroom collect clutter fast—wiping them down removes crumbs, toothpaste splatters, and stray items.
Fluffing pillows on the couch or armchairs makes the living area look inviting without any real effort.
Make It A Habit
Tie the reset to something you already do, like brewing coffee or waiting for your toast. Keep a spray bottle and cloth under the sink for quick wipe-downs. Set a timer if needed.
After a week, it'll feel weird to skip it. This isn't about perfection—it's about starting your day with a small win for your home.
12. Use a Timer for Each Task
Ever find yourself scrubbing the same spot for twenty minutes because you got distracted? A simple kitchen timer can break that cycle. Setting a countdown for each task keeps you moving and prevents burnout.
The timer method works because it creates a sense of urgency. You're less likely to scroll your phone when the clock is ticking. Plus, seeing how much you can accomplish in 20 minutes is genuinely motivating.
Start Small And Build Momentum
Begin with the smallest task on your list. Set the timer for 10 minutes and tidy one counter. When the timer goes off, you'll feel a little win.
That momentum carries you into the next 20-minute block.
Match The Task To The Time
Not every job needs a full 20 minutes. Wiping a mirror might take 5. Vacuuming a room might take 15.
Adjust the timer to fit the task, not the other way around. This keeps the pressure manageable.
Take Breaks Between Blocks
After each timed session, step away for 5 minutes. Stretch, grab water, or just breathe. Those short breaks prevent fatigue and help you maintain focus for the next round.
Use A Visual Timer For Kids
If little ones are helping, try a timer that shows the countdown visually. They can see the time disappearing, which makes cleaning feel like a game. It also teaches them time management early.
13. Rotate Your Cleaning Tools Seasonally
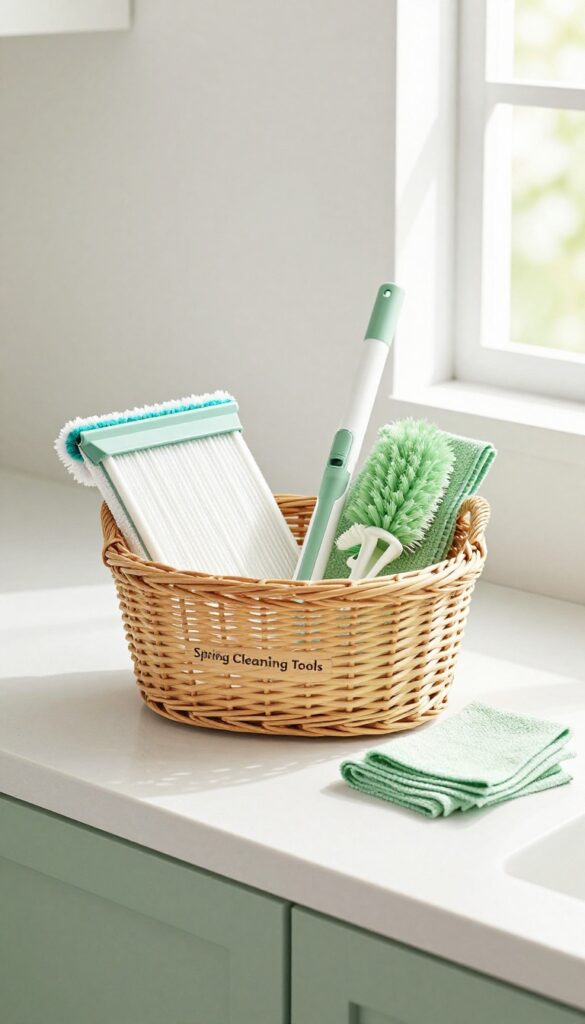
Cleaning tools take a beating. Mop heads get grimy, vacuum filters clog, and scrub brushes lose their stiffness. Using worn-out equipment just spreads dirt around instead of lifting it.
A simple seasonal swap keeps everything working at its best, so you're not fighting your own supplies.
Mark your calendar for the first day of each season—spring, summer, fall, winter—and make it a habit to inspect and replace key cleaning tools. This small investment pays off in better results and fewer headaches.
What To Swap And When
Start with the items that see the most action. Mop heads (both flat mop pads and string mops) should be replaced every three months. Vacuum filters and bags need changing at least seasonally, especially if you have pets.
Scrub brushes and sponges lose their scrubbing power quickly—swap sponges monthly, but a seasonal brush swap keeps tough jobs easier.
Don't Forget The Small Stuff
Dusting cloths, squeegee blades, and even the rubber seals on your vacuum can wear out. Replace microfiber cloths when they start leaving lint behind. Change squeegee blades if they streak.
Check vacuum belts and brushes for hair tangles. These little swaps prevent bigger cleaning frustrations down the road.
Make It A Ritual
Pair your seasonal tool rotation with another regular task, like changing your HVAC filter or flipping your mattress. That way you won't forget. Keep a small stash of replacement items in a labeled bin so you're ready to go.
A little planning now saves you from scrubbing with a sad, flat brush later.
14. Keep a 'Donate' Box Handy
Clutter has a sneaky way of piling up when you're not looking. That shirt you haven't worn in two years, the gadget you replaced but never tossed, the books you'll probably never read again. Instead of letting these items take up valuable space, give them a temporary home until you're ready to let them go.
A dedicated donate box changes the game. Place it somewhere convenient—a closet corner, mudroom shelf, or garage—and drop items in as you spot them. When the box fills up, take it to your local donation center.
No more piles of 'I'll deal with this later' that never get dealt with.
Choose The Right Spot
Location matters. Pick a spot you pass daily, like near the laundry room or entryway. If it's hidden in the back of a closet, you'll forget about it.
The box should be visible enough to remind you to use it, but out of the way so it doesn't become an eyesore.
Set A Drop-off Routine
A full box is useless if it never leaves the house. Tie donation drop-offs to a regular errand, like every other Saturday or the first of the month. Keep a list of nearby donation centers or schedule a pickup with a charity.
Consistency prevents the box from turning into a permanent storage bin.
What Goes In, What Stays Out
Not everything belongs in the donate box. Clothes should be clean and wearable, electronics should work, and books should be in decent shape. Torn, stained, or broken items belong in the trash or recycling.
A quick rule: if you wouldn't give it to a friend, don't donate it.
15. Schedule a Weekly 'Zone' Clean
Instead of trying to deep clean the whole house in one exhausting day, break it down into zones. Each week, pick one area—like the kitchen, bathroom, or living room—and give it a thorough clean. This way, every space gets attention without overwhelming your schedule.
Zone cleaning turns a marathon into manageable sprints. You’ll rotate through areas so nothing gets neglected for months. Plus, focusing on one zone means you can really dig in without rushing.
How To Set Up Your Zones
Start by dividing your home into five to seven zones. Common zones include kitchen, living room, primary bedroom, bathrooms, home office, and entryway. Assign each zone to a week, and rotate them in a cycle.
You can also tie zones to days of the week if that’s easier to remember.
What A Zone Clean Looks Like
A zone clean goes beyond surface-level tidying. In the kitchen, that means wiping down cabinets, cleaning the oven exterior, and scrubbing the sink. In the living room, you might vacuum under cushions, dust blinds, and wipe baseboards.
The goal is to hit those spots you usually skip.
Tips To Stay On Track
Keep a simple checklist for each zone so you don’t have to think about what to do. Set a timer for 30–45 minutes to keep the task from ballooning. And if a zone is particularly messy, don’t be afraid to split it across two weeks.
16. Use a Digital Cleaning App
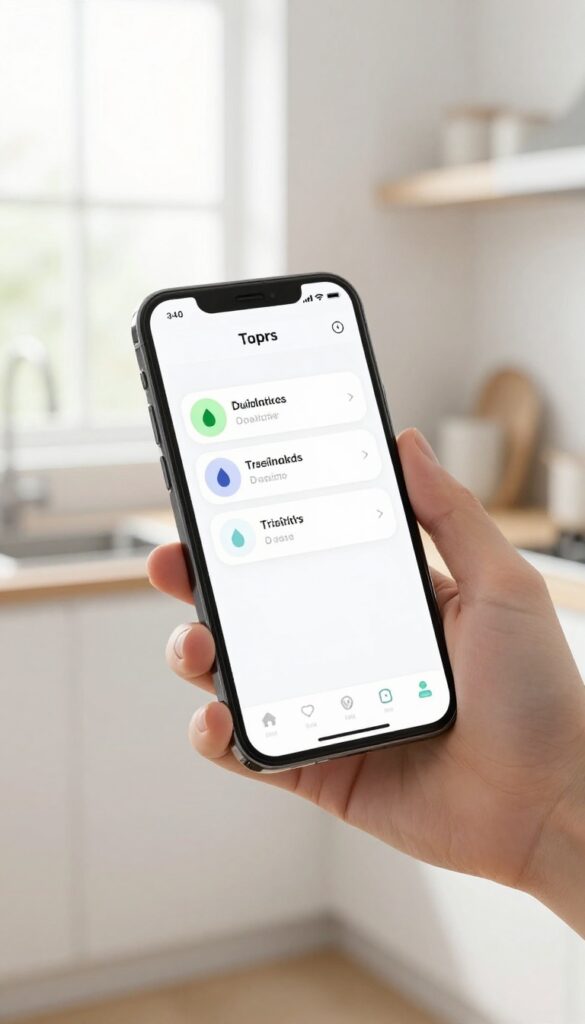
If you're the type who forgets when you last wiped the baseboards or changed the sheets, a digital cleaning app can be a game-changer. These apps handle the scheduling and tracking for you, so you don't have to rely on memory or a paper list. With built-in reminders and progress tracking, you'll always know what needs attention.
No more guessing or overlooking tasks that only pop up every few weeks.
Pick An App That Fits Your Style
Apps like Tody use a traffic-light system to show which tasks are overdue, while OurHome lets you assign chores to family members. Try a few to see which interface feels natural. Most have free versions, so you can test before committing.
Set Recurring Tasks And Reminders
Once you choose an app, input your regular cleaning tasks with the frequency that makes sense—daily, weekly, monthly. Enable push notifications so you get a nudge when it's time to tackle a task. This keeps you consistent without having to think about it.
Track Progress And Adjust As Needed
Most apps show your cleaning history, so you can see what you've actually accomplished. Use that data to tweak your schedule. Maybe you realize you don't need to dust twice a week, or that the fridge needs a monthly wipe.
Let the app adapt with you.
17. Create a Holiday Prep Cleaning List
Holidays bring joy, but they also bring a flurry of last-minute cleaning panic. Instead of scrambling the day before guests arrive, a holiday prep cleaning list spreads tasks over a week so everything feels calm and under control. This approach turns chaos into a manageable countdown, leaving you more time to actually enjoy the celebration.
Start With A Guest-ready Walkthrough
Walk through your home as if you're a guest entering for the first time. Note what catches your eye: dusty shelves, smudged windows, cluttered entryways. Jot down these observations and schedule them across the week leading up to the holiday.
Tackle one or two items each day so nothing feels overwhelming.
Divide Tasks By Zone And Day
Assign each day a specific zone: Monday for the living room, Tuesday for the kitchen, Wednesday for bathrooms, and so on. Within each zone, list tasks like dusting, wiping surfaces, vacuuming, and tidying closets. This structure prevents you from bouncing aimlessly and ensures every area gets attention before the big day.
Include Pre-holiday Errands
Your holiday prep list shouldn't stop at cleaning. Add errands like grocery shopping, picking up extra chairs, or buying fresh flowers. Group similar tasks together to save trips.
For example, combine a store run with a quick car clean-out. This holistic list keeps your whole life holiday-ready, not just your floors.
Build In Buffer Time
Unexpected things always pop up before holidays—a sick kid, a forgotten ingredient, or a last-minute guest. Leave at least one buffer day near the end of your countdown with no assigned tasks. Use it to catch up on any missed items or simply relax.
A little flexibility keeps the process stress-free.
18. Implement a 'One In, One Out' Rule
Ever notice how quickly stuff multiplies? That new blender, the cute throw pillow, or the bulk-buy paper towels can silently push your home toward chaos. The 'one in, one out' rule is a simple way to keep your space balanced without feeling deprived.
Every time something new crosses your threshold, something old has to leave.
This rule works because it forces you to be intentional. You can't just buy on impulse; you have to consider what you're willing to part with. Over time, it trains your brain to value quality over quantity and keeps your home from becoming a storage unit.
It's not about minimalism or sacrifice—it's about maintaining a comfortable, clutter-free environment where everything has a purpose.
Make It A Habit, Not A Chore
The easiest way to stick with this rule is to pair it with an existing routine. For example, when you bring in groceries, check the pantry for expired items to toss. When you buy new clothes, immediately bag an old piece for donation.
The key is to act right away—don't let the new item sit around while you decide. Consistency turns the rule into a reflex.
Apply It To Every Category
This rule works for more than just clothes and kitchen gadgets. Use it for books, toys, decor, linens, and even digital files. Got a new cookbook?
Donate one you never use. Downloaded a new app? Delete one you haven't opened in months.
By applying it broadly, you prevent any single area from becoming a clutter magnet.
Handle Exceptions Gracefully
Some items are harder to part with—gifts, sentimental pieces, or things you truly need duplicates of (like towels). For those, modify the rule: maybe it's 'one in, two out' for categories that tend to overaccumulate, or set a monthly review where you evaluate if the item still serves you. The goal isn't deprivation; it's thoughtful curation.
19. Use a Whiteboard for Shared Tasks
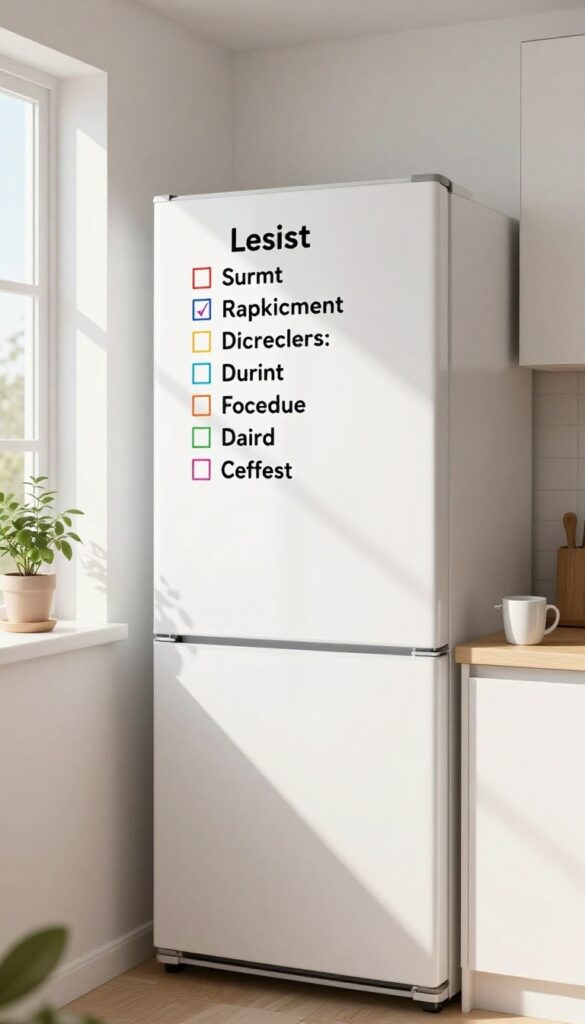
When multiple people share a home, cleaning can quickly become a game of 'I thought you did it. ' A simple whiteboard in a high-traffic area cuts through the confusion. It turns vague expectations into visible, trackable tasks that everyone can own.
A whiteboard is one of the lowest-tech but highest-impact tools for shared households. It keeps chores front and center without requiring anyone to open an app or remember a verbal request. The key is to make it simple and consistent.
Choose The Right Spot
Place the whiteboard where everyone passes daily—kitchen, mudroom, or hallway. Avoid tucking it away in a laundry room or office. The more visible it is, the more likely people will actually use it.
Keep The List Short And Clear
List only the daily or weekly non-negotiables: take out trash, wipe counters, vacuum living room, load dishwasher. Use a simple check-box format. Avoid long lists that overwhelm.
Rotate tasks weekly to keep it fair.
Add A 'done By' Column
Include a column for initials or a time stamp. This adds gentle accountability without nagging. Family members can see who handled what, and it prevents duplicate work.
Review And Reset Weekly
Set a recurring five-minute meeting (like Sunday evening) to erase completed tasks and reassign. This keeps the board fresh and prevents it from becoming background noise.
20. Plan Your Cleaning Around Your Week
Your calendar already holds your appointments, work deadlines, and social plans. Why not let it guide your cleaning too? By syncing chores with what's already happening, you clean when you have time and skip the guilt when you don't.
Match Chores To Your Energy Levels
Not all cleaning tasks are created equal. Save heavy-duty jobs like scrubbing the oven or mopping floors for days when you have more time and energy—maybe a weekend morning. Quick tasks like wiping counters or making the bed fit naturally into busy weekdays.
Look at your calendar and assign chores to the days that match your typical energy. You'll get more done without feeling drained.
Use Existing Events As Triggers
Hosting a dinner party? That's your cue to clean the living room and dining area. Expecting a weekend guest?
Time to freshen up the guest room and bathroom. Letting real-life events dictate your cleaning schedule makes it feel less arbitrary. You're not cleaning for the sake of cleaning—you're cleaning for a purpose.
That shift in mindset can make all the difference.
Block Off Cleaning Time Like An Appointment
Treat cleaning slots as non-negotiable appointments. If Tuesday evening is free, pencil in "30-minute kitchen reset" just like you would a dentist visit. When it's on the calendar, you're more likely to follow through.
Plus, seeing it visually helps you avoid overbooking yourself. You'll stop trying to squeeze in a deep clean on a day that's already packed.
21. Keep a 'Cleaning Playlist' Ready
Music can turn a tedious chore into a mini dance party. Having a dedicated cleaning playlist means you never waste time searching for the right tunes. It sets the pace and keeps your energy up from start to finish.
Match The Tempo To The Task
Fast songs work best for vacuuming, mopping, and scrubbing. Slower tracks are better for folding laundry or organizing shelves. Build separate playlists for different cleaning modes so you can grab the right one instantly.
Keep It Fresh
Rotate your playlist every few weeks to avoid boredom. Add new discoveries or seasonal favorites. A fresh mix keeps you looking forward to cleaning sessions.
Time Your Cleaning By The Playlist
Make your playlist exactly 30 or 60 minutes long. When the music ends, you're done. This natural timer helps you stay focused and prevents over-cleaning or burnout.
22. Use a Reward System for Consistency
Cleaning can feel like a never-ending loop, especially when you’re doing it for yourself with no one cheering you on. That’s exactly why a reward system works so well. By pairing a completed week of chores with a small treat, you train your brain to associate cleaning with something positive.
It’s not bribery—it’s smart motivation.
Choose Rewards That Actually Motivate You
The reward needs to feel like a real treat, not just another chore. Think about what genuinely makes you happy: a fancy coffee from your favorite café, a guilt-free movie night with takeout, or even an hour of uninterrupted reading. Keep it small and immediate—something you can enjoy right after you finish your cleaning checklist for the week.
Set Clear Milestones And Track Progress
A reward system only works if you know exactly what you’re working toward. Define what a “completed week” looks like: all daily tasks done, plus the weekly deep-clean items checked off. Use a simple chart or a habit tracker app to mark your progress.
Seeing those checkmarks pile up is its own mini reward.
Don’t Let Guilt Ruin The Fun
Some people feel weird rewarding themselves for something they “should” do anyway. Push past that. Cleaning is work, and work deserves recognition.
If you skip a day but still finish the week strong, that counts. The goal is consistency, not perfection. Celebrate the wins, even the small ones.
23. Create a 'Before Bed' Cleanup Routine
A tidy home in the morning starts the night before. Instead of waking up to yesterday's mess, a quick 10-minute reset before bed can transform your mornings. This small habit keeps clutter from piling up and sets a calm tone for the next day.
The before-bed cleanup is about efficiency, not perfection. Focus on high-traffic areas like the living room and kitchen. Clear countertops, fluff pillows, and put away stray items.
You'll thank yourself when you walk into a clean space with your first cup of coffee.
What To Tackle In 10 Minutes
Start with the kitchen: load the dishwasher, wipe counters, and put away leftovers. Then move to the living room: fold blankets, stack magazines, and return remote controls to their spot. If time allows, sweep high-traffic floors or do a quick toy pickup if you have kids.
Make It A Family Habit
Get everyone involved. Assign each family member a zone—like the coffee table or the entryway. Set a timer and make it a game.
When everyone participates, the load is lighter and the habit sticks. Plus, it teaches kids responsibility and the value of teamwork.
Pair It With A Wind-down Ritual
Combine your cleanup with something relaxing. Play soft music, light a candle, or listen to a podcast while you tidy. This turns the chore into a calming pre-sleep routine.
You'll not only have a cleaner home but also a more peaceful transition to bedtime.
24. Keep a Cleaning Journal for Notes
Ever feel like you're trying to remember a cleaning tip you saw weeks ago? A cleaning journal solves that. It's a simple notebook or digital doc where you track what works, what doesn't, and what you want to try next.
Over time, it becomes your personalized cleaning bible.
A cleaning journal isn't about perfection. It's about noticing patterns and making small tweaks that save you time and frustration. Jot down a quick note after each cleaning session—what product worked great, which room took longer than expected, or a new routine you want to test.
After a few weeks, flip back and see what's changed. You'll be surprised how much you learn about your own home.
What To Track
Start with the basics: date, room cleaned, time spent, and any observations. Did the bathroom need extra scrubbing? Did the living room dust return faster than usual?
Note it. Over time, you'll spot trends—like which areas get dirtiest first or what time of day you're most productive.
Refine Your System
Use your journal to experiment. Try a new microfiber cloth and write down if it picks up more dust. Test a different order of cleaning rooms.
When you find a winning combo, you'll have it recorded. This turns cleaning from a chore into a science—tailored just for you.
Stay Motivated
Looking back at your progress can be a huge motivator. See how you've cut cleaning time in half or finally tackled that closet. Your journal becomes a record of small wins that keep you going.
Plus, it's satisfying to see how far you've come.
25. Review and Adjust Your Plan Monthly

Your cleaning planner isn't set in stone. Life shifts—new seasons, changing schedules, unexpected events—and your routine should flex with it. A monthly check-in keeps your system relevant and prevents burnout from following a plan that no longer fits.
Set a recurring reminder for the last day of each month. Spend 10 minutes scanning your planner. Which tasks felt overwhelming?
Which ones did you skip repeatedly? Maybe you added a new pet or started working from home. Tweak task frequencies, swap days, or drop what's not working.
This small habit ensures your planner evolves with you, not against you.
What To Look For
Notice patterns: Did you consistently skip the weekly deep-clean of the guest bathroom? Maybe it only needs a monthly refresh. Did the kitchen floor get dirty faster?
Bump it to twice a week. Also check for seasonal shifts—winter might need more floor mopping, summer more window cleaning.
How To Tweak Without Overhauling
You don't need to rewrite the whole planner. Just adjust a few items. Move a task to a different day.
Change a frequency from weekly to biweekly. Add a new task for a recent change, like cleaning a new appliance. Keep what works, modify what doesn't.
Involve Your Household
If others help with cleaning, ask for their input during the review. Maybe they find a certain task easier on a different day. Their feedback makes the plan more collaborative and realistic.
A quick 5-minute family huddle can save frustration later.
FAQ
How do I start a cleaning planner if I'm overwhelmed?
Start small. Pick just one or two ideas from this list, like the daily 15-minute tidy or a weekly overview. Build from there as you get comfortable.
What's the best way to keep my family on board?
Use a visual chore chart and assign age-appropriate tasks. Make it a team effort by cleaning together for short bursts, and celebrate small wins.
How often should I deep clean my home?
Aim for a deep clean once per season, but adjust based on your household. High-traffic areas may need more frequent attention.
Can I use a digital app instead of a paper planner?
Absolutely. Apps like Tody, OurHome, or even a shared Google Calendar work great. Choose what feels easiest for you to stick with.
What if I miss a day in my cleaning schedule?
Don't stress. Just pick up where you left off. The goal is progress, not perfection.
A missed day doesn't mean your system is broken.
Conclusion
A more organized home doesn't require a complete overhaul overnight. Start with just one or two planner ideas that resonate with your current routine, then build from there. Small, consistent steps will transform your cleaning habits without overwhelming you.
The real win is finding a system that actually fits your life. Pick a strategy that feels doable, give it a few weeks, and adjust as needed. Soon, you'll have a personalized cleaning routine that keeps your home tidy with minimal effort.


