
Opening your closet shouldn't feel like a game of Tetris. A chaotic wardrobe wastes time and energy every morning. But a fresh reset can change how you dress and how you feel.
Letting go of clothes is hard, but holding onto things you never wear only weighs you down. The goal isn't a bare closet—it's a curated collection of pieces you actually love.
These 25 tips will guide you through the entire process, from the first purge to the final fold. You'll end up with a closet that works for you, not against you.
1. Pull Everything Out
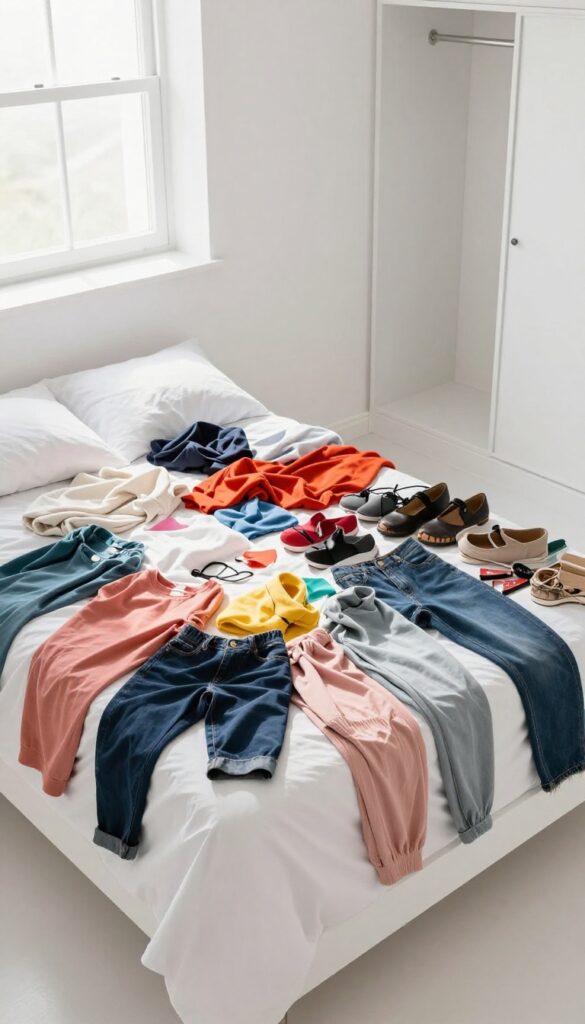
You can't organize what you can't see. Emptying your entire closet onto your bed or floor forces you to face every single item you own. It's messy at first, but seeing everything at once makes it much easier to sort, decide, and let go.
Why This Step Matters
When clothes are hidden behind closet doors, it's easy to ignore the clutter. Pulling everything out removes that mental block. You'll see duplicates, forgotten pieces, and items that no longer fit or suit your style.
This visual inventory is the foundation of a successful reset.
How To Do It Right
Clear your bed or a large floor area. Take everything out—clothes, shoes, accessories, even hangers. Don't sort as you go; just pile it all up.
This creates a blank slate and prevents you from second-guessing mid-process. Once it's all out, you can start making decisions.
What To Do Next
Before you put anything back, clean the empty closet. Wipe down shelves, vacuum the floor, and maybe add a fresh scent. Then sort items into three piles: keep, donate/sell, and trash.
Be honest with yourself—if you haven't worn it in a year, it's probably time to let it go.
2. Sort Into Three Piles
Once you've emptied your closet, it's time to make decisions. The three-pile method keeps things simple and prevents second-guessing. Grab three laundry baskets or trash bags and label them: keep, donate/sell, and trash.
Work through each item one by one. Hold it up, ask yourself when you last wore it, and be brutally honest. If it's stained, torn, or unwearable, it goes in the trash.
If it's in good condition but not your style anymore, it's donate or sell. Everything else stays.
The One-year Rule
A good rule of thumb: if you haven't worn it in the past year, you probably never will. Exceptions exist for formal wear or seasonal items, but for everyday clothes, that year mark is a solid cutoff. It removes the emotional weight of "maybe someday.
"
Be Honest About Fit And Feel
We all have that pair of jeans we hope to fit into again or that itchy sweater we keep for sentimental reasons. Let them go. Clothes that don't fit or feel good just take up space and make you feel guilty every time you see them.
Your closet should only hold pieces that make you feel great.
Don't Overthink It
If you find yourself hesitating for more than a few seconds, it's probably a sign to let it go. Trust your gut. The goal is to reduce clutter, not to agonize over every T-shirt.
Once you've sorted everything, immediately remove the donate and trash bags from your space so you're not tempted to dig through them.
3. Try On the Doubtful Items
You've got a pile of clothes you're on the fence about. Maybe it's a top you bought on sale but never wore, or a pair of jeans that might fit someday. The only way to know for sure is to put them on.
This step takes a little time, but it saves you from future regret.
Grab every piece you're unsure about and head to a full-length mirror. Try each one on with an open mind. Check how it fits, how it feels, and how it makes you feel.
If it's uncomfortable, unflattering, or just doesn't spark joy, it's time to let it go. Trust your gut—you'll know when something is right.
Check The Fit And Comfort
Does it pinch, sag, or ride up? Clothes that don't fit well will never be your favorites. Be honest about whether it's a size issue or just a bad cut.
If it needs tailoring and you actually love it, set it aside for alterations. Otherwise, it's a pass.
Notice How You Feel
When you put it on, do you feel confident and comfortable? Or do you feel self-conscious and eager to take it off? Your emotional reaction matters.
If a piece doesn't make you feel good, it's not worth the closet space.
Consider The Occasion
Think about when you'd actually wear it. Is there a specific event or regular use? If you can't picture a realistic scenario within the next few months, it's probably just taking up room.
Let it go to someone who will use it.
4. Use the Hanger Trick
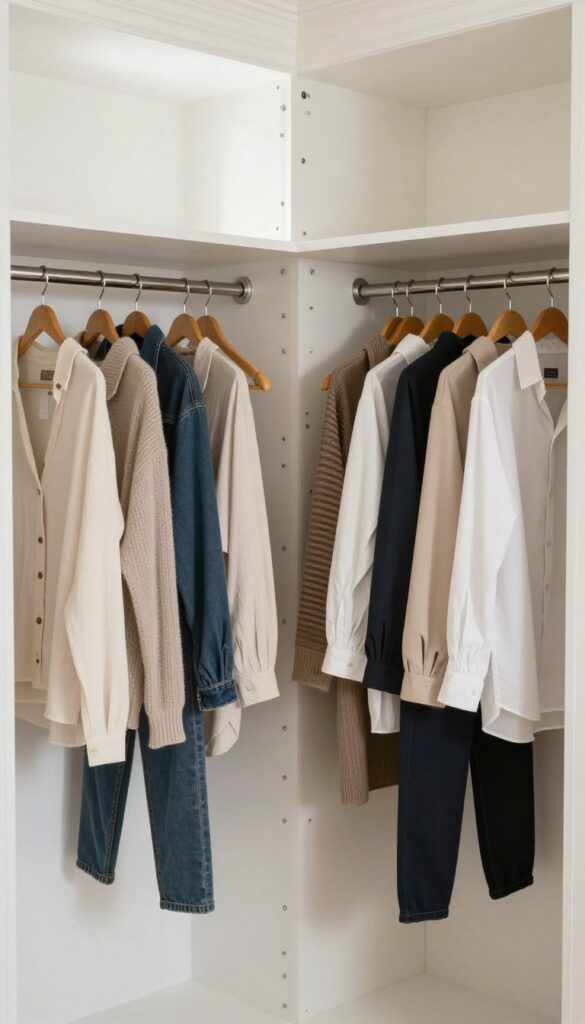
This simple trick takes the guesswork out of deciding what to keep. At the start of a new season, turn all your hangers backward so the hooks face you. As you wear an item and put it back, hang it normally with the hook facing the wall.
After six months, anything still on a backward hanger clearly hasn't been worn.
The hanger trick is a low-effort way to track your actual wardrobe usage without keeping a log. It works for any closet, from minimalist to maximalist. The visual cue of backward hangers makes it easy to spot the clothes you're not reaching for.
Set Your Starting Point
Pick a date—like the first day of spring or fall—and flip every hanger backward. This works best if you've already done an initial purge, but it's fine to start fresh. The key is consistency: commit to the system for the full six months.
What To Do After Six Months
When the time comes, look at the backward hangers. Each item is a candidate for donation or sale. But before you toss everything, give each piece a second look.
Maybe it's a special occasion dress you still love but rarely wear—that's okay to keep. The trick is about awareness, not strict rules.
Adapt The Trick To Your Lifestyle
If six months feels too long, try three. Or use the trick seasonally instead of annually. You can also apply it to shoes, bags, or accessories by turning them backward on shelves.
The core idea stays the same: let your habits, not your memory, guide your decluttering.
5. Set a Limit for Each Category
Deciding how many of each item you truly need stops the endless cycle of accumulation. Without a cap, even a freshly organized closet can quickly overflow. A simple number gives you a clear target and makes future shopping decisions easier.
Setting limits forces you to prioritize quality over quantity. It also makes maintenance a breeze—when something new comes in, something old goes out.
Determine Your Magic Number
Think about your lifestyle. If you work from home, you might need only five casual tops. If you commute daily, you may need seven work blouses.
Count how many you actually wear in a typical week, then add one or two for variety. That's your limit.
Stick To It When Shopping
Once you've set your number, honor it. If you buy a new pair of jeans, donate or sell an old pair. This one-in-one-out rule keeps your closet from creeping back to chaos.
It also helps you be more intentional with purchases.
Adjust As Needed
Your limit isn't set in stone. As seasons change or your life shifts, revisit your numbers. Maybe you need more workout gear now, or fewer formal dresses.
The goal is to maintain a closet that fits your current reality, not a past one.
6. Keep Only What Fits Right Now
Holding onto clothes that don't fit is like keeping a bookmark in a book you'll never read. It takes up space and reminds you of a goal that may or may not happen. Your closet should serve your current life, not a future fantasy.
The easiest way to clear clutter is to be honest about size. Try everything on and be ruthless. If it doesn't fit comfortably right now, it goes.
This isn't about giving up—it's about making room for clothes that make you feel good today.
The One-year Rule
If you haven't worn it in a year and it doesn't fit, it's unlikely to ever fit again. Bodies change, but so do styles and preferences. Give yourself a firm deadline: one year.
After that, let it go without guilt.
Tailoring Vs. Hoping
If a piece is almost perfect but needs minor alterations, set aside a small pile for the tailor. But if it's multiple sizes off or would require major work, it's not worth the cost or the mental load. Be realistic about what you'll actually alter.
Create A Capsule Of Current Sizes
Once you've removed everything that doesn't fit, you'll see a clearer picture of your wardrobe. Organize the remaining pieces by category and color. This capsule becomes your go-to for effortless outfits that actually fit.
7. Remove Seasonal Items
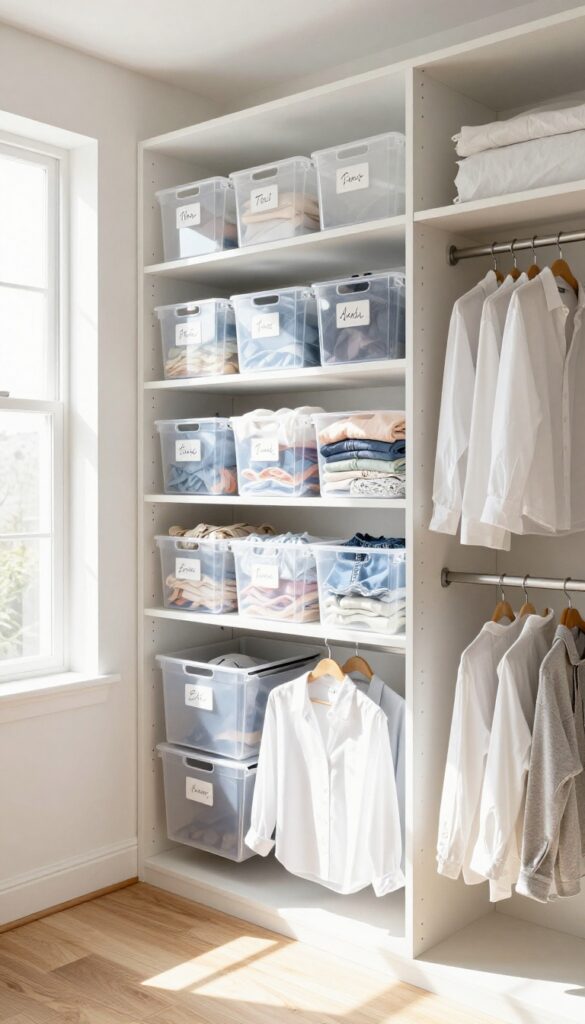
Your closet doesn't need to hold every single piece of clothing you own all year round. Seasonal items like heavy sweaters in July or linen shorts in January just take up valuable space. By storing off-season pieces elsewhere, you free up room for what you actually reach for right now.
Storing seasonal items is one of the easiest ways to instantly declutter your closet without getting rid of anything. You're not throwing things away—you're just giving them a temporary home. This simple habit makes your daily wardrobe feel more spacious and intentional, and it saves you from digging through winter coats to find a t-shirt.
Choose The Right Storage Spot
The best storage spots are out of the way but still accessible. Under-bed bins are perfect for bulky sweaters or jeans. High shelves in your closet or a hall closet work well for lighter items.
Avoid damp basements or hot attics—extreme temperatures can damage fabrics. Clear bins let you see what's inside without opening every lid.
Prep Clothes Before Storing
Always clean items before putting them away. Stains attract pests and set in over time. Fold knits to avoid stretching, and use breathable garment bags for delicate dresses or suits.
Add cedar blocks or lavender sachets to keep moths away and maintain a fresh smell.
Rotate Twice A Year
Set a reminder to swap seasonal items at the start of spring and fall. When you pull out the next season's clothes, take a moment to reassess—don't just put everything back. If you didn't wear something last season, consider donating it.
This keeps your rotation fresh and your closet clutter-free.
8. Invest in Matching Hangers
You might not think much about hangers, but they play a bigger role in your closet's look and function than you'd expect. Mixing wire, plastic, and wooden hangers creates visual clutter and can even damage your clothes. Switching to a uniform set instantly upgrades the whole space.
Matching hangers do more than just look good. They save space, protect your clothes, and make your closet feel like a boutique. Here's why it's worth the swap.
Why Uniform Hangers Work
When every hanger is the same thickness and shape, your clothes hang at the same height. That alone makes your closet look neater and more organized. Plus, you won't have to wrestle with tangled wire hangers or deal with stretched-out necklines from thick plastic ones.
Best Hanger Types For Different Clothes
Velvet hangers are a popular choice because they grip fabric and prevent slipping. They're thin, so you can fit more items per foot of rod. For heavier items like coats or suits, wooden hangers with a wider shoulder support are better.
Slim, non-slip hangers work well for most everyday pieces.
How Many Hangers You Actually Need
Count your current clothes and buy a set that matches. It's tempting to buy a big pack, but you'll end up with extras you don't need. Stick to what fits your wardrobe now, and add a few spares for future purchases.
This keeps your closet from getting overcrowded.
9. Group by Category and Color
Once you've purged and sorted your keep pile, it's time to put everything back in a way that makes sense. Grouping by category and color is the most intuitive system for a reason—it saves you time and mental energy every single day. Instead of hunting through a jumble of sleeves and hems, you'll see exactly what you have at a glance.
Start by separating your clothes into broad categories: tops, bottoms, dresses, outerwear, and so on. Within each category, arrange items from lightest to darkest. This visual gradient makes it easy to spot the white tee you need or the black trousers you're looking for.
The payoff is a closet that feels calm, organized, and ready for action.
Pick Your Categories First
Before you touch a single hanger, decide which categories make sense for your wardrobe. Common ones include tops, bottoms, dresses, jackets, and sweaters. If you have a lot of activewear or work clothes, give them their own section.
The key is to keep categories broad enough to be useful but specific enough to prevent clutter.
Arrange Within Each Category
Once your categories are set, it's time to color-code. Start with whites and creams, then move through pastels, brights, and finally dark shades. This creates a smooth visual flow that's both pleasing and practical.
You'll naturally gravitate toward the color you're in the mood for, and outfit assembly becomes almost effortless.
Maintain The System Long-term
The hardest part is keeping it up after the initial reset. Make it a habit to return items to their correct category and color spot after washing. If you notice a category getting overcrowded, it's a sign to revisit your purge criteria.
A little maintenance goes a long way toward preserving that fresh wardrobe reset feeling.
10. Use Vertical Space
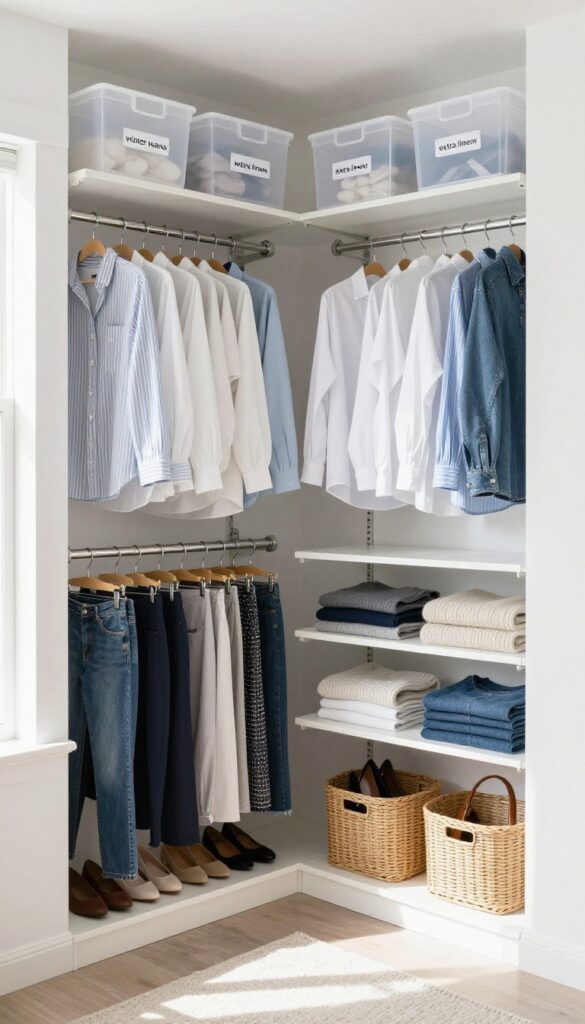
Most closets waste the vertical real estate above your main rod and below your hanging clothes. That empty air is prime storage territory. By adding a second rod, shelf risers, and stackable bins, you can double your usable space without adding a single square foot of floor area.
Vertical storage is the secret weapon of organized closets. It turns dead air into functional zones for folded items, shoes, and accessories. Start by assessing how much clearance you have above your current rod.
If you have at least 40 inches, you can install a second rod for shirts, blouses, and skirts. Below that, use stackable bins for off-season clothes or extra linens. Shelf risers lift your folded stacks so you can see everything at a glance.
The goal is to use every inch from floor to ceiling.
Double Your Hanging Space
A second rod is the easiest vertical upgrade. Measure the height between your existing rod and the shelf above. If it's 40 inches or more, install a tension rod or a fixed rod for shorter items.
This instantly creates two tiers: long items below, short items above. You'll be amazed how many more shirts and jackets fit.
Shelf Risers For Folded Items
Shelf risers are small platforms that lift your folded sweaters or jeans so you can store a second layer underneath. They're perfect for maximizing shelf space. Use them on closet shelves or inside cubbies.
They keep stacks neat and prevent the bottom items from getting lost.
Stackable Bins And Baskets
Stackable bins are great for shoes, handbags, or off-season clothes. Choose clear bins so you can see contents, or label them. Stack them on high shelves or on the floor.
They keep dust out and make it easy to rotate seasonal items. Just be sure to measure your shelf height before buying.
11. Store Shoes on Display
Shoes tend to pile up in dark corners or get shoved into bins where you forget what you own. When you can't see them, you end up buying the same black sneakers twice or ignoring a perfectly good pair of heels. Putting your shoes on display solves that problem instantly.
Open shelving or clear boxes turn your shoe collection into a visual inventory. You'll spot every pair at a glance, which makes it easier to rotate styles and actually wear what you have. Plus, seeing your shoes neatly arranged can feel like a mini boutique in your own home—and that little dopamine hit makes putting away shoes less of a chore.
Choose The Right Display Method
If you have floor space, a slim shoe bench or tiered rack works great for everyday pairs. For smaller closets, wall-mounted shelves or over-the-door organizers keep shoes visible without taking up floor area. Clear acrylic boxes stack neatly and protect delicate shoes while still letting you see them.
Group By Style Or Color
Arrange sneakers together, heels together, and boots together so you can grab what you need fast. Within each group, sort by color—neutrals first, then brighter shades. This system makes outfit pairing easier and keeps the display looking intentional rather than cluttered.
Rotate Seasonally
Keep only the current season's shoes on display. Store off-season pairs in clear bins under the bed or on high shelves. Rotating twice a year keeps your display manageable and ensures you're actually wearing what's visible.
12. Fold Heavy Knits
Sweaters and chunky knits are prone to stretching out when hung on hangers. The weight of the fabric pulls on the shoulders, leaving permanent bumps and misshapen silhouettes. Folding them on shelves not only preserves their shape but also frees up valuable hanging space for items that truly need it.
Folding heavy knits is a simple habit that extends the life of your favorite sweaters. Start by laying the sweater flat on a clean surface, smoothing out any wrinkles. Fold the sleeves inward, then fold the body in half or thirds, depending on the depth of your shelf.
Stack them loosely to avoid deep creases, and consider using shelf dividers to keep piles neat.
Why Hangers Are The Enemy Of Knits
Hangers create stress points at the shoulders, causing the fabric to sag over time. Even padded hangers can't fully prevent stretching for heavier knits. The constant pull also weakens the fibers, leading to pilling and distortion.
Shelves distribute the weight evenly, so your sweaters keep their intended shape.
How To Fold Chunky Sweaters Without Creases
For bulky knits, use the flat fold method: lay the sweater face down, fold one sleeve across the back, then the other. Fold the bottom up to the collar, then fold in half horizontally. If your shelf is narrow, try rolling instead—roll from the bottom up to minimize wrinkles.
Avoid stacking too high; three or four sweaters max per pile to prevent pressure marks.
Shelf Organization Tips For Knits
Group sweaters by weight or color to make mornings easier. Use clear bins or open cubbies for visibility. For deep shelves, place heavier knits at the bottom and lighter ones on top.
Add a cedar block or lavender sachet to keep moths away without harsh chemicals.
13. Use Drawer Dividers for Accessories
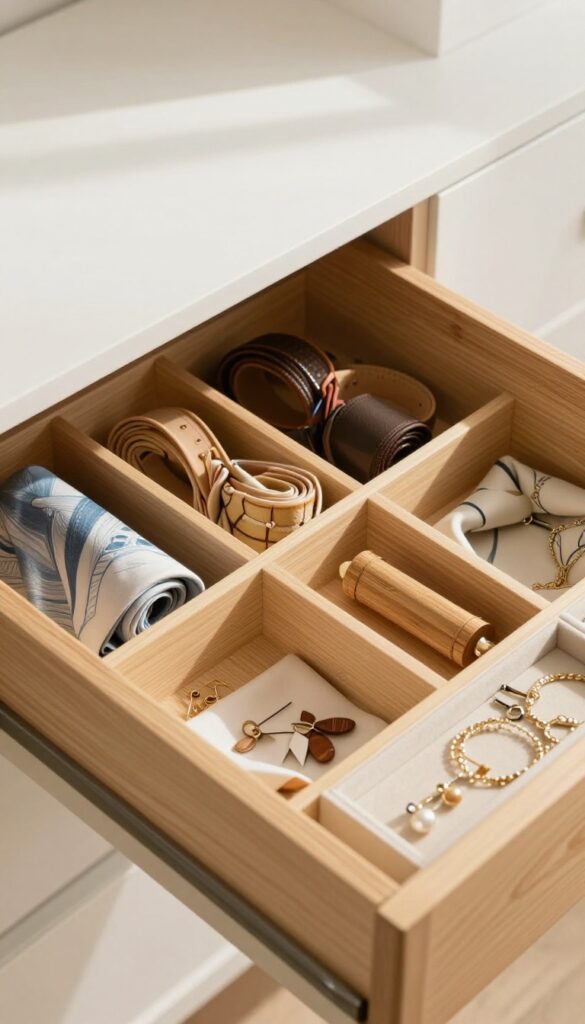
Belts, scarves, and jewelry have a way of turning into a knotted mess if you just toss them in a drawer. Drawer dividers are the simple fix that keeps everything organized and easy to grab. Once you have them in place, you'll wonder why you didn't do it sooner.
Choose The Right Dividers
Not all dividers are created equal. Adjustable bamboo or plastic ones let you customize compartments to fit your specific accessories. Measure your drawer first, then pick dividers that can be rearranged as your collection changes.
Sort By Type And Frequency Of Use
Group similar items together: belts in one section, scarves in another, and jewelry in smaller compartments. Place the accessories you reach for most often in the front. This way, you can grab what you need without rifling through everything.
Keep Delicate Items Safe
For necklaces and earrings, line the bottom of the compartment with a soft cloth or use a dedicated jewelry tray inside the divider. This prevents tangling and scratching. You'll never have to untangle a chain again.
14. Add a Full-Length Mirror
A mirror isn't just a closet accessory—it's a game-changer for making smarter clothing decisions. When you can see your full outfit before stepping out, you avoid those "I thought this looked good" moments. Plus, it keeps you honest during the decluttering process.
Placing a full-length mirror near your closet transforms how you evaluate each piece. You'll quickly spot items that don't fit well, are outdated, or just don't spark joy. It also makes getting dressed faster because you can mix and match in real time.
Choose The Right Spot
Hang the mirror where you have good lighting and enough space to step back. Inside a closet door works well, but an adjacent wall is even better if you have room. Avoid placing it where it reflects clutter—you want a clear view of your outfit.
Use It During The Purge
Try on questionable items in front of the mirror. If you find yourself adjusting or feeling uncomfortable, it's a sign to let it go. The mirror reveals fit issues that hangers hide.
Style Faster Each Morning
With a mirror nearby, you can quickly test combinations without running back and forth. Keep a small stool or hooks nearby for bags and accessories to complete the look.
15. Create a Capsule Wardrobe Zone
A capsule wardrobe isn't just a trend—it's a lifesaver for busy mornings. By setting aside a dedicated section for your most-worn basics, you eliminate decision fatigue and streamline your routine. This zone becomes your go-to for quick outfits, whether you're rushing to work or heading out on the weekend.
Designating a capsule wardrobe zone means choosing a specific area in your closet—like a shelf, a rod, or a drawer—for versatile pieces that mix and match easily. Think neutral tops, classic jeans, a blazer, and simple dresses. Keep this zone clutter-free so you can grab and go without second-guessing.
Choose Your Core Pieces
Start with 10 to 15 items that form the backbone of your style. These should be high-quality basics you wear often, like a white button-down, dark wash jeans, a little black dress, and comfortable sneakers. Stick to a cohesive color palette so everything works together.
Arrange For Visibility
Hang or fold these items so they're immediately visible. Use matching hangers or uniform bins to keep the zone tidy. Avoid stacking too many pieces—you want to see every option at a glance.
A clear view speeds up your morning routine.
Rotate Seasonally
Twice a year, swap out seasonal items. In spring, add lighter layers and breathable fabrics; in fall, bring in sweaters and boots. Keep the core zone lean—only what you actually reach for.
Store off-season pieces elsewhere to maintain the zone's efficiency.
16. Label Storage Bins
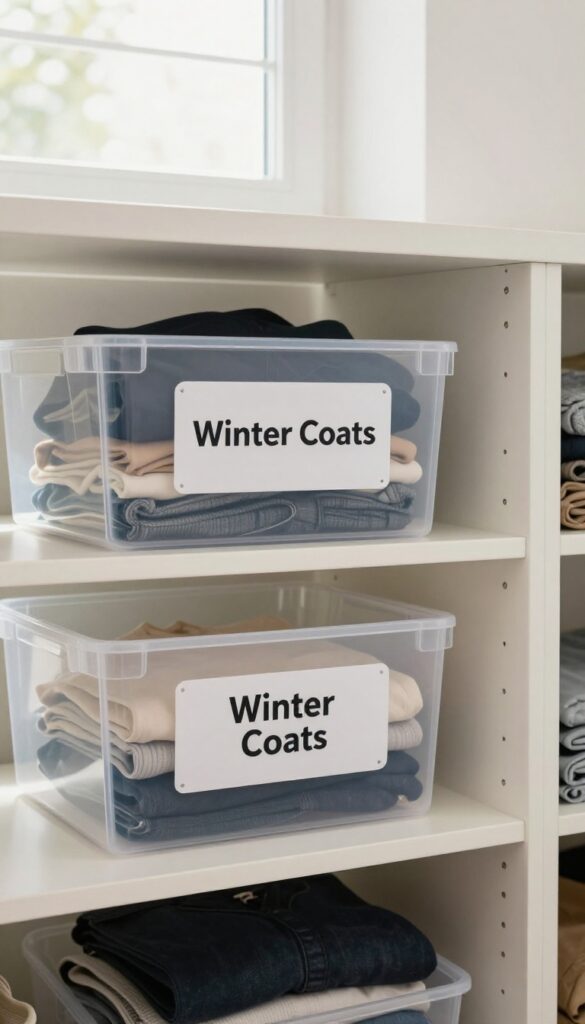
Labels aren't just for pantry organization. When you box up off-season clothes, sentimental pieces, or specialty gear, a clear label saves you from digging through every bin later. It's a small step that keeps your closet system running smoothly all year round.
Adding labels to your storage bins turns guesswork into instant knowledge. You won't have to unstack boxes or peek inside to find what you need. This simple habit keeps your closet organized and your seasonal swaps stress-free.
Choose The Right Labels
Pick labels that stick well to plastic or fabric bins. Waterproof and removable options work best. Use a label maker for a clean look, or write by hand with a permanent marker.
Either way, make sure the text is large enough to read from a distance.
Be Specific, Not Vague
"Winter coats" is better than "cold weather. " Include sizes, seasons, or occasions. For sentimental items, note what's inside like "Baby clothes – ages 0-3 months.
" The more detail you add, the less you'll have to hunt later.
Update Labels As Needed
When you swap bins out, change the label right away. Keep a small stash of blank labels handy. If you donate or sell items, remove the old label to avoid confusion.
Consistent updates keep your system reliable year after year.
17. Keep a 'Maybe' Box
Decision fatigue is real, especially when you're staring at a pile of clothes you haven't worn in years. Instead of forcing yourself to make a final call on every single item, give yourself permission to pause. A 'maybe' box buys you time and reduces the pressure of the purge.
Grab a sturdy box or bin and label it "Maybe. " Toss in anything you're genuinely on the fence about—that dress you wore once to a wedding, the jeans that might fit again someday, the sweater your aunt gave you. Seal it up and stash it somewhere out of sight, like under the bed or in the garage.
Set a reminder on your phone for three months. If you haven't gone digging for any of those items by the time the alarm goes off, you have your answer. Donate the entire box without opening it.
Trust the process—if you truly needed something, you would have missed it.
Why Three Months?
Three months is long enough to break the emotional attachment but short enough that you won't forget what's in there. It covers a full season, so you'll know if you actually reach for that lightweight jacket or those summer sandals. Any shorter and you might still be in the "I'll wear it next week" mindset.
Any longer and the box becomes part of the furniture.
What To Put In The Box
Not everything belongs in the maybe box. Only items you genuinely have mixed feelings about. If you haven't worn something in over a year and don't feel a twinge of guilt, skip the box and donate it directly.
The box is for the hard cases—sentimental pieces, expensive mistakes, or things that almost fit. Avoid tossing in basics like t-shirts or socks; those are easy to replace and not worth the mental energy.
The No-peek Rule
Once the box is sealed, resist the urge to open it. If you cheat and peek, you'll likely pull things back into your closet out of nostalgia or guilt. The whole point is to test whether you actually miss those items.
If you can't remember what's in there after a month, that's a strong sign you don't need it. Stay strong—your future self will thank you.
18. Use the One-In-One-Out Rule
Every time you bring a new piece into your closet, say goodbye to an old one. It's a simple pact that keeps your wardrobe from ballooning back to chaos. This rule forces you to think twice before buying and makes each new addition a deliberate choice.
The one-in-one-out rule is a commitment to balance. When you buy a new shirt, donate or sell an old shirt. This prevents your closet from creeping back to overflow and keeps your collection manageable.
It also makes you more mindful: if you can't find something to let go, maybe you don't need the new item.
Why It Works
This rule creates a natural cap on your wardrobe size. Without it, clothes accumulate silently. With it, every purchase has a cost—letting go of something you already own.
That friction reduces impulse buys and keeps your closet from becoming a storage unit.
How To Start
Pick a category—like tops or shoes—and apply the rule there first. Keep a donation bag handy so you can immediately bag the outgoing item. If you're torn, ask yourself: 'Would I rather have this new piece or keep the old one? ' The answer often clarifies.
When To Break It
Exceptions exist: replacing worn-out basics (like underwear or socks) doesn't require a one-out. Also, if you're building a capsule wardrobe, you might need a temporary expansion. But for most items, stick to the rule to maintain a fresh, functional closet.
19. Install a Hooks or Valet Rod
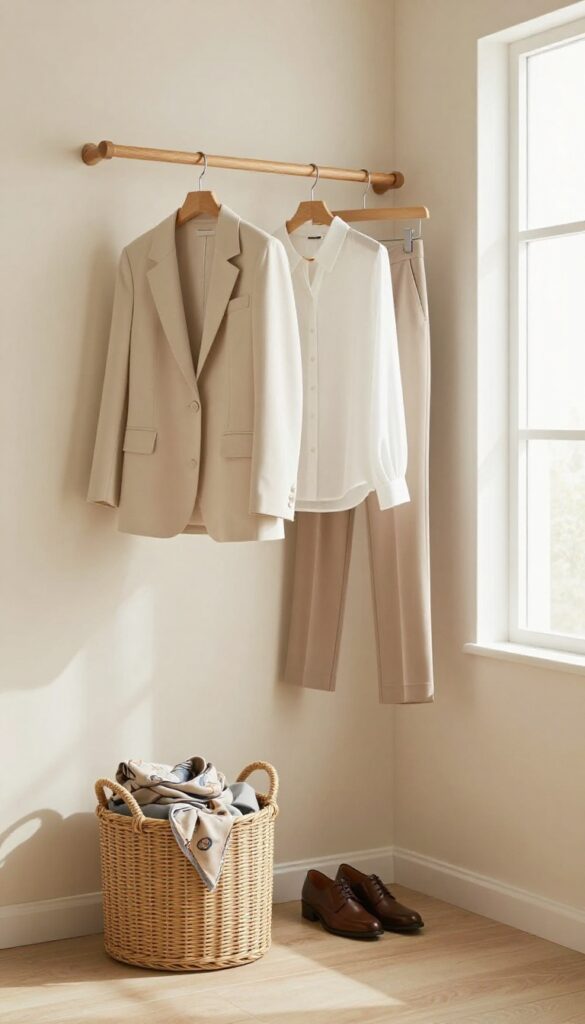
Morning rush is real, and nothing kills momentum like digging through a pile of clothes you just wore. A simple hook or valet rod gives you a dedicated spot for tomorrow's outfit or items that aren't dirty enough for the laundry. It's a small upgrade that saves time and keeps your floor clean.
A hook or valet rod solves two common problems: where to hang your "wear again" clothes and how to plan outfits ahead. Instead of draping jeans over a chair or tossing a sweater on the bed, you have a designated space. This keeps your closet organized and your mornings smooth.
Choose The Right Spot
Place a hook on the back of your closet door or on an empty wall near your dresser. For a valet rod, install it inside your closet or on a wall where you can see it. The goal is easy access without cluttering your main hanging space.
Use It For Outfit Planning
Each evening, hang your next day's outfit on the hook or rod. This eliminates morning decision fatigue and ensures you look put together. You can also use it to coordinate accessories or shoes.
Keep Worn-once Items Off The Floor
Jeans, hoodies, or jackets that you've worn briefly and plan to re-wear can go on the hook. This prevents them from ending up on the floor or chair, keeping your room tidy and your clothes fresh.
20. Digitize Your Closet
Your phone can become your closet's best friend. Apps like Stylebook or Cladwell let you photograph and catalog every item you own. Once everything is digital, you can mix and match outfits without pulling clothes off hangers.
It's like having a personal stylist in your pocket.
Snap And Sort
Start by taking flat-lay photos of each piece against a neutral background. Group them by category—tops, bottoms, dresses, shoes. Most apps let you remove backgrounds, so your clothes appear as clean icons.
This step takes an afternoon but pays off every time you get dressed.
Plan Outfits Visually
The real magic comes when you start building outfits. Drag and drop items onto a virtual mannequin or calendar. You'll see combinations you never noticed before.
Planning outfits for the week ahead reduces morning stress and helps you wear more of what you own.
Avoid Duplicate Buys
Ever bought a black turtleneck only to find three already in your closet? A digital catalog prevents that. Before you shop, check your app to see what you already have.
You can also track how often you wear each item, making it easier to decide what to keep or donate.
21. Repair Before You Toss
Before you throw that shirt with a missing button or those jeans with a loose hem into the donation pile, stop. A quick fix might be all they need. Small repairs are easier than you think and can save you money while reducing waste.
Learning a few basic sewing skills pays off. You don't need to be a tailor—just know how to reattach a button, stitch a small tear, or tighten a loose button. Many dry cleaners offer affordable alterations for trickier fixes like zippers or hemming.
Set aside a "repair day" once a season to go through your closet and tackle any damage. You'll be surprised how many pieces you can save.
The Button Fix
Buttons are the easiest repair. Keep a small sewing kit with matching thread and extra buttons. A missing button doesn't mean the shirt is ruined—it just needs five minutes of attention.
If you don't have a spare, steal one from the bottom of the shirt or an inside seam.
Zippers And Seams
A stuck zipper can often be fixed with a little soap or wax. If the slider is misaligned, a pair of pliers can gently squeeze it back into place. For ripped seams, a simple running stitch will hold until you can get it professionally done.
Don't let a small tear turn into a big one.
When To Let Go
Some repairs aren't worth it—like extensive moth damage or stains that won't come out. Be honest with yourself. If the cost of repair exceeds the value of the item, or if you haven't worn it in years, it's okay to let it go.
But for beloved basics, a quick fix is a win.
22. Donate Strategically

Not all donation bins are created equal. When you drop off bags at random drop boxes, you never really know where those clothes end up. Some get sold for profit, others get shipped overseas and harm local economies.
If you want your gently used pieces to actually help people, a little research goes a long way.
Take fifteen minutes to look up local shelters, thrift stores run by nonprofits, or clothing drives in your area. Many organizations have specific needs—warm coats in winter, professional attire for job interviews, or children's clothes in certain sizes. Matching your donations to those needs makes a real difference.
Some charities even offer free pickup, which means you can clear out bags without leaving your house.
Find The Right Fit
Start by searching for "clothing donation pick up near me" or check websites like Dress for Success, Goodwill, or The Salvation Army. Smaller local shelters often appreciate basics like socks, underwear, and plain T-shirts more than trendy pieces. Call ahead to ask what they currently need most.
Prepare Your Items
Wash everything before donating. Fold or bag items neatly—no one wants to sort through musty piles. Check for stains, holes, or excessive wear; if you wouldn't give it to a friend, don't donate it.
Torn or stained items can go to textile recycling instead.
Schedule A Pickup
Many charities let you book a pickup online. You leave labeled bags on your porch or curb, and they handle the rest. This removes the friction of hauling heavy bags to a drop-off, making it easier to actually follow through with your donation pile.
23. Sell High-Value Items
Not everything you purge has to go to waste. If you've got designer handbags, barely worn shoes, or vintage denim that's still in great shape, selling them can turn clutter into cash. The extra money can fund new wardrobe staples or just treat yourself to something nice.
Know What's Worth Selling
Before you list anything, check sold prices on platforms like Poshmark or eBay. Look for items with brand recognition, timeless styles, or rare finds. Generally, pieces that cost over $50 retail or have a strong resale market (like designer shoes, leather jackets, or silk blouses) are worth the effort.
If it's fast fashion with visible wear, it's probably better to donate.
Choose The Right Platform
Poshmark is great for clothing and accessories, especially mid-range brands. Depop appeals to a younger crowd and vintage lovers. eBay works well for luxury items or bundles. For high-end designer pieces, consider The RealReal or Vestiaire Collective—they handle authentication and listing, but take a bigger cut.
Match your item to the platform's audience for faster sales.
Photograph Like A Pro
Good photos make or break a sale. Use natural light, a plain background, and show multiple angles. Include close-ups of tags, fabric, and any flaws.
Flat lays or mannequin shots look more professional than wrinkled piles. Honest photos build trust and reduce returns.
Price Strategically And Ship Smart
Price slightly higher than your minimum to leave room for offers. Research similar listings to stay competitive. Offer bundle deals to move multiple items.
For shipping, use flat-rate priority mailers or the platform's label—it's often cheaper. Ship within two days and include a thank-you note for repeat buyers.
24. Schedule a Seasonal Reset
Clutter has a sneaky way of creeping back in. Before you know it, that perfectly organized closet starts looking messy again. The fix is simple: put a recurring date on your calendar for a quick closet check-in.
A 30-minute seasonal reset every three months keeps your wardrobe fresh and functional. It’s not a full overhaul—just a light review to catch what’s drifted off course.
Why Seasonal Works Best
Seasons naturally shift what you wear. A spring reset lets you pack away heavy coats and bring out lighter layers. Fall is perfect for swapping sandals for boots.
Aligning your review with nature’s rhythm makes the task feel logical, not forced.
What To Check In 30 Minutes
Set a timer and focus on three things: pull out anything you didn’t wear last season, spot items with stains or damage, and confirm your go-to pieces are still in rotation. Don’t overthink—just be honest about what you actually reach for.
Make It A Habit, Not A Chore
Pair your reset with something you already enjoy, like listening to a podcast or having a cup of coffee. After two or three cycles, it becomes second nature. Your future self will thank you every morning.
25. Celebrate Your Progress

You did it. The closet is clean, organized, and full of only the pieces you truly love. Before you rush off to your next task, take a beat to soak it all in.
Acknowledging your hard work isn't just nice—it's a powerful way to lock in the new habit.
When you pause to appreciate your tidy closet, you reinforce the effort it took to get there. That positive feeling makes you more likely to keep it that way. Plus, it turns a chore into a small victory worth repeating.
Take A Photo
Snap a picture of your freshly organized closet. Not for social media—for you. This visual reminder of how good it looks will motivate you to maintain the order.
When clutter starts creeping back, one look at that photo can reset your resolve.
Enjoy The Morning Routine
The next morning, pick out an outfit with zero stress. Notice how easy it is to find what you need and how much time you save. Let that smooth experience be your reward.
A few days of this will solidify your new habits.
Share The Win
Tell a friend or family member about your accomplishment. Sharing positive changes helps them stick. You might even inspire someone else to tackle their own closet.
Celebrating together makes the effort feel even more worthwhile.
FAQ
How often should I clean out my closet?
Aim for a deep clean once or twice a year, with a quick seasonal refresh every three months. This keeps clutter from building up.
What should I do with clothes I don't wear but can't part with?
Store them in a 'maybe' box for three months. If you don't reach for them, it's time to donate or sell.
How do I decide what to keep?
Keep only items that fit well, make you feel confident, and get worn regularly. If it's torn, stained, or outdated, let it go.
What's the best way to organize a small closet?
Use vertical space with double rods and shelf risers. Slim hangers, clear bins, and drawer dividers maximize every inch.
Should I keep clothes that might fit again?
It's better to keep only what fits now. Holding onto 'someday' clothes adds clutter and guilt. Focus on your current body and style.
Conclusion
A wardrobe reset isn't about tossing everything you own—it's about curating a closet that actually works for your daily life. Start with just one or two tips from this list, like the hanger trick or the one-year rule, and see how much lighter your mornings feel. Remember, you don't have to do it all in one weekend.
Small, consistent steps add up to a wardrobe that sparks joy every time you open the door. Pick what resonates, take it slow, and enjoy the fresh start.


