
You open the cupboard under the sink and a bottle of all-purpose spray topples out, followed by a cascade of scrub brushes. Sound familiar? The cleaning cupboard is often the most chaotic spot in the house, yet it's the one you need most when messes happen.
A well-organized cupboard saves time and frustration. No more digging through piles of rags or knocking over half-empty bottles.
With a few simple tweaks, you can turn that jumble into a space where everything has a place and you can actually see what you own. These 15 hacks focus on real problems: wobbly shelves, tangled spray nozzles, and forgotten products buried in the back.
1. Use Tension Rods to Hang Spray Bottles
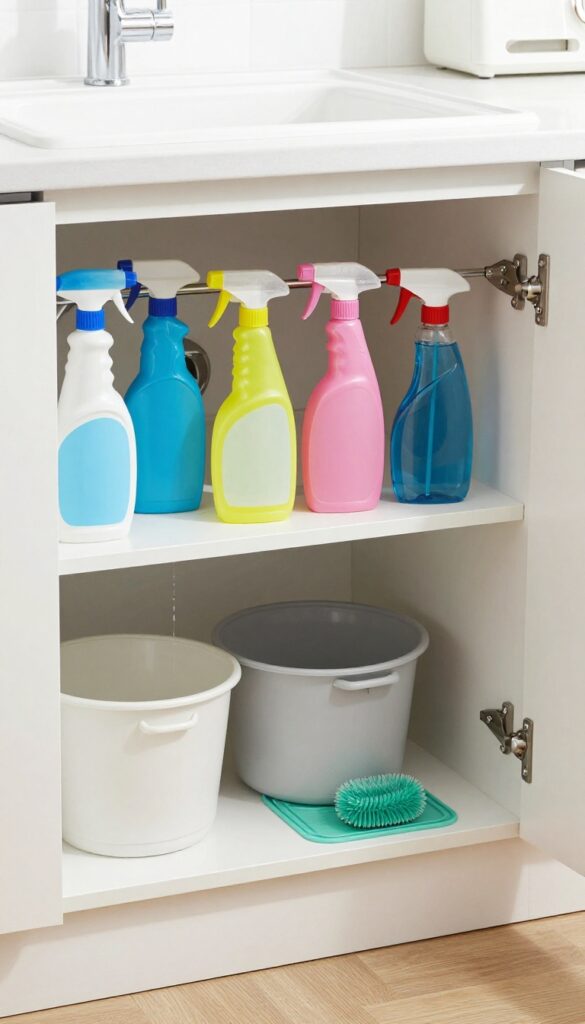
Spray bottles are notorious for taking up shelf space and tipping over. A simple tension rod changes that. Install one horizontally under the sink and hang bottles by their triggers.
It's a zero-cost fix if you already have a rod, and it instantly clears shelf real estate.
This hack works best with standard trigger spray bottles. Adjust the rod height so bottles hang straight without touching the bottom. Group by type: all-purpose cleaners on one rod, glass cleaners on another.
For deep cabinets, use two rods in a row to double capacity.
Choosing The Right Rod
Look for a tension rod that extends to your cabinet width. Spring-loaded rods work well, but make sure they have rubber ends to grip the sides without slipping. A rod rated for at least 10 pounds is plenty for a few bottles.
Maximizing Vertical Space
If your cabinet is tall, install the rod at mid-height. Use the lower shelf for bulky items like buckets or scrub brushes. The rod keeps spray bottles off the shelf entirely, so that space stays clear for other gear.
Preventing Drips
Place a small tray or mat under the hanging bottles to catch any drips. A silicone baking mat works great—it's easy to wipe clean. This keeps the cabinet floor dry and prevents rust or water stains.
2. Add a Small Shelf Above the Door
That empty space above the inside of the cupboard door is prime real estate. Most people ignore it, but a narrow shelf there can hold lightweight items you use often. Think microfiber cloths, gloves, or small brushes.
It keeps them handy without cluttering your main shelves.
Mounting a small shelf on the inside of the cupboard door is a clever way to add storage without losing any floor or shelf space. You can buy a ready-made over-door shelf or make one from a piece of wood and a few brackets. Just make sure it's shallow enough that the door can still close properly.
Use it for items you grab frequently, like dusting cloths or scrub brushes. This way, you're not digging through a pile every time you need a quick clean.
What To Store
Stick to lightweight items that you reach for often. Microfiber cloths, cleaning gloves, small scrub brushes, and even spray bottles with trigger locks work well. Avoid heavy bottles or bulky items that could strain the shelf or make the door hard to close.
Installation Tips
Use adhesive hooks or small brackets that attach to the door panel. Make sure the shelf is level and secure. If the door is hollow, use toggle bolts or adhesive strips rated for the weight.
Measure the door's clearance before buying or building to ensure the shelf won't hit the frame.
Alternative Ideas
If a shelf isn't your style, try a mesh pocket organizer that hangs over the door. It's even easier to install and can hold similar items. Or use magnetic strips to hold metal tools like tweezers or small scissors.
3. Repurpose a Shoe Organizer for Cleaning Supplies
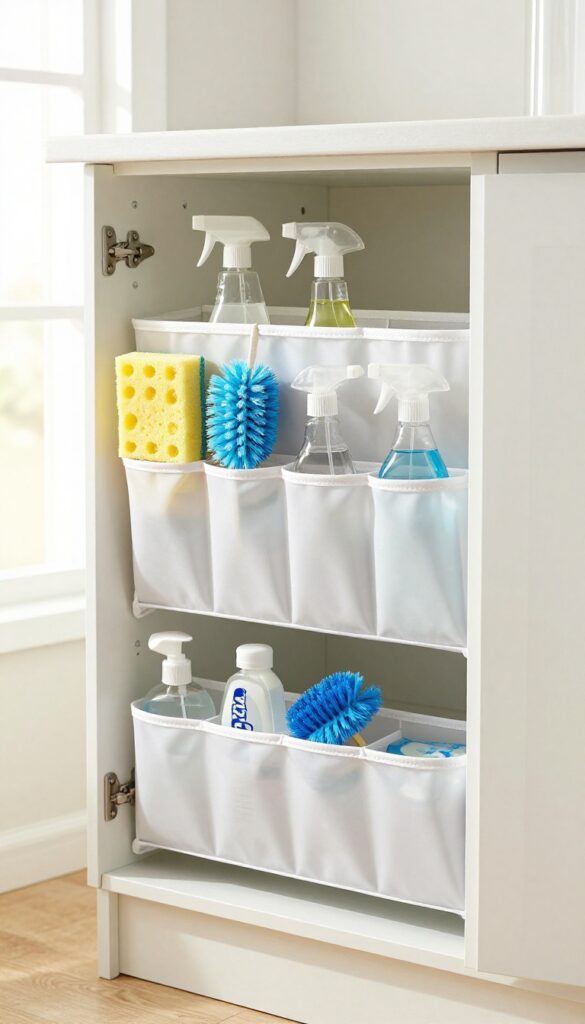
That over-the-door shoe organizer you were about to donate? It might be the best cleaning cupboard upgrade you never thought of. Hanging one on the back of the cupboard door turns wasted vertical space into a perfectly segmented storage system for all those odds and ends that usually clutter your shelves.
A clear, over-the-door shoe organizer with pockets is ideal for keeping small cleaning items visible and within reach. Each pocket can hold a different category: sponges in one, scrub brushes in another, and smaller bottles like glass cleaner or disinfectant wipes in the rest. This keeps everything off the shelves, freeing up space for larger bottles and supplies.
Choose The Right Organizer
Look for a clear, breathable mesh or vinyl organizer with pockets deep enough to hold standard spray bottles. Avoid fabric organizers that hide contents—you want to see what's where. A 24-pocket version usually fits most standard cupboard doors without blocking the latch.
Sort And Assign Pockets
Group items by frequency of use. Top pockets for daily grab-and-go items like all-purpose spray and microfiber cloths. Middle pockets for sponges and scrub brushes.
Bottom pockets for rarely used items like specialty cleaners or extra gloves. Label each pocket with a marker or small tag for quick identification.
Install Without Damage
Most over-the-door organizers come with hooks that slip over the top of the door. If your cupboard door is too thick or the gap is tight, use adhesive hooks instead. Just make sure the organizer doesn't drag on the floor or block the door from closing fully.
4. Use Binder Clips to Hang Rags and Towels
Rags and towels always seem to multiply in the cleaning cupboard, ending up in a damp, tangled heap. Binder clips offer a dirt-cheap fix. Clip a few onto a wire shelf or a tension rod, and you’ve got instant hooks for hanging cloths.
They stay aired out, visible, and ready to grab—no more digging through a pile to find a dry one.
Binder clips are one of those items you probably already have in a desk drawer. They’re strong enough to hold a damp towel without slipping, and the metal loops create a perfect hook for hanging. Attach them to the edge of a wire shelf, a cabinet rod, or even a command hook installed on the inside of the door.
Then just loop the corner of your rag through the clip’s handles. The cloth stays open to air dry, and you can see exactly which ones are clean and which are used.
Where To Place Them
The best spot is a wire shelf or a tension rod near the front of the cupboard. That way, you can grab a rag without moving other items. If you have a deep cabinet, attach clips to the underside of the shelf above—this keeps cloths out of the way but still accessible.
For a quick setup, stick a few command hooks on the inside of the cupboard door and clip the binder clips onto those.
Pro Tip: Color Code Your Clips
Use different colored binder clips to separate rags by use. Blue clips for glass cleaning, red for kitchen counters, green for bathroom surfaces. This keeps cross-contamination in check and makes it obvious which cloth to grab.
You can even clip a small label to the shelf above each cluster so everyone in the household knows the system.
Bonus: Hang Sponges And Brushes Too
Binder clips aren’t just for fabric. Clip a sponge by its scrubby side to let it drip dry. Or clip a scrub brush by the handle hole.
This keeps them off the shelf, prevents mildew, and frees up space for other items. Just make sure the clip is large enough to hold the weight—standard 1-inch clips work for most sponges.
5. Install a Magnetic Strip for Metal Tools
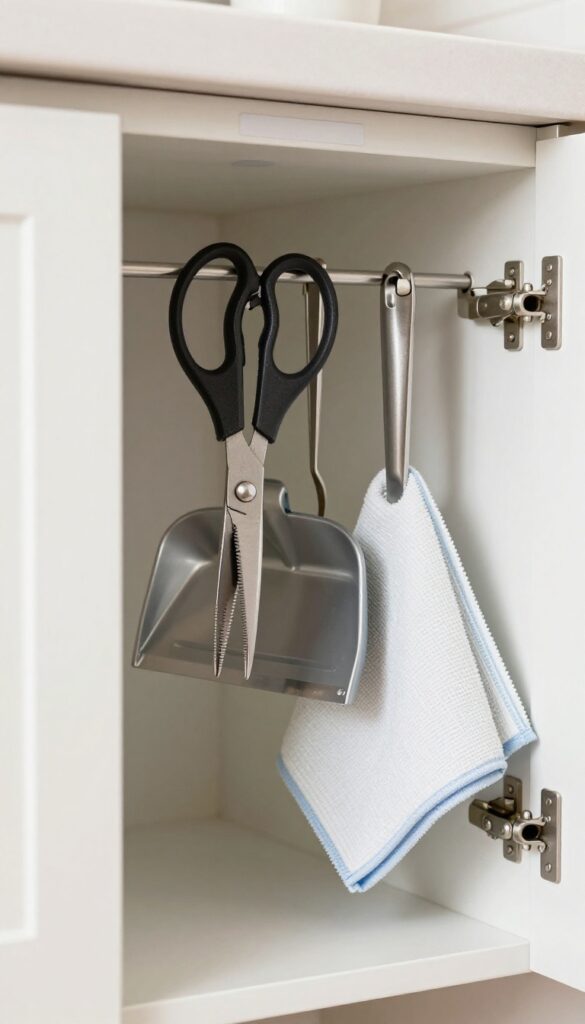
Scissors, tweezers, small dustpans, and even some spray bottles have metal parts that can be held in place with a simple magnetic strip. Instead of letting these items rattle around in a drawer or take up shelf space, mount a strip on the inside wall of your cupboard. It’s a zero-footprint solution that keeps frequently used tools right where you need them.
Where To Place The Strip
Pick a spot on the inside of the cupboard door or on a side wall that’s easy to reach. For under-sink cabinets, the back wall works well, but make sure it’s not blocked by pipes. Measure the length of your longest tool to ensure the strip is long enough.
What To Store On It
Metal scissors, tweezers, needle-nose pliers, small dustpans, and even metal bottle openers. You can also attach a small magnetic hook to hold a microfiber cloth or a pair of rubber gloves. Avoid storing anything too heavy, like a full metal spray bottle, as it might slide off.
Installation Tips
Most magnetic strips come with adhesive backing or screws. For a rental-friendly option, use strong double-sided tape or command strips. Clean the surface with rubbing alcohol before applying to ensure a secure hold.
Test the strip with your heaviest tool before loading it up.
6. Group Products by Task in Clear Bins
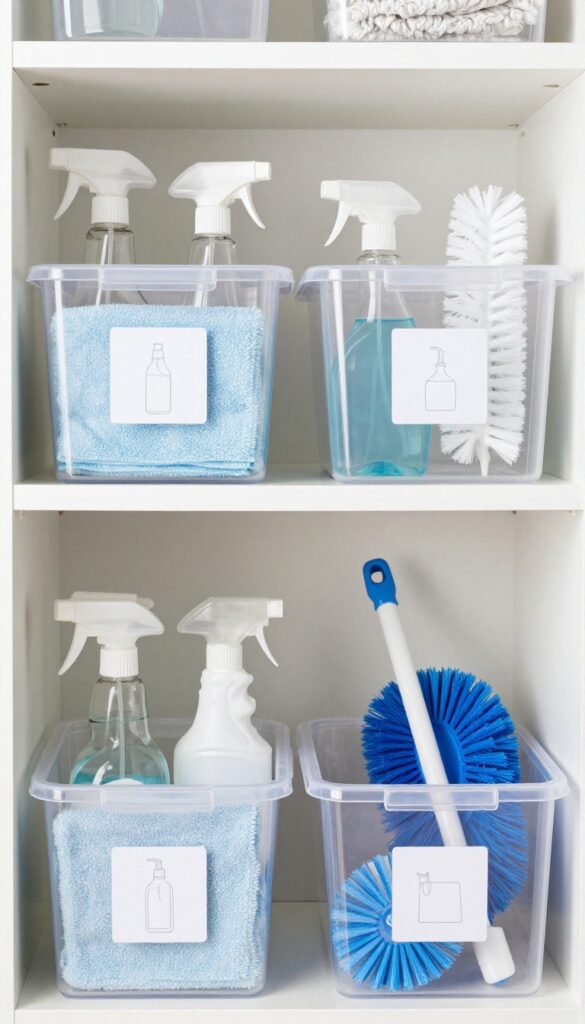
One of the fastest ways to cut down on rummaging is to stop storing everything in one big pile. Instead, sort your supplies by where they're used. Clear bins make it easy to see what's inside without pulling everything out, and labeling each bin means you can grab the right kit and go.
Grouping by task turns your cupboard into a grab-and-go station. You'll never again have to search for the glass cleaner when you're halfway through wiping down mirrors. Plus, clear bins keep bottles upright and prevent leaks from spreading to other products.
Choose The Right Bins
Look for shallow, rectangular bins that fit your shelf depth. Clear plastic is best—you can see contents at a glance. Avoid bins with lids unless you're storing powders or tablets; open bins are easier to access daily.
Label Clearly And Consistently
Use a label maker or simple adhesive labels. Write the task name in plain language: "Kitchen, " "Bathroom, " "Glass & Mirrors, " "Floors. " If you share the cupboard, add a small icon or color code for extra clarity.
Keep A "daily" Bin Handy
Designate one bin for the products you use most often—all-purpose spray, microfiber cloth, and a scrub brush. Place it at the front of the shelf. Rotate less-used bins to the back or a higher shelf.
7. Add a Lazy Susan for Corner Cupboards
Corner cupboards and deep shelves are notorious for swallowing bottles whole. You know the drill: you buy a new cleaner, stash it in the back, and forget it exists until you move out. A lazy Susan changes that completely.
It spins, so everything comes to you.
A lazy Susan turns dead space into a functional storage hub. No more twisting your arm or crawling halfway into the cupboard. Just give it a spin and grab what you need.
It works best for round or square turntables that fit your shelf dimensions. Measure first, then pick one with a lip to keep bottles from sliding off during rotation.
Pick The Right Size And Material
Measure the depth and width of your shelf before buying. A turntable that's too small wastes space; one that's too big won't spin freely. Look for a sturdy plastic or bamboo lazy Susan with a non-slip surface.
Bamboo looks nice and holds up to moisture, but plastic is easier to wipe clean if something leaks.
Group Products By Frequency Of Use
Place daily-use items like all-purpose spray and dish soap on the lazy Susan. Store rarely used bottles elsewhere. That way, you spin only the essentials.
If you have two turntables, use one for daily cleaners and another for backups or specialty products.
Pair With Tiered Risers For Double The Space
A lazy Susan is great, but it only uses one level. Add a small tiered riser on top of the turntable to store smaller bottles or sponges above the taller ones. This doubles your vertical storage without losing the spin function.
Just make sure the riser is stable and doesn't block the rotation.
8. Use a Tension Rod to Hang Trash Bags
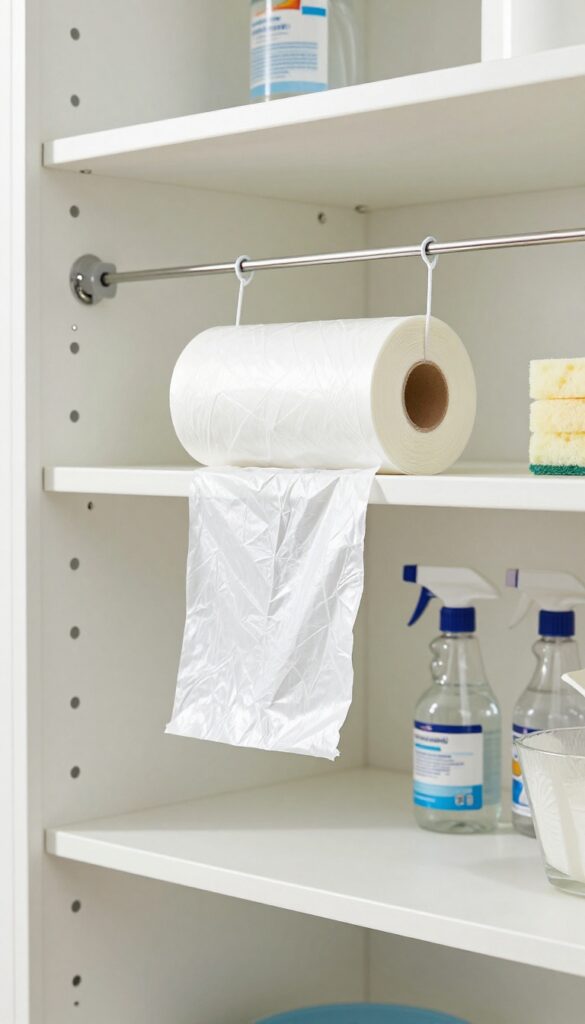
Trash bag rolls are notorious for rolling away or getting buried under other supplies. A simple tension rod can turn that roll into a neat dispenser that's always ready when you need it. No more wrestling with a tangled plastic sleeve while your hands are full.
Mount a tension rod either vertically between two shelves or horizontally under a shelf. Slide a roll of trash bags onto the rod, and you can tear off bags one at a time without pulling the whole roll out. This hack works best with standard kitchen trash bag rolls, but you can also use it for smaller bags like recycling or bathroom bin liners.
The rod keeps the roll secure and accessible, and you can easily replace it when empty.
Vertical Vs. Horizontal Mounting
Vertical mounting works well in tall, narrow cupboards where you have space between shelves. The bags hang like a curtain, and you can tear them off from the bottom. Horizontal mounting is better under a shelf or in a shallow cabinet, where the roll sits parallel to the shelf edge.
Both methods keep the roll contained and stop it from unspooling on its own.
What To Do With The Loose Bags
If you have a stash of loose trash bags (like those from grocery shopping), you can still use this hack. Simply roll them up into a tight cylinder and secure with a rubber band before threading onto the rod. Or, use a small binder clip to attach the loose bags to the rod itself.
Either way, you get the same grab-and-go convenience.
9. Store Vacuum Attachments in a Pencil Holder
Vacuum attachments are the worst when it comes to rolling around. You open the cupboard and a crevice tool clatters out, followed by a dusting brush that disappears behind the bleach. Keeping them upright stops the chaos.
A wide-mouth jar or a sturdy pencil holder works perfectly. Just drop each attachment in handle-first so the bristles or narrow tips stay clean and accessible. No more digging through a tangled mess of hoses and wands.
Choose The Right Container
Look for something heavy enough not to tip over. A ceramic pencil cup, a mason jar with a wide mouth, or even a repurposed coffee can works. Make sure it's tall enough to hold the longest attachment without sticking out too much.
Group By Frequency Of Use
Keep the attachments you use weekly—like the crevice tool and dusting brush—in the holder. Store specialty attachments (upholstery tool, turbo brush) elsewhere, labeled or in a separate bin. That way the holder stays neat and you grab what you need fast.
Place It Near The Vacuum
Put the holder right next to where you store your vacuum, whether that's in the cupboard or a closet. If your vacuum lives in a corner, mount the holder on the wall with adhesive strips so it doesn't take up floor space.
10. Use a Paper Towel Holder for Plastic Wrap and Foil
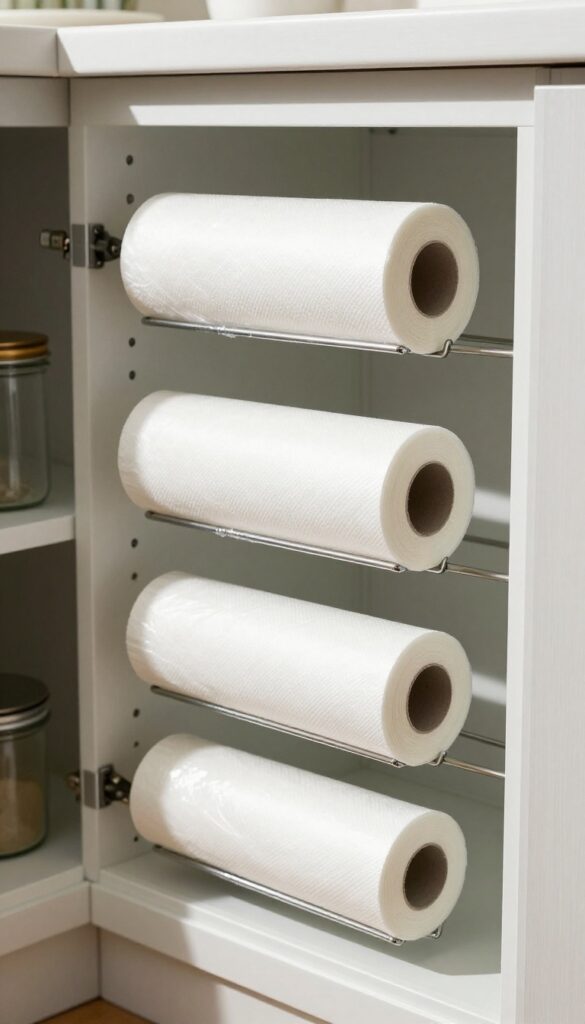
Rolls of plastic wrap, foil, and parchment paper are notorious for sliding around and unraveling inside cupboards. A simple paper towel holder mounted on the inside of a cabinet door or wall can corral them neatly. This hack keeps rolls accessible and prevents that frustrating hunt for the end of the roll.
Why It Works So Well
Paper towel holders are designed to hold a cylindrical roll and allow easy tearing. By repurposing one for your food wraps, you eliminate the need for bulky boxes or drawers. The holder keeps each roll in place, so you can pull out just what you need without the whole roll falling out.
How To Set It Up
Choose a sturdy adhesive or screw-mounted paper towel holder that can support the weight of multiple rolls. Mount it on the inside of a cupboard door or on a wall inside the cupboard. Slide your rolls of plastic wrap, foil, and parchment paper onto the holder.
If the holder is too long for one roll, stack two rolls side by side.
Extra Tips For Best Results
For even easier access, store the rolls with the edge facing outward so you can grab the end without fumbling. If you have a deep cupboard, position the holder near the front. You can also use a tension rod inside a cupboard to hang rolls vertically, but a dedicated holder is more stable.
11. Add a Small Trash Can Inside the Cupboard
Tossing used wipes, dryer sheets, or empty packaging into a distant bin across the kitchen is a hassle. You end up leaving them on the counter, creating clutter. A slim trash can tucked right inside your cleaning cupboard solves that instantly.
A small bin inside the cupboard catches disposable waste as you work, keeping counters clear and your workflow smooth. It also prevents stray wrappers from hiding under bottles or behind products.
Choose The Right Size And Style
Look for a narrow, rectangular bin that fits beside bottles or under a low shelf. A 2- to 4-gallon can is usually enough for daily cleaning waste. A swing-top or step lid keeps odors contained and looks tidy.
Place It For Easy Access
Position the bin near the front of the cupboard so you can toss trash without reaching deep. If the cupboard is under the sink, put it on the door or side wall using adhesive hooks or a small hanging bin. That way it stays out of the way but is always handy.
Line It And Empty Often
Use small trash bags or even reused grocery bags to line the bin. Empty it weekly or whenever it gets full—damp wipes and dryer sheets can get musty. A quick wipe-down keeps the bin fresh.
12. Use a Spice Rack for Small Bottles
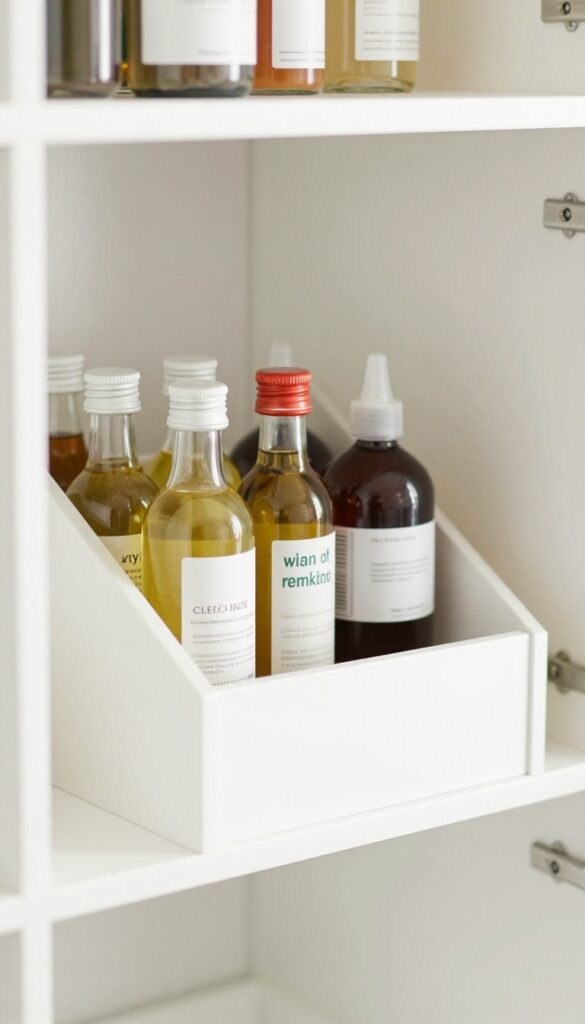
Small bottles are the worst offenders when it comes to cupboard chaos. They tip over, roll behind larger containers, and get lost in the shuffle. A simple spice rack can solve that problem without taking up much space.
Mount a small spice rack on the inside of your cupboard door to corral tiny bottles of essential oils, stain removers, or polish. This keeps them visible and accessible, and frees up shelf space for bigger items.
Choose The Right Rack
Look for a spice rack with tiered shelves or individual slots to keep bottles upright. Measure your door clearance first to make sure the rack won't hit the shelves when closed. Adhesive or screw-mount options work fine.
Group By Use
Arrange bottles by category: cleaning oils on one tier, stain treatments on another. This makes it easy to grab what you need without rummaging. Label the rack if you share the cupboard with others.
Secure Bottles
If your rack has open slots, add a small rubber band or adhesive strip to prevent bottles from sliding out when you open and close the door. This is especially helpful for tall, narrow bottles.
13. Label Everything Clearly
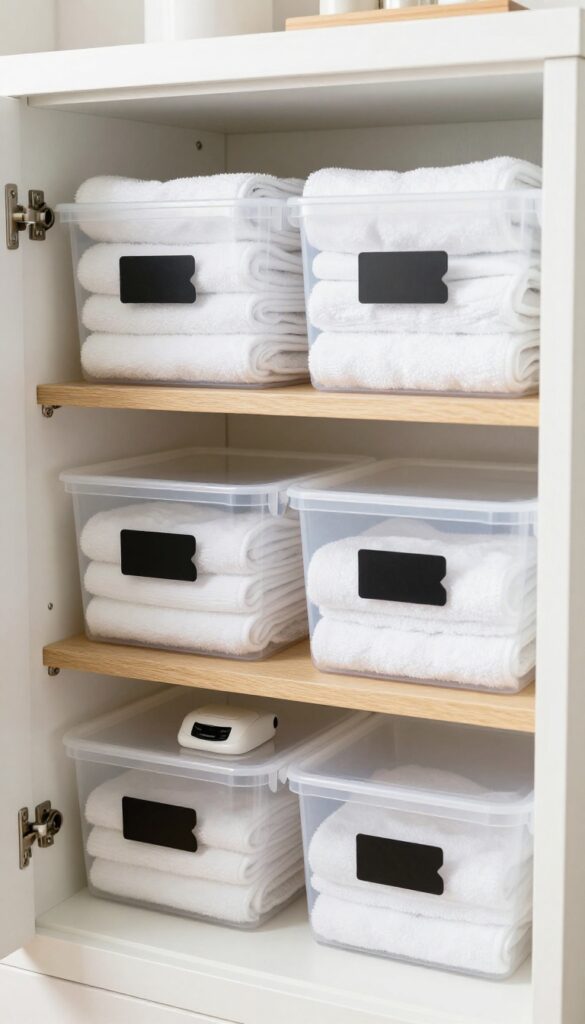
Labels turn a chaotic cupboard into a system anyone can follow. When every bin, basket, and shelf has a clear label, you never have to guess where the glass cleaner goes or wonder if that spray bottle is bleach or all-purpose. A few minutes with a label maker or a set of chalk labels can save you from grabbing the wrong product mid-scrub.
Why Labels Matter More Than You Think
Labels aren't just for looks—they create a visual map of your cupboard. When you're in a hurry, you don't want to read tiny print on bottles. A bold label on the bin or shelf tells you exactly what belongs there.
Plus, if you share the space with family or roommates, labels make it easy for everyone to put things back where they found them.
Best Labeling Tools For The Job
A label maker gives crisp, waterproof labels that stick for years. If you prefer a softer look, chalk labels let you write and rewrite as your stash changes. For quick fixes, use masking tape and a permanent marker—just replace the tape when it gets grimy.
Whichever method you choose, stick to a consistent font or handwriting style so the system feels cohesive.
Where To Place Your Labels
Put labels on the front edge of shelves so they're visible when you open the door. For bins and baskets, label the side that faces you. If you store items in clear containers, a small label on the lid works well.
Don't forget to label the inside of the cupboard door with a master list of what's inside—handy for quick inventory checks.
14. Install a Pull-Out Drawer for Deep Cabinets
Deep cabinets are notorious for swallowing up your cleaning supplies. You know there's a bottle of stain remover in there somewhere, but reaching it means moving everything else first. A pull-out drawer changes the game entirely.
By adding a sliding wire drawer, you transform that dark abyss into a functional, accessible space. No more kneeling and groping around. Just pull the drawer and grab what you need.
Why Wire Drawers Work Best
Wire drawers allow air to circulate, which helps prevent moisture buildup from damp bottles or spills. They also let you see through the bottom, so nothing gets hidden underneath. Plus, they're lightweight and easy to install.
Measuring And Installation Tips
Measure the width, depth, and height of your cabinet before buying. Most pull-out drawers come in standard sizes, but you can find adjustable options. Installation usually involves screwing the drawer slides into the cabinet floor or sides.
Make sure the drawer clears the cabinet door when closed.
What To Store In Your Pull-out Drawer
Use it for heavy or frequently used items like spray bottles, multipurpose cleaners, and scrub brushes. Keep smaller items like sponges and gloves in bins inside the drawer to prevent them from shifting around.
15. Use a Pegboard for Customizable Storage
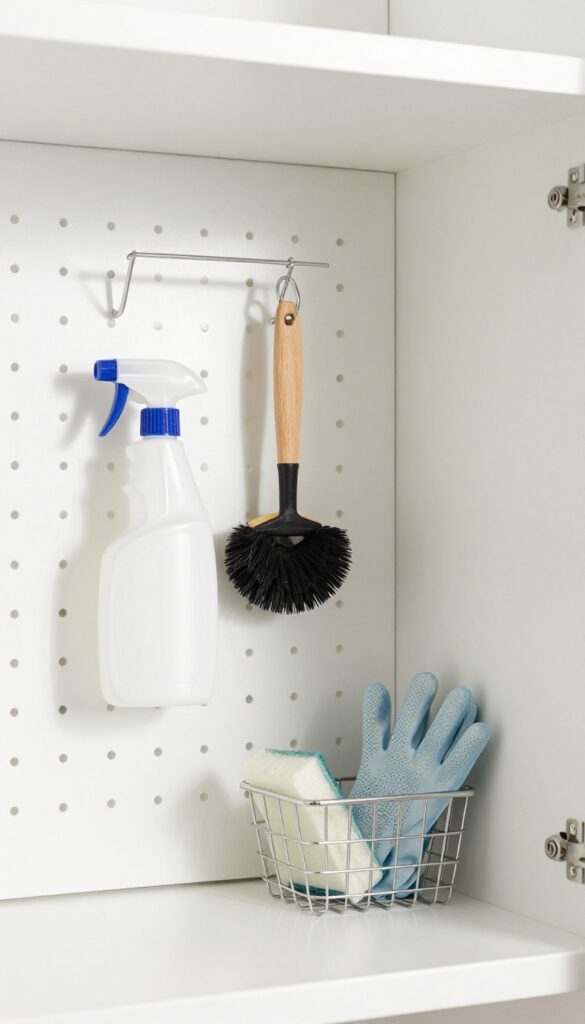
If your cleaning cupboard is a jumble of brushes, dustpans, and gloves, a pegboard can bring order without permanent commitment. Mount a small board on the inside wall or door, then use hooks and baskets to hang exactly what you need. The best part?
You can rearrange everything whenever your tools change.
Pick The Right Pegboard And Hardware
Choose a lightweight pegboard that fits your cupboard door or wall space. Metal pegboards are sturdy, while plastic ones are easy to cut to size. Use screws or strong adhesive strips to mount it—just make sure the door can still close.
Grab a variety of peg hooks: straight for hanging spray bottles, curved for brushes, and small baskets for sponges or gloves.
Arrange By Frequency Of Use
Hang your most-used tools at eye level or within easy reach. Keep dustpans and scrub brushes on lower hooks, and store rarely used items like specialty brushes higher up. This way, you grab what you need without moving anything else.
Mix Hooks With Small Bins
Not everything hangs well. Attach small wire bins or cups to the pegboard for storing sponges, scrub pads, or gloves. You can also use binder clips to hold spray bottles by the neck—works like a charm and keeps them from tipping.
FAQ
How do I keep my cleaning cupboard from getting messy again?
Maintain your system by returning items to their designated spots after each use. Do a quick monthly tidy to remove expired products and wipe down shelves.
What's the best way to store cleaning products under the sink?
Use a combination of tension rods, clear bins, and a lazy Susan. Keep heavy bottles on the bottom and lightweight items on door-mounted organizers.
Can I use these hacks in a small apartment cupboard?
Absolutely. Many hacks like binder clips, magnetic strips, and over-door organizers are space-saving and work well in tight spots.
How do I prevent spray bottles from leaking in the cupboard?
Store spray bottles upright using tension rods or a bottle holder. Check nozzles periodically and tighten them to prevent drips.
What should I do with cleaning products I rarely use?
Store them in a labeled bin in a less accessible spot, like the top shelf or a separate closet. Rotate them into your main cupboard only when needed.
Conclusion
These 15 hacks prove that organizing your cleaning cupboard doesn't have to be complicated or expensive. Small tweaks—like using tension rods or repurposing caddies—can instantly turn chaos into calm. Pick the one that solves your biggest frustration first, whether it's tangled hoses or overflowing shelves.
Each win makes your daily routine smoother and your space more enjoyable. Start with one change this weekend, and let the momentum carry you toward a cupboard that actually works for you.


