Bathroom cleaning often feels like a chore that eats up your weekend. Sinks get grimy fast, and tile grout seems to attract dirt no matter what you do. But with the right hacks, you can cut cleaning time in half and still get professional-looking results.
These 15 ideas focus on speed and effectiveness, using items you probably already have at home. No fancy products or expensive tools required. Just smart, practical solutions that tackle the toughest bathroom messes.
Whether you're dealing with hard water stains, soap scum, or mildew, these tips will help you clean smarter, not harder. Let's get your bathroom sparkling without the elbow grease.
1. Use a Dishwasher Tablet to Clean the Sink Drain
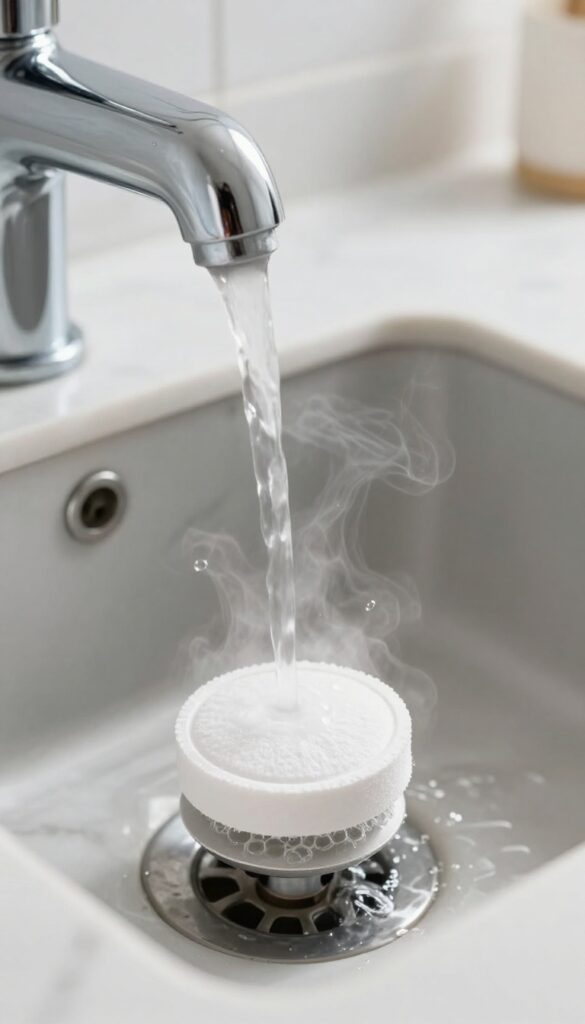
Sink drains can get pretty nasty, especially in the bathroom where hair, soap scum, and toothpaste gunk accumulate. Instead of reaching for a harsh chemical drain cleaner, grab a dishwasher tablet from under the kitchen sink. It's a simple trick that works like magic.
Drop one dishwasher tablet into the drain, then pour a kettle of boiling water over it. Let it sit for a few minutes while the fizzing action breaks down grime and neutralizes odors. Follow up with a quick flush of hot tap water.
That's it—no scrubbing, no fumes, just a clean-smelling drain.
Why Dishwasher Tablets Work
Dishwasher tablets contain powerful enzymes and surfactants designed to dissolve tough food residue. In a bathroom drain, they attack soap scum, hair buildup, and organic matter just as effectively. The fizzing action helps dislodge debris stuck to pipe walls.
Best Practices For Best Results
Use this hack monthly to prevent clogs and odors. For extra stubborn buildup, drop two tablets and let them fizz for 10 minutes before flushing. Avoid this method if you have a garbage disposal—the tablets can damage it.
What To Avoid
Never mix dishwasher tablets with bleach or other cleaning products—the chemical reaction can release harmful fumes. Also, don't use this hack on drains that are completely clogged; clear the blockage first with a plunger or snake.
2. Shine Chrome Fixtures with Baby Oil
Chrome faucets and handles look great when they're clean, but water spots and fingerprints show up almost instantly. Baby oil is a surprising hack that not only removes those spots but also leaves a protective layer that keeps fixtures shiny longer. It's cheap, gentle, and works better than many commercial polishes.
To use baby oil, put a few drops on a soft microfiber cloth—not directly on the fixture. Wipe the faucet, handles, and any other chrome surfaces in smooth, circular motions. The oil dissolves water spots and soap scum without scratching.
After wiping, buff with a dry part of the cloth for a streak-free shine. The thin oil film repels water and fingerprints, so your fixtures stay clean for days. This works on stainless steel too, but avoid it on brushed or matte finishes.
Why Baby Oil Works So Well
Baby oil is mostly mineral oil, which is a gentle solvent that breaks down hard water deposits and soap residue. It's non-abrasive, so it won't damage chrome plating. The oil also leaves a microscopic barrier that makes future water spots bead up and slide off, reducing how often you need to polish.
How To Apply For Best Results
Start with a clean, dry surface—wipe away any loose dust or debris first. Use just a few drops of baby oil on a clean microfiber cloth. Work in small sections, applying the oil and then buffing immediately.
For tough water spots, let the oil sit for 30 seconds before wiping. Finish with a dry cloth to remove any excess and reveal a brilliant shine.
Where Else You Can Use This Hack
This trick isn't just for faucets. Use it on shower door handles, towel bars, robe hooks, and even the chrome trim on soap dispensers. It's also great for polishing stainless steel sinks—just test a small spot first.
Avoid using it on porous surfaces like stone or unsealed metal.
3. Remove Soap Scum with a Dryer Sheet
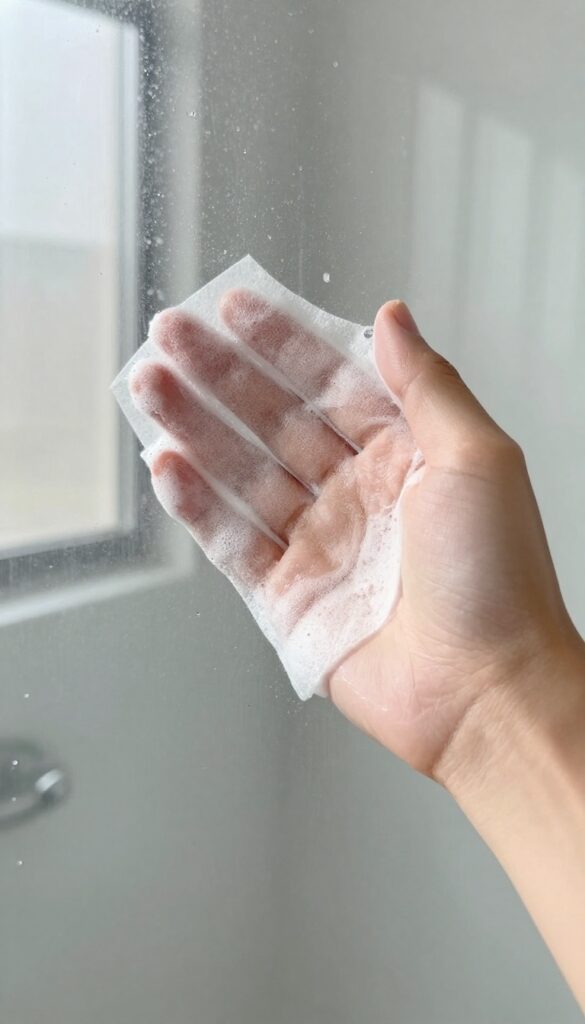
Soap scum builds up fast on glass shower doors and tiles, creating a cloudy film that makes your bathroom look dingy. Instead of reaching for harsh chemical sprays, grab a used dryer sheet. The anti-static agents in the sheet break down soap scum and leave a streak-free shine.
This simple hack works because dryer sheets contain surfactants that cut through grease and soap residue. Plus, the anti-static properties repel dust and grime, so your surfaces stay clean longer. It's a zero-cost solution since you're reusing something you'd otherwise throw away.
How To Use A Dryer Sheet On Soap Scum
Take a used dryer sheet (from your last laundry load) and wet it slightly with warm water. Scrub the soap scum-covered glass or tile in a circular motion. Rinse with water and wipe dry with a microfiber cloth.
For heavy buildup, let the wet dryer sheet sit on the area for a few minutes before scrubbing.
Why Dryer Sheets Work So Well
Dryer sheets are coated with fatty acids and softening agents that act as mild abrasives and solvents. These ingredients dissolve soap scum and hard water deposits without scratching surfaces. The anti-static component also reduces future buildup, making your next cleaning easier.
Safety Tips And Alternatives
Avoid using dryer sheets on natural stone like marble or granite, as the chemicals can dull the finish. For acrylic or fiberglass surfaces, test on a small hidden spot first. If you don't have dryer sheets, a fabric softener diluted in water works similarly.
But for most glass and ceramic tile, used dryer sheets are a perfect fit.
4. Clean Grout with a Baking Soda Paste and Toothbrush
Grout lines are notorious for trapping dirt, soap scum, and mildew, making them look darker and dingier over time. But you don't need harsh chemicals or a steam cleaner to get them white again. A simple paste made from baking soda and water, plus a little elbow grease with an old toothbrush, can work wonders on stained grout.
This hack is perfect for spot-cleaning grout in between deep cleans. It's cheap, non-toxic, and surprisingly effective. For extra stubborn stains, a splash of vinegar added to the paste creates a fizzy reaction that helps lift grime.
Just be careful not to use vinegar on natural stone tiles, as it can etch the surface.
Make The Paste
In a small bowl, mix three parts baking soda with one part water until it forms a thick, spreadable paste. Adjust the ratio if needed—you want it to stick to vertical grout lines without dripping. For tough stains, substitute the water with hydrogen peroxide for a gentle bleaching effect.
Apply And Scrub
Use an old toothbrush or a grout brush to apply the paste directly onto the grout lines. Work the paste into the grout with a circular motion, focusing on heavily soiled areas. Let it sit for 5 to 10 minutes to break down the grime, then scrub again before rinsing.
Rinse And Seal
Wipe away the paste with a damp cloth or rinse the area with water from a spray bottle. For best results, dry the grout thoroughly with a clean towel. To keep grout cleaner longer, consider applying a grout sealer after cleaning—it creates a protective barrier that repels moisture and dirt.
5. Use a Pumice Stone on Hard Water Stains
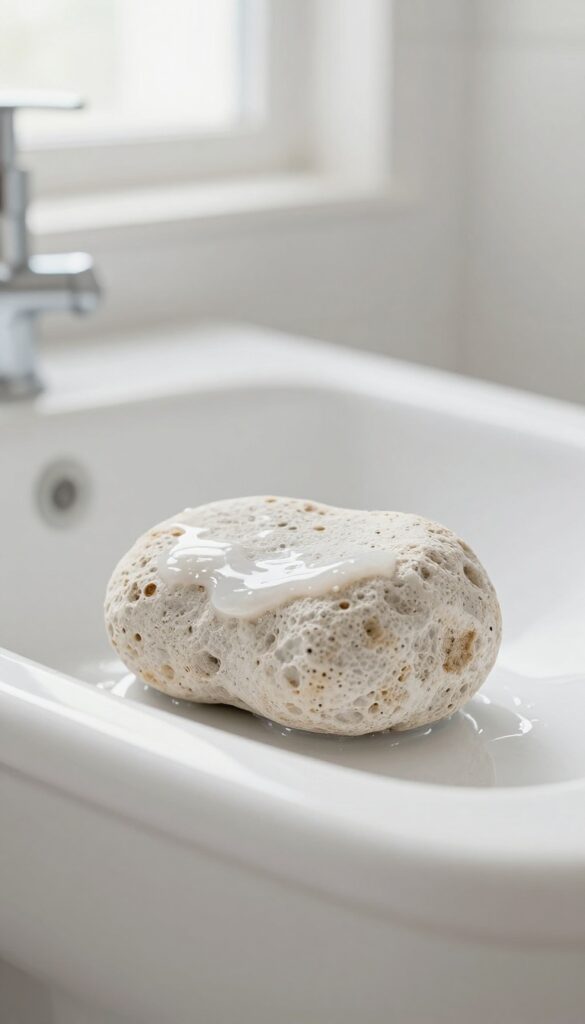
Hard water stains can make even a clean bathroom look neglected. Those white, crusty rings around the toilet bowl or stubborn deposits on sink surfaces seem impossible to scrub off. But there's a surprisingly simple tool that handles them without harsh chemicals: a pumice stone.
A pumice stone is porous and abrasive, but when wet, it's gentle enough not to scratch porcelain. It works by physically grinding away mineral buildup without damaging the surface underneath. This makes it perfect for tough stains that resist regular cleaners.
How To Use It Safely
Always wet the stone and the surface first. Gently rub the stain in a circular motion—don't press hard. Let the stone do the work.
Rinse and check progress often to avoid over-scrubbing. Once the stain is gone, wipe the area clean.
Where It Works Best
Toilet bowls, sink basins, and even tile floors with hard water deposits. Avoid using it on polished or glossy surfaces like enameled cast iron or acrylic, as it may cause fine scratches. Test on an inconspicuous spot first.
Pro Tips For Best Results
Keep a dedicated pumice stone in your bathroom caddy. After use, rinse it and let it dry completely to prevent bacteria growth. For extra stubborn stains, combine with a mild bathroom cleaner to soften the deposits first.
6. Make a DIY All-Purpose Cleaner with Vinegar and Dawn
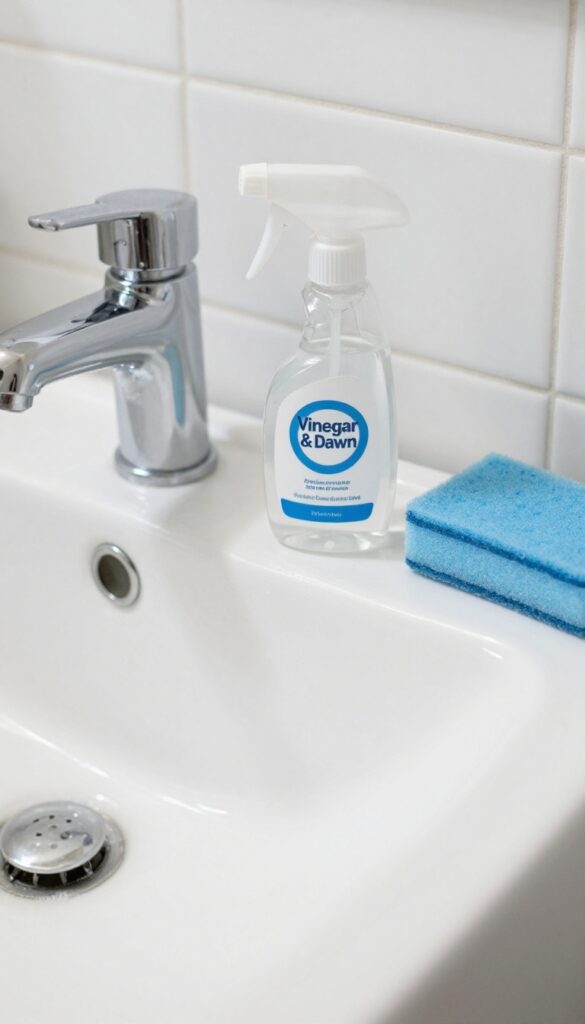
You don't need a cabinet full of specialized cleaners to tackle bathroom grime. A simple mix of white vinegar and Dawn dish soap handles grease, soap scum, and mildew on tiles and sinks with surprising ease. This homemade spray is cheap, non-toxic, and works as well as most store-bought options.
Combine equal parts white vinegar and Dawn dish soap in a spray bottle. Shake gently to mix. Spray generously on sinks, tiles, and shower walls.
Let it sit for 5–10 minutes, then scrub with a soft brush or sponge. Rinse with warm water. The vinegar cuts through mineral deposits and soap scum, while the Dawn breaks down grease and lifts grime.
For tough mildew spots, spray directly and let it sit longer before scrubbing.
Why This Combo Works So Well
Vinegar is acidic, which dissolves hard water deposits and soap scum. Dawn dish soap contains surfactants that trap and lift grease and dirt. Together, they create a powerful cleaner that's safe for most bathroom surfaces.
The soap also helps the vinegar cling to vertical surfaces longer, giving it more time to work.
Best Uses Around The Bathroom
This cleaner shines on ceramic sinks, porcelain tubs, and glazed tiles. Use it on chrome fixtures too—just rinse thoroughly to avoid dulling the finish. It's also great for cleaning shower caddies, soap dishes, and toothbrush holders.
Avoid using it on natural stone like marble or granite, as the acid can etch the surface.
Storage And Safety Tips
Store the mixture in a labeled spray bottle out of direct sunlight. It stays effective for several weeks. Shake before each use because the ingredients can separate.
Keep it away from bleach or hydrogen peroxide—mixing vinegar with bleach creates toxic chlorine gas. Always test on a small hidden area first to check for any adverse reaction.
7. Use a Squeegee After Every Shower
You've probably seen a squeegee hanging in hotel bathrooms, but it's just as useful at home. The trick is making it a habit right after you shower, before water has a chance to dry on surfaces. This one simple tool can save you hours of scrubbing later.
A squeegee is your best defense against water spots, soap scum, and mineral deposits on glass doors and tiles. It takes less than a minute to run it over the surfaces after each shower, and the payoff is huge: your shower stays cleaner, and you'll rarely need to deep clean. Plus, it helps prevent mold and mildew by removing excess moisture.
Keep a small squeegee hooked inside the shower or on the door handle so you never forget.
Why It Works So Well
Hard water contains minerals like calcium and magnesium that leave white spots when water evaporates. Soap scum also bonds to wet surfaces and hardens over time. By wiping away the water immediately, you stop these deposits from forming.
The squeegee's rubber blade removes almost all the water, leaving the surface nearly dry.
Best Technique For Glass And Tile
Start at the top corner and pull the squeegee across in overlapping horizontal strokes. Wipe the blade with a dry cloth after each pass to avoid streaks. For large glass doors, use vertical strokes on the final pass to catch any drips.
Don't forget the corners and edges where water pools.
How To Keep Your Squeegee Clean
Rinse the squeegee blade with water after each use to remove soap residue. Once a week, wipe it down with a mild cleaner or vinegar solution to prevent buildup. Replace the rubber blade every few months when it starts leaving streaks or skipping.
8. Clean the Toilet with Alka-Seltzer
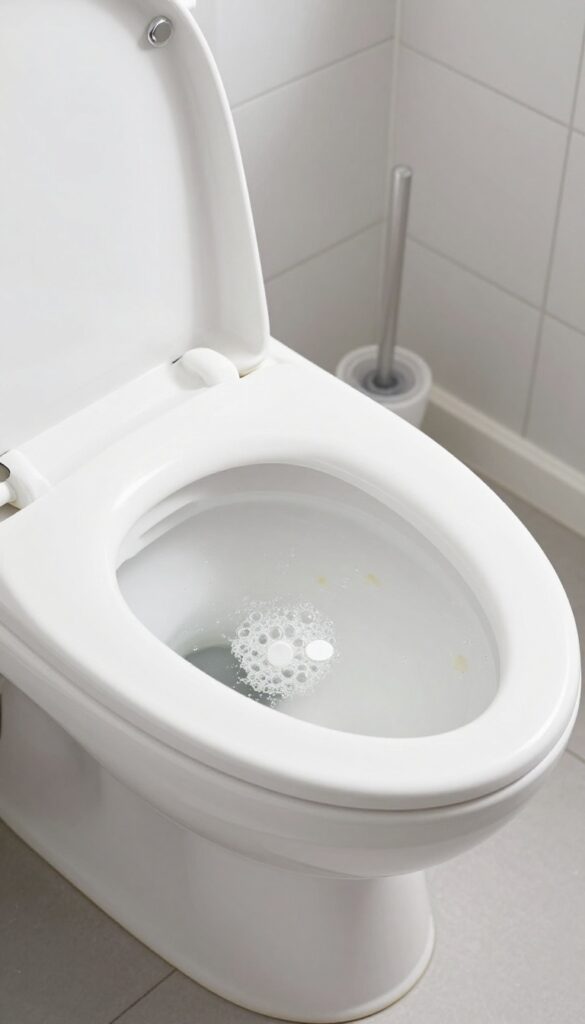
Toilet cleaning is nobody's favorite task, but it doesn't have to be a scrub-fest. Alka-Seltzer tablets, typically used for heartburn, double as a powerful cleaning agent. The effervescent action helps lift stains and deodorize without harsh chemicals.
Drop two Alka-Seltzer tablets into the toilet bowl, wait 15 minutes, then scrub and flush. The fizzing action lifts stains and deodorizes naturally.
Why It Works
The combination of citric acid and sodium bicarbonate creates carbon dioxide bubbles that agitate and loosen grime. This gentle yet effective action reaches under the rim and into hard-to-scrub areas, breaking down mineral deposits and organic stains.
Step-by-step Instructions
Start by flushing the toilet to wet the bowl. Drop two Alka-Seltzer tablets in and let them fizz for about 15 minutes. Use a toilet brush to scrub the bowl, paying extra attention to stubborn rings.
Flush again to rinse. For heavy stains, repeat or let the tablets sit longer.
When To Use This Hack
This method is perfect for routine maintenance or for freshening up a toilet between deep cleans. It's also great for removing light to moderate stains without the harsh smell of bleach. For extremely tough, set-in stains, you may need a pumice stone or a stronger cleaner.
9. Remove Mildew with Tea Tree Oil Spray
Mildew loves damp bathroom corners and grout lines. Instead of reaching for harsh bleach, try a natural alternative that's just as effective. Tea tree oil is a powerful antifungal that kills mold spores without the strong fumes.
This simple DIY spray is easy to make and use. Mix 2 teaspoons of tea tree oil with 2 cups of water in a spray bottle. Shake well before each use.
Spray the solution directly onto mildew-prone areas like shower corners, grout, and around the sink. Let it sit for at least 10 minutes to penetrate the mold. Then wipe away with a damp cloth or scrub with a soft brush.
No rinsing needed—the tea tree oil continues to prevent regrowth.
Why Tea Tree Oil Works
Tea tree oil contains terpinen-4-ol, a compound that kills mold, mildew, and bacteria. Unlike bleach, it doesn't release toxic fumes, making it safer for enclosed bathrooms. It also leaves a fresh, clean scent without chemical residue.
Where to Use It
This spray works on tile grout, shower curtains, caulking, and even fabric shower liners. Avoid using it on unsealed natural stone or porous surfaces that could absorb the oil. Test on a small hidden area first if you're unsure.
Pro Tips For Best Results
For stubborn mildew, let the spray sit for 20-30 minutes before scrubbing. Use a toothbrush for tight grout lines. To prevent future growth, spray the area weekly and improve ventilation by running the fan or opening a window after showers.
10. Use a Magic Eraser on Scuff Marks
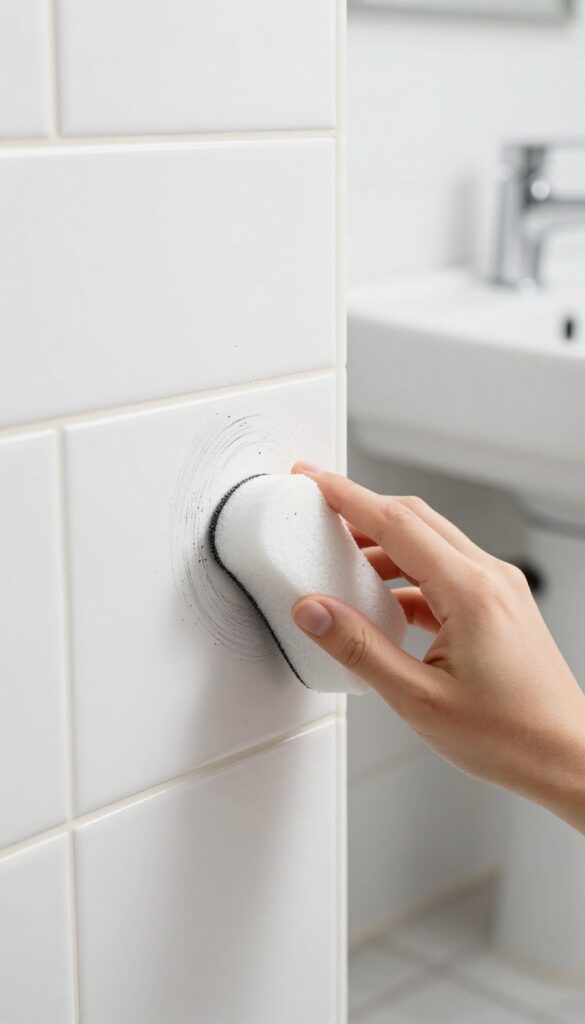
Scuff marks on bathroom walls, baseboards, or tiles can make the space look dingy, even after a deep clean. A magic eraser—a melamine sponge—is a simple fix. Just dampen it slightly and gently rub the marks.
The sponge acts like a fine sandpaper, lifting scuffs without damaging paint or tile.
Magic erasers are versatile for more than just scuffs. Use them on sink edges, shower doors, and even on stubborn soap scum. They work best on smooth surfaces, so avoid textured or glossy finishes that might scratch.
Always test in an inconspicuous spot first.
Where Scuffs Hide Most
Baseboards near the toilet, corners of the tub, and behind the door are prime spots for scuffs. Shoes, cleaning tools, and even dropped items leave marks. A quick once-over with a magic eraser can restore these areas in seconds.
How To Use It Right
Wet the sponge until it's damp but not dripping. Gently rub the scuff mark in a circular motion—no need to press hard. The sponge will start to crumble as it works; that's normal.
Rinse the area after to remove any residue.
When To Skip The Eraser
Avoid using magic erasers on high-gloss paint, unsealed natural stone, or delicate surfaces like wallpaper. For these, try a mild soap solution or a specialized cleaner instead. Always check manufacturer guidelines for finished surfaces.
11. Clean Showerheads with Vinegar Soak
A clogged showerhead can turn a refreshing rinse into a weak dribble. Hard water minerals and grime build up over time, blocking the nozzles and reducing water pressure. Instead of scrubbing each tiny hole, try a simple overnight vinegar soak that dissolves the deposits with zero effort.
Fill a plastic bag with white vinegar, tie it around the showerhead, and let it soak overnight. Rinse in the morning to restore water flow and shine.
Why Vinegar Works
White vinegar is mildly acidic, which breaks down calcium and lime scale without harsh chemicals. It's safe for most metal and plastic showerheads, and it's cheap. Just make sure your showerhead is fully submerged in the bag.
How To Secure The Bag
Use a rubber band or twist tie to hold the bag in place. Fill the bag enough to cover the showerhead, then loop the handles or tie it tight. If the bag leaks, double-bag it or use a larger bag.
After The Soak
Remove the bag and run the shower for a few minutes to flush out loosened debris. Wipe the showerhead with a cloth to reveal a like-new shine. For stubborn buildup, scrub gently with an old toothbrush.
12. Use a Toothbrush Holder to Store Cleaning Tools
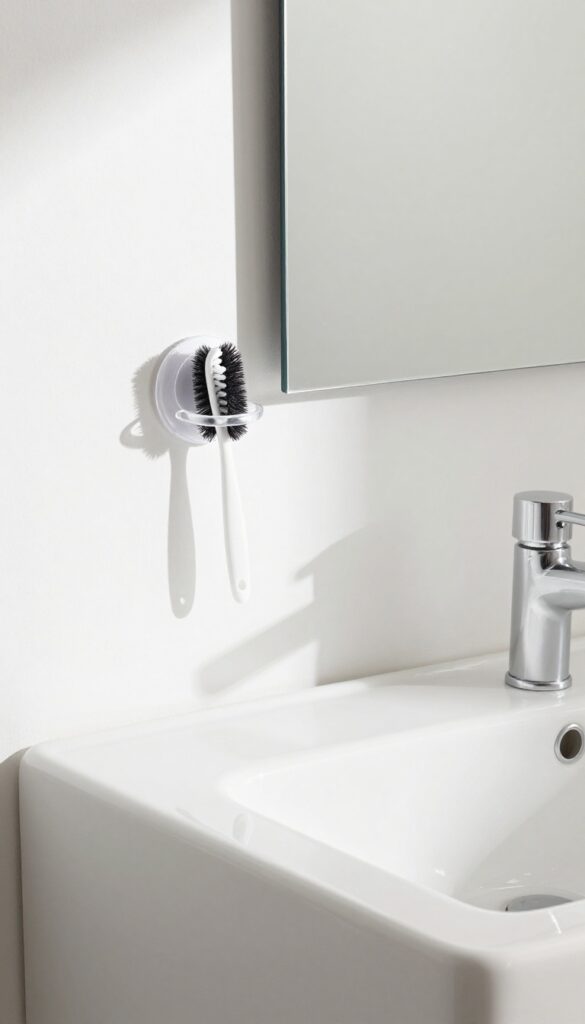
A toothbrush holder isn't just for toothbrushes. Those suction-cup models that stick to the mirror or tile can do double duty in your bathroom cleaning routine. Attach one near the sink, and you'll always have a scrub brush or a small razor within arm's reach.
Instead of digging through a messy drawer or cabinet, mount a toothbrush holder on the wall or mirror. It keeps your go-to cleaning tools right where you need them, so you can grab and go. No more excuses for skipping a quick wipe-down because the brush is buried somewhere.
Choose The Right Holder
Look for a toothbrush holder with strong suction cups and a wide enough opening to fit your scrub brush handle. Some holders have multiple slots, which work great for storing a brush and a small squeegee or razor. Test the suction on a clean, dry surface before loading it up.
Best Tools To Store
A small nylon scrub brush is perfect for tackling sink edges and faucet bases. A tile scraper or razor blade holder can sit in another slot for quick grout cleaning. You can even stash a microfiber cloth rolled up in the cup for drying the sink after use.
Keep It Clean And Dry
Rinse the brush after each use and shake off excess water before placing it back in the holder. This prevents mildew from building up. Every couple of weeks, remove the holder and wipe down the suction cup and the wall area to keep everything fresh.
13. Polish Mirrors with Rubbing Alcohol
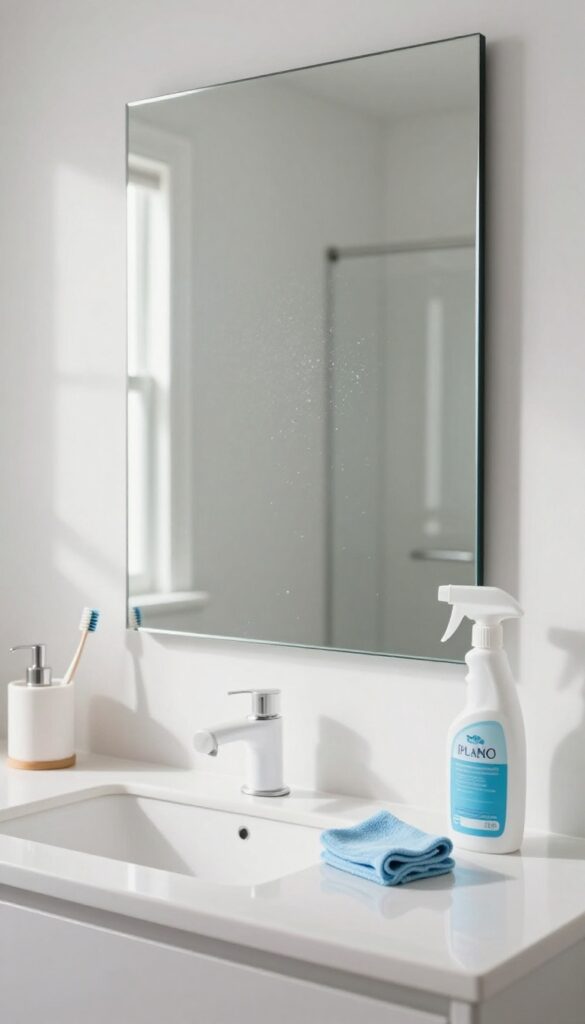
Mirrors in the bathroom always seem to attract smudges, toothpaste splatter, and water spots. Store-bought glass cleaners work, but rubbing alcohol does the job faster and cheaper. It evaporates almost instantly, leaving zero streaks behind—even on large mirrors.
For a crystal-clear mirror without the fog or residue, reach for a bottle of rubbing alcohol. Spray it directly onto a clean, lint-free microfiber cloth (not the mirror itself) to avoid overspray on counters. Wipe in a zigzag or S-pattern to prevent streaks, and watch the alcohol vanish as it dries.
This hack also disinfects the surface, so you're removing germs along with grime.
Why Rubbing Alcohol Works Best
Rubbing alcohol has a low surface tension and high evaporation rate. That means it spreads evenly and dries before water spots or streaks can form. Unlike vinegar, it doesn't leave a smell, and unlike ammonia-based cleaners, it won't damage mirror edges or frames over time.
The Right Cloth Matters
Paper towels leave lint and tiny scratches on mirrors. Microfiber cloths are the gold standard—they trap dust and absorb liquid without shedding. Use a fresh, dry side for the final buff to pick up any remaining particles.
Bonus: De-fog Your Mirror
After polishing, rub a thin layer of shaving cream over the mirror and buff it off. The soap residue creates a barrier that prevents fog from forming during hot showers. One application lasts a week or more.
14. Use a Lint Roller for Dust and Hair
Dust and hair seem to multiply in the bathroom, settling on every surface no matter how often you wipe. A lint roller is a quick fix that grabs debris without any spray or cloth. Keep one in the bathroom drawer, and you'll reach for it more than you expect.
A lint roller isn't just for clothes. It's perfect for picking up dust, hair, and lint from bathroom surfaces where a cloth might just push things around. Roll it over countertops, vents, light fixtures, and even lampshades.
The sticky sheets grab particles instantly, and you can tear off a fresh one when it's full. No dusting spray needed, no damp cloth to rinse. It's especially handy for quick touch-ups between deeper cleans.
Keep a roller in the bathroom cabinet, and you'll be surprised how often you use it.
Where To Roll
Focus on areas where dust and hair collect: countertops near the mirror, window sills, vent covers, light fixtures, and even the top of the toilet tank. The lint roller's adhesive grabs fine particles that a dry cloth might miss. For textured surfaces like lampshades or woven baskets, the roller is gentler than a vacuum attachment.
Why It Works Better
Unlike a dusting cloth that can push debris around, the lint roller traps everything on the sticky surface. You can cover a large area in seconds without stirring up dust into the air. It's also great for picking up stray hairs that cling to walls or baseboards after grooming.
No need for extra products or water.
Quick Maintenance Tip
Store the lint roller inside the bathroom cabinet or under the sink. Use it as a daily or every-other-day touch-up tool. When the sheet is full, just peel and toss.
Keep a refill pack handy so you never run out. This hack saves time and keeps surfaces looking fresh between deep cleans.
15. Freshen the Room with a DIY Citrus Spray
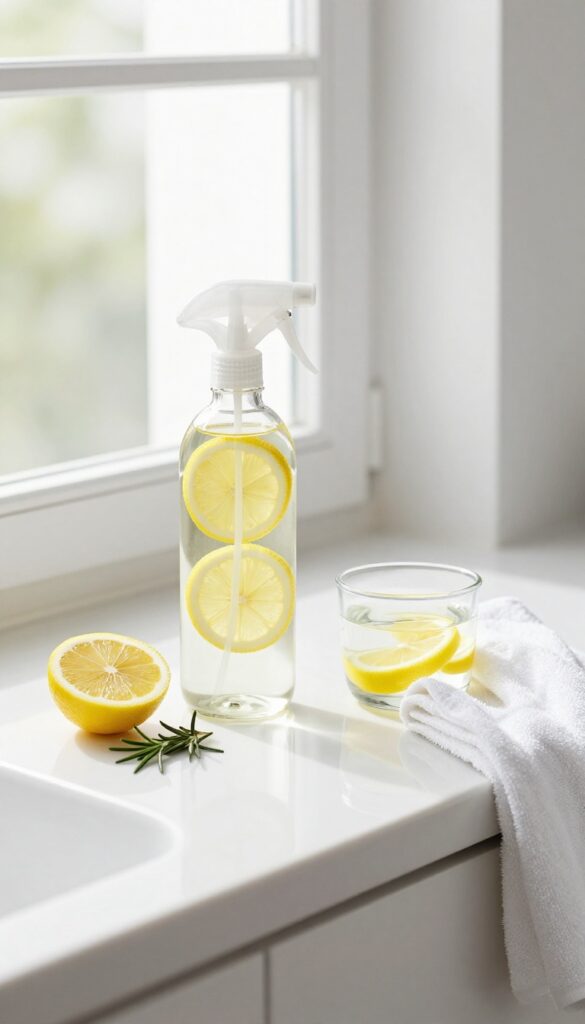
A fresh-smelling bathroom doesn't have to come from a can of chemical air freshener. You can create a natural, uplifting scent using ingredients from your kitchen. This hack not only masks odors but actually cleans the air while leaving a pleasant citrus aroma.
Simmer lemon peels and a few sprigs of rosemary in a pot of water on the stove for 15–20 minutes. The steam carries the fresh scent throughout the bathroom, neutralizing musty smells. For a quick spritz, fill a spray bottle with water and add 10–15 drops of lemon essential oil.
Mist the air or lightly spray onto fabric surfaces like towels or shower curtains for an instant refresh.
Why Citrus Works
Lemon and other citrus fruits contain natural oils that cut through odors and leave a clean, bright scent. Rosemary adds an herbaceous note that complements the citrus without being overpowering. Together, they create a spa-like atmosphere without any synthetic fragrances.
How To Make The Simmer Pot
Fill a small saucepan with water, add the peels of two lemons and a few rosemary sprigs. Bring to a boil, then reduce to a simmer. Keep an eye on the water level and add more as needed.
The scent will linger for hours after you turn off the heat.
Quick Spray Version
If you don't have time to simmer, mix 1 cup of distilled water with 10–15 drops of lemon essential oil in a spray bottle. You can also add 5 drops of rosemary or lavender oil. Shake well before each use.
This spray works great on bathroom mirrors, counters, and even toilet paper rolls for a subtle scent boost.
FAQ
What is the fastest way to clean bathroom tiles?
Use a mixture of equal parts vinegar and Dawn dish soap in a spray bottle. Spray on tiles, let sit for 5 minutes, then wipe with a damp microfiber cloth. For grout, use a baking soda paste and an old toothbrush.
How do I remove hard water stains from my sink?
Wet a pumice stone and gently rub the stain. The stone abrades the mineral deposit without scratching porcelain. Alternatively, soak a cloth in vinegar and lay it on the stain for an hour before scrubbing.
Can I use bleach to clean bathroom grout?
Yes, but bleach can be harsh and may discolor colored grout. A safer option is a baking soda and hydrogen peroxide paste. Apply, let sit for 10 minutes, scrub, and rinse.
How often should I clean my bathroom to prevent buildup?
For maintenance, wipe down surfaces weekly and use a squeegee after each shower. Deep clean tiles and grout every month to prevent soap scum and mildew from setting in.
What natural ingredients can I use to clean my bathroom?
White vinegar, baking soda, lemon juice, and tea tree oil are effective natural cleaners. They cut through grime, kill mold, and deodorize without harsh chemicals.
Conclusion
These 15 cleaning hacks prove that a sparkling bathroom doesn't require expensive products or hours of scrubbing. By incorporating a few simple tricks into your routine, you can keep your sink and tiles looking fresh with minimal effort.
Pick one or two ideas to try this week, and see how they transform your cleaning experience. Small changes really do add up to big wins, and your bathroom will thank you for it.


