A sparkling bathroom doesn't have to mean hours of scrubbing every weekend. With the right strategies, you can keep your bathroom looking fresh and clean with just a little effort each week. These 17 tips are designed to make your weekly shine day quick, effective, and even a little satisfying.
Think of it as working smarter, not harder. By tackling small tasks consistently and using the right tools, you'll prevent grime from building up in the first place. That means less elbow grease and more time enjoying your clean space.
Ready to transform your bathroom cleaning routine? Let's dive into the tips that will save you time and leave your bathroom gleaming.
1. Squeegee the Shower After Every Use
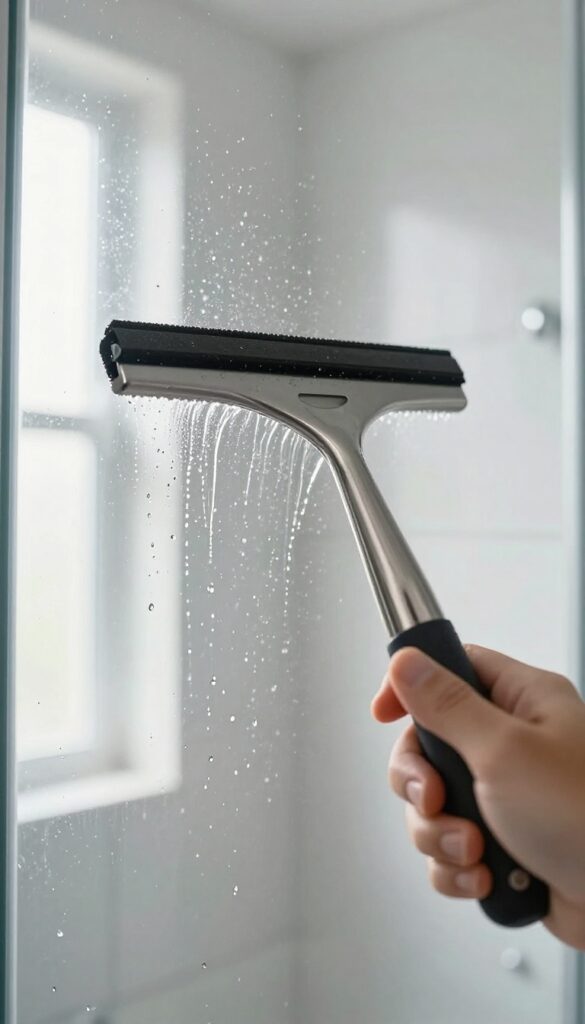
You know that satisfying feeling when you run a squeegee across wet glass and it comes out perfectly clear? That's exactly what you can achieve every day with just 30 seconds of effort. This simple habit is the single most effective way to keep your shower looking pristine between deep cleans.
It stops hard water spots and soap scum from ever getting a foothold, so your weekly shine day becomes a breeze.
The secret to a spot-free shower is consistency. By removing water immediately after each shower, you prevent minerals in the water from drying onto surfaces and forming those stubborn white stains. Plus, you'll cut down on the need for harsh chemical cleaners.
Just keep a squeegee in the shower or hang it on a hook nearby, and make it part of your post-shower routine.
Pick The Right Squeegee
Not all squeegees are created equal. Look for one with a rubber blade that's soft enough to glide without scratching glass or tile. A squeegee with a stainless steel or plastic handle and a built-in hook makes storage easy.
If you have large glass panels, a wider blade (12 inches or more) will save you time.
Technique Matters
Start at the top corner and pull the squeegee across in a straight, overlapping path. Work your way down, wiping the blade with a microfiber cloth after each pass to avoid redepositing water. For doors, do vertical strokes on the inside and horizontal on the outside to catch drips.
It takes less than a minute once you get the hang of it.
Don't Forget The Tiles
While the glass gets most of the attention, running the squeegee over tiles and the shower floor helps too. It pushes water toward the drain and prevents soap scum from building up on grout lines. A quick once-over on all surfaces keeps everything looking fresher longer.
2. Use a Daily Shower Spray
Stopping grime before it starts is the ultimate cleaning hack. A daily shower spray is your low-effort secret weapon against soap scum and mildew buildup. Just a few seconds of spraying after each shower can save you serious scrubbing time on cleaning day.
The beauty of this method is that it turns prevention into a habit. You don't need fancy products—a simple DIY spray works wonders. Keep a bottle within arm's reach of your shower, and make it part of your post-shower routine.
The Perfect Diy Mix
Mix equal parts white vinegar and water in a spray bottle. Add a few drops of tea tree oil for extra mildew-fighting power and a fresh scent. Shake well before each use.
This solution is gentle on most surfaces but tough on the minerals and residues that cause buildup.
How To Make It A Habit
Place the spray bottle where you can't miss it—right next to your towel or on the shower caddy. After your last rinse, give the walls, door, and fixtures a quick spritz. No wiping needed; just let it air dry.
The acidity of the vinegar neutralizes alkaline soap scum and slows mildew growth.
What To Avoid
Don't use this spray on natural stone like marble or granite, as the acid can etch the surface. Also avoid getting it on unsealed grout too often—test a small area first. For those surfaces, stick with a pH-neutral daily spray instead.
3. Wipe Down Countertops and Sinks Daily
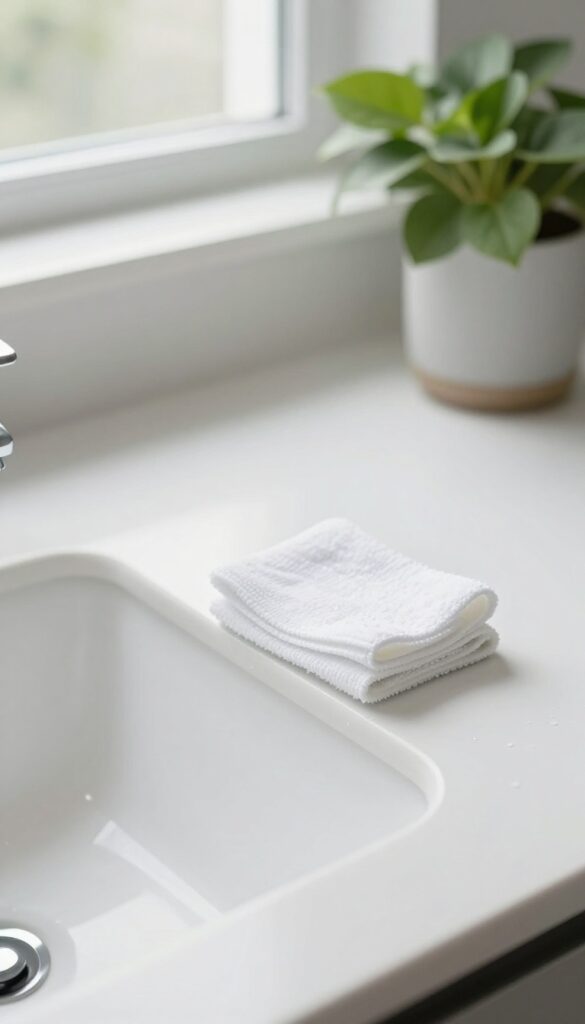
A quick daily wipe is the secret to a bathroom that always looks clean without a deep clean every time. After you brush your teeth or wash your face, grab a microfiber cloth and spend 60 seconds wiping the counter and sink. This simple habit stops toothpaste splatters and water spots from hardening, so they don't turn into stubborn stains later.
It's amazing what a difference 60 seconds makes. When you wipe down surfaces daily, you prevent the buildup of soap scum, toothpaste residue, and hard water deposits. That means your weekly shine day becomes a light refresh instead of a heavy scrub session.
Plus, a clean counter every morning sets a positive tone for the day.
The Right Cloth Makes All The Difference
Not all cloths are created equal. Microfiber is your best friend here because it traps particles and absorbs water without leaving lint. Keep a dedicated microfiber cloth in the bathroom and swap it out weekly.
You can even color-code it to avoid confusion with kitchen cloths.
Target The Trouble Zones
Pay extra attention to areas around the faucet base, the sink edges, and the counter corners. These spots collect water and toothpaste residue that can harden into a crust. A quick swipe daily keeps them pristine.
Don't forget the backsplash if it's within reach.
Combine With A Quick Mirror Wipe
While you're at it, give the mirror a quick pass with a dry microfiber cloth. This removes splatters and keeps it streak-free. Doing both together takes under two minutes and leaves the whole vanity area looking fresh.
4. Keep a Toilet Brush with Cleaner in the Holder
The toilet brush is one of those tools that often sits in a grimy holder, collecting bacteria and odors. But what if you could make it work for you between cleanings? By filling the holder with a cleaning solution, you keep the brush sanitized and ready to use at a moment's notice.
This simple hack transforms your toilet brush from a neglected tool into a constant cleaning ally. Every time you use it, you're not just scrubbing—you're also disinfecting the brush itself. Plus, the solution helps deodorize the holder, so no more musty smells.
How To Set It Up
Mix about 1 part bleach to 5 parts water in the toilet brush holder. Make sure the solution covers the bristles when the brush is stored. Replace the solution weekly to keep it effective.
Safety First
Always use bleach in a well-ventilated area. Never mix bleach with other cleaners, especially ammonia. Keep the holder out of reach of children and pets.
Quick Swish Routine
After each use, give the brush a quick swish in the holder to rinse it. Then return it to the solution. This keeps the brush clean and ready for the next use.
5. Use a Magic Eraser on Tough Stains
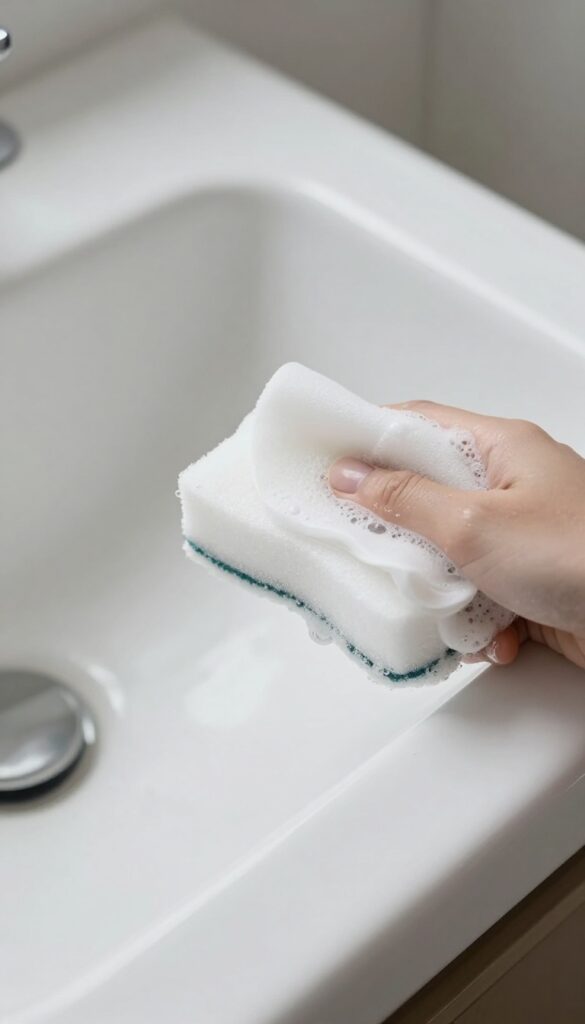
Some stains just don't budge with regular cleaners. Soap scum, marker doodles, and scuff marks can make your bathroom look dingy no matter how much you scrub. That's where a magic eraser—a melamine foam sponge—comes in.
It's like a super-fine sandpaper that lifts away grime with just water, no harsh chemicals needed.
Magic erasers are a game-changer for those stubborn spots that resist your usual spray-and-wipe routine. They work by micro-abrasion, gently wearing away the top layer of the stain. Best of all, they're incredibly easy to use: wet the sponge, squeeze out excess water, and wipe.
No extra products required. Keep a few on hand for weekly touch-ups, and you'll wonder how you ever lived without them.
Where To Use Them Safely
Stick to non-porous surfaces like fiberglass tubs, ceramic sinks, tile, and sealed countertops. Avoid using magic erasers on glossy or delicate finishes—they can dull the shine. Test in an inconspicuous spot first, especially on painted walls or acrylic surfaces.
For most bathrooms, they're perfect for removing soap scum from shower doors, scuff marks from baseboards, and even crayon or marker from walls.
Pro Tip: Cut Them Into Small Pieces
A full-size magic eraser can be wasteful for small jobs. Cut it into quarters or even smaller chunks. That way, you can use a fresh piece for each task—like one for the sink rim, another for the tub.
It also makes them last longer. Store the unused pieces in a dry place, and they'll be ready for next week's shine day.
Rinse And Repeat
As you wipe, the sponge picks up dirt and starts to degrade. Flip or rotate it frequently to keep a clean surface working. Once it looks dirty or starts crumbling, toss it.
Don't try to rinse and reuse a magic eraser that's already falling apart—it loses effectiveness. For heavy-duty jobs, you might go through a few pieces, but the effort saved is worth it.
6. Clean Showerheads with Vinegar Soaks
A weak, uneven spray from your showerhead is a telltale sign of mineral buildup. Hard water deposits clog the nozzles over time, reducing water pressure and making the fixture look dull. The fix is surprisingly simple: a vinegar soak breaks down those deposits without any scrubbing.
The Bag Method
Fill a plastic sandwich bag with enough white vinegar to fully submerge the showerhead. Secure the bag around the showerhead with a rubber band or twist tie, making sure the nozzles are immersed. Leave it overnight, then remove the bag and run the water for a minute to flush out loosened deposits.
For Fixed Or Handheld Heads
If your showerhead is not detachable, you can still use the bag method. For handheld models, you can soak the head in a bowl of vinegar. If the buildup is stubborn, use an old toothbrush to gently scrub the nozzles after soaking.
Maintenance Tips
To prevent heavy buildup, do this soak every few months. If you have hard water, consider a monthly quick soak. This simple habit keeps water pressure strong and extends the life of your showerhead.
7. Vacuum Floors Before Mopping
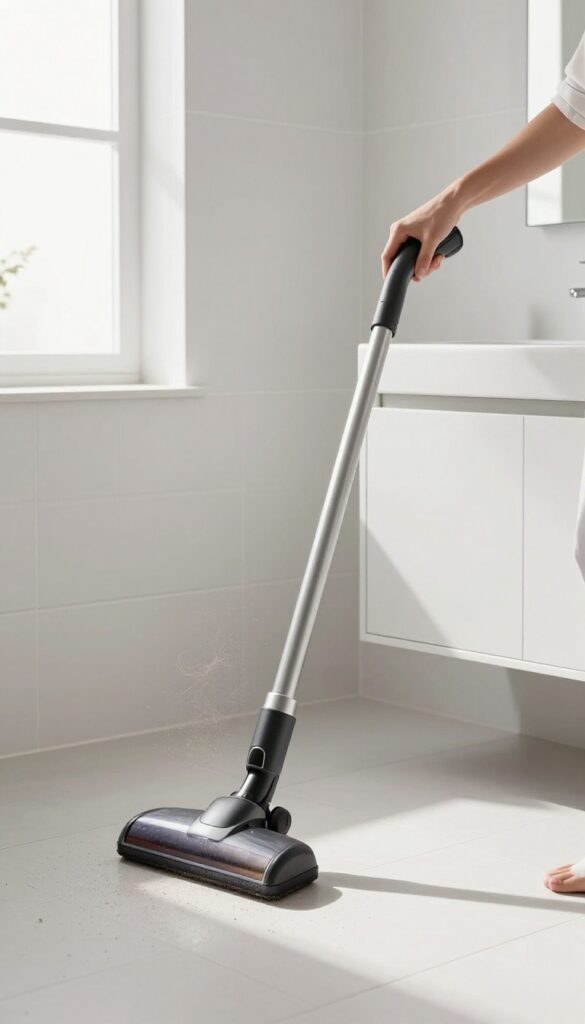
Skipping the pre-mop sweep is one of the fastest ways to turn a quick clean into a messy chore. Hair, dust, and debris on the floor mix with mop water and create a muddy film that spreads instead of lifting. Taking two minutes to vacuum or sweep first makes the mopping step genuinely effective and leaves floors streak-free.
A cordless stick vacuum is perfect for this step because you can grab it and go without dragging out a full-size machine. Focus on corners and under the vanity where hair collects. If you prefer sweeping, use a rubber-bristle broom that attracts hair instead of pushing it around.
Why Dry Debris Matters
Mopping over loose hair and dust turns water into a grimy paste that dries into a dull residue. Removing dry debris first means your mop picks up actual dirt rather than redistributing it. It also prevents clogging your mop head with hair.
Best Tools For The Job
A cordless stick vacuum with a crevice tool makes quick work of edges and tight spots. For tile floors, a microfiber dust mop is another fast option that traps dust without scattering it. Whichever tool you choose, the key is to do it right before you wet the floor.
How To Make It A Habit
Keep your vacuum or broom in an easy-to-reach spot so you don't have to hunt for it. Pair the step with another routine, like spraying cleaner in the toilet bowl, so it feels natural. After a few weeks, it becomes automatic.
8. Use a Grout Brush for Tile Lines
Tile lines are notorious for trapping dirt, soap scum, and mildew, making them look darker than the tiles themselves. A stiff-bristled grout brush is the perfect tool to tackle these narrow grooves without damaging the grout. Pair it with a simple baking soda paste for a chemical-free scrub that lifts grime effortlessly.
Focus on high-traffic areas like the shower floor and around the sink for an instant freshening effect.
Why A Dedicated Brush Matters
A regular sponge or cloth can't reach deep into grout lines. A grout brush has stiff, angled bristles that dig into the crevices and dislodge embedded dirt. It's also small enough to maneuver around corners and fixtures.
Using the right tool saves time and prevents you from scrubbing with a toothbrush for hours.
The Baking Soda Paste Trick
Mix baking soda with a little water to form a thick paste. Apply it along the grout lines and let it sit for 5–10 minutes. Then scrub with the grout brush in a circular motion.
Baking soda is mildly abrasive, so it won't scratch tiles but will break down grime. Rinse with water and wipe dry. For stubborn stains, add a splash of white vinegar to the paste – just avoid using vinegar on natural stone.
Focus On High-traffic Zones
Don't waste energy scrubbing every inch of grout every week. Concentrate on areas that see the most moisture and foot traffic: the shower floor, around the toilet base, and the backsplash near the sink. These spots accumulate grime fastest.
A quick weekly scrub keeps them looking fresh and prevents buildup that requires heavy-duty cleaning later.
9. Disinfect Light Switches and Doorknobs
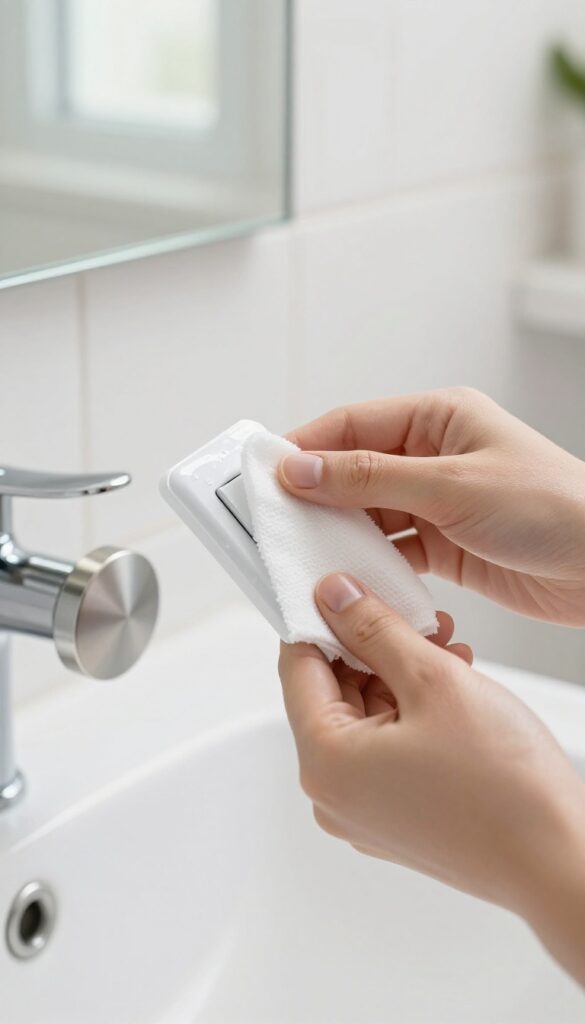
Light switches and doorknobs are some of the most touched surfaces in any bathroom, yet they're often overlooked during cleaning. Every time you flush the toilet or touch a dirty surface, germs transfer to these high-touch spots. Making them part of your weekly routine keeps your bathroom truly hygienic, not just visually clean.
These small surfaces can harbor bacteria and viruses that spread illness. A quick wipe during your weekly shine day takes seconds but makes a big difference in overall cleanliness. Don't let these hidden germ hotspots undo your hard work on the rest of the bathroom.
Why They Need Weekly Attention
Studies show that bathroom light switches and doorknobs can be among the germiest spots in the house. They get touched by multiple people throughout the day, often after handwashing but sometimes before. A weekly disinfecting wipe is a simple way to break the germ cycle without adding much time to your routine.
Best Products For The Job
Disinfectant wipes are the easiest option—just pull, wipe, and toss. If you prefer spray, use a disinfectant spray and a microfiber cloth, letting the surface stay wet for the recommended contact time. Avoid harsh bleach on metal fixtures, as it can cause tarnishing.
Alcohol-based wipes or sprays work well on most switch plates and knobs.
Don't Forget The Switch Plate Edges
Grime often builds up around the edges of light switch plates. Use a cotton swab dipped in disinfectant to clean those tight crevices. This extra step ensures you're not just wiping the flat surface but also removing buildup that can attract more dirt.
10. Organize Products in Trays or Baskets
If your counter is cluttered with bottles, jars, and tubes, you're making cleaning harder than it needs to be. Every time you wipe down the surface, you have to move everything around. Grouping products in trays or baskets solves this problem in one simple step.
When all your daily essentials live in a tray, you can lift the whole thing, wipe the counter in seconds, and set it back down. No more picking up each bottle individually. Plus, trays keep everything contained and tidy, so your bathroom looks put together even when you're in a rush.
Choose Waterproof Materials
Bathrooms are humid, so avoid fabric or wicker baskets that can trap moisture and grow mold. Instead, go for plastic, acrylic, or silicone trays that can be wiped clean or even rinsed under the faucet. Clear acrylic keeps a light, airy look, while colored plastic adds a pop of personality.
Group By Use
Create a tray for daily items like toothbrushes, toothpaste, and face wash, and another for cleaning supplies under the sink. In the shower, use a rust-proof caddy for shampoo, conditioner, and body wash. This way, you grab what you need without rummaging, and cleaning stays simple.
Make It Part Of Your Routine
Once you have trays, incorporate them into your weekly shine day. Pull out each tray, wipe the counter or shelf underneath, and give the tray itself a quick spray and wipe. This takes less than a minute and prevents grime from building up around your products.
11. Use a Toilet Cleaning Gel for Continuous Action
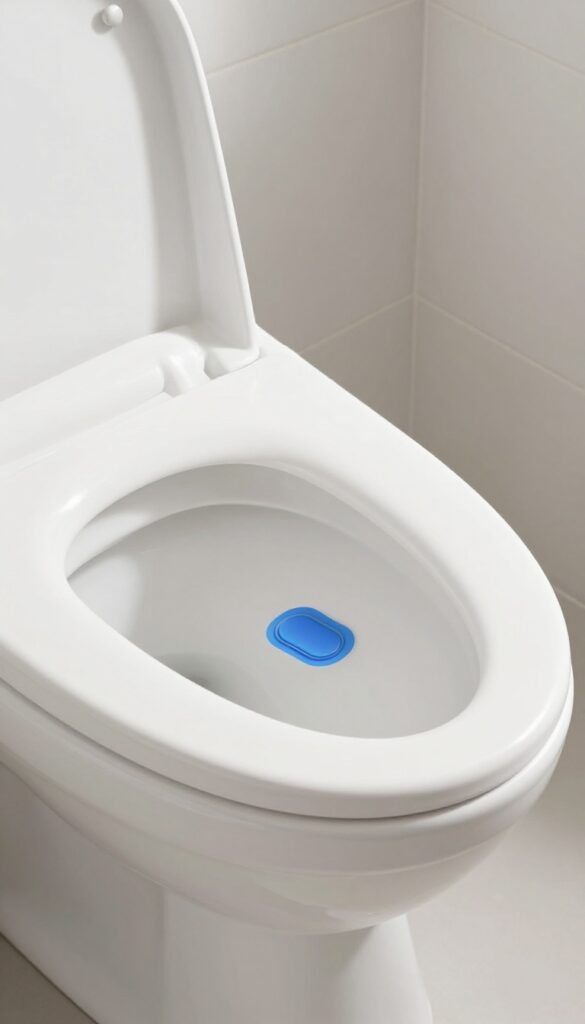
Adhesive gel tabs inside the toilet bowl release cleaner with every flush. They help prevent stains and keep the bowl fresh between deep cleans. This is a set-it-and-forget-it solution that makes a big difference with almost zero effort.
Toilet cleaning gels are small, adhesive tabs that stick to the inside of your toilet bowl. Each time you flush, the gel releases a dose of cleaning and deodorizing agents. This continuous action helps break down stains, prevent new ones from forming, and keeps the water looking clear.
It's an easy way to maintain freshness without scrubbing every day.
How They Work
The gel contains surfactants and mild bleaches that activate when water flows over them. They cling to the porcelain and slowly dissolve over several weeks. Most brands offer a range of scents, from citrus to lavender, so you can pick one that freshens your bathroom naturally.
Placement Tips
For best results, apply the gel tab under the rim of the bowl, away from the direct stream of water during flushing. This ensures maximum contact with the water and bowl surface. Make sure the area is clean and dry before sticking the tab so it adheres properly.
Maintenance And Safety
Replace the gel tab every three to four weeks, or as directed on the package. While these gels are generally safe for septic systems, it's wise to check the label. Avoid using them with bleach-based drop-in tablets, as the combination can be too harsh and may damage toilet components.
12. Clean Mirrors with Microfiber and Vinegar
Mirrors are the first thing you check before leaving the bathroom, but they're also the first to show streaks and smudges. The trick to a crystal-clear reflection is simpler than you think: a homemade vinegar solution and the right cloth. No fancy sprays needed.
A 50/50 mix of white vinegar and water works wonders on bathroom mirrors. It cuts through toothpaste splatters, hairspray residue, and hard water spots without leaving a chemical film. The key is using a microfiber cloth—paper towels and old rags often leave lint or streaks behind.
Spray the solution lightly onto the mirror (not soaking wet), then wipe in a zigzag pattern. This prevents streaking and covers the entire surface evenly. For extra stubborn spots, let the solution sit for 30 seconds before wiping.
Why Vinegar Works Best
Vinegar is a mild acid that dissolves mineral deposits and soap scum naturally. Unlike commercial glass cleaners, it doesn't contain ammonia or dyes, so it's safe for the environment and your lungs. The smell fades quickly once dry.
The Zigzag Technique
Wiping in a zigzag motion helps avoid leaving a visible line where you stop and start. Start at the top left, work your way across and down, and finish at the bottom right. This method ensures every inch gets cleaned without redundant passes.
Microfiber Cloth Care
Use a clean, dry microfiber cloth for mirrors. Wash cloths separately without fabric softener, which clogs the fibers. Replace them when they lose their softness or start leaving lint.
13. Wash Shower Curtains and Liners Monthly

Shower curtains and liners take a beating from moisture, soap scum, and mildew. Fabric ones can look dingy fast, while plastic liners get grimy and start to smell. A monthly wash keeps them fresh and extends their life.
Tossing fabric curtains and liners into the washing machine is one of the easiest ways to keep them clean. Use warm water and a regular detergent cycle. Add a cup of white vinegar or half a cup of bleach to kill mildew and brighten whites.
Hang them back up immediately to prevent wrinkles. Plastic liners can also go in the machine on a gentle cycle with a few towels to scrub them clean. If a liner is too far gone—stiff, discolored, or smelly—just replace it.
They're cheap and quick to swap out.
Why Monthly Matters
Mildew builds up quickly in damp bathrooms. Washing curtains monthly stops it from taking hold. You'll also avoid that musty smell that clings to the fabric.
Machine-wash Tips
Always check the care label first. Use cold or warm water, not hot, to prevent shrinking. Add a couple of towels to the load to help scrub the curtain.
Skip the fabric softener—it can leave a residue that attracts soap scum.
When To Replace Instead
Plastic liners usually last three to six months. If you see stubborn mildew stains that won't come out, or the liner feels brittle, it's time for a new one. Fabric curtains can last years with proper care.
14. Use a Pumice Stone on Hard Water Rings
Hard water rings and stubborn toilet bowl stains can make your bathroom look dingy no matter how often you clean. A pumice stone is a surprisingly gentle solution that tackles these deposits without scratching porcelain. It's a simple tool that saves you from harsh chemicals and elbow grease.
Pumice stones are porous volcanic rocks that work like a fine abrasive. When wet, they gently wear away mineral deposits without damaging the surface. They're perfect for those brown or white rings that form just above the waterline in toilets, or for hard water spots on sinks and tubs.
Just remember to keep the stone wet while you scrub—dry pumice can scratch.
How To Use It Safely
First, wet the pumice stone thoroughly. Then, gently rub the stain using light pressure—let the stone do the work. You'll see the deposit start to powder away.
Rinse the area and the stone frequently to check progress and keep everything lubricated. Never use a pumice stone on acrylic, fiberglass, or enameled surfaces; it's only for uncoated porcelain.
Where Else It Works
Beyond toilet bowls, pumice stones are great for removing hard water spots from porcelain sinks, bathtubs, and even ceramic tiles. They can also clean rust stains from toilet bowls or urinals. For tough calcium rings, a few minutes of gentle rubbing can restore the surface to like-new condition.
Pro Tips For Best Results
Always test on an inconspicuous spot first. Keep the stone and surface wet throughout the process. If the stone starts to feel smooth, you can trim it with a utility knife to expose fresh abrasive surface.
After use, rinse the stone and let it dry completely before storing.
15. Keep a Trash Can with a Lid
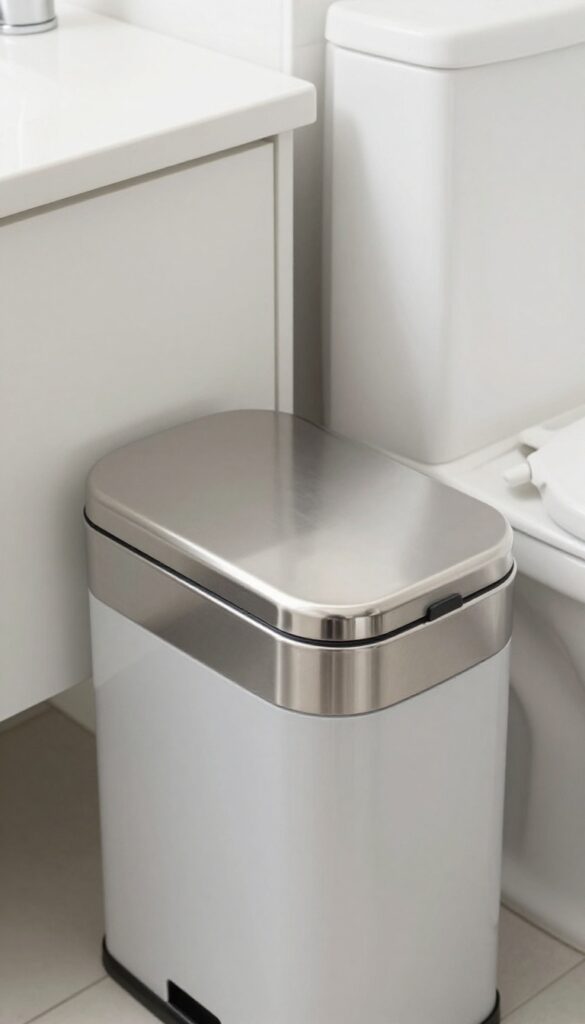
A small trash can might not seem like a game-changer, but it makes a big difference in how clean your bathroom feels. Without one, used cotton balls, floss, and tissues end up on the counter or in an open bin that looks messy and can smell. A lidded trash can keeps all that out of sight and traps odors, so your bathroom stays fresh between cleanings.
Choose a can that fits your space—a slim, step-can works well next to the toilet or under the sink. Empty it weekly as part of your shine day routine to prevent buildup and keep the room smelling clean. This simple habit reduces visual clutter and makes the whole space feel more put-together.
Why A Lid Matters
An open trash can lets odors escape and shows off unsightly trash. A lid contains smells and hides the mess, so your bathroom looks tidy even when the can is full. It also keeps curious pets or toddlers out.
Choosing The Right One
Look for a small, easy-to-clean can with a lid that opens without touching—like a step pedal or a swing-top. Stainless steel or plastic with a smooth surface wipes down quickly. Make sure it fits in your designated spot without blocking foot traffic.
Weekly Emptying Routine
Tie off the bag and take it out every week on shine day. Wipe the inside of the can with a disinfecting wipe or spray before putting in a new liner. This prevents lingering smells and keeps the can itself clean.
16. Deep Clean Exhaust Fans Seasonally
Your bathroom exhaust fan works hard to remove moisture and odors, but dust buildup can slow it down and even spread particles back into the air. A quick seasonal deep clean keeps it running efficiently and improves air quality. This is one of those tasks that's easy to overlook but makes a real difference.
Dust on fan blades and grilles reduces airflow and forces the motor to work harder. Over time, this can lead to noisier operation and higher energy bills. Worse, that dust can recirculate every time you turn the fan on, landing on your freshly cleaned surfaces.
To deep clean, start by turning off the power to the fan at the circuit breaker. Remove the grille—usually held by clips or screws—and vacuum it thoroughly with a brush attachment. Wash the grille in warm, soapy water, then let it dry completely.
Use a microfiber cloth or a soft brush to gently wipe dust off the fan blades and the interior housing. Reassemble and restore power. Do this every three to four months, or more often if you use the fan heavily.
It takes less than 15 minutes and keeps your fan working quietly and effectively.
Why It Matters
A clean exhaust fan removes humidity faster, which helps prevent mold and mildew growth. It also reduces the dust that settles on bathroom surfaces, so your weekly cleaning stays effective longer.
Step-by-step Clean
Turn off power at the breaker. Remove the grille and vacuum it. Wash the grille with soap and water, then dry.
Wipe blades and interior with a damp cloth. Let everything dry before reassembling.
How Often To Do It
Aim for every three to four months. If you notice the fan is louder than usual or seems to move less air, it's time for a clean. High-usage bathrooms may need it more often.
17. Set a 15-Minute Timer for a Speed Clean
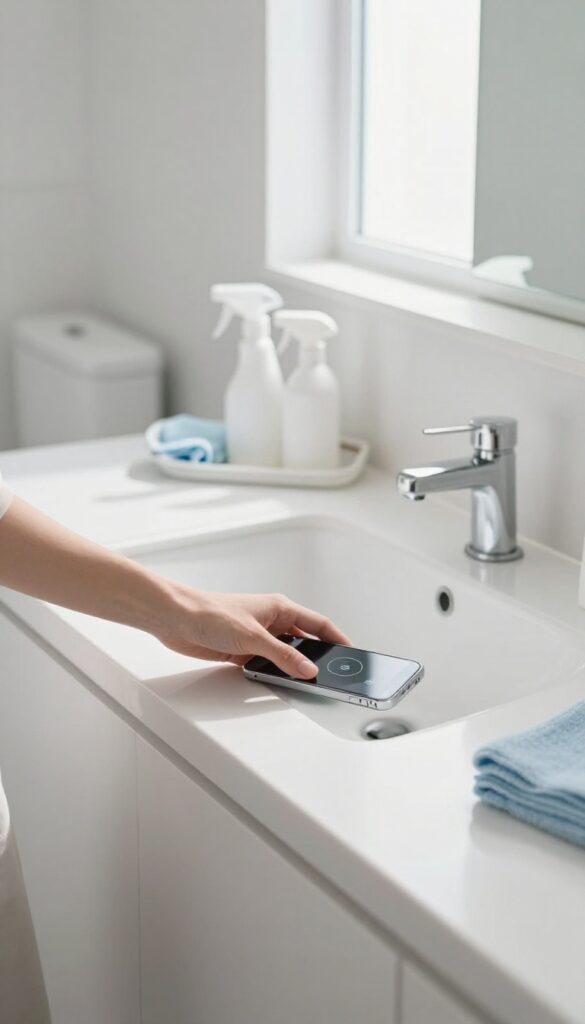
When motivation is low but the bathroom needs a refresh, a 15-minute speed clean is your secret weapon. It's short enough to feel manageable but long enough to make a visible difference. The key is to move fast and focus only on the areas that matter most.
Grab your cleaning caddy, set a timer, and commit to stopping when it goes off. You'll be surprised how much you can accomplish when you're racing the clock. This method works especially well for busy mornings or when guests are on their way.
Start With The Toilet
The toilet is usually the highest-impact area. Squirt cleaner inside the bowl and around the rim, then give it a quick scrub with a toilet brush. Wipe down the seat and lid with a disinfectant wipe or spray.
This takes about 3 minutes and instantly makes the bathroom feel cleaner.
Hit The Sink And Counter
Next, spray the sink, faucet, and counter with an all-purpose cleaner. Wipe them down with a microfiber cloth, paying attention to the faucet base and handles where grime collects. Clear away any clutter—toothbrushes, soap dispensers—and give the surface a quick polish.
Finish With The Mirror
A streak-free mirror makes the whole bathroom look brighter. Use a glass cleaner or a mix of vinegar and water. Spray and wipe with a dry microfiber cloth in a zigzag pattern to avoid streaks.
If you have time, give the mirror frame a quick dusting too.
End With A Quick Floor Sweep
If you have a minute left, grab a broom or a dust mop and do a fast pass over the floor. Pick up hair, dust bunnies, and any visible debris. This final step ties the whole room together and leaves the bathroom looking tidy and fresh.
FAQ
How often should I deep clean my bathroom?
Aim for a deep clean once a month, focusing on grout, showerheads, and exhaust fans. Weekly shine days handle the rest.
Can I use vinegar on all bathroom surfaces?
Vinegar is safe for glass, tiles, and chrome, but avoid it on natural stone like marble or granite, as it can etch the surface.
What's the best way to remove soap scum?
A paste of baking soda and water, or a commercial cleaner with citric acid, works well. Let it sit for a few minutes before scrubbing.
How do I prevent mold in the bathroom?
Improve ventilation by running the fan during and after showers. Wipe down wet surfaces and use a daily spray to inhibit mold growth.
What's the easiest way to clean a toilet?
Use a toilet brush with cleaner in the holder for quick daily swishes. For deeper cleaning, apply a bowl cleaner, let it sit, then scrub and flush.
Conclusion
These 17 tips show that a gleaming bathroom doesn't demand harsh chemicals or hours of effort. Pick the ones that tackle your biggest annoyances—like grout grime or foggy mirrors—and weave them into your weekly rhythm.
Start small, stay consistent, and soon your bathroom will shine without stealing your weekend.


