
Your floors work hard, collecting dust, sticky spots, and scuff marks that dull their shine. You don't need a cabinet full of specialty products to bring back that fresh, clean look.
With simple tools like a tennis ball, rubbing alcohol, and a squeegee, you can tackle any floor type from hardwood to tile. These 23 tips are practical, budget-friendly, and designed to deliver real results without harsh chemicals.
Whether you're dealing with sticky kitchen spills or dull living room floors, each idea offers a straightforward fix. Let's get your floors gleaming.
1. Sweep with Purpose, Not Just Habit
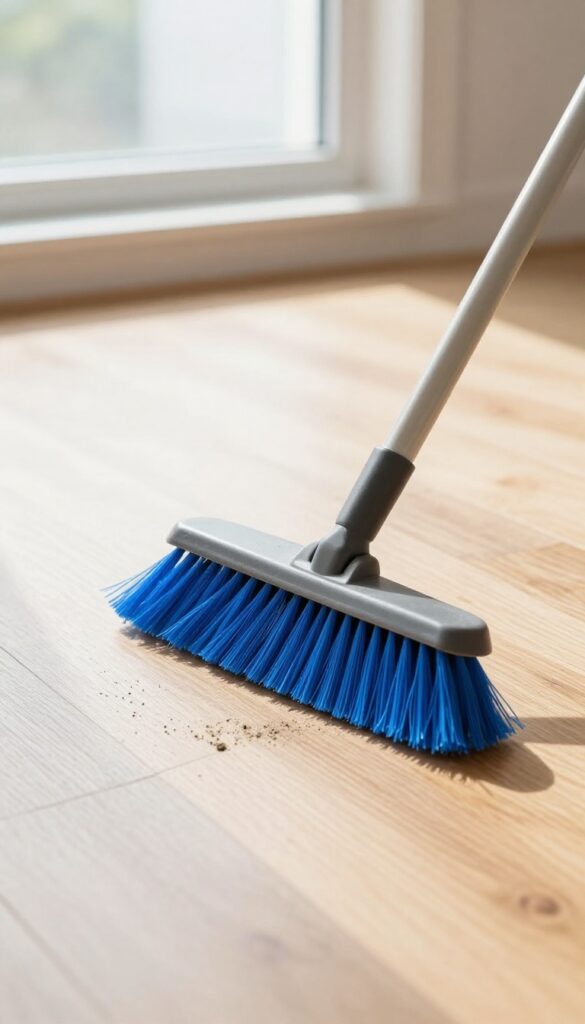
Most people sweep on autopilot, pushing dust into corners and under furniture. That approach just moves dirt around instead of removing it. A purposeful sweep collects debris efficiently and leaves floors noticeably cleaner.
Choosing the right broom makes all the difference. Microfiber brooms attract dust like a magnet, while horsehair brooms are gentle on delicate surfaces. Sweep in straight, overlapping lines toward a central pile, then scoop without scattering.
Pick The Right Broom
Microfiber brooms are ideal for hard floors because they trap fine particles and reduce airborne dust. Horsehair brooms work well for delicate surfaces like vinyl or sealed wood. Avoid cheap plastic bristles that just flick debris around.
Sweep In A Pattern
Start at the farthest corner and work your way toward the door. Use long, straight strokes and overlap each pass slightly. This prevents missed spots and keeps dust from escaping.
Finish With A Damp Cloth
Even the best broom leaves a thin film of dust. After sweeping, wipe the floor with a slightly damp microfiber cloth to pick up any remaining particles. This step preps the surface for mopping or leaves it shine-ready.
2. Vacuum Before You Mop Every Time
Mopping over loose dirt turns your floor into mud. Always vacuum or sweep first to remove grit that can scratch surfaces.
Skipping the dry cleanup step is a common mistake. When you mop over dust, hair, and crumbs, you're basically spreading abrasive particles across the floor. That leads to micro-scratches that dull the finish over time.
A quick vacuum or sweep takes just a minute and makes a huge difference.
Why Grit Is Your Floor's Enemy
Tiny particles of dirt and sand act like sandpaper under the mop. On hardwood, they scratch the polyurethane. On tile, they wear down the glaze.
On vinyl, they create cloudy patches. Removing them first keeps your floor looking new longer.
Vacuum Vs. Sweep: Which Is Better?
A vacuum with a hard floor setting or a soft brush attachment picks up fine dust that a broom leaves behind. If you sweep, use a microfiber dust mop that traps particles instead of pushing them around. Avoid traditional brooms on hardwood—they scratch.
The Right Order For Best Results
Start by vacuuming or sweeping the entire floor, including corners and under furniture. Then spot-clean any sticky spots with a damp cloth. Finally, mop with your chosen solution.
This three-step routine prevents mud and ensures a streak-free shine.
3. Choose the Right Mop for Your Floor Type
Not all mops are created equal, and using the wrong one can leave streaks, damage surfaces, or just push dirt around. The key is matching the mop to your floor's material and finish. A quick swap can make a huge difference in how clean your floors look and how long they last.
Flat mops with microfiber pads are ideal for hardwood and laminate because they trap dust without scratching. String mops work well on tile and stone, but they can hold too much water for delicate surfaces. Always wring out excess moisture—no floor likes to be soaked.
Why Flat Mops Win For Hardwood And Laminate
Hardwood and laminate are sensitive to moisture and scratches. Flat mops with a spray bottle let you control how much water you use. Microfiber pads pick up dust and grime without leaving lint or swirl marks.
They're also easy to wash and reuse, saving money over disposable pads.
String Mops For Tile And Stone
String mops are classic for a reason—they're great at getting into grout lines and covering large areas quickly. Use a cotton or microfiber blend for better absorbency. Just be sure to wring thoroughly; standing water can seep into grout and cause mildew or discoloration over time.
Avoid The Soaking Mistake
No matter what mop you choose, excess water is the enemy. Over-wetting can warp hardwood, peel laminate edges, and leave residue on tile. A damp mop—not a wet one—is all you need.
Wring until no drips fall, then mop in sections, rinsing the mop head often.
4. Hot Water Is Your Best Cleaner
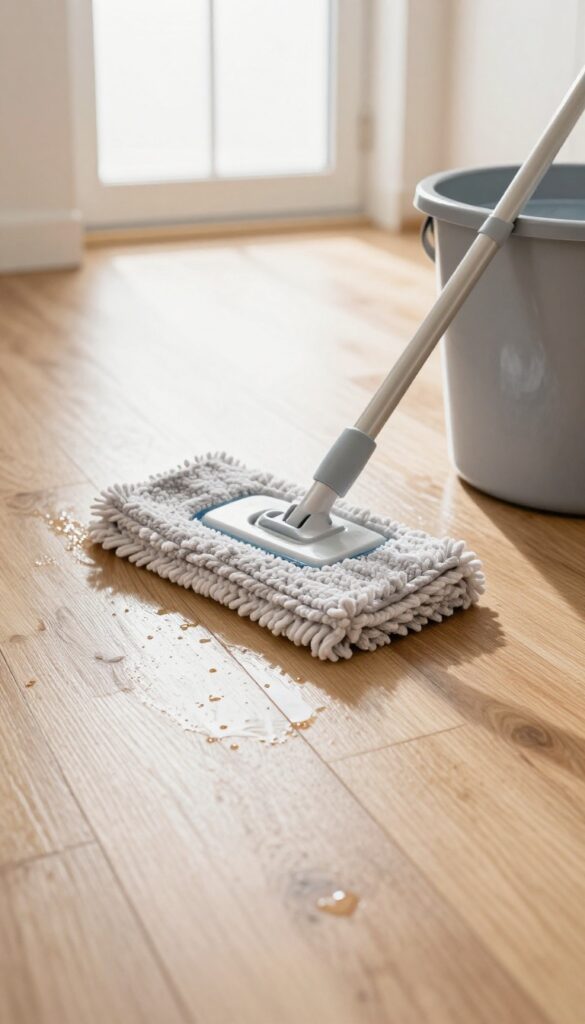
You might think you need a fancy floor cleaner to get results, but hot water alone does the heavy lifting. Heat helps dissolve grease and loosen dried-on grime, making it easier to wipe away. A splash of vinegar or a drop of dish soap can help with stubborn spots, but most of the time, plain hot water is enough.
Hot water is a powerful solvent. When you mop with it, the heat breaks down dirt particles and makes them easier to lift off the floor. It also helps evaporate quickly, leaving less moisture behind.
For routine cleaning, fill your bucket with hot tap water—not boiling—and mop as usual. You'll be surprised how much grime comes off without any chemicals. If you have sticky spots or greasy areas, add a tablespoon of white vinegar per gallon of water.
For tough food spills, a single drop of dish soap can cut through the grease. Just be careful not to use too much soap, as it can leave a residue that attracts more dirt. Always test a small area first, especially on unsealed hardwood or natural stone.
Why Heat Matters
Hot water molecules move faster and penetrate dirt more effectively than cold water. This means you can clean with less scrubbing and less product. The heat also helps sanitize surfaces naturally, reducing the need for harsh disinfectants.
When To Add Vinegar
White vinegar is a mild acid that cuts through grease and removes residue. Use it for sticky spots or to restore shine on tile and linoleum. Avoid vinegar on unsealed hardwood or natural stone, as it can damage the finish over time.
The Soap Rule
A single drop of dish soap is plenty for a bucket of water. Too much soap creates a film that dulls floors and attracts dust. For best results, add the soap after the water is in the bucket and mix gently to avoid suds.
5. Tackle Sticky Spots with Rubbing Alcohol
Sticky residue from spills, tape, or stickers can be a real eyesore on an otherwise clean floor. Instead of scrubbing endlessly with soap and water, reach for rubbing alcohol. Isopropyl alcohol breaks down the sticky bonds without damaging most sealed floor surfaces, and it evaporates quickly, leaving no residue behind.
Dab a cloth with isopropyl alcohol and gently rub the sticky spot. The alcohol dissolves the adhesive almost instantly, allowing you to wipe it away with minimal effort. This method works on hardwood, laminate, tile, and vinyl floors, as long as the finish is intact.
Avoid using it on unsealed or waxed floors, as it can strip the finish. Always test in an inconspicuous area first.
Why Rubbing Alcohol Works
Sticky residues are often made of adhesives or sugars that water alone can't dissolve. Rubbing alcohol is a solvent that breaks down these compounds, making them easy to wipe away. It also evaporates quickly, so you won't have to worry about moisture seeping into floor seams or causing damage.
How To Apply It Safely
Dampen a soft cloth with rubbing alcohol—don't soak it. Gently rub the sticky spot in a circular motion. The residue should lift off within seconds.
If it's stubborn, let the alcohol sit for a few seconds before rubbing. Once the spot is gone, wipe the area with a dry cloth to remove any excess alcohol.
When To Avoid This Method
Avoid using rubbing alcohol on unsealed wood, waxed floors, or any surface with a delicate finish. It can strip the protective layer and cause discoloration. Always check your floor manufacturer's guidelines and test in an inconspicuous spot before treating a visible area.
6. Use a Squeegee on Tile Grout
Grout lines are notorious for trapping moisture and grime, leading to discoloration and mildew. After mopping, a squeegee can be your secret weapon for keeping those lines clean and dry. It's a simple step that takes seconds but makes a big difference in the long run.
A standard window squeegee works perfectly for this task. After you've mopped the tile floor, run the squeegee blade along the grout lines at a slight angle. The rubber blade will pull out excess water that would otherwise sit in the grooves and encourage mold growth.
For best results, wipe the blade clean between passes to avoid redepositing dirt. This technique is especially useful in bathrooms and kitchens where moisture is high. You'll notice your grout stays lighter and fresher longer, and you'll reduce the need for harsh chemical cleaners.
Why Squeegeeing Works
Grout is porous, so it absorbs water like a sponge. When water sits, it creates a perfect environment for mildew and bacteria. A squeegee physically removes that water, cutting off the moisture supply.
It's the same principle as squeegeeing your shower walls to prevent soap scum, but adapted for the floor.
Choosing The Right Squeegee
Look for a squeegee with a soft rubber blade to avoid scratching the tile. A 6- to 10-inch blade gives you good control. You can find them at any hardware store for a few dollars.
If you don't have one, a microfiber cloth wrapped around a putty knife works as a quick alternative.
When To Squeegee
Do this right after mopping, while the floor is still wet but not soaking. Work in small sections so the water doesn't dry before you get to it. For heavily soiled grout, you can spray a mild cleaner directly on the lines before squeegeeing to lift stubborn dirt.
7. Dry Mop Daily for High-Traffic Areas
A quick once-over with a dry microfiber mop in the kitchen and entryway keeps dust from turning into a sticky film. It takes less than a minute and saves you from scrubbing later.
High-traffic areas like the kitchen and entryway collect dust, crumbs, and grit throughout the day. When you wet mop over that loose debris, it turns into a muddy paste that dries into a sticky film. A dry mop picks up the dry particles before they get wet, keeping your floors cleaner longer.
Use a microfiber mop head—it traps dust and dirt without scratching. Swipe it across the floor in quick, overlapping strokes. No water, no cleaner, just dry sweeping.
Do this daily, and your floors will stay noticeably shinier.
Why Dry First?
Wet mopping over dirt creates a thin layer of mud that dries into a hazy film. That film attracts more dust and makes floors look dull. Dry mopping removes the abrasive particles before they can scratch or stick.
Best Mop For Daily Dry Mopping
A flat microfiber mop with a reusable pad works best. The microfiber fibers create static electricity that pulls dust into the cloth. Avoid string mops for dry use—they just push dirt around.
Make It A Habit
Keep the mop handy near the high-traffic zone. After breakfast or when you get home, do a quick pass. It becomes a 30-second routine that prevents weekly scrubbing sessions.
8. Polish Hardwood with Olive Oil and Vinegar
Natural ingredients can work wonders on hardwood floors without the chemical residue. Olive oil and vinegar combine to create a gentle polish that restores luster and removes light grime. This DIY solution is especially useful for tired-looking floors that just need a quick pick-me-up.
Mix 1/4 cup olive oil with 1/2 cup vinegar and 2 cups warm water. Apply sparingly with a damp mop for a natural shine.
Why This Combo Works
Vinegar cuts through grease and disinfects, while olive oil conditions the wood and adds a subtle sheen. Together, they clean and polish in one step, leaving floors looking refreshed without sticky buildup.
Application Tips
Always test on an inconspicuous area first. Use a spray bottle to mist the solution onto the floor, then mop with a well-wrung microfiber mop. Avoid soaking the wood, as excess moisture can cause warping.
Buff dry with a clean cloth for extra shine.
When To Skip This Method
If your hardwood has a wax finish or is unsealed, skip the vinegar as it can dull the surface. Also avoid overusing oil, which can attract dust over time. Stick to once-a-month polishing for best results.
9. Remove Scuff Marks with a Tennis Ball
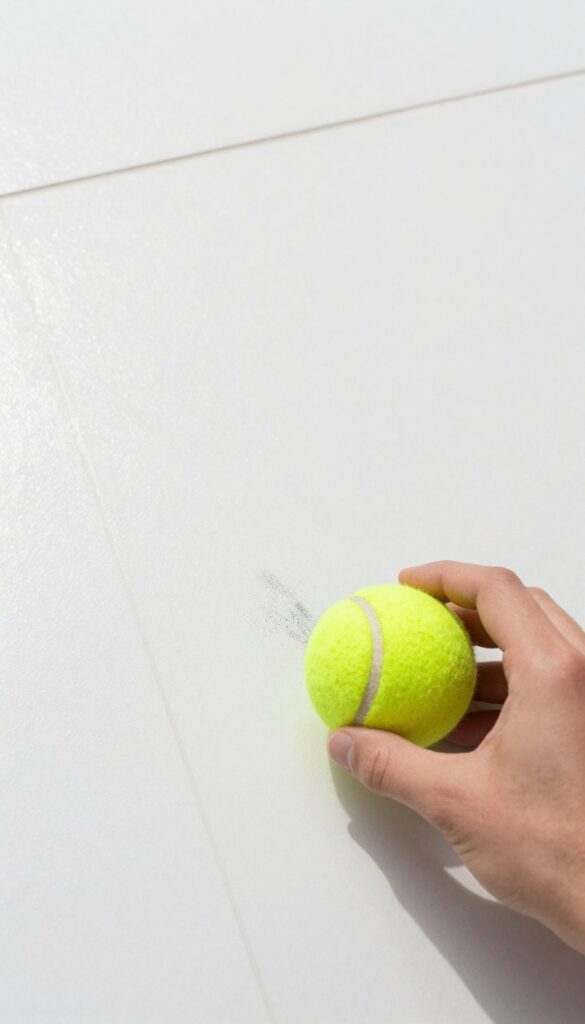
Black scuff marks from shoes or furniture legs can make clean floors look dirty. Before you reach for harsh chemicals, try a simple tennis ball. It's a gentle, effective way to erase those marks without damaging the surface.
Grab a clean tennis ball and rub it firmly over the scuff mark. The rubber material lifts the mark without scratching tile, vinyl, or laminate. For stubborn marks, apply a bit of pressure and rub in a circular motion.
This trick works best on smooth, non-porous floors. Avoid using on unfinished wood or delicate surfaces.
Why A Tennis Ball Works
The rubber in a tennis ball acts like a gentle eraser. It grabs the scuff residue without being abrasive. Unlike a magic eraser or scrubbing pad, it won't dull the finish.
Plus, it's reusable and costs next to nothing.
When To Use This Method
This trick is perfect for tile, vinyl, laminate, and linoleum floors. It handles marks from sneakers, heels, and furniture legs. For hardwood, test in an inconspicuous spot first.
If the mark is fresh, it usually comes off in seconds.
Tips For Best Results
Use a clean, dry tennis ball. Avoid one that's dirty or worn, as it might transfer dirt. For large scuff areas, cut the ball in half and use the flat side.
Rub with steady pressure, then wipe away any residue with a damp cloth.
10. Deep Clean Laminate with a Steam Mop (Carefully)
Laminate flooring is durable and easy to maintain, but it doesn't like excess moisture. A steam mop can be a game-changer for deep cleaning, but only if you use it the right way. Too much water or heat can warp the planks and ruin the seams.
High-quality laminate with a sealed surface handles steam well. Lower-end laminate might not. If you're unsure, test a small area first.
Keep the mop moving steadily and never let it sit in one spot.
Check Your Laminate Rating
Not all laminate is built the same. Look for an AC (Abrasion Class) rating of AC3 or higher—these are more moisture-resistant. If your laminate is older or budget-friendly, skip the steam and stick to a damp mop.
A quick check: drip a few drops of water on the floor. If they bead up, you're likely safe. If they soak in, avoid steam.
Prep The Floor First
Sweep or vacuum thoroughly before steaming. Any grit left behind will get pushed around by the mop and can scratch the surface. Pay extra attention to corners and under furniture where dust bunnies hide.
A clean start means a better finish.
Keep It Moving
The golden rule of steaming laminate: never pause. Glide the mop in long, even strokes, overlapping slightly. If you stop, even for a few seconds, moisture can seep into the seams and cause swelling.
Work in sections so you can see your progress and avoid backtracking over wet areas.
Dry Immediately
After steaming, grab a dry microfiber cloth or a clean towel and give the floor a quick buff. This removes any leftover moisture and adds extra shine. It also prevents water spots.
For high-traffic areas, consider running a fan or opening windows to speed up drying.
11. Neutralize Pet Urine Odors with Baking Soda
Pet accidents happen, and the lingering smell can be tough to eliminate. Standard cleaners often mask the odor temporarily, but baking soda tackles it at the source. This simple method works on carpets, rugs, and even some hard floors, leaving your space fresh without harsh chemicals.
Baking soda is a natural deodorizer that absorbs and neutralizes odors rather than covering them up. For fresh urine spots, blot up as much liquid as possible first, then generously sprinkle baking soda over the area. Let it sit for at least 15 minutes—longer for older stains—then vacuum thoroughly.
For stubborn smells, follow up with a rinse of equal parts white vinegar and water. The vinegar helps break down uric acid crystals, and once dry, the vinegar smell dissipates, taking the pet odor with it.
Why Baking Soda Works
Baking soda is alkaline, which helps neutralize the acidic compounds in pet urine. It also absorbs moisture, which reduces the environment where odor-causing bacteria thrive. This makes it effective for both fresh and dried stains.
Step-by-step Application
Blot the area with paper towels to remove excess moisture. Sprinkle a thick layer of baking soda over the spot and let it sit for 15-30 minutes. Vacuum thoroughly.
If the smell persists, mix 1 cup white vinegar with 1 cup water, spray lightly on the area, and blot dry. Repeat if needed.
When To Avoid This Method
Avoid using vinegar on natural stone floors like marble or granite, as the acid can etch the surface. For these floors, stick to baking soda alone and rinse with water. Always test a small, hidden area first.
12. Use Microfiber Cloths for Spot Cleaning
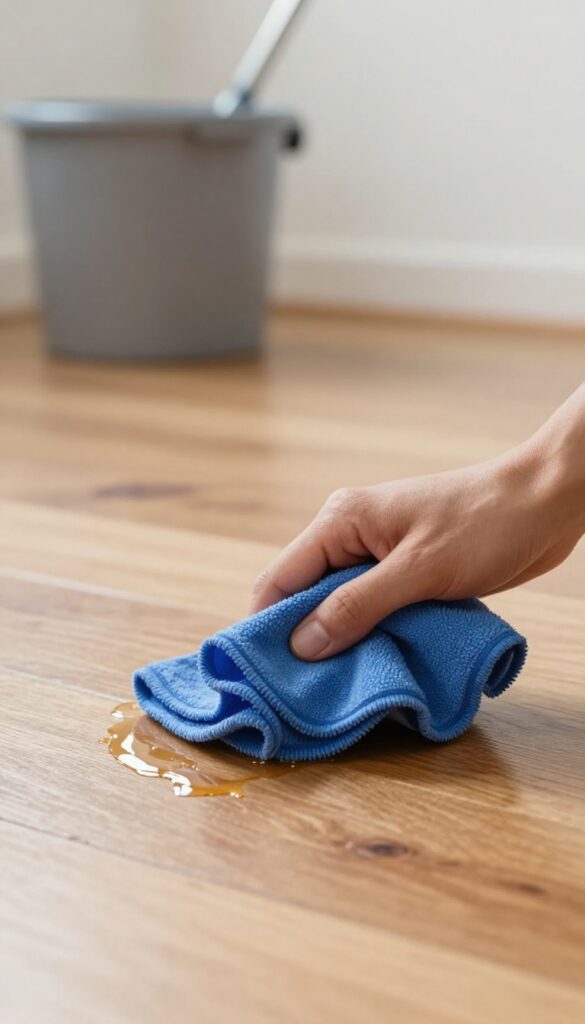
Paper towels might seem convenient, but they often just push dirt around and leave lint behind. Microfiber cloths are a game-changer for quick wipe-ups. They trap dust, grime, and sticky residue deep in their fibers, lifting messes away instead of smearing them.
Plus, they're reusable, so you save money and reduce waste.
Keep a stack of microfiber cloths handy for quick wipe-ups. They trap dirt better than paper towels and are reusable. Dampen one slightly for sticky spots or use it dry for dusting.
Wash them separately to avoid lint transfer and they'll last for months.
Why Microfiber Works So Well
Microfiber cloths are made of ultra-fine polyester and polyamide fibers. These fibers split into tiny hooks that grab and hold onto dirt, dust, and bacteria. A dry microfiber cloth creates a static charge that attracts dust like a magnet.
When damp, the fibers open up and absorb spills and sticky residues effectively.
Best Practices For Spot Cleaning
For sticky spots, lightly dampen a microfiber cloth with water or a mild cleaner. Wipe the spot using a gentle pressure to lift the residue without scratching the floor. For dust and pet hair, use a dry cloth and sweep in long, straight strokes.
Fold the cloth to use a fresh side for each pass.
Caring For Your Microfiber Cloths
To keep them effective, wash microfiber cloths separately from cotton towels to prevent lint transfer. Use a mild detergent and avoid fabric softener or bleach, which clog the fibers. Air dry or tumble dry on low heat.
Replace them when they start to lose their grip or leave streaks.
13. Seal Grout to Prevent Stains
Grout lines are porous, so they soak up spills and sticky residue like a sponge. Once stained, scrubbing them clean is a real chore. A simple yearly treatment with grout sealer changes that entirely.
Sealing grout creates an invisible barrier that repels liquids and dirt. It makes routine cleaning far easier because spills sit on top instead of sinking in. You'll spend less time scrubbing and more time enjoying your clean floors.
Why Grout Needs Sealing
Unsealed grout absorbs moisture, oils, and food particles. Over time, this leads to discoloration and stubborn stains that even bleach can't fix. Sealing blocks absorption and preserves the original color.
How To Apply Grout Sealer
Clean the grout thoroughly and let it dry for 24 hours. Apply the sealer with a small brush or applicator bottle, working it into the lines. Wipe away excess from tile surfaces before it dries.
Let it cure for the time specified on the product label.
When To Reseal
Test your grout by sprinkling a few drops of water on it. If the water beads up, the seal is still working. If it soaks in quickly, it's time to reseal.
For most households, once a year is sufficient, but high-traffic kitchens may need it every six months.
14. Buff Vinyl Floors with Baby Oil
Vinyl and linoleum floors can look dull and hazy after mopping, especially if you use too much cleaner or hard water. A tiny amount of baby oil in your mop water cuts through residue and leaves a brilliant, streak-free shine. It's a trick that costs pennies and makes your floors look brand new.
Baby oil is mostly mineral oil, which gently dissolves dirt and adds a light protective layer without making floors slippery when used correctly. The key is using just a few drops—too much can leave a greasy film. This method works best on smooth vinyl or linoleum, not textured or waxed floors.
How Much Baby Oil To Use
Add 3 to 5 drops of baby oil to a bucket of warm water. Stir well so the oil disperses. For a spray mop, add 1 drop to the water reservoir.
Less is definitely more here.
Best Mop For The Job
A microfiber mop or a flat mop with a washable pad works best. Avoid sponge mops—they can push oil around unevenly. Wring the mop well so the floor is damp, not wet.
Drying For Maximum Shine
Let the floor air dry completely. If you see any streaks, buff them with a dry microfiber cloth. The shine will deepen as the floor dries.
15. Fight Dust with a Damp Cloth on Your Swiffer
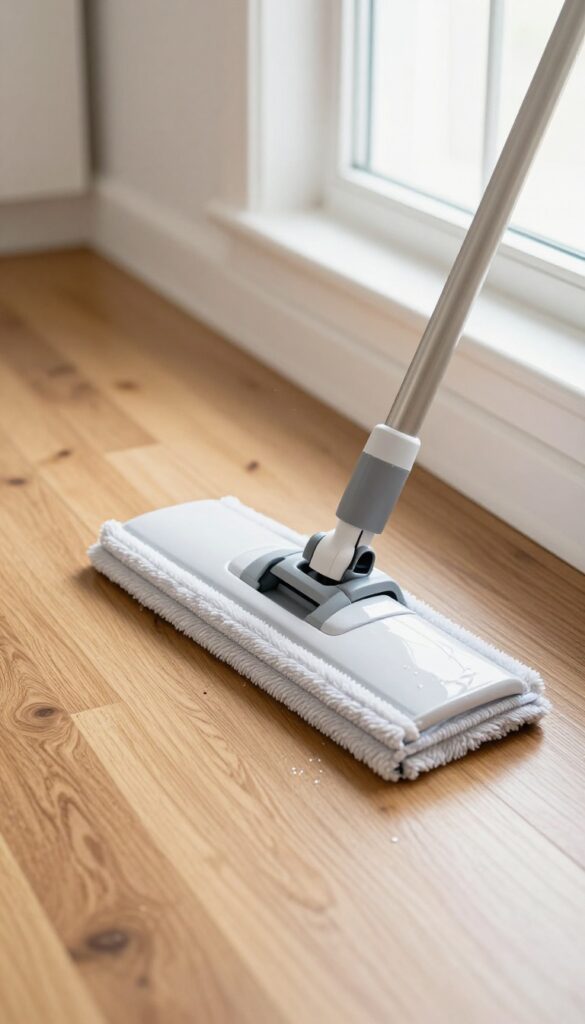
Dry dusting with a Swiffer can send particles flying right back into the air, settling on furniture and shelves. A simple tweak—dampening the cloth—turns it into a dust-trapping powerhouse. The moisture grabs hold of dust and locks it in, so you actually remove it instead of just relocating it.
Swiffer cloths are designed to attract dust electrostatically, but they lose effectiveness quickly, especially on textured surfaces. By adding a light mist of water or a dusting spray, you create a tacky surface that captures fine particles and prevents them from becoming airborne. This method works wonders on hardwood, tile, and laminate, leaving floors noticeably cleaner and less dusty between deep cleans.
Why Damp Works Better
Dry cloths rely on static cling, which only grabs larger debris. Dampness adds adhesion, trapping microscopic dust, pollen, and pet dander that dry dusting misses. It also reduces the cloud of dust that can trigger allergies or settle on surfaces after cleaning.
How To Dampen Without Overdoing It
Lightly spray the cloth with water or a gentle floor cleaner until it's barely moist—not dripping. Wring it out if needed. Attach it to the Swiffer and glide over floors.
The slight moisture evaporates quickly, so there's no risk of water damage on sensitive floors like hardwood or laminate.
Best Practices For Best Results
Use a microfiber cloth instead of disposable ones for even better dust pickup. Wash and reuse them to save money. For extra stubborn dust, add a drop of dish soap to your spray bottle.
Always test on an inconspicuous area first, and avoid soaking the floor—damp, not wet, is the rule.
16. Use a Hair Dryer on Sticky Wax or Gum
Sticky wax or gum on your floor can feel impossible to remove without leaving a residue or damaging the surface. But heat is your secret weapon. A regular hair dryer can soften the mess in seconds, making it easy to lift off cleanly.
When wax or gum hardens on a floor, it bonds tightly to the surface. Trying to scrape it off cold often leaves behind a sticky film or scratches the finish. Heat reverses that bond.
By warming the spot, you soften the material so it releases from the floor without pulling up the finish. This method works on hardwood, tile, vinyl, and laminate—just keep the dryer moving to avoid overheating any one area.
How To Do It
Set your hair dryer to medium or high heat and hold it 2–3 inches from the sticky spot. Move it back and forth for about 30 seconds. You'll see the wax or gum start to look glossy or feel tacky.
That's your cue to stop.
Scraping Safely
Grab a plastic card—an old gift card or credit card works perfectly. Gently slide the edge under the softened material and lift. It should come off in one piece or a few large chunks.
Avoid metal scrapers; they can scratch the floor. If any residue remains, repeat the heating step.
Clean The Area
After removing the bulk, wipe the spot with a damp cloth to pick up any leftover stickiness. For extra stubborn traces, dab a little rubbing alcohol on a cloth and rub gently. Then dry the area with a clean towel.
17. Mop in a Figure-Eight Pattern
Most people mop in straight lines or random swipes, which often leaves streaks and missed spots. A figure-eight pattern changes that. This simple motion keeps the mop moving in a continuous, overlapping path that lifts dirt and distributes cleaning solution evenly.
It sounds small, but it makes a big difference in how your floors look when they dry.
The figure-eight pattern works because it prevents the mop from stopping abruptly, which is what causes streaks. When you mop in straight lines, you tend to lift the mop at the end of each stroke, leaving a line of excess water. With figure eights, the mop stays in contact with the floor, spreading the water in a thin, even layer.
Overlap each pass by about half the width of the mop head to ensure no area is missed. This technique is especially effective on large, open floors like living rooms and hallways.
Why It Beats Straight Lines
Straight-line mopping often leaves visible streaks because the mop head picks up dirt and then deposits it at the end of each stroke. The figure-eight motion keeps the mop head moving in a fluid path, so dirt is carried away rather than left behind. It also reduces the chance of missing spots, since the overlapping curves cover more surface area.
How To Master The Motion
Start at the far corner of the room and work backward toward the door. Hold the mop handle at a comfortable angle and move in a continuous figure-eight shape, keeping your wrists loose. Don't press too hard—let the mop do the work.
Overlap each figure eight by a few inches to avoid gaps. For larger rooms, divide the floor into sections and complete one section before moving to the next.
Best Mops For This Technique
A flat mop with a swivel head works best for figure-eight mopping because it allows smooth, circular motion. Avoid bulky string mops that can't pivot easily. Microfiber pads are ideal because they trap dirt and hold just the right amount of water.
If you're using a spray mop, make sure the spray pattern is even so you don't end up with dry spots.
18. Rinse Your Mop Head Frequently
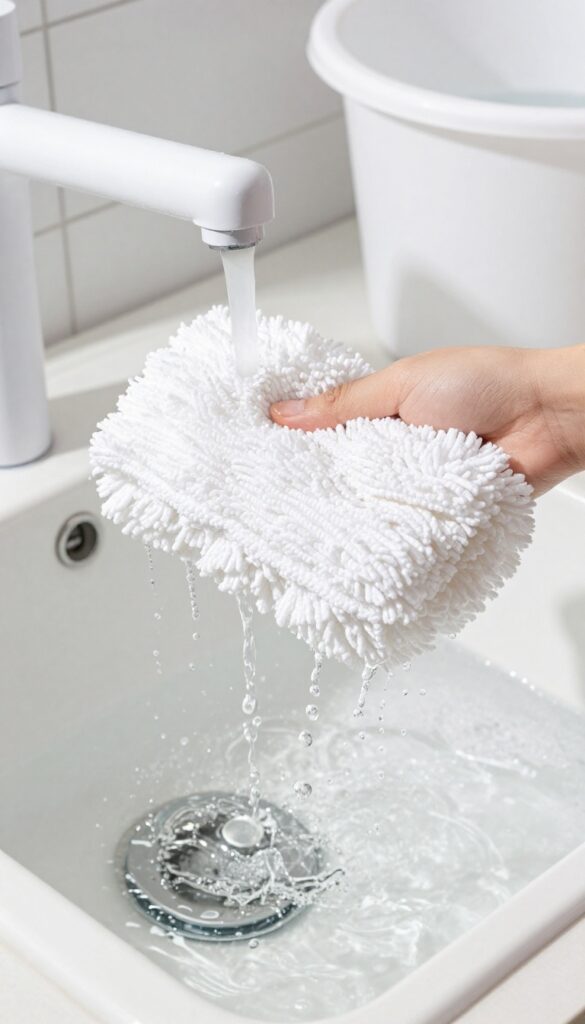
It sounds obvious, but it's the most common mistake people make when mopping. You dip the mop in the bucket, scrub a few square feet, then put it right back in the same dirty water. That's just spreading grime around.
Dirty mop water is a magnet for bacteria and dirt. Every time you dunk a soiled mop head back into the bucket, you contaminate the entire solution. The result?
A thin film of dirt left behind on your floors. Instead, use a two-bucket system: one with cleaning solution and one with clean rinse water. Dip, mop, then rinse the mop head in the clean bucket before reloading with solution.
This simple switch keeps your cleaning water effective and your floors streak-free.
Why It Matters
When you mop with dirty water, you're essentially painting a layer of grime onto your floors. Over time, this can dull the finish and attract more dust and dirt. Rinsing frequently ensures you're actually removing soil, not just redistributing it.
How To Do It Right
Get two buckets and label them. Fill one with hot water and your preferred floor cleaner, the other with plain hot water. After mopping a small section (about 3×3 feet), rinse the mop head in the clean bucket, wring it out, then dip back into the cleaning bucket.
Change the rinse water when it looks murky.
Bonus Tip
For microfiber mop heads, you can also rinse them under running water in a utility sink after each room. This is faster than hauling two buckets around and works just as well. Just make sure to wring thoroughly before applying cleaner.
19. Let Floors Air Dry Before Walking
You just finished mopping and the floor looks amazing. But if you let anyone walk across it while it's still wet, you're basically undoing all that work. Wet floors are magnets for dust, hair, and footprints, and they can also become slippery and dangerous.
Giving your floors time to air dry fully is one of the simplest ways to keep them looking clean for longer.
After mopping, resist the urge to let people or pets walk on the floor. Even a single footprint can leave a mark that's hard to buff out once the floor dries. Instead, block off the area with a sign or a simple barrier like a chair or a laundry basket.
Open windows and turn on ceiling fans or a portable fan to speed up the drying process. On humid days, a dehumidifier can also help. Depending on your floor type and the amount of water used, drying can take anywhere from 20 minutes to an hour.
For best results, wait until the floor feels completely dry to the touch before allowing traffic.
Why Wet Floors Attract Dust
When a floor is wet, the thin layer of water acts like a glue for airborne dust and debris. As the water evaporates, it leaves behind those particles, making your floor look dull or speckled. This is especially noticeable on dark floors.
By letting the floor dry completely before anyone walks on it, you minimize the amount of dust that gets trapped.
How To Speed Up Drying
If you're in a hurry, you can speed up drying without damaging your floors. Open windows to create cross-ventilation. Place a fan at floor level aimed across the wet area.
If you have a wet-dry vacuum with a squeegee attachment, you can also remove excess water after mopping. Just make sure the floor isn't soaking wet before you start.
When It's Safe To Walk
A good rule of thumb is to wait until the floor feels completely dry to the touch. For tile or vinyl, this might be 20–30 minutes. For hardwood, it can take up to an hour.
If you're not sure, test a small corner with a dry paper towel. If it comes back damp, give it more time.
20. Use a pH-Neutral Cleaner for Natural Stone
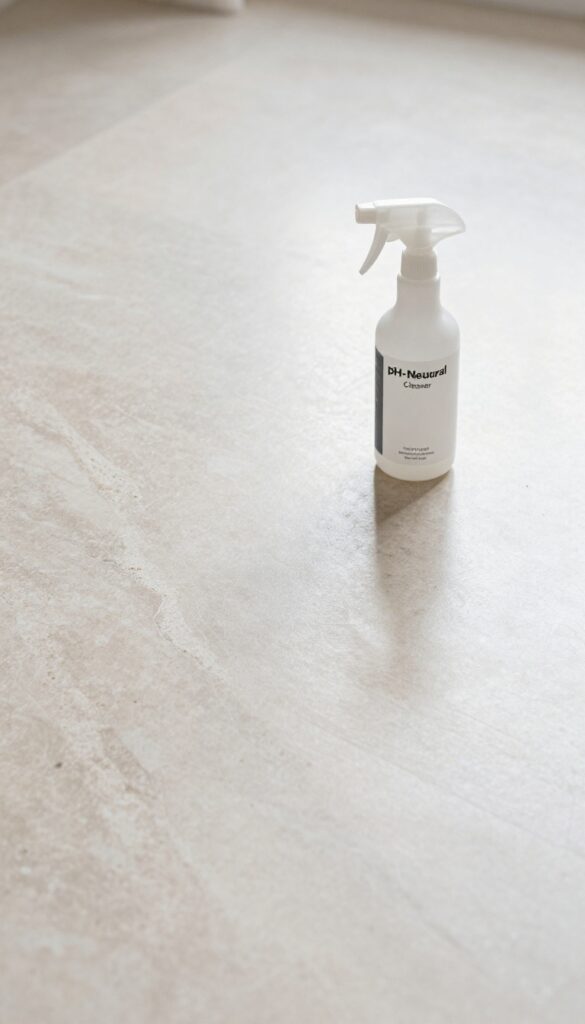
Natural stone floors like marble, granite, and travertine add elegance to any home, but they’re surprisingly delicate. Common household cleaners—especially vinegar, lemon juice, or anything acidic—can etch the surface, leaving dull spots that are nearly impossible to fix. The good news?
You don’t need harsh chemicals to keep stone looking its best. A pH-neutral cleaner is all it takes.
Stick to a cleaner specifically formulated for natural stone. These products are balanced to clean without reacting with the minerals in the stone. Avoid all-purpose sprays, bleach, or abrasive scrubs.
For daily cleaning, a damp microfiber mop with a few drops of stone-safe soap works wonders. Always check the label—if it says “safe for marble, ” you’re good.
Why Acidic Cleaners Are A No-go
Vinegar and lemon are popular natural cleaners, but on stone they cause chemical etching. That’s when the surface becomes rough and loses its polish. Even mild acids can dull the finish over time.
Stick to neutral pH (around 7) to keep your stone shiny.
What To Look For In A Stone Cleaner
Look for products labeled “pH-neutral” or “stone-safe. ” Brands like Method, Seventh Generation, or specialty stone cleaners work well. Avoid anything with ammonia, bleach, or citrus oils. A simple test: if it smells strong, it’s probably too harsh.
Simple Daily Care Routine
Dust mop daily to remove grit that can scratch. For spills, blot immediately with a soft cloth—never wipe, which spreads the liquid. Once a week, damp mop with a pH-neutral cleaner diluted in warm water.
Dry with a clean microfiber cloth to prevent water spots.
21. Remove Dried Mud with a Dry Brush First
Dried mud on your floors is a different beast than loose dust or wet spills. It's crusty, sharp, and can act like sandpaper if you try to mop it away. Scraping or brushing off that dried dirt before you bring out the mop saves your floor's finish and your elbow grease.
When mud dries, it forms hard, gritty particles that can scratch the floor surface when pushed around with a wet mop. A stiff-bristled brush or a plastic scraper lifts the mud without moisture, making it easy to sweep up. This one-step pre-treatment means you won't have to scrub the same spot repeatedly, and your mop water stays cleaner longer.
Why Dry Brushing Works
Wet mud becomes a paste that smears, while dry mud breaks into chunks. By brushing first, you remove the bulk of the dirt without turning it into a muddy soup. This protects delicate finishes like laminate or hardwood from micro-scratches.
Best Tools For The Job
A stiff-bristle broom or a hand brush with natural or synthetic bristles works well. For stubborn patches, use a plastic putty knife or an old credit card. Avoid metal scrapers on wood or tile to prevent gouges.
When To Skip This Step
If the mud is still wet, let it dry completely first. Rushing to brush wet mud just pushes it around. Also, on unsealed stone or grout, dry brushing may not remove all residue—follow up with a damp cloth if needed.
22. Add a Splash of Rubbing Alcohol to Mop Water
That lingering haze after mopping tile or laminate? It's usually leftover moisture that dries unevenly. A simple splash of rubbing alcohol can change that.
Alcohol lowers the surface tension of water, helping it spread and evaporate faster. The result is a streak-free shine with no dull residue. It's a cheap trick that professional cleaners use, and it works on almost any hard surface.
Why Alcohol Beats Plain Water
Water alone takes time to dry, especially in humid rooms. As it evaporates, minerals and dirt particles settle back onto the floor, creating spots and streaks. Rubbing alcohol (isopropyl) evaporates at a much lower temperature than water.
When you add just a tablespoon to a bucket of warm water, the mixture dries in seconds. That means less time for dust to settle and no mineral deposits left behind.
The Right Ratio For Any Floor
Don't overdo it. A tablespoon of 70% isopropyl alcohol per gallon of warm water is plenty. For smaller mop buckets, use a teaspoon.
Too much alcohol can strip sealants on some laminate or engineered wood floors over time. Test a hidden spot first, especially on matte finishes. If your floor is already sealed, this mix is safe for regular use.
When To Skip The Alcohol
Avoid this trick on unsealed hardwood, cork, or bamboo. Alcohol can penetrate raw wood and cause discoloration or damage. Stick to manufacturer-recommended cleaners for those surfaces.
Also, skip it if your floor has a wax coating—alcohol dissolves wax. For everything else, it's a fast track to a spotless finish.
Pro Tip: Pair With A Squeegee Mop
For the best results, use a flat mop with a squeegee edge or a microfiber pad. The alcohol helps the water sheet off the floor, and the squeegee pushes it into a puddle you can wipe away. This combo leaves tile and laminate looking like glass with zero effort.
23. Maintain a No-Shoes Policy
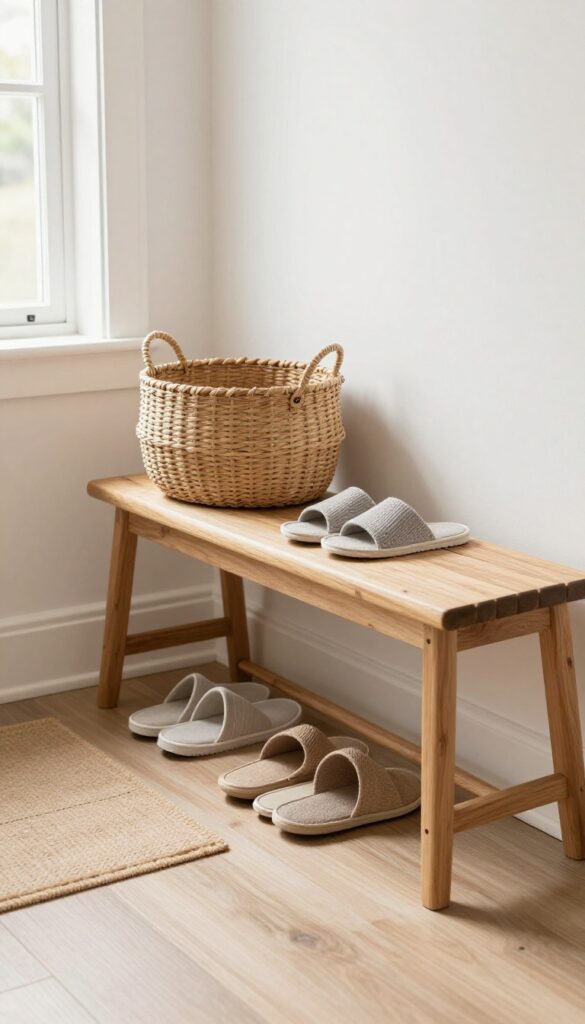
Shoes track in dirt, grit, and moisture from outside, grinding into your floors with every step. That daily traffic is what dulls shine and creates those stubborn scuff marks. A simple no-shoes rule stops the problem before it starts.
You don't need a strict house rule for everyone—just a designated spot by the door where shoes come off. It's the single most effective habit for keeping floors cleaner longer.
A no-shoes policy isn't just about less dust—it protects your floor's finish. Grit from shoes acts like sandpaper on hardwood and tile, wearing down sealants over time. It also reduces the amount of sticky residue and grime that gets tracked into kitchens and bathrooms.
Make it easy for guests by providing a bench or a shoe rack near the entrance. A small basket with slippers or socks can make the transition feel welcoming rather than demanding. Consistency is key.
If you slip up occasionally, that's fine—but the more you stick with it, the less often you'll need to deep-clean your floors.
Set Up A Shoe Station
Place a sturdy mat or tray right inside the door to catch any dirt that clings to shoes before they're removed. Add a low bench or stool so people can sit while taking off footwear. A small basket or cubby for slippers encourages guests to swap shoes without feeling awkward.
Communicate Clearly But Kindly
A friendly sign by the door—like "Please leave shoes here, thanks! "—reminds everyone without sounding bossy. For regular visitors, a quick heads-up in a text or conversation sets expectations.
Most people are happy to comply once they understand it helps keep the floors clean.
Keep Slippers Handy
Invest in a few pairs of inexpensive house slippers for guests. Place them in a visible spot near the shoe station. This small gesture makes the policy feel like a courtesy rather than a restriction, and it keeps feet comfortable on cold or hard floors.
FAQ
How often should I mop my floors?
High-traffic areas like kitchens and entryways benefit from mopping once a week. Low-traffic rooms can go two to three weeks between mopping.
Can I use vinegar on all floor types?
No. Vinegar is safe for sealed hardwood, tile, and vinyl but can damage natural stone and unsealed wood. Always test in a small area first.
What's the best way to remove sticky spots from floors?
Rubbing alcohol works on most sticky residues. Apply it to a cloth and rub gently. For gum or wax, use a hair dryer to soften it first.
How do I prevent dust from settling so quickly?
Use a damp microfiber mop or cloth for dusting. Dry dusting often just redistributes particles. Also, consider an air purifier in dusty rooms.
Is steam mopping safe for laminate floors?
It depends on the quality of your laminate. High-end laminate with sealed edges can handle occasional steam mopping, but cheaper laminate may warp. Check your manufacturer's guidelines.
Conclusion
You don't need a closet full of fancy products to get shiny, dust-free floors. Most of these tips rely on everyday items and a little technique. Pick two or three that address your biggest floor frustrations and start there.
Small changes—like sweeping with a better broom or adding a splash of alcohol to your mop water—can make a noticeable difference. Your floors will thank you, and so will your weekend.


