You've dusted the shelves, but somehow the corners still look like a dust bunny convention. It's frustrating when those stubborn particles cling to every nook and cranny, refusing to budge with a standard cloth.
The good news is that with the right tools and techniques, you can banish dust from even the trickiest spots. From microfiber cloths to compressed air, these 23 tips target specific surfaces and angles, making your cleaning routine faster and more effective.
No more resweeping the same shelf—just clean, dust-free results.
1. Use a Microfiber Cloth Dampened with Water
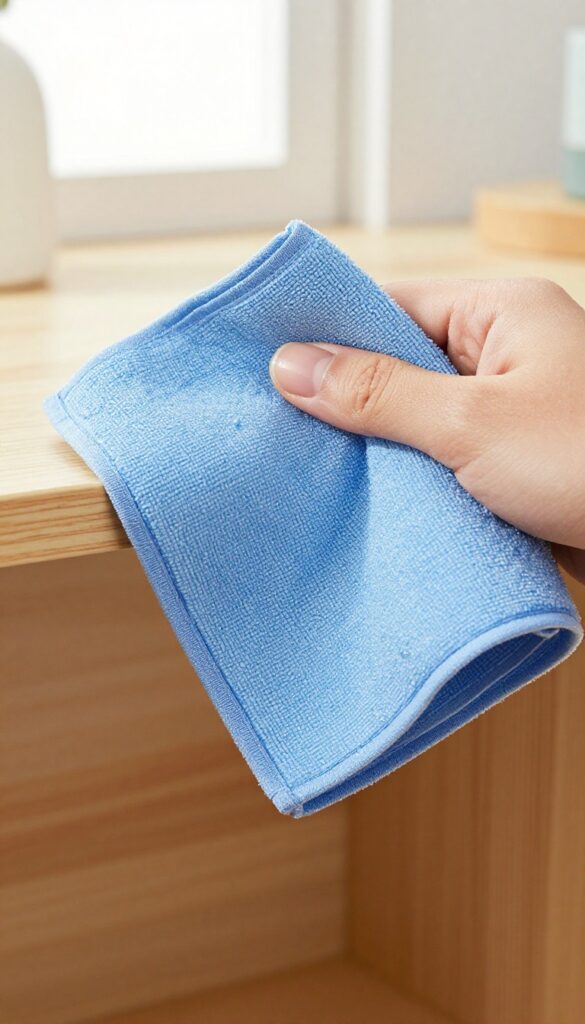
Dusting seems straightforward, but the cloth you choose makes all the difference. A dry cloth often just pushes dust into the air or spreads it around, leaving surfaces barely cleaner. Microfiber cloths are designed to trap and hold dust particles, not just move them.
When you lightly dampen one with water, it becomes even more effective at grabbing fine dust without leaving streaks or residue.
Microfiber cloths have tiny fibers that create a static charge, attracting dust like a magnet. Dampening the cloth slightly with water enhances this effect, allowing it to pick up even the smallest particles that dry cloths miss. The key is to use just a mist of water—too much can leave surfaces wet and potentially damage certain materials.
Wring out the cloth until it's barely damp, then wipe shelves and corners in a single direction to avoid redistributing dust. This method works wonders on wood, glass, and plastic surfaces, leaving them clean and shiny without chemical cleaners.
Why Microfiber Works Better
Microfiber is made of split fibers that create a large surface area with microscopic hooks. These hooks grab dust, dirt, and even bacteria, holding them until you rinse the cloth. Unlike cotton or paper towels, microfiber doesn't just smear dust around—it lifts and traps it.
This makes it ideal for delicate surfaces like electronics or polished wood, where scratches are a concern.
How To Dampen Correctly
Fill a spray bottle with plain water and lightly mist the microfiber cloth. Avoid soaking it—you want the cloth to feel cool and slightly damp, not dripping. Fold the cloth into quarters to create multiple clean surfaces as you work.
When one side gets dirty, flip to a fresh side. This prevents redepositing dust onto already-cleaned areas.
Best Practices For Corners
Corners and crevices collect dust that a flat cloth can't reach. Use your finger to press the damp microfiber into the corner, or wrap the cloth around a thin tool like a butter knife or a plastic card. The dampness helps the cloth conform to the shape, grabbing dust from tight spots.
For high shelves, a microfiber duster with an extendable handle can reach without a ladder.
2. Try a Dryer Sheet for Static-Free Shelves
Your laundry room might hold the secret to dust-free shelves. Used dryer sheets aren't just for softening clothes—they're surprisingly effective at picking up dust and keeping it away longer. The anti-static properties reduce the cling that attracts new dust, and the light fragrance leaves your shelves smelling fresh.
Grab a used dryer sheet from the laundry and run it over your shelves and corners. The sheet's texture grabs dust easily, while the anti-static agents help prevent dust from resettling quickly. It's a simple swap that makes a noticeable difference.
Why Dryer Sheets Work
Dryer sheets contain cationic surfactants that neutralize static charge. When you wipe a surface, these compounds leave a thin, anti-static layer that repels dust. This means less frequent dusting and a cleaner look for longer.
Best Surfaces For Dryer Sheet Dusting
Use them on wooden shelves, plastic bins, and metal surfaces. Avoid glossy or painted finishes, as the residue might leave a slight film. Test on an inconspicuous spot first if you're unsure.
Pro Tips For Maximum Effect
For best results, use a slightly damp dryer sheet—dampness helps trap dust better. Replace the sheet when it looks dirty. Keep a stash of used sheets in your cleaning caddy for quick touch-ups.
3. Vacuum Corners with a Brush Attachment
A vacuum with a soft brush attachment is a game-changer for corners. It sucks up dust without scattering it, unlike dry cloths that just push particles around. This tool is perfect for tight spots where your fingers or a rag can't reach, like the crevices where walls meet shelves or the deep corners of baseboards.
Using a vacuum brush attachment is simple but effective. Attach the soft brush to your vacuum hose, set the suction to medium (too high might blow dust away), and gently run the brush along corners and edges. The bristles loosen the dust while the suction pulls it in.
This method works especially well on textured surfaces like crown molding or wicker baskets, where dust clings stubbornly. For best results, vacuum corners before wiping surfaces, so you don't just redistribute dust. Remember to clean the brush attachment regularly to maintain suction.
Why Brush Attachments Work Best
Soft brush attachments are designed to agitate dust without scratching surfaces. The bristles reach into narrow gaps that cloths miss, and the vacuum's airflow captures the dust immediately. This prevents the common problem of dust flying into the air and settling elsewhere.
For corners with cobwebs or heavy dust buildup, use a crevice tool first to dislodge the bulk, then follow up with the brush for a thorough clean.
Targeting High And Low Corners
Don't forget ceiling corners and floor edges. For high corners, use an extension wand with the brush attachment to reach without a ladder. For low corners, get down to floor level and run the brush along the baseboard and wall junction.
This catches dust that accumulates from foot traffic and air currents. A quick once-over weekly keeps these spots from becoming dust magnets.
4. Use a Paintbrush for Delicate Items
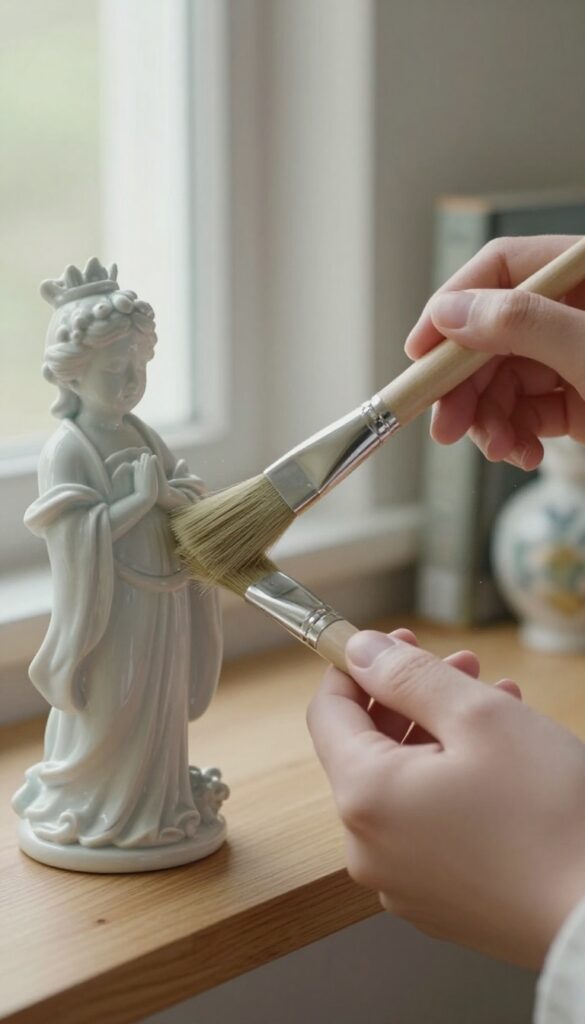
A clean, soft paintbrush is a surprisingly effective dusting tool for fragile decor, books, and electronics. Its bristles reach into crevices without scratching or damaging surfaces. This tip is especially handy for items that can't handle a damp cloth or strong suction.
A paintbrush lets you dust delicate objects with precision and care. It's perfect for intricate carvings, small figurines, and keyboard crevices. The soft bristles lift dust without pushing it deeper into cracks.
Why A Paintbrush Works
A standard dust cloth can snag on fragile edges or leave lint behind. A paintbrush's fine bristles glide over surfaces, collecting dust in the brush hairs. You can then tap the brush clean over a trash can.
Best Brushes For Dusting
Look for a brush with natural or synthetic soft bristles, about 1 to 2 inches wide. A flat brush covers larger areas, while a round brush reaches into corners. Avoid stiff bristles that might scratch.
How To Use It Effectively
Hold the brush like a pencil and sweep gently in one direction. For electronics, lightly brush between keys and along vents. For books, brush the top edges and spine crevices.
Clean the brush after each use by wiping it on a microfiber cloth.
5. Apply Furniture Polish to Wood Shelves
Wood shelves have a natural warmth, but they also attract dust like a magnet. A light coat of furniture polish does double duty: it adds a protective layer that repels dust and gives the wood a subtle shine. The trick is to use it sparingly—too much and you'll end up with a sticky mess that actually traps more dust.
Choose The Right Polish
Not all polishes are created equal. For dust repelling, look for a polish with a wax or silicone base. These ingredients create a smooth surface that dust slides off.
Avoid heavy oil-based polishes that leave a greasy film. A spray polish with a light formula works best for shelves you use frequently.
Apply With A Microfiber Cloth
Spray the polish onto a microfiber cloth, not directly onto the shelf. This prevents overspray and uneven application. Wipe the shelf in the direction of the wood grain, using light pressure.
Let it sit for a minute, then buff with a clean section of the cloth for a streak-free finish.
Don't Forget The Edges And Corners
Dust loves to hide along the edges and in corners. When applying polish, pay extra attention to those areas. Use the corner of your cloth to work the polish into tight spots.
A thin coat here will help keep dust from settling in those hard-to-reach places.
Reapply Only When Needed
You don't need to polish every time you dust. A single application can last several weeks. When the shelf starts to look dull or dust settles faster than usual, it's time for a fresh coat.
Over-polishing can cause buildup, which attracts dust and makes the surface look cloudy.
6. Dust from Top to Bottom
Gravity is not your friend when dusting—unless you work with it. Starting at the top and moving downward ensures that any loosened dust falls onto surfaces you haven't cleaned yet, not onto freshly polished ones. It's a simple shift in order that saves you from double work.
When you dust from top to bottom, you let gravity do the heavy lifting. Dust that drifts down lands on areas still waiting for attention, so you capture it all in one pass. This method is especially effective for shelves, ceiling fans, and tall furniture where dust accumulates overhead.
Start With The Highest Shelves
Begin your dusting routine at the highest point in the room—top shelves, crown molding, or ceiling fans. Use a microfiber cloth or an extendable duster to reach without stretching. Work your way down systematically, tackling each level before moving to the next.
Work In Sections
Break the room into vertical sections, like a grid. Dust everything in one section from top to bottom before moving to the next. This prevents you from accidentally re-dusting an area and keeps the process organized.
Save Floors For Last
Once all surfaces above are clean, vacuum or sweep the floors. This captures any dust that settled during the process. If you clean floors first, you'll just have to do them again after dusting overhead.
7. Use a Lint Roller for Fabric Shelves
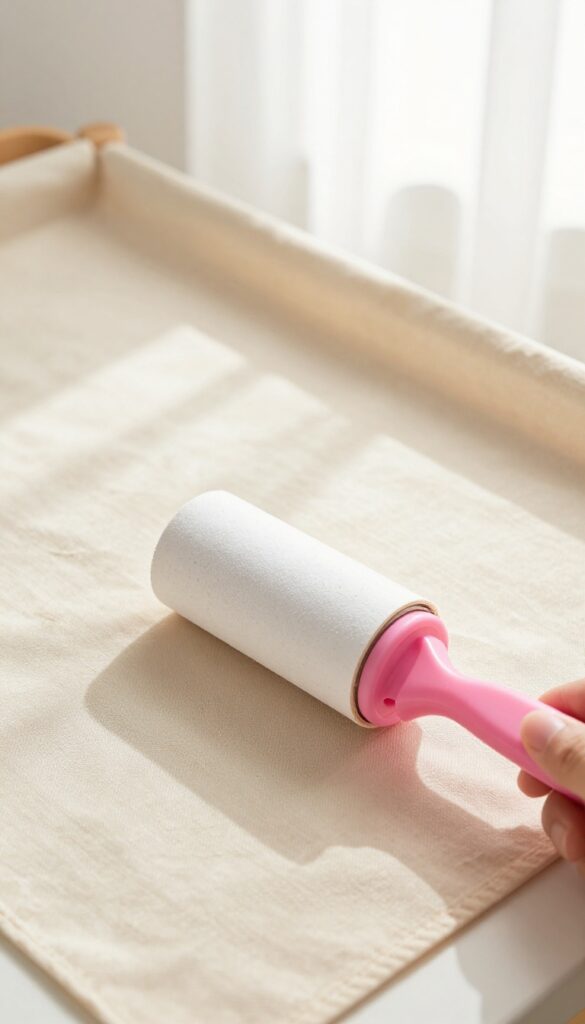
Fabric-covered shelves and liners add warmth to a room, but they're dust magnets. A regular cloth just pushes debris deeper into the fibers. That's where a lint roller comes in—it's the quickest way to lift dust and pet hair without spreading it around.
Lint rollers are designed for fabric, so they grab particles that standard dusters miss. They're especially handy for shelf liners, upholstered storage bins, or any fabric surface in your home. Keep one in your cleaning caddy for a fast touch-up between deep cleans.
Roll In One Direction
For best results, roll the lint roller in a single direction—top to bottom or left to right. This prevents pushing dust back into the fabric. Overlap each pass slightly to cover the entire surface without missing spots.
Replace Sheets Often
A full sheet loses its stickiness fast. Peel off the used layer as soon as it looks dirty or stops picking up debris. Using a fresh sheet ensures maximum efficiency and keeps you from redepositing dust.
Pair With A Vacuum For Deep Cleaning
For fabric shelves that haven't been cleaned in a while, start with a lint roller to grab surface dust, then follow up with a vacuum's upholstery attachment. This two-step method removes embedded dirt without damaging the material.
8. Clean Corners with a Toothbrush
Corners are dust traps. No matter how carefully you wipe shelves, that fine layer of grime always seems to settle right where the walls meet. A standard cloth is too bulky to reach into those tight seams, and a duster just pushes the dust deeper.
That's where an old toothbrush comes in. Its small head and firm bristles are perfect for digging into corner crevices, along baseboards, and around shelf brackets. You can scrub away built-up dust without scratching paint or wood.
Pair it with a microfiber cloth to catch the loosened particles, and your corners will look brand new.
Why A Toothbrush Works Best
The bristles are stiff enough to dislodge stubborn dust but soft enough not to damage surfaces. The narrow head fits into gaps that a sponge or rag can't reach. Plus, the handle gives you good control for precise scrubbing.
How To Use It Effectively
Dip the toothbrush in a small amount of all-purpose cleaner or just water for light dust. Scrub along the corner seam in short strokes, then wipe away the loosened dirt with a dry microfiber cloth. For extra-tight corners, angle the brush to get the bristles right into the groove.
Don't Forget The Edges
Use the same technique on shelf edges, window sills, and door frames. Dust loves to collect on the lip where horizontal meets vertical. A quick toothbrush scrub followed by a wipe makes those edges gleam.
9. Try a Static Duster for Quick Touch-Ups
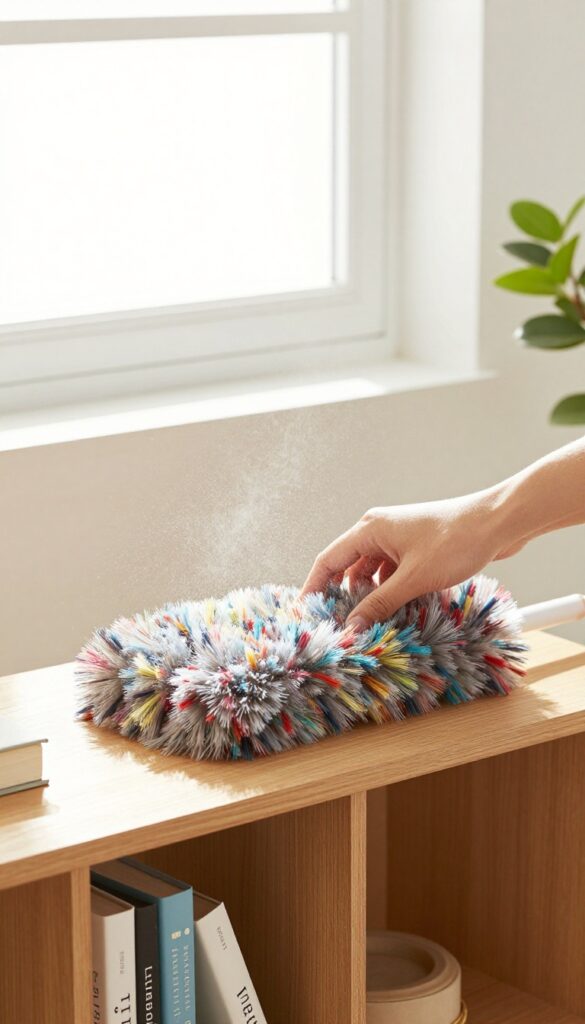
If you're tired of dust settling back onto shelves minutes after wiping them, a static duster might be your new best friend. These tools use an electrostatic charge to attract and hold dust particles rather than just pushing them around. They're perfect for quick daily touch-ups on shelves and corners, keeping surfaces looking fresh with minimal effort.
Static dusters work by generating static electricity as you sweep them across surfaces. The charge pulls dust toward the duster and locks it in the fibers, preventing it from scattering into the air. Unlike traditional cloths that can redistribute dust, static dusters trap it until you rinse or replace the head.
This makes them ideal for high-traffic areas like living room shelves or office corners where dust accumulates fast.
How Static Dusters Work
The magic behind static dusters is the electrostatic charge created when the synthetic fibers rub against surfaces. This charge attracts dust particles like a magnet, holding them firmly. Many models have disposable or washable heads, so you can swap them out when they get too dirty.
They're especially effective on smooth surfaces like wood, glass, and plastic.
Best Uses For Static Dusters
Use a static duster for quick daily maintenance on shelves, window sills, and baseboards. They're also great for electronics like TV screens and monitor frames because they don't leave lint or streaks. For corners, the slim design of many static dusters can reach tight spots without disturbing nearby items.
Just remember to clean the duster head regularly to maintain its charge.
Tips For Maximum Effectiveness
For best results, use a static duster on dry surfaces only—moisture can reduce the electrostatic effect. Sweep in one direction to build up the charge, and avoid pressing too hard. If the duster loses its grip, a quick rinse and dry usually restores it.
Keep one in a drawer for those spur-of-the-moment touch-ups when you spot a dusty corner.
10. Use a Squeegee on Glass Shelves
Glass shelves look sleek, but they show every speck of dust and every fingerprint. A dry cloth often pushes dust around or leaves lint behind. A rubber squeegee, the kind you use on windows, works like a charm on glass shelves.
A squeegee glides over the smooth surface, picking up dust and moisture in one pass. It leaves no lint, no streaks, and no residue. For best results, lightly mist the shelf with water or a glass cleaner before squeegeeing.
Work from top to bottom, wiping the blade clean between strokes. This method is especially effective for bathroom or kitchen glass shelves where grease or soap scum mixes with dust.
Why A Squeegee Works Better Than A Cloth
Cloths, even microfiber ones, can leave tiny fibers behind on glass. A squeegee's rubber blade creates a tight seal against the surface, lifting dust and liquid without shedding anything. It also removes smudges and fingerprints in one motion, saving you from having to buff afterward.
How To Squeegee Glass Shelves Properly
Start by spraying the shelf lightly with water or a streak-free glass cleaner. Use a small squeegee (6 to 10 inches wide) for easy handling. Pull the squeegee from one edge to the other in a straight line, overlapping each stroke slightly.
Wipe the blade dry with a lint-free cloth after each pass. For corners, use a corner of the squeegee or follow up with a microfiber cloth.
When To Avoid Using A Squeegee
Avoid squeegees on shelves with painted or etched glass, as the rubber blade can scratch or wear the finish. Also, don't use a squeegee on shelves that are not securely fixed—the pressure can dislodge them. For regular clear glass shelves, though, it's a fast, effective tool.
11. Wipe Down Shelves with a Vinegar Solution
Vinegar isn't just for cooking—it's a powerhouse in natural cleaning. A simple mix of equal parts water and white vinegar creates a solution that cuts through grime and leaves a finish that actually repels dust. It's cheap, non-toxic, and works on most shelf materials.
This method works because vinegar is acidic enough to dissolve the oils and residues that attract dust. When you wipe shelves with this solution, you're not just removing existing dust—you're leaving a slightly acidic surface that makes it harder for new dust to stick. Over time, you'll notice you need to dust less frequently.
Mix It Right
Combine 1 cup of water with 1 cup of white vinegar in a spray bottle. Shake gently to mix. For extra cleaning power on greasy shelves (like in the kitchen), add a drop of dish soap.
Always test on an inconspicuous spot first, especially on untreated wood or painted surfaces.
Wipe With The Grain
Spray the solution onto a microfiber cloth—not directly onto the shelf—to avoid oversaturating. Wipe in the direction of the wood grain if your shelves are wooden. This prevents streaks and ensures you're not pushing dust into crevices.
For glass or metal shelves, a circular motion works fine.
Let It Dry Completely
After wiping, allow the shelves to air dry fully before placing items back. Vinegar smell dissipates quickly once dry. If the scent bothers you, add a few drops of essential oil (like lemon or lavender) to the mixture.
This step is crucial because putting objects on damp shelves can trap moisture and cause damage.
12. Use a Compressed Air Can for Electronics
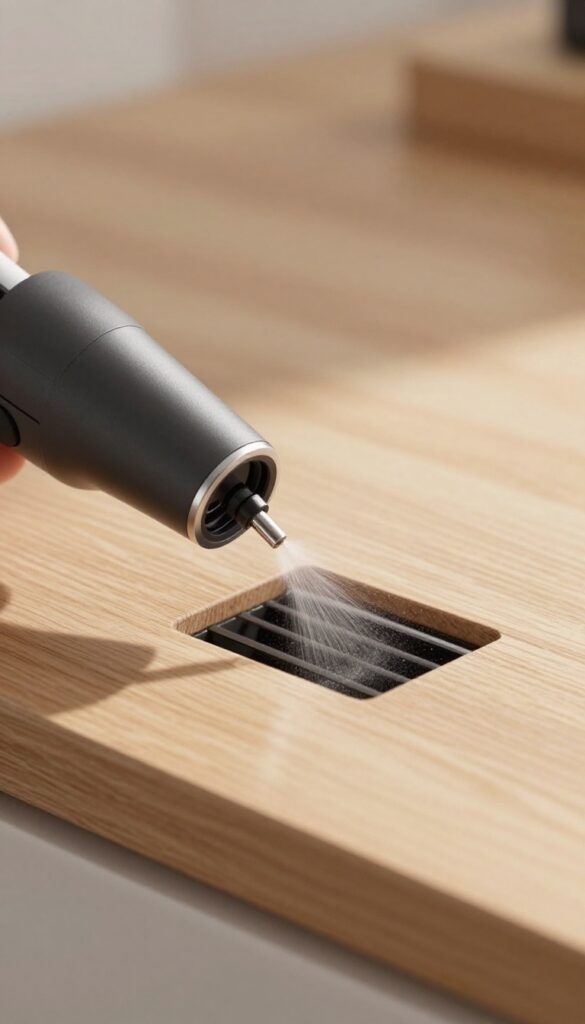
Electronics like gaming consoles, routers, and streaming devices often sit on shelves where dust settles into every vent and crevice. A microfiber cloth can't reach those tight spaces, but a can of compressed air can blast dust out effortlessly. It's a quick, non-contact method that keeps your gadgets clean and running cool.
Compressed air is ideal for electronics because it avoids physical contact that could scratch or damage sensitive components. Short bursts are key—long continuous sprays can cause moisture buildup. Hold the can upright and use the straw attachment to direct air into vents, ports, and gaps.
This method works especially well for gaming consoles, routers, cable boxes, and smart speakers that accumulate dust in hard-to-reach areas. Always power off and unplug devices before cleaning to prevent static damage.
When To Use Compressed Air
Reach for compressed air when you see dust clogging ventilation grilles or settling in deep corners around electronics. It's also perfect for cleaning keyboard keys, remote control buttons, and the gaps between shelf brackets and device stands. Avoid using it on delicate surfaces like camera lenses or open optical drives without a protective cover.
How To Use It Safely
Always read the instructions on the can. Keep the can upright to prevent liquid propellant from spraying out. Use short, controlled bursts (1-2 seconds) from about 3-4 inches away.
Never shake the can before use, as this can mix in the propellant. Work in a well-ventilated area, and consider wearing a mask if you're sensitive to dust.
Alternatives To Canned Air
If you prefer a reusable option, an electric air duster or a camera blower bulb can work similarly without disposable cans. For small electronics, a soft-bristled brush can loosen dust before blowing it away. Compressed air is still the most convenient for quick, targeted cleaning of multiple devices.
13. Line Shelves with Shelf Paper
Shelf paper isn't just for protecting surfaces—it's a clever shortcut for dust control. By lining your shelves with paper, you create a replaceable barrier that catches dust before it settles into the wood or paint. When it gets grimy, you can swap it out in seconds instead of scrubbing.
Shelf paper makes cleaning easier. When it gets dusty, simply wipe or replace it. Choose a pattern that hides light dust.
This trick works especially well on pantry shelves, bookcases, and bathroom cabinets where dust and spills accumulate quickly.
Pick The Right Paper
Not all shelf liners are equal. For dust resistance, choose a smooth, non-stick surface like vinyl or coated paper. Avoid textured liners that trap dust in their grooves.
Patterns with small prints or subtle marbling help disguise light dust between cleanings.
Install It The Easy Way
Measure each shelf and cut the paper slightly smaller than the surface so it lies flat without curling. Use double-sided tape at the corners to keep it from shifting. For a no-adhesive option, choose a grippy liner that stays put without glue.
When To Replace
Check your shelf paper every few weeks. If you see a visible dust layer or sticky residue, it's time for a fresh sheet. Keep a roll of liner handy so you can swap it out in minutes.
This simple habit keeps shelves looking clean with minimal effort.
14. Dust with a Slightly Damp Sponge
Sometimes the simplest tools work best. A slightly damp sponge is surprisingly effective at grabbing dust without scratching delicate surfaces. Unlike dry cloths that just push dust around, the moisture traps particles and holds them in place.
Just make sure the sponge is only damp, not wet, to avoid water damage.
This method is especially useful for shelves with a smooth finish, like painted wood or laminate. The sponge's texture creates a gentle friction that lifts stubborn dust. Rinse the sponge frequently under running water and wring it out well before continuing.
This prevents you from just smearing dirt across the surface.
Why A Sponge Works Better Than A Cloth
A dry cloth often leaves a thin film of dust behind due to static electricity. A damp sponge neutralizes static and traps dust in its pores. The result is a visibly cleaner surface with less effort.
Best Sponges For The Job
Opt for a non-abrasive sponge with a soft cellulose side. Avoid scrubby pads that can scratch. A standard kitchen sponge works great, but designate one just for dusting to avoid cross-contamination.
Technique Tips
Work from top to bottom so dust falls onto areas you haven't cleaned yet. Use long, straight strokes rather than circular motions to keep dust contained. Rinse the sponge after every few passes to keep it effective.
15. Use a Hairdryer on Cool Setting for Corners
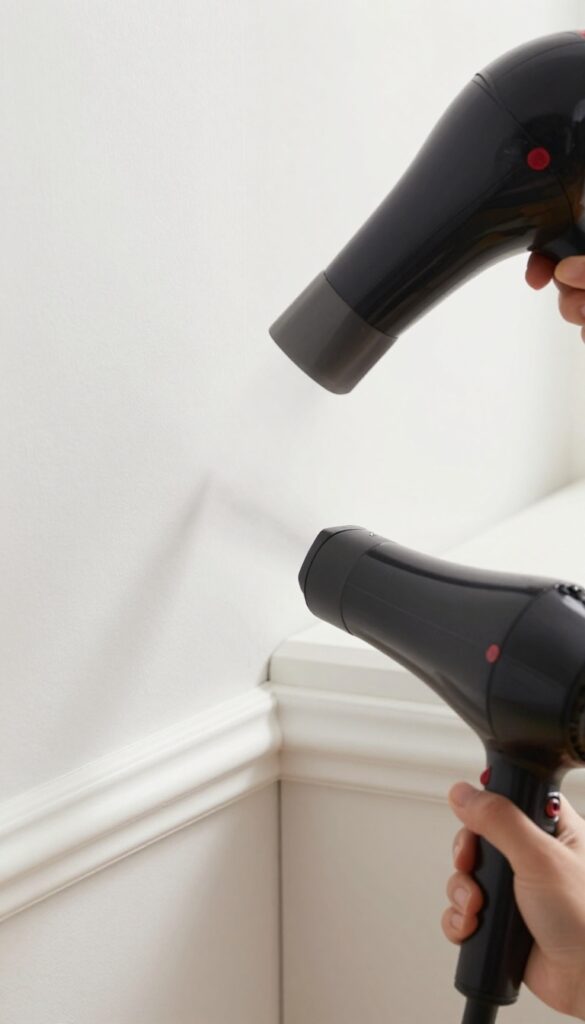
Corners and crevices are dust magnets that a cloth can't always reach. A hairdryer on cool mode blows dust out of those tight spots, making it easy to capture with a vacuum or sweep away. It's a quick trick that saves you from poking around with a damp rag.
This method works especially well on baseboards, window sills, and behind furniture where dust accumulates. The cool air prevents heat damage to surfaces or electronics. Just aim the nozzle into the corner and watch the dust cloud fly out.
Direct The Dust Stream
Point the hairdryer toward the corner at an angle so the air pushes dust outward. Keep the nozzle about 6 inches away to avoid scattering it everywhere. A narrow concentrator attachment helps focus the airflow.
Pair With A Vacuum
Hold a vacuum hose or dustpan near the opening of the corner to catch the dust as it blows out. This prevents it from resettling on nearby surfaces. A handheld vacuum with a crevice tool works perfectly.
Use On Cool Setting Only
Always use the cool or low heat setting to avoid melting plastic or damaging paint. High heat can warp baseboards or loosen adhesive on wallpaper. Cool air is just as effective and much safer.
16. Apply Anti-Static Spray to Shelves
Static electricity is a silent culprit in dust buildup. It pulls particles toward surfaces like a magnet, making shelves look dirty again soon after cleaning. Anti-static spray breaks that charge, so dust can't cling as easily.
This simple step adds a protective layer that repels dust for weeks. It's especially useful on plastic, glass, and laminated shelves where static is strongest. Just a quick spritz after cleaning keeps results lasting longer.
Anti-static spray works by neutralizing the electrical charge on surfaces. When dust floats by, it's less likely to stick—so it settles on the floor instead of your shelves. This means fewer touch-ups and more time between deep cleans.
Most sprays are safe for common shelf materials, but always check the label. Some formulas are designed specifically for electronics or wood, while others work universally. A light, even mist is all you need—no soaking required.
For best results, apply after your shelves are completely dry from cleaning. Let the spray air dry before placing items back. Reapply every few weeks or after a heavy dusting session.
How Static Attracts Dust
Static charge builds up when surfaces rub against dust, air, or cleaning cloths. This charge pulls in more dust particles, creating a cycle that's hard to break. Anti-static spray neutralizes that charge, so dust can't cling as strongly.
You'll notice the difference especially on plastic bins, TV stands, and glass shelves. These materials are prone to static, making them dust magnets. A quick spray changes that dynamic.
Choosing The Right Anti-static Spray
Not all sprays are the same. Some are made for electronics and are safe on screens and delicate parts. Others are designed for wood or painted surfaces.
Always read the label to avoid damage. For general shelf use, a household anti-static spray works well. Test on an inconspicuous area first, especially on finished wood or laminate.
If you're unsure, a diluted fabric softener solution can be a DIY alternative—but use it sparingly.
Application Tips For Maximum Effect
Spray from about 6–8 inches away for an even mist. Don't oversaturate—a light coating is enough. Wipe off any excess with a microfiber cloth to avoid streaks.
Focus on high-static areas like plastic bins, glass doors, and metal shelving. Let the spray dry completely before putting items back. Reapply every few weeks or after cleaning to maintain the anti-static barrier.
17. Clean Ceiling Corners First
Ceiling corners are prime real estate for cobwebs and dust bunnies. Since gravity pulls dust downward, tackling these high spots first prevents debris from falling onto freshly cleaned lower surfaces. A simple change in order can save you from redoing work.
Start by inspecting ceiling corners with a flashlight to spot webs and dust clumps. Use an extendable duster with a microfiber head to gently sweep along the edges. For stubborn spots, wrap a damp microfiber cloth around the bristles of a soft broom and reach up.
Work systematically around the room, moving from one corner to the next. This top-down approach keeps dust from resettling on shelves and furniture below.
Why Start At The Top
Dust and cobwebs naturally fall when disturbed. Cleaning ceiling corners first means any dislodged particles will land on surfaces you haven't cleaned yet. Once you wipe lower shelves and corners, you remove that fallen debris in one pass.
Tools For High Corners
An extendable duster with a bendable head reaches tight angles without a ladder. Alternatively, attach a microfiber cloth to a broom with a rubber band. For heavy cobwebs, a vacuum with a brush attachment works well—just use the crevice tool for precision.
Technique Tips
Work in slow, deliberate strokes to avoid flinging dust into the air. Start from the corner's center and move outward. If using a damp cloth, wring it well to avoid dripping.
Change cloths frequently to prevent redepositing dust.
18. Use a Makeup Brush for Small Decor
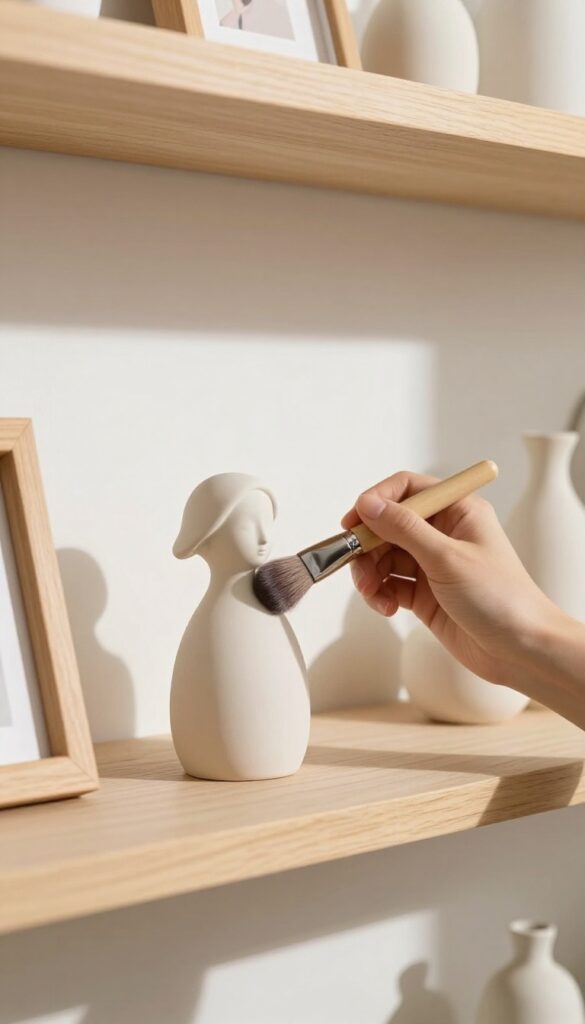
Delicate items like tiny figurines, picture frames, and knick-knacks are dust magnets that a cloth can easily knock over. That's where a soft makeup brush comes in handy. It's gentle enough to whisk away dust without disturbing your decor, making it a secret weapon for precision cleaning.
A fluffy powder brush or a small eyeshadow brush works wonders on intricate surfaces. The soft bristles reach into crevices without scratching finishes. Just sweep gently over each piece, and the dust clings to the brush.
Tap the brush over a trash can to release the dust, and you're done. This method is especially effective for items on high shelves where you can't apply much pressure.
Why A Makeup Brush Works Best
Unlike a cloth or duster, a makeup brush is designed to pick up fine particles without leaving streaks. The synthetic bristles are static-resistant, so dust sticks to them rather than flying away. Plus, the brush's shape lets you get into tight spots like the folds of a ceramic figurine or the edges of a photo frame.
Which Brush To Choose
A large powder brush covers broader surfaces like a vase or a stack of books. A smaller angled brush is perfect for detailed areas, such as the crevices of an ornate frame or the leaves of an artificial plant. Keep a dedicated brush for dusting so you don't mix it with makeup.
Quick Cleaning Routine
Before dusting, give the brush a few flicks to remove any loose particles. After dusting a few items, rinse the bristles under warm water with a drop of mild soap, then let them air dry. This keeps the brush effective and prevents cross-contamination.
19. Vacuum Shelves with a HEPA Filter Vacuum
Standard vacuums can recirculate fine dust particles back into the air, which defeats the purpose of cleaning. A HEPA filter vacuum traps 99. 97% of particles as small as 0.
3 microns, including dust mites and pollen. This makes it a game changer for allergy sufferers and anyone who wants truly clean shelves.
Why Hepa Matters For Dusting
When you vacuum shelves with a non-HEPA vacuum, exhaust air can blow dust right back onto the surface. HEPA filters capture those tiny particles, so the air coming out is cleaner than the air going in. This is especially important for shelves holding books, electronics, or decor that attract static dust.
Technique: Use A Soft Brush Attachment
Attach the soft brush head to your vacuum to avoid scratching surfaces. Gently run the brush along shelf edges, corners, and under items. For vertical surfaces like book spines, use short strokes to lift dust without knocking things over.
Move slowly to give the vacuum time to suck up debris.
When To Vacuum Vs. Dust
Vacuuming with HEPA is ideal for deep cleaning, but for quick touch-ups, a microfiber cloth works fine. Use the vacuum every few weeks or after heavy dust accumulation. If you have allergies, vacuuming before dusting can reduce airborne particles and make the rest of your cleaning more effective.
20. Wipe Down Corners with a Cloth on a Stick
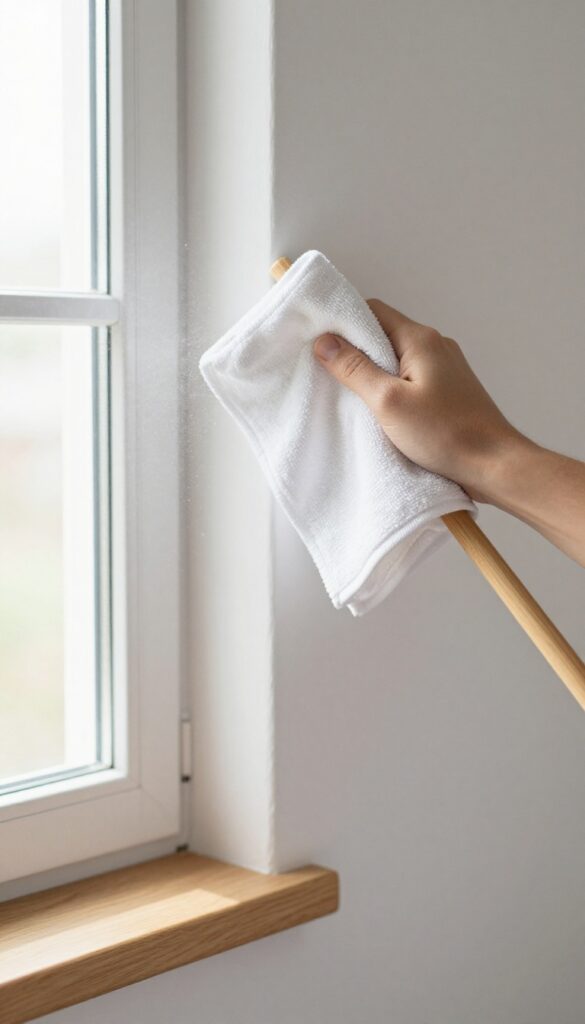
Deep corners collect dust like nobody's business, but you don't need to be a contortionist to clean them. A simple hack—attaching a microfiber cloth to a long stick or ruler—lets you reach those awkward spots without stretching or climbing. It's a game-changer for high shelves, ceiling corners, and behind furniture.
This method works because it extends your reach and applies even pressure. You can use a broom handle, a paint roller extension, or even a wooden spoon. The key is to secure the cloth tightly so it doesn't slip mid-swipe.
Once you try it, you'll wonder why you ever struggled with dusty corners.
Choose The Right Stick
A lightweight, sturdy stick is best. A wooden ruler or a plastic dowel works well. Avoid anything too flimsy that might bend.
The stick should be long enough to reach the corner without you having to stretch.
Secure The Cloth Properly
Wrap the microfiber cloth around the end of the stick and fasten it with a rubber band or tape. Make sure the cloth is snug but not too tight—you want some give to wipe effectively. A loose cloth will just push dust around.
Use A Damp Cloth For Stubborn Dust
For corners with caked-on dust, lightly dampen the cloth with water or a cleaning spray. The moisture helps grab and hold dust particles. Just don't soak it, or you'll leave streaks.
21. Use a Damp Paper Towel for Quick Dusting
When you're in a hurry and need to grab dust fast, a slightly damp paper towel is your best friend. It works like a charm on smooth surfaces like shelves, countertops, and window sills. The moisture traps particles instead of sending them flying, and since it's disposable, you skip the laundry hassle.
Why Damp Works Better
Dry dusting often just moves dust around. A damp paper towel creates a static charge that attracts dust, holding it in the fibers. Plus, the moisture prevents dust from becoming airborne, so you're not breathing it in or coating nearby furniture.
Best Surfaces For This Method
Use it on non-porous surfaces like painted shelves, laminate, glass, and metal. Avoid unfinished wood or delicate electronics, where moisture could cause damage. For electronics, use a barely damp cloth and wring it out well.
Quick Technique Tips
Fold the paper towel into a small square for better control. Start at the top of the shelf and work your way down, so dust doesn't fall on already cleaned areas. Toss the towel when it looks dirty—no rinsing or reusing needed.
22. Keep Shelves Clutter-Free
Every knickknack, book, and decorative item on your shelves is a potential dust magnet. The more stuff you have, the more surfaces dust can settle on—and the harder it is to wipe them down quickly. Decluttering isn't just about aesthetics; it's a strategic move to cut down your dusting time.
When shelves are packed, dust hides behind and under objects, requiring you to move everything each time you clean. That extra step often gets skipped, allowing dust to build up. By keeping only what you truly love or use, you create open space that's easy to wipe in one sweep.
The One-touch Rule For Shelf Items
Adopt a simple habit: every time you pick up an item from a shelf, decide right then whether to keep it, relocate it, or toss it. This prevents the slow creep of clutter. Over a few weeks, you'll naturally reduce the number of dust-collecting objects without a big purge session.
Group Like Items For Easier Cleaning
Instead of scattering small decor across multiple shelves, cluster similar items together on one tray or in a shallow basket. That way, you can lift the entire group as a unit when dusting underneath. Bonus: the tray itself catches dust, making shelf cleaning even faster.
Rotate Seasonal Decor To Minimize Dust
Store off-season decorations in closed bins and only display a few curated pieces at a time. Rotating your shelf decor every few months not only keeps your space feeling fresh but also ensures each item gets dusted before being put away. Less on display means less dust to manage daily.
23. Dust Weekly to Prevent Buildup

Consistent weekly dusting prevents thick layers from forming. It takes less time than tackling months of accumulated dust, and your shelves stay cleaner with minimal effort.
A quick weekly dusting keeps surfaces fresh and reduces allergens. Use a microfiber cloth or electrostatic duster to trap particles rather than spreading them around. Focus on high-touch areas like shelves, corners, and electronics.
This habit also makes deep cleaning sessions less overwhelming.
Why Weekly Matters
Dust builds up fast, especially in homes with pets or open windows. Weekly removal stops it from settling into hard-to-reach crevices. You'll spend less time scrubbing later.
Tools For Quick Dusting
A microfiber cloth works wonders on flat surfaces. For corners and edges, use a soft brush attachment on your vacuum or a compressed air duster. Keep supplies handy so you can grab them without delay.
Make It A Routine
Link dusting to an existing habit, like after morning coffee or before vacuuming. Set a timer for 10 minutes per room. Consistency beats intensity every time.
FAQ
How often should I dust shelves and corners?
Aim for once a week to prevent heavy buildup. High-traffic areas or homes with pets may need more frequent dusting.
What is the best cloth for dusting?
Microfiber cloths are ideal because they trap dust effectively. Use them slightly damp for better results.
Can I use furniture polish on all shelf materials?
No, furniture polish is best for wood. Avoid it on glass, metal, or plastic, as it can leave residue or cause damage.
How do I dust corners without spreading dust?
Use a vacuum with a brush attachment or a damp cloth. Avoid dry dusting that just moves dust around.
Does vinegar really repel dust?
Vinegar helps cut grime and can reduce static, but it doesn't repel dust long-term. It's a good natural cleaner for regular use.
Conclusion
Dust doesn't stand a chance when you have the right tools and techniques. Start with the tip that matches your biggest frustration—whether it's reaching high shelves or tackling stubborn corners.
A few small changes to your routine can keep your shelves and corners cleaner for longer. Pick one method today and notice the difference.


