
You open the cupboard door and brace yourself—bottles tumble out, rags spill everywhere, and you can't find the all-purpose spray. That daily frustration is exactly why a well-organised cleaning cupboard matters. It saves time, reduces stress, and makes chores feel less like a battle.
A neat cleaning cupboard doesn't require a massive budget or a full renovation. Small tweaks—like using tension rods or repurposing spice racks—can turn chaos into calm. The best part?
Once you set it up, it stays tidy with minimal effort. These 23 ideas range from quick fixes to weekend projects. Pick the ones that fit your space and habits, and soon you'll actually look forward to opening that door.
1. Use Tension Rods to Hang Spray Bottles
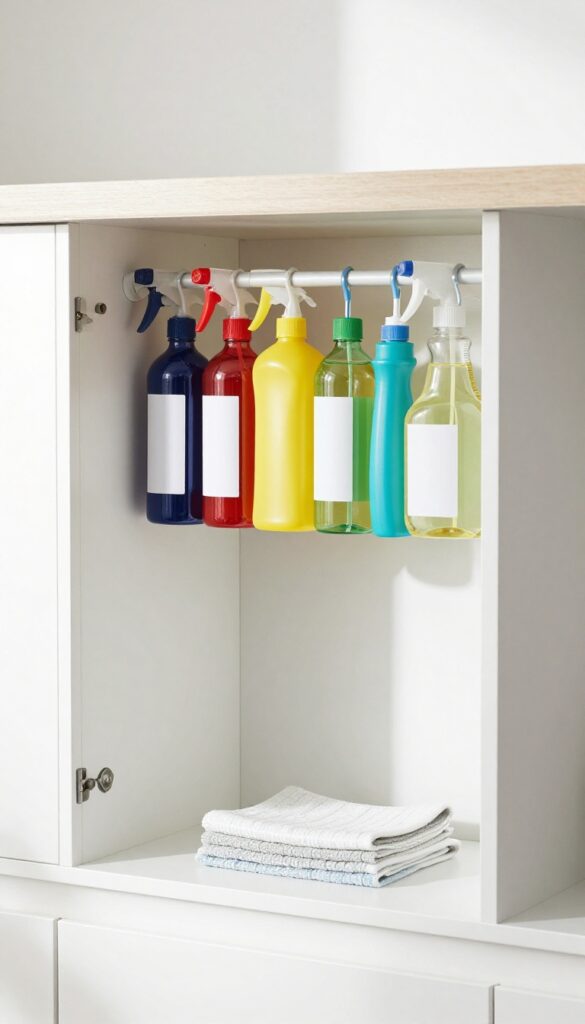
Spray bottles are notorious for taking up shelf space and toppling over. A tension rod changes that. Install one horizontally across your cupboard, and hang bottles by their triggers.
It's a zero-drill solution that works in seconds.
This trick frees up an entire shelf for other items. You can see every bottle at a glance, and grabbing one is as easy as lifting it off the rod. No more digging through a pile of cleaners.
Choosing The Right Rod
Pick a tension rod that fits snugly between your cupboard walls. Measure the width first. For heavy bottles, choose a rod rated for curtains or closet use—they're sturdier.
A spring-loaded rod works best because it stays put without screws.
Hanging Tips
Not all spray triggers are the same. Test a few bottles to see if the trigger hook clears the rod. If the bottle hangs crooked, add a small command hook on the rod to hold the trigger in place.
Group bottles by use—all-purpose, glass cleaner, disinfectant—so you grab the right one fast.
What About Odd-sized Bottles?
Some bottles have triggers that are too small or too wide. For those, use a small binder clip on the trigger, then hang the clip on the rod. Or place them on a shelf below.
The rod works best for standard spray bottles, but you can adapt with simple hacks.
2. Add a Slim Over-the-Door Organiser
That skinny gap on the back of your cupboard door is prime real estate. A clear, pocketed over-the-door shoe organiser turns wasted space into a highly visible storage system for cleaning supplies. Each pocket can hold a different tool or product, making everything easy to grab and return.
This trick is especially useful if your cupboard shelves are already packed. The organiser adds vertical storage without taking up any shelf room. Plus, the clear pockets let you see exactly what you have at a glance—no more digging around for that scrub brush.
What To Put In Each Pocket
Assign pockets by category: one for spray bottles, one for scrub brushes, one for dusters, and so on. Use the bottom pockets for heavier items like large spray bottles, and the top ones for lightweight things like microfiber cloths or gloves. If you label each pocket with a marker or sticker, everyone in the household will know where things go.
Choosing The Right Organiser
Look for an over-the-door organiser with pockets at least 2 inches deep to accommodate bottles. A 24-pocket model works well for most cleaning cupboards. Make sure the hooks fit your door thickness—most standard doors work fine.
If your door is hollow, check that the hooks won't damage it.
Bonus: Use It For Small Tools Too
Don't limit yourself to bottles. The pockets are great for holding sponges, scouring pads, duster refills, and even small brushes. You can also stash a lint roller, a small squeegee, or a pack of replacement mop heads.
This keeps everything off the shelves and easy to find.
3. Repurpose a Cutlery Tray for Small Items
Small cleaning tools and accessories are notorious for turning into a jumbled mess at the bottom of a cupboard. Sponges, scrub brushes, and tiny bottles of polish or bleach all end up in a tangled pile. A simple plastic cutlery tray—the kind you already have in your kitchen drawer—can bring order to that chaos.
It fits neatly on a shelf and keeps each item in its own compartment, so you can grab what you need without digging around.
Using a cutlery tray in your cleaning cupboard is a clever way to organise bits and pieces that otherwise get lost. The divided sections are perfect for separating sponges from brushes, and small bottles from scrub pads. You can even use the slots for dish gloves, microfiber cloths, or extra spray nozzle heads.
It’s a low-cost solution that makes the most of vertical shelf space and keeps everything visible and accessible.
Choose The Right Tray
Look for a cutlery tray that fits your shelf depth and width. Plastic trays are easy to clean and won’t rust. If your cupboard is deep, consider a longer tray with more compartments.
For narrow shelves, a smaller tray or even a bamboo utensil holder can work. The goal is to have a dedicated spot for each type of item.
Arrange By Frequency Of Use
Place the items you reach for most often—like the all-purpose spray or dish soap—in the front compartments. Less frequently used items, such as specialty brushes or spare sponges, can go toward the back. This way, your daily cleaning routine stays smooth and efficient.
Keep It Dry And Clean
After using sponges or brushes, let them dry before putting them back in the tray. You can store the tray on a shelf with good air circulation, or drill a few small drainage holes in the bottom if needed. Wipe the tray down occasionally to prevent grime buildup.
4. Install a Magnetic Strip for Metal Tools
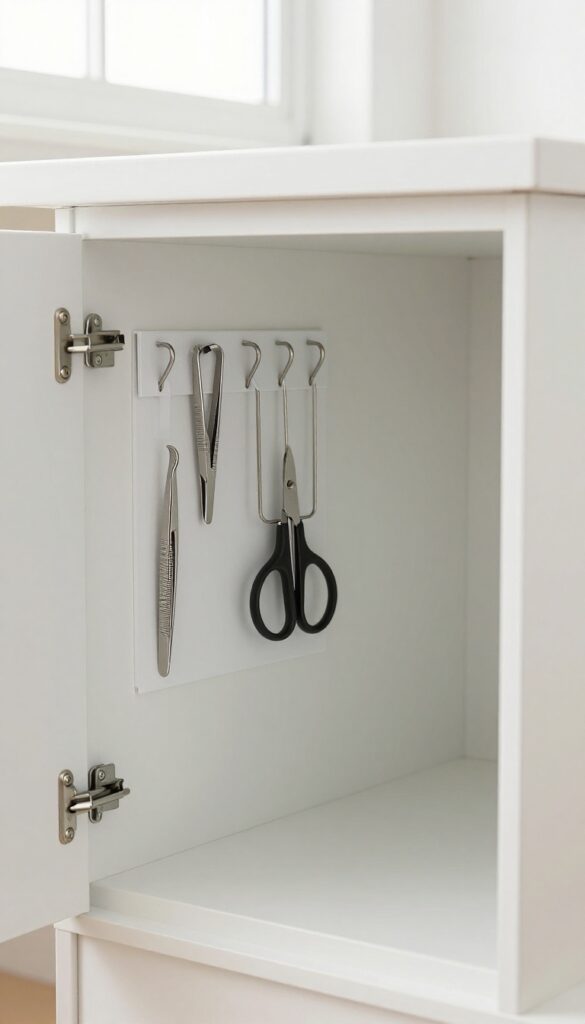
Metal tools like tweezers, scissors, and clamps have a way of vanishing into the abyss of a cleaning cupboard. A magnetic strip—the kind usually used for knives—solves that instantly. Mount it on the inside wall or door, and suddenly everything metal stays visible and grab-and-go accessible.
No more digging through drawers or untangling cords. A magnetic strip keeps your most-used metal tools front and center. It's a one-time install that pays off every single day.
Where To Mount It
The inside of the cupboard door is ideal—it's out of sight but easy to reach. If your door is too thin or uneven, the side wall works just as well. Just make sure the strip is at a height where you can comfortably grab tools without stretching.
What To Stick On It
Think tweezers for splinters, small scissors for opening packages, and metal clamps for hanging wet cloths. Even a mini screwdriver set can live there. Avoid anything too heavy like full-size pliers—they might slide off or strain the adhesive.
Installation Tips
Most magnetic strips come with adhesive backing or screws. For a rental-friendly option, use strong double-sided tape. Clean the surface with rubbing alcohol first, press firmly, and let it cure for 24 hours before loading it up.
That bond will hold for years.
5. Use Stackable Bins for Vertical Storage
If your cleaning cupboard has high shelves that waste a ton of vertical space, stackable bins are a game-changer. They let you double or triple your storage capacity without adding any shelves. Plus, clear bins mean you can see exactly what's inside without pulling everything out.
Stackable bins work best when you group similar items together—all bathroom cleaners in one bin, floor care supplies in another. Label the front of each bin with a label maker or simple masking tape so everyone in the household knows where things go. The clear plastic makes it easy to spot when you're running low on a product, so you can restock before you run out.
Choose The Right Size
Measure your shelf height and depth before buying bins. You want them to fit snugly without wasted space. For tall shelves, go with deeper bins that can hold bottles upright.
For shorter shelves, use shallow bins for sponges, gloves, and small accessories.
Stacking Stability Tips
Look for bins with interlocking lids or built-in stacking ridges—they won't slide off when you reach for a bin on top. Avoid overfilling bins; heavy bins are hard to lift and can crush the bin below. Keep lighter items like dusting cloths or scrub brushes in the top bins.
Labeling For Quick Access
Use a label maker or write on removable chalkboard labels so you can change categories later. Place labels on the front of each bin at eye level. If you share the cupboard, add a small icon or color code for non-readers or family members who don't speak the same language.
6. Label Everything Clearly
Labels are the unsung heroes of an organised cleaning cupboard. They turn a chaotic jumble into a system that anyone—including forgetful family members—can follow. A simple label on a shelf, bin, or spray bottle tells you exactly where something lives and where it goes back.
Labels eliminate the guesswork. When everything has a designated spot with a clear name, it’s much easier to maintain order. You won’t have to dig through bins to find the glass cleaner or wonder where the scrub brushes belong.
Choose Your Labeling Method
You don’t need fancy equipment. Masking tape and a permanent marker work perfectly for most shelves and bins. For a cleaner look, use a label maker or print labels on sticker paper.
Chalk labels are great for bins you might repurpose later—just wipe and rewrite.
What To Label
Label every shelf with a category: “All-Purpose Cleaners, ” “Glass & Surface Sprays, ” “Scrubbing Tools, ” etc. Label bins for smaller items like sponges, cloths, and gloves. If you use a pocket organiser on the door, label each pocket for specific tools or bottles.
Make It Stick
Use strong adhesive labels or tape that won’t peel off in a damp cupboard. For plastic bins, write directly with a permanent marker or use adhesive vinyl. If you change your system often, go with removable labels or chalk labels so you can update easily.
7. Hang a Pegboard on the Back Wall
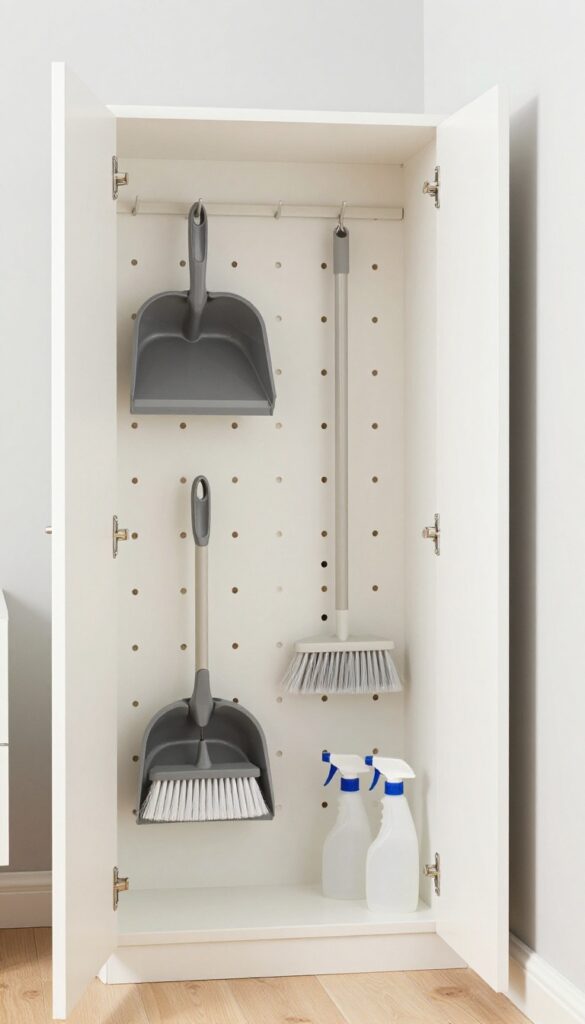
If your cleaning cupboard has an empty back wall, you're missing out on serious storage potential. A small pegboard turns that blank space into a flexible command centre for your most-used tools. It's a weekend project that pays off every single day.
Pegboards are brilliant because they let you rearrange hooks and shelves whenever your needs change. You can hang a dustpan and brush set side by side, clip a small broom onto a hook, and even attach a shallow shelf for spray bottles. Everything stays visible and within reach—no more digging through piles to find the scrub brush.
What You'll Need
Grab a pegboard panel (hardware stores sell pre-cut sizes), a few pegboard hooks in various lengths, and small shelves if you want to hold bottles. You'll also need screws and wall anchors to mount it securely. Choose a board with a smooth finish so it's easy to wipe clean.
How To Set It Up
Measure the back wall of your cupboard and cut the pegboard to fit if needed. Mark the studs or use drywall anchors for a solid mount. Attach the board with screws at each corner and a few along the edges.
Then arrange hooks and shelves based on what you use most. Hang heavier items like a broom on sturdy hooks, and keep lighter brushes on smaller pegs.
Pro Tips For Maximum Use
Group similar tools together—all dusting tools on one side, scrubbing brushes on the other. Use small bins or baskets on shelves to catch smaller items like sponges or scrub pads. Leave a little space between items so you can grab them easily.
And don't forget to label the pegboard if you share the cupboard with others.
8. Store Vacuum Attachments in a Basket
Vacuum attachments are easy to lose, especially the small crevice tool or the brush head you only use occasionally. Tossing them into a designated basket keeps them together and easy to grab when you need them. No more digging through the cupboard or checking every drawer.
Choose a small, sturdy basket or bin that fits on a shelf or inside your cupboard. Mesh baskets work well because you can see the contents at a glance. Place it near your vacuum or on a shelf where you naturally reach for attachments.
This simple habit saves time and keeps your cupboard tidy.
Pick The Right Basket
Look for a basket with low sides so you can easily see and grab attachments. A rectangular shape fits neatly on most shelves. If your cupboard is deep, a wider basket prevents items from getting buried.
Avoid baskets with high sides that hide smaller tools.
Sort By Frequency Of Use
Keep everyday attachments like the standard floor head on top or separate. Store specialty tools like the upholstery brush or mattress nozzle in the basket. If you have multiple vacuums, label the basket or use separate containers for each machine.
Maintain The System
After each vacuuming session, return attachments to the basket immediately. This takes seconds and prevents clutter from building up. Every few months, empty the basket and wipe it down to remove dust and debris.
9. Use a Lazy Susan for Corner Access
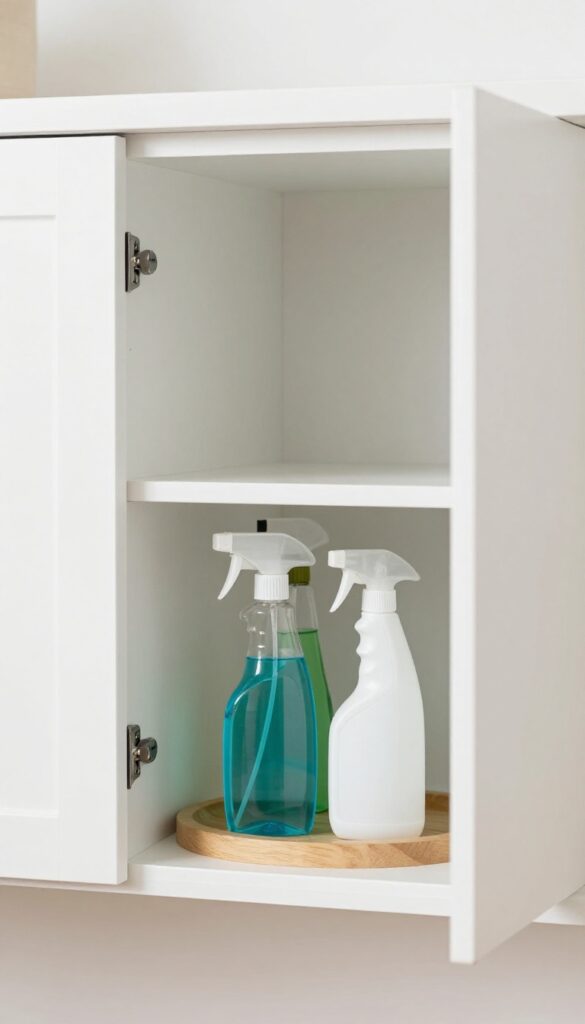
Deep shelves in cleaning cupboards are notorious for swallowing up small bottles and spray cans. You reach in, knock things over, and still can't grab the glass cleaner hiding at the back. A lazy Susan turns that dead space into a functional turntable where every item is within arm's reach.
This simple rotating tray works wonders in corner cabinets or on any shelf deeper than your forearm. Just give it a spin and the bottle you need slides into view. No more digging, no more clutter avalanches.
A lazy Susan is one of the easiest fixes for a deep, awkward shelf. It keeps bottles upright, prevents them from getting lost, and makes grabbing what you need almost effortless. The key is choosing the right size and material for your cleaning products.
Choose The Right Size
Measure your shelf depth and width before buying. A lazy Susan that's too small wastes space, while one that's too large won't spin freely. For standard 12-inch deep shelves, an 10- or 11-inch diameter turntable works well.
If you have a corner cabinet, look for a D-shaped lazy Susan that fits the angled space.
Group By Frequency Of Use
Place your most-used cleaners—all-purpose spray, glass cleaner, disinfectant wipes—on the lazy Susan. Less frequently used items like floor polish or oven cleaner can stay on a different shelf. This way you spin for the daily essentials without sifting through rarely touched bottles.
Add Non-slip Liners
Bottles can slide or tip when you spin the tray. A thin non-slip liner or a piece of shelf liner on top of the lazy Susan keeps everything in place. Silicone liners are easy to wipe clean and won't trap moisture.
10. Group Cleaning Supplies by Room or Task
Walking back and forth between the kitchen and bathroom because you grabbed the wrong spray is a waste of time. Grouping your cleaning supplies by room or task eliminates that hassle. Create dedicated zones so you can grab exactly what you need without digging through a jumble of bottles.
Kitchen Zone
Keep kitchen-specific cleaners like degreaser, dish soap, and stainless steel polish together. Add a microfiber cloth or sponge dedicated to kitchen use. This way, when you're tackling greasy stovetops or countertops, everything you need is in one spot.
Bathroom Zone
Bathroom cleaners often include tile spray, toilet cleaner, and glass cleaner. Store them together along with a separate set of rags or scrub brushes. Having a dedicated bathroom caddy or shelf prevents cross-contamination and makes cleaning faster.
All-purpose & Floor Care
All-purpose cleaners and floor solutions can live together in a central zone. Keep mop heads, bucket, and floor wipes nearby. This grouping works well for quick tidy-ups or weekly floor cleaning without needing to pull from multiple areas.
11. Install a Small Shelf Under the Sink
The space under your sink is often a black hole of cleaning supplies. Adding a simple half-shelf can instantly double your usable storage. It lifts smaller items off the floor of the cabinet, so you can actually see and grab what you need without playing Tetris.
A half-shelf is a game-changer for under-sink storage. It creates two distinct zones: the shelf for everyday items like spray bottles and sponges, and the floor for bulky containers like laundry detergent or floor cleaner. This separation keeps everything accessible and prevents bottles from getting lost in the back.
You can buy an adjustable shelf kit or DIY one using a wire cooling rack and some command hooks. Either way, it's a quick, low-cost upgrade that makes a huge difference in how functional your cleaning cupboard feels.
Choose The Right Shelf Type
Not all shelves are created equal for under-sink use. Look for a shelf that is adjustable or can be cut to size. Wire shelves are great because they allow air circulation and let you see through to the bottom.
Plastic or coated metal shelves are easy to wipe clean. Avoid wooden shelves unless they are sealed, because leaks and spills are common under the sink.
Maximise Vertical Space
Once the shelf is in, use the vertical space above it. Install a small tension rod under the shelf to hang spray bottles by their triggers. You can also add adhesive hooks to the underside of the shelf for hanging scrub brushes or gloves.
Every inch counts in a small cupboard.
Keep Heavy Items On The Bottom
Resist the urge to put heavy containers on the shelf. Stick to lighter items like all-purpose sprays, glass cleaner, and sponges. Reserve the bottom for heavy jugs of laundry detergent, bleach, or floor cleaner.
This keeps the shelf stable and prevents accidents.
12. Use a Caddy for On-the-Go Cleaning
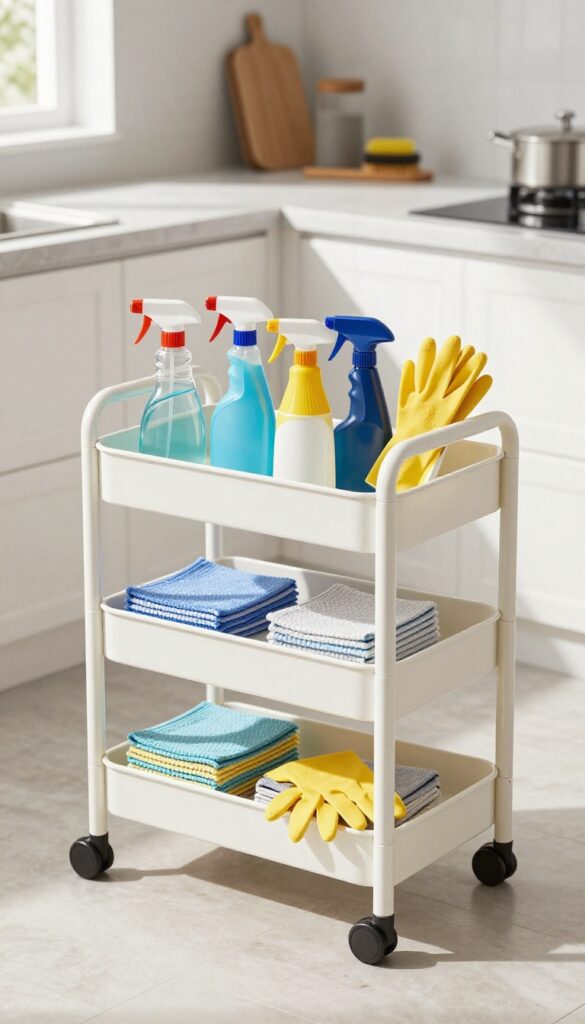
Ever find yourself trekking back and forth because you forgot the glass cleaner in the kitchen? A cleaning caddy solves that. It's a simple way to keep your most-used supplies together and ready to move from room to room.
No more wasted steps or hunting for a spray bottle.
A caddy turns your cleaning routine into a grab-and-go system. Instead of pulling out multiple products from different spots, you load the caddy once and carry it with you. It's especially handy for multi-room cleanings or when you only have a few minutes to tidy up.
Look for a caddy with a sturdy handle and compartments to keep bottles upright. Some even have a tray or removable sections for sponges and cloths.
What To Put In Your Caddy
Stock it with the essentials: an all-purpose cleaner, glass spray, a microfiber cloth, a scrub brush, and maybe a small bottle of disinfectant. Add gloves and a few trash bags if you have room. The idea is to cover most common messes without overloading it.
Keep it light enough to carry easily.
Where To Store The Caddy
The best spot is somewhere central and easy to reach—like under the kitchen sink, in a hall closet, or on a shelf in the laundry room. If you have a larger home, consider two caddies: one for upstairs and one for downstairs. That way you're not hauling it up and down steps.
Keep It Stocked
Make it a habit to refill the caddy after each use. If you use the last of the all-purpose spray, add it to your shopping list right away. A caddy only works if it's ready when you are.
A quick weekly check can save you from grabbing a half-empty bottle mid-clean.
13. Repurpose a Magazine Holder for Spray Bottles
Tall spray bottles are notorious for tipping over and rolling around the cupboard. A simple magazine holder solves that problem by keeping them upright and contained. It’s a clever reuse of something you might already have lying around.
Grab a sturdy magazine holder—preferably one with a solid bottom and open front. Place it on a shelf or under the sink, then stand your spray bottles inside, nozzles facing up. The holder keeps them from falling over and makes grabbing the right bottle quick.
For extra stability, choose a holder with a wide base or one that’s slightly taller than your bottles.
Why It Works
Magazine holders are designed to keep tall, flat items upright, so they naturally cradle spray bottles. The open front lets you see labels at a glance, and the sides prevent bottles from knocking into each other. It’s a low-cost, no-drill solution that works on any shelf.
Where to Use It
Under the kitchen sink is a prime spot, but it also works in bathroom cabinets or laundry room shelves. If you have a deep cupboard, place the holder near the front so bottles are easy to reach. You can even stack two holders side by side for larger collections.
Customising Your Holder
Paint or decoupage the holder to match your cupboard interior. Add a label on the front to identify the category—like “all-purpose” or “glass cleaner. ” For a cohesive look, use identical holders for all your spray bottles.
14. Add a Hanging Bin for Rags and Cloths
Microfiber cloths and rags are essential for cleaning, but they often end up in a messy pile or stuffed into a drawer. A hanging bin on the inside of your cupboard door solves that problem neatly. It keeps them accessible without taking up valuable shelf space, so you can grab one quickly whenever you need it.
A hanging bin is one of those small changes that makes a big difference in daily use. Instead of hunting through a stack of cloths, you can just open the door and pull one out. It also helps keep your rags clean and separate from other supplies, reducing cross-contamination between different cleaning tasks.
Choose The Right Bin
Look for a small bin or bucket with a hook or adhesive backing that can support the weight of several cloths. Wire bins, plastic caddies, or even a small mesh bag work well. Make sure it's deep enough to hold folded cloths without them spilling out, but not so deep that you lose items at the bottom.
Mount It Securely
Most hanging bins come with adhesive strips or screws. For a cupboard door, adhesive hooks are usually strong enough for lightweight cloths. If you're storing heavier wet rags, consider using screws or a bin that hangs over the top of the door.
Test the placement so the bin doesn't hit shelves or bottles when the door closes.
Organise By Type Or Task
Use one bin for dry dusting cloths and another for wet cleaning rags. Or separate them by room—kitchen cloths in one bin, bathroom cloths in another. This keeps your system logical and saves time when you're in the middle of cleaning.
15. Use Drawer Dividers in a Deep Drawer
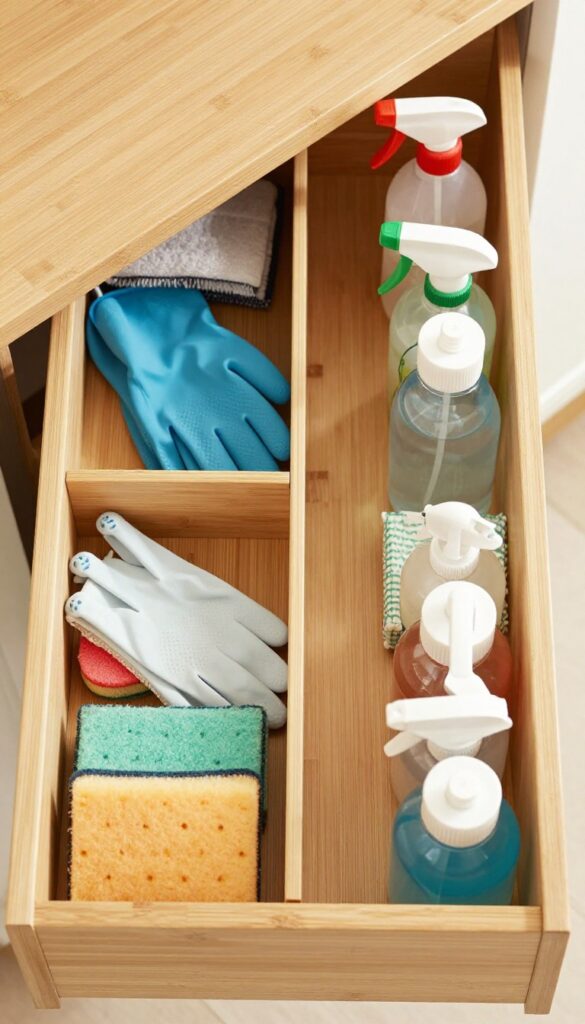
A deep drawer in your cleaning cupboard can quickly become a jumble of gloves, scrub pads, and dusters. Without organisation, you’re digging through a pile to find what you need. Drawer dividers solve that by creating dedicated slots for each item, so everything stays in its place and you can grab it in seconds.
Drawer dividers are an affordable, low-effort upgrade that makes a deep drawer work harder for you. They come in various sizes and materials—adjustable plastic, bamboo, or even DIY cardboard versions—so you can customise the layout to fit your supplies. The key is to measure your drawer first and plan compartments for the items you use most often.
Sort By Frequency Of Use
Place the items you reach for daily—like rubber gloves and all-purpose scrub pads—in the front compartments. Less frequently used dusters or specialty brushes can go toward the back. This way, you’re not shuffling things around every time you clean.
Group Similar Items Together
Keep all gloves in one section, scrub pads in another, and dusters in a third. If you have multiple types of gloves (rubber, microfiber, disposable), give each its own slot. Grouping makes it easy to see when you’re running low and need to restock.
Mix And Match Divider Types
You don’t need a single set of dividers. Combine adjustable plastic dividers for wider sections with small bamboo trays for tiny items like scrub brushes or steel wool. This flexibility lets you adapt as your cleaning supplies change over time.
16. Store Bulk Supplies in a Separate Bin
Bulk bottles and refills can quickly clutter your main cleaning cupboard, making it hard to find everyday essentials. A simple solution is to designate a separate bin on a high shelf or in another storage area. This keeps overflow out of sight but still accessible, and restocking your daily caddy becomes a breeze.
When you buy cleaning products in bulk to save money, they often end up crammed into every available space. That defeats the purpose of an organised cupboard. A dedicated bulk bin changes the game: you pull from it only when the main supply runs low, so your everyday shelf stays neat and functional.
Choose The Right Bin
Pick a sturdy, open-top bin or basket that fits your top shelf or a spare closet. Clear plastic bins let you see what's inside without digging. If space is tight, a slim caddy with a handle works well and can be tucked away.
Label And Rotate Stock
Use a label maker or simple tape to mark the bin “Bulk Refills. ” When you bring home new bottles, place them behind older ones so you use the oldest first. This prevents products from expiring or getting forgotten.
Keep A Running List
Tape a small notepad or whiteboard to the bin lid. Jot down items you're low on as you use the last of a refill. Next time you shop, you'll know exactly what to restock without guessing.
17. Install a Paper Towel Holder Under the Shelf
Paper towels are a cleaning staple, but the roll often ends up balancing on a shelf or stuffed in a corner. Mounting a holder under a shelf or cabinet frees up valuable counter space and keeps the roll within easy reach. You can tear off sheets directly into the cupboard without having to carry the roll around.
Choose The Right Holder
Look for a holder that mounts with screws or strong adhesive. A spring-loaded arm works well for standard rolls, while a horizontal bar can hold larger commercial rolls. Make sure the holder is positioned so the paper tears easily and doesn't hit the shelf above.
Installation Tips
Measure the clearance under your shelf to ensure the roll won't drag on items below. Use a level to keep the holder straight. If you're renting, opt for a no-drill adhesive holder that can be removed without damage.
Keep A Spare Roll Handy
Store an extra roll on the same shelf or in a nearby basket. That way, you're never caught without when the current roll runs out. A small hook or ring can hold the spare right next to the holder.
18. Use a Spice Rack for Small Bottles
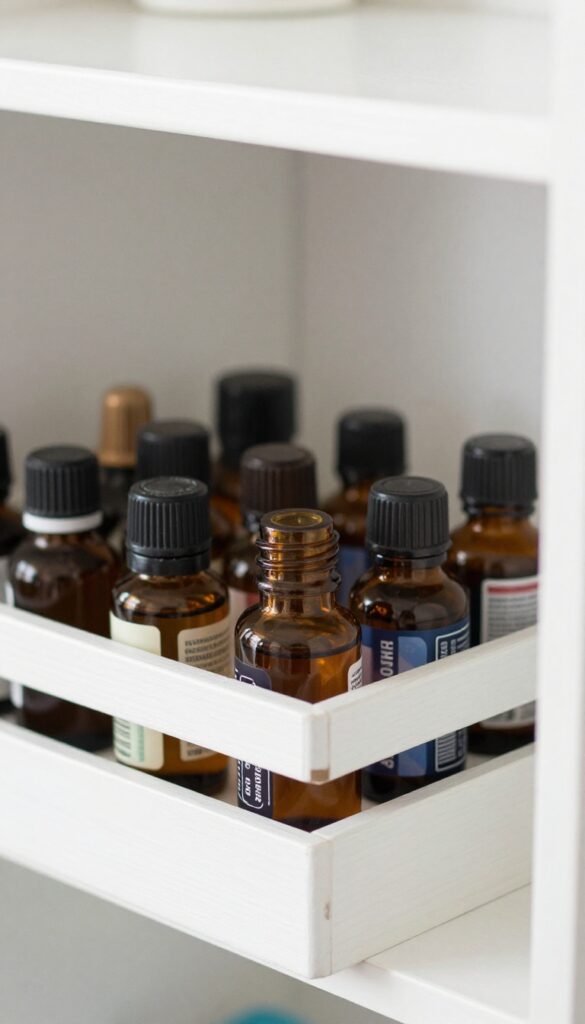
Tiny bottles of essential oils, stain removers, and sample sizes are easy to lose in a deep cupboard. They slide behind larger containers or get knocked over every time you grab something. Mounting a small spice rack on the inside door or a wall section keeps them visible and within reach.
A spice rack is the perfect size for those little bottles that usually end up scattered. You can find inexpensive wire or wooden racks at kitchen stores or online. Attach it with strong adhesive strips or screws, depending on your door material.
Once it's up, you'll see every bottle at a glance and grab what you need without digging.
Choose The Right Rack
Look for a rack with tiers or a lip to prevent bottles from falling. A two-tier rack doubles your storage without taking up extra space. Measure your door or wall area first to ensure a good fit.
Group By Use
Arrange bottles by frequency of use or purpose. Put daily stain removers and essential oils on the top tier, and sample sizes or rarely used items on the bottom. This keeps your most-used products easy to grab.
19. Add a Hook for a Dustpan and Brush Set
Dustpans and brushes are one of those items that never seem to have a proper home. They get shoved into corners, fall over every time you open the door, and generally make the cupboard feel messy. The fix is simple: mount two hooks on the inside of the door or on a wall, and hang the dustpan and brush by their handles.
It takes five minutes and instantly frees up floor space.
Choose The Right Hooks
Look for adhesive hooks that hold at least 2–3 pounds, or use screw-in hooks if you prefer a permanent solution. Command hooks work well on painted surfaces and are easy to remove later. Make sure the hooks are spaced far enough apart so the dustpan and brush don't overlap.
Placement Tips
Mount the hooks on the inside of the cupboard door so the set is hidden when closed. If your door is too thin or awkward, use a wall inside the cupboard at a height where you can easily grab both items. Avoid placing them directly above other stored items, as water or dirt may drip.
Bonus: Add A Small Tray Below
To catch any debris that falls off the brush, attach a small plastic tray or a shallow container on the shelf directly beneath the hooks. That way you don't end up with crumbs and dust collecting on your other supplies.
20. Use a Shower Caddy for Tall Bottles
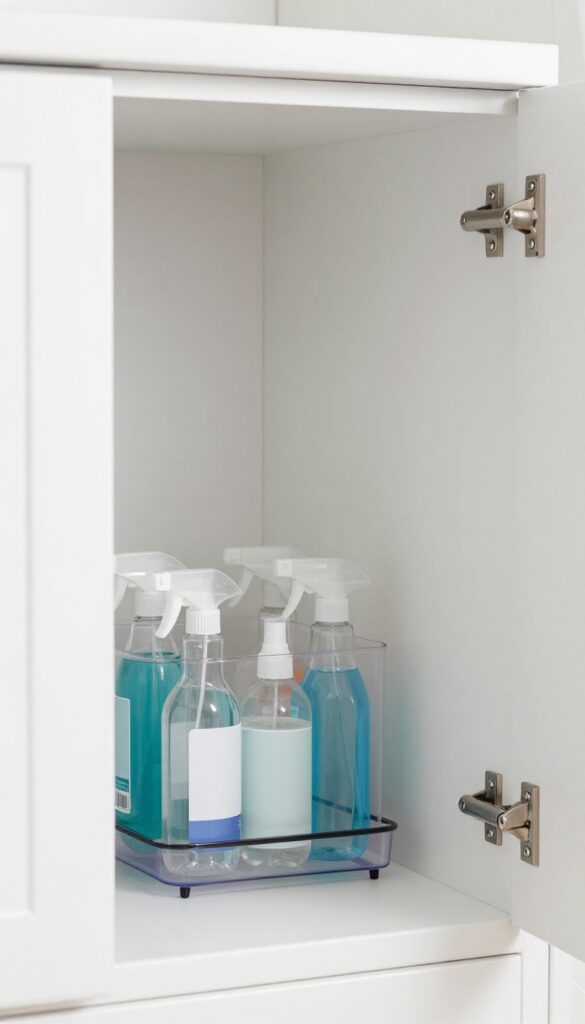
Tall spray bottles and cleaning solutions are awkward to store. They topple over, leak, or get shoved to the back of the cupboard. A simple shower caddy solves that problem neatly.
Hang a shower caddy on the inside of your cupboard door. It keeps tall bottles upright, visible, and easy to grab. No more digging around or knocking things over.
Why It Works
Shower caddies are designed to hold bottles securely. The wire or plastic slots keep each bottle in its place, even when you open the door quickly. Plus, the caddy uses vertical space that would otherwise go to waste.
Choosing The Right Caddy
Look for a caddy with deep enough slots to hold your bottles. Over-the-door hooks are best—they install without tools. A rust-proof finish is a must if your cupboard is near a steamy area.
What To Store
All-purpose spray, glass cleaner, fabric refresher, and any tall trigger bottles. Group them by frequency of use. Keep daily cleaners at eye level, weekly ones lower down.
21. Keep a Trash Bag Dispenser Inside
Trash bags are one of those things you always need but never have within reach when cleaning. Stashing a dispenser or a roll on the inside of the cupboard door solves that problem instantly. You can grab a bag for dirty rags, broken items, or quick decluttering without hunting through drawers.
Mount a small trash bag dispenser or simply hook a roll of bags over a command hook on the door. This keeps bags visible and accessible, saving you from rummaging. It also frees up shelf space for other supplies.
Choosing The Right Dispenser
Look for a dispenser that holds standard kitchen or small trash bags. Adhesive-backed options work well on smooth cupboard doors. If you prefer a no-cost solution, repurpose a empty tissue box or a small plastic container with a hole cut in the lid.
Placement Tips
Attach the dispenser near the top of the door so bags don't drag on the floor when pulled. Make sure it doesn't interfere with shelves or items stored on the door. Test the door swing to avoid bumping.
Bonus: Bag Organization
Keep a few different bag sizes if you use them for various tasks. Label the dispenser or use a clear one so you can see when it's time to refill. This small addition makes a big difference in daily convenience.
22. Use a Binder Clip to Hang Small Items
Binder clips aren't just for paper—they're surprisingly handy in the cleaning cupboard. Clip them to the edge of a shelf and you instantly have a hook for lightweight items like rubber gloves, scrub brushes, or dusters. It's a zero-cost trick that uses things you probably already have.
This idea works best on standard wire or solid shelves with a lip. Just open the clip, slide it onto the shelf edge, and let the metal arms hang down. The clip's grip holds small items securely, but you can easily remove them when needed.
It's perfect for keeping frequently used tools within reach without taking up shelf space.
What To Hang
Stick to items that are lightweight and have a loop, handle, or hole. Rubber gloves hung by the cuff dry faster and are easy to grab. Scrub brushes with a hanging hole stay off the shelf and air out.
Microfiber cloths can be clipped by a corner. Avoid heavy bottles or anything that might pull the clip off.
Placement Tips
Clip them near the front of the shelf so items hang clear of the shelves below. Space clips a few inches apart to prevent overcrowding. On wire shelves, position the clip between the wires for a secure hold.
For solid shelves, make sure the clip's grip is tight enough to stay put when you remove an item.
23. Add a Small Light for Dark Cupboards
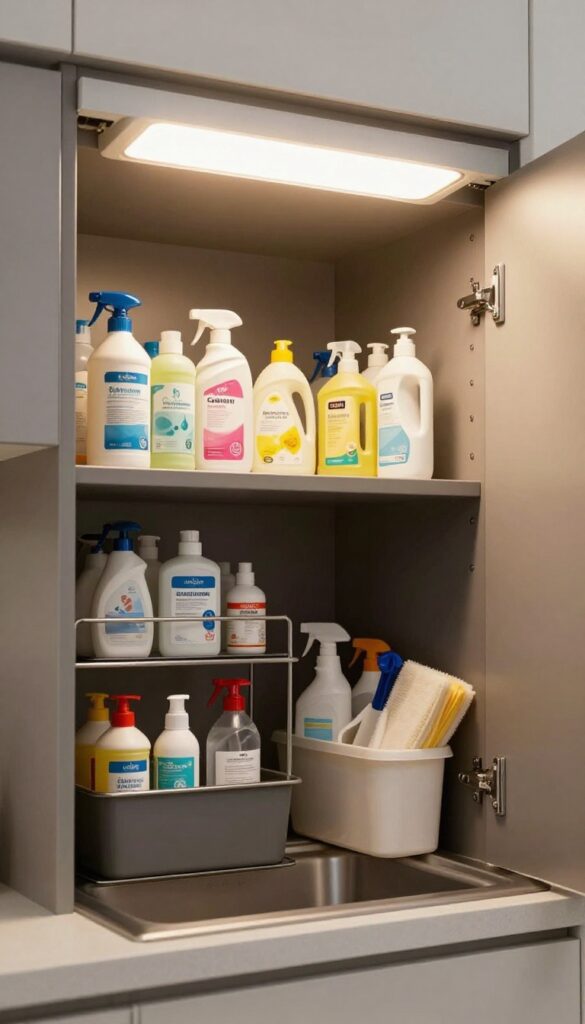
A dark cleaning cupboard is an invitation to chaos. When you can't see what's inside, you end up grabbing the wrong bottle or knocking things over. A simple battery-operated LED light changes everything.
It makes the space feel bigger, helps you spot items instantly, and even makes you more likely to keep things tidy.
Lighting is often overlooked in cupboard organisation, but it's a game-changer. A well-lit space reduces frustration and helps you maintain order because you can actually see what you're doing. Stick-on LED lights are cheap, easy to install, and last for months on a single set of batteries.
Pick The Right Light
Look for a motion-sensor LED light that turns on automatically when you open the door. That way you never have to fumble for a switch. Choose a warm or neutral white light (around 3000K) so it feels natural and doesn't distort colours.
Where To Place It
Mount the light on the ceiling of the cupboard or on the underside of a shelf above. Avoid placing it directly behind tall bottles where it will be blocked. Aim for a spot that illuminates the centre or the back of the cupboard evenly.
Battery Life And Maintenance
Most stick-on LED lights use AAA batteries and last 3-6 months with normal use. Keep spare batteries nearby so you can swap them quickly. Some lights come with a remote or timer, but motion sensor is the most convenient for a cupboard.
FAQ
How do I start organising my cleaning cupboard?
Empty everything out, declutter expired or unused products, and group similar items. Then choose a few ideas from this list that fit your space and budget.
What is the best way to store spray bottles?
Hanging them upside down from a tension rod or using a magazine holder keeps them upright and easy to grab. Both methods prevent leaks and clutter.
Can I organise a small cleaning cupboard?
Absolutely. Use vertical space with stackable bins, over-the-door organisers, and magnetic strips. Every inch counts—even the inside of the door.
How often should I reorganise my cleaning cupboard?
Aim for a quick tidy-up every season. Remove expired products, wipe down shelves, and adjust your system as your cleaning habits change.
Do I need to buy special organisers?
Not necessarily. Many ideas use items you already have, like cutlery trays, binder clips, or tension rods. Start with what you own before buying new.
Conclusion
A tidy cleaning cupboard doesn't just look good—it makes your daily chores smoother and less stressful. By trying even a few of these ideas, you'll save time and frustration every time you reach for a sponge or spray. Start with the easiest fix that appeals to you, then build from there.
Small changes add up, and soon you'll have a cupboard that works as hard as you do. Happy organising!


