
A clean concrete floor can completely change how your garage or patio feels. Instead of looking at stains and grime, you get a surface that looks fresh and well-maintained. The best part?
You don't need industrial chemicals or expensive gear to make it happen. Most people think concrete is impossible to keep clean, but that's just not true. With the right approach, you can remove oil stains, tire marks, and mildew without breaking a sweat.
These 20 ideas focus on real results, so you can pick the method that fits your situation. Whether you're prepping for a party or just want a garage that doesn't embarrass you, these tips will get you there.
1. Sweep Away Loose Dirt First
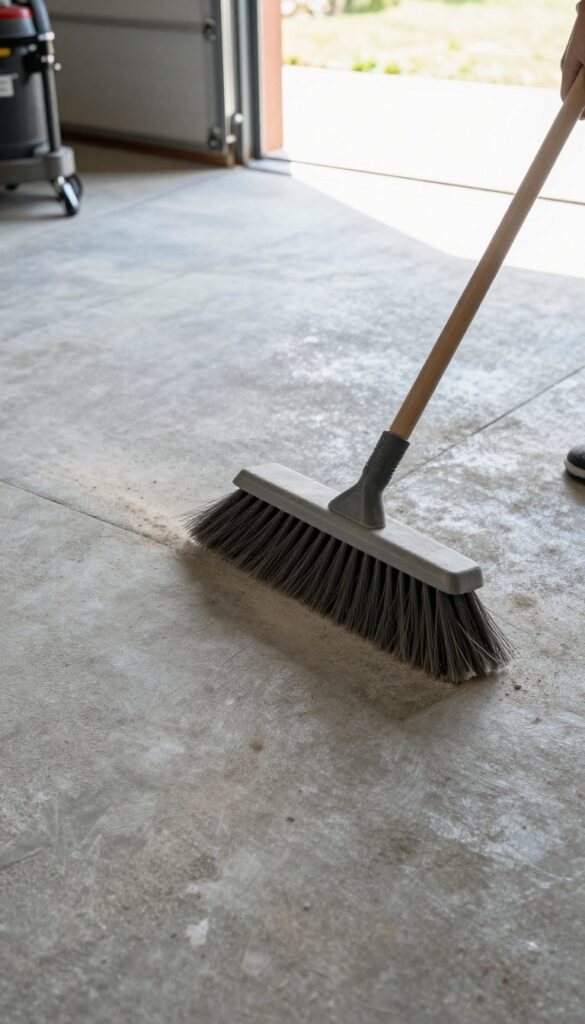
Before you bring out any cleaners or scrub brushes, take a few minutes to remove loose dirt and debris. A stiff broom or a shop vac works great for this. Sweeping or vacuuming first prevents tiny particles from scratching the concrete surface when you apply cleaners or water.
It also makes the cleaning step more effective because you aren't just pushing mud around.
Start by clearing the area of any furniture, tools, or clutter. Then use a stiff-bristle broom to sweep the entire floor, working from the corners outward. For stubborn dust in cracks, a shop vac with a crevice tool is your best friend.
Don't skip this step—it's the foundation for every other cleaning method you'll try.
Why Bother Sweeping First?
Skipping the sweep means you'll grind grit into the concrete as you scrub, creating fine scratches that dull the finish over time. Even if your floor is already stained, removing loose dirt ensures your cleaning solution reaches the actual grime instead of sitting on top of a layer of dust.
Best Tools For The Job
A heavy-duty push broom with stiff bristles is ideal for large garages. For patios, a standard corn broom works fine. If you have a shop vac, use it to get into corners and along edges where dirt hides.
A dustpan and brush set helps collect piles quickly.
How Often To Sweep
For high-traffic areas like garage floors, sweep once a week. Patios may need less frequent sweeping, but do it before any deep cleaning session. Regular sweeping also prevents stains from setting in, making future cleanings easier.
2. Degrease Stubborn Oil Stains with Dish Soap
Oil stains are the enemy of a clean garage floor. They seem to set in overnight and refuse to budge with plain water. But you don't need a heavy-duty degreaser to win this fight.
A simple dish soap solution can break down the grease and lift it right out, even if the stain has been sitting for weeks.
Why Dish Soap Works On Oil
Dish soap is designed to cut through grease on plates, and it does the same on concrete. The surfactants in the soap surround oil molecules, allowing them to be rinsed away with water. For fresh stains, this method is almost effortless.
For older stains, a little more scrubbing elbow grease is needed, but the soap still loosens the bond.
Step-by-step Scrubbing Process
Start by blotting up any fresh oil with paper towels or cat litter. Then mix a few drops of dish soap into a bucket of warm water. Apply the soapy water to the stain and scrub vigorously with a stiff-bristled brush.
Work in small circles to agitate the oil. Let it sit for 5–10 minutes, then rinse thoroughly with a hose or bucket of clean water. Repeat if necessary.
When To Add A Little Extra Power
For really stubborn, set-in stains, you can boost the dish soap with a sprinkle of baking soda or a splash of white vinegar. The baking soda adds mild abrasion, while vinegar helps cut through grime. Just be careful not to mix vinegar with bleach-based cleaners.
After scrubbing, rinse well to avoid any residue that could attract more dirt.
3. Use Baking Soda for Deep Oil Absorption
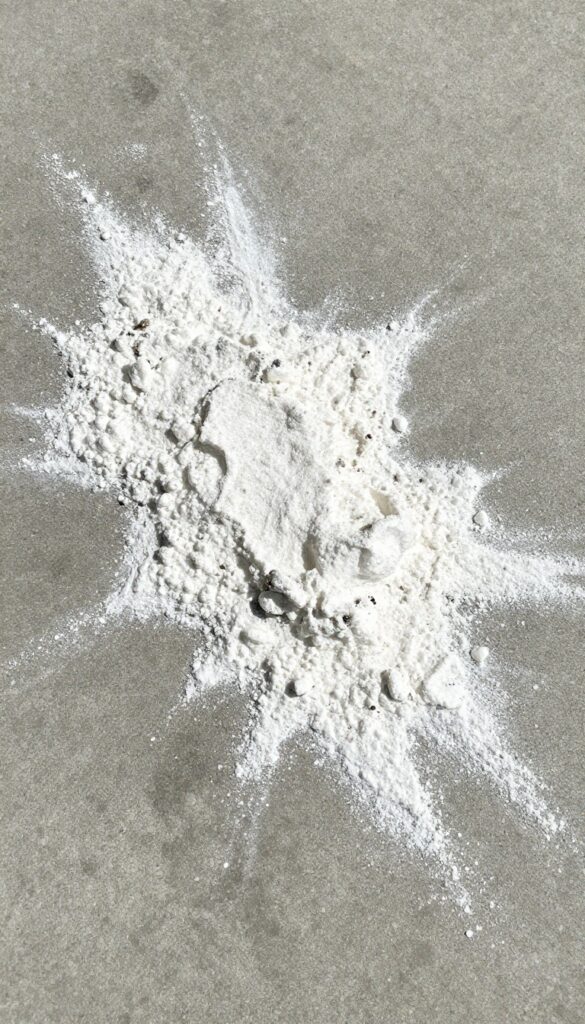
Fresh oil spills are one thing, but those dark, set-in stains are a different beast. Before you reach for harsh solvents, try a pantry staple that pulls oil out like a magnet. Baking soda is gentle on concrete but tough on grease, making it a go-to for deep cleaning.
Sprinkle a thick layer of baking soda over the oil stain, making sure it covers the entire area. Let it sit for at least 24 hours—overnight works, but a full day gives better results. The baking soda will absorb the oil from the pores, turning into a clumpy paste.
Sweep up the powder, then scrub the spot with a stiff brush and a little dish soap. Rinse with water and repeat if needed. This method is cheap, non-toxic, and surprisingly effective on old stains.
Why Baking Soda Works
Baking soda is a mild abrasive and a natural absorbent. Its fine particles get into the tiny pores of concrete and draw out oil through capillary action. Unlike chemical degreasers that just dissolve oil on the surface, baking soda pulls it from deep within the slab.
Step-by-step Application
First, blot up any fresh oil with paper towels. Then cover the stain with a 1/4-inch layer of baking soda. Press it down lightly so it makes contact.
Wait 24 hours, then sweep up the powder. For stubborn residue, scrub with a paste of baking soda and water, let it dry, then rinse.
When To Repeat Or Combine
Some old stains need two or three treatments. If you see a shadow after the first round, just reapply. For extra power, mix baking soda with a little hydrogen peroxide to create a fizzing action that lifts grease.
Always test on a small area first.
4. Try a Pressure Washer for a Deep Clean
When a mop and bucket just aren't cutting it, a pressure washer can work wonders. It's like giving your concrete a power shower that blasts away years of embedded grime. The key is using the right technique to avoid damaging the surface.
For a truly deep clean, nothing beats the force of a pressure washer. It's especially effective on patios and garage floors that have accumulated dirt, mildew, and stubborn stains over time. Just make sure you're using the correct nozzle and keeping the wand moving to prevent etching.
Choose The Right Nozzle
A 15 to 25-degree tip is the sweet spot for concrete. It's strong enough to lift dirt but not so narrow that it gouges the surface. Avoid zero-degree tips, which can leave permanent lines in the concrete.
Keep It Moving
Don't hold the spray in one spot for more than a second. Sweep the wand in smooth, overlapping passes. If you stop, you risk etching a pattern into the floor that's hard to fix.
Pre-treat Stains
For oil or grease stains, apply a degreaser and let it sit for 10-15 minutes before pressure washing. This breaks down the stain so the water can wash it away more effectively.
5. Kill Mold and Mildew with White Vinegar
Mold and mildew love damp, shaded concrete. They leave dark patches and a musty smell that spreads fast. White vinegar cuts through that grime without harsh fumes.
Undiluted white vinegar is a natural mold killer. Spray it directly on the affected areas, let it sit for ten minutes, then scrub with a stiff brush and rinse with water. For stubborn spots, repeat or let it soak longer.
This method is safe for pets and plants, and it won't damage your concrete.
Why Vinegar Works On Concrete
Concrete is porous, so mold roots into the surface. Vinegar's acetic acid penetrates those pores and kills the mold at the source. It's also alkaline enough to neutralize mildew odors without leaving a chemical residue.
Step-by-step Application
Start by sweeping the area. Pour white vinegar into a spray bottle and coat the moldy spots. Wait ten minutes, then scrub firmly with a deck brush.
Rinse with a garden hose or bucket of water. For thick mold, increase soak time to 20 minutes.
When To Avoid Vinegar
Don't use vinegar on sealed or polished concrete—it can dull the finish. Test a small area first. If the concrete is unsealed, vinegar is safe.
Also avoid mixing vinegar with bleach; the combination creates toxic chlorine gas.
6. Remove Rust Stains with Lemon Juice and Salt
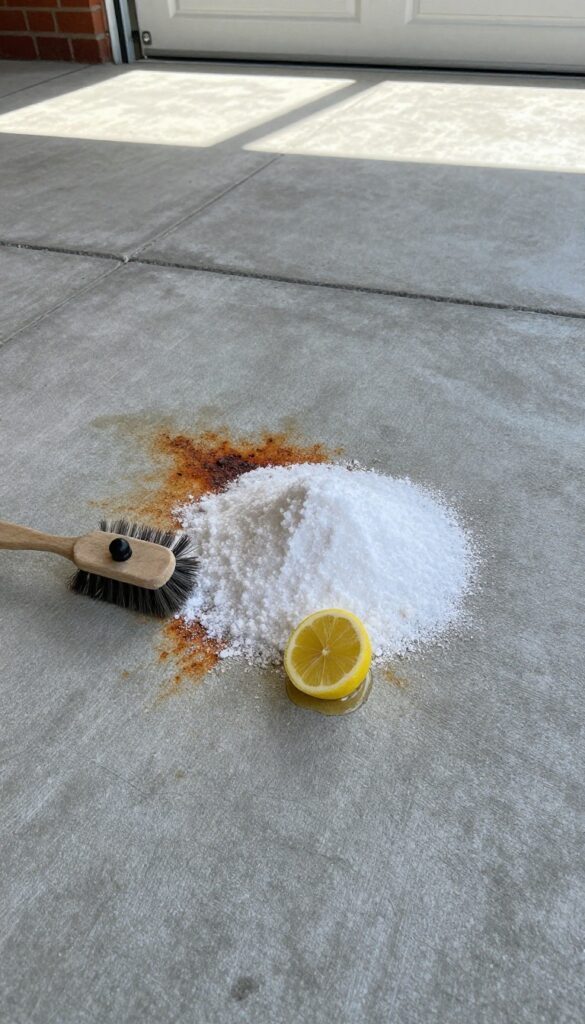
Rust stains on concrete can be stubborn, but a simple kitchen remedy often does the trick. Lemon juice and salt work together to break down rust without harsh chemicals. This method is cheap, natural, and surprisingly effective on fresh or light rust marks.
Why This Combo Works
Salt acts as a mild abrasive to scrub the stain, while the citric acid in lemon juice reacts with rust to dissolve it. Together, they lift the discoloration without damaging the concrete surface.
Step-by-step Application
Start by sprinkling a generous layer of salt directly over the rust stain. Squeeze fresh lemon juice onto the salt until it's saturated but not pooling. Let the mixture sit for about an hour—longer for older stains.
Then scrub with a stiff brush or broom, and rinse thoroughly with water.
Tips For Best Results
For stubborn stains, repeat the process or let it sit overnight. Avoid using on sealed concrete, as the acid could dull the finish. Always test on a small area first.
7. Tackle Tire Marks with a Magic Eraser
Tire marks are one of the most common eyesores on garage concrete, but they don't have to be permanent. A simple melamine sponge—often sold as a magic eraser—can lift rubber scuffs without any harsh chemicals. Just wet it, squeeze out excess water, and gently rub the mark.
The sponge's micro-abrasive texture breaks down the rubber, leaving the concrete clean and unscratched.
Why Magic Erasers Work So Well
Melamine foam acts like ultra-fine sandpaper. When damp, it creates a mild abrasive action that dislodges rubber particles from the porous concrete surface. Unlike solvents or degreasers, it doesn't leave residue or require rinsing.
It's also safe for sealed and unsealed concrete, as long as you don't scrub too hard.
Step-by-step Application
Cut the sponge into smaller pieces to get more use out of it. Wet one piece under running water, then squeeze until it's damp but not dripping. Rub the tire mark in a circular motion with light to moderate pressure.
The mark should start fading within a few seconds. If it's stubborn, rewet the sponge and continue. Rinse the area with water afterward to remove any foam dust.
When To Use A Different Method
Magic erasers work best on fresh to moderately set-in tire marks. For very old or deeply embedded scuffs, you might need a stronger cleaner or a pressure washer. Also, avoid using them on polished or coated concrete, as the abrasion can dull the finish.
Always test on a small, hidden spot first.
8. Use a Concrete Cleaner and Degreaser for Heavy Grime
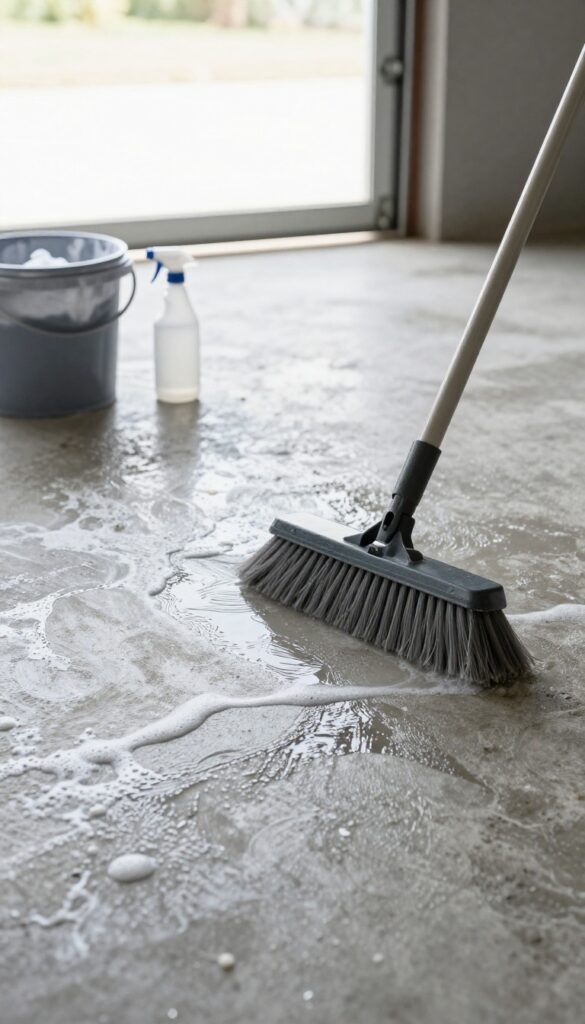
When dirt and grease have built up over time, a simple soap and water mix won't cut it. That's where a dedicated concrete cleaner and degreaser comes in. These commercial products are formulated to break down tough grime, oil, and grease without damaging the surface.
They're especially effective for large garage floors or patio areas that see heavy use.
Using a concrete cleaner and degreaser is straightforward but requires some prep. Clear the area of any furniture, tools, or debris. Sweep thoroughly to remove loose dirt.
Then dilute the cleaner according to the manufacturer's instructions—usually a ratio of about 1: 4 with water. Apply it generously to the concrete using a watering can or sprayer. Let it sit for 5–10 minutes to penetrate the grime.
Then scrub with a stiff push broom, working in sections. Rinse thoroughly with a garden hose or pressure washer. For best results, choose a product that's biodegradable and safe for plants if you're working near landscaping.
Choosing The Right Product
Not all concrete cleaners are the same. Look for a product labeled as a degreaser or heavy-duty cleaner. Avoid ones with harsh acids that can etch the surface.
Citrus-based degreasers work well and smell better. For pet-safe options, check the label for non-toxic ingredients.
Scrubbing Technique For Large Areas
Use a push broom with stiff bristles—skip the soft ones. Work in a grid pattern to cover every inch. For stubborn spots, pour a little undiluted cleaner directly on the stain and scrub with a stiff brush.
Rinse often to avoid residue buildup.
Rinsing And Drying
Rinse thoroughly with clean water. Leftover cleaner can attract dirt or leave a film. Use a squeegee to push water toward a drain or off the edge.
Let the concrete dry completely before walking on it or moving items back.
9. Brighten with Oxygen Bleach
Oxygen bleach is a gentler alternative to chlorine bleach that still delivers serious whitening power. Unlike harsh chemicals, it breaks down into harmless oxygen and water, making it safe for plants, pets, and the environment. This method works especially well on dull or lightly stained concrete that just needs a brightness boost.
Mix a scoop of oxygen bleach powder with warm water according to the package instructions—usually about 1 cup per gallon of water. Pour the solution over the concrete, let it sit for 15 minutes to activate, then scrub with a stiff-bristle brush. Rinse thoroughly with a hose or pressure washer.
For stubborn areas, apply the paste directly and let it dwell longer before scrubbing.
How Oxygen Bleach Works
Oxygen bleach releases hydrogen peroxide when mixed with water, which lifts dirt and organic stains without damaging the concrete's surface. It's non-toxic and won't bleach nearby grass or harm your garden. This makes it a top choice for patios where you want a clean look without environmental guilt.
Best Uses For Oxygen Bleach
This method is ideal for brightening sun-faded concrete, removing mildew stains, and tackling light oil residue. It's not strong enough for deep-set rust or heavy grease, but for everyday grime and yellowing, it works like a charm. Use it seasonally to keep your garage or patio looking fresh.
Application Tips For Best Results
Always test on a small area first to check for any unexpected reaction. Work in sections to prevent the solution from drying out before you scrub. For extra stubborn spots, make a thick paste with less water and let it sit for 30 minutes.
Wear gloves and old shoes—the solution can irritate skin and stain fabric.
10. Seal the Concrete After Cleaning
You've put in the work to scrub, degrease, and rinse your concrete floor until it looks fresh. Now comes the step that locks in all that effort: sealing. A quality concrete sealer acts like a shield, keeping future spills, stains, and moisture from soaking into the porous surface.
It also makes your next cleaning session much faster—dirt and grime won't have a chance to bond with the concrete. Whether your floor is in a garage or on a patio, sealing is the secret to long-lasting shine and easy maintenance.
Why Sealing Matters
Concrete is naturally porous, which means it acts like a sponge for oil, grease, and water. Without a sealer, even a small spill can leave a permanent mark. A good sealer fills those pores and creates a protective barrier.
It also helps prevent cracking from freeze-thaw cycles on patios and makes sweeping or hosing down the floor effortless.
Choosing The Right Sealer
Not all sealers are the same. For garage floors where you park cars, look for a solvent-based acrylic or polyurethane sealer that can handle heavy traffic and chemical spills. For patios, a water-based acrylic sealer works well and is easier to apply.
You can also choose between a matte finish for a natural look or a glossy finish for extra shine. Always check the manufacturer's recommendations for your specific surface.
Application Tips For Best Results
Before sealing, make sure the concrete is completely clean and dry—any moisture trapped underneath can cause peeling. Apply the sealer in thin, even coats using a roller or sprayer, and work in small sections to avoid overlaps. Two coats are usually better than one.
Let each coat dry fully before adding the next. Avoid walking on the floor for at least 24 hours, and keep vehicles off for a few days to let the sealer cure properly.
11. Use a Shop Vac for Wet Pickup
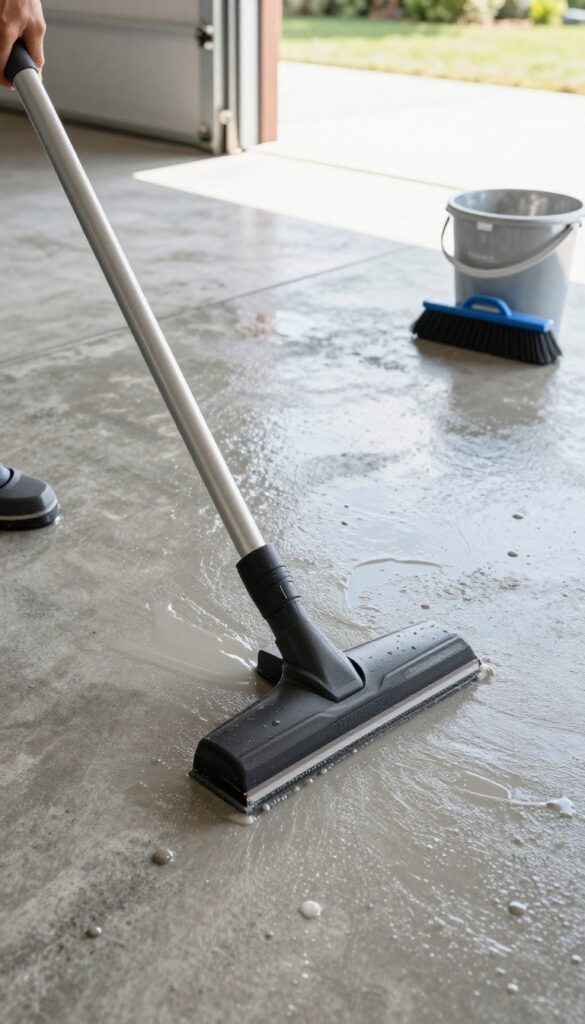
After you've scrubbed the concrete, you're left with a layer of dirty water that can redeposit grime as it dries. Instead of pushing it around with a squeegee or letting it evaporate, a wet/dry vacuum makes quick work of the mess. It pulls the water straight off the surface, cutting drying time and leaving a cleaner finish.
Using a shop vac for wet pickup is a game-changer when you're deep cleaning a garage or patio. It prevents the muddy water from settling back into the pores of the concrete, which can cause streaking or a dull film. Plus, it's much faster than waiting for the floor to air dry, so you can move on to sealing or just enjoy your clean space sooner.
Choose The Right Vacuum
Not all wet/dry vacs are created equal. Look for one with at least 5 gallons of capacity and a squeegee attachment designed for liquid pickup. A wide floor nozzle helps cover more area quickly.
Make sure the filter is rated for wet use—remove any paper filters and install the foam sleeve that comes with most units.
Work In Sections
Don't try to vacuum the entire floor at once. Split the area into manageable sections, about 4×4 feet each. Scrub one section, then immediately vacuum up the dirty water before moving on.
This keeps the water from pooling and gives you better control over the cleanup.
Rinse And Repeat
After the initial pickup, you might notice a thin residue left behind. Give the floor a quick rinse with clean water and vacuum again. This second pass removes any soap or loosened dirt that was missed the first time.
Your concrete will dry streak-free and ready for sealing or just daily use.
12. Try Trisodium Phosphate for Tough Stains
Some stains just laugh at regular cleaners. Grease that's been baked into the garage floor or paint splatters from that DIY project can feel impossible. That's where trisodium phosphate, or TSP, comes in.
It's a heavy-duty cleaner that breaks down stubborn grime fast.
What Makes Tsp So Effective
TSP is a strong alkaline compound that cuts through grease, oil, and even old paint. It works by emulsifying oils and loosening dirt so you can rinse it away. It's been used for decades in construction and industrial cleaning for good reason.
How To Use It Safely
Wear rubber gloves and safety goggles. Mix the powder with warm water according to the package directions. Apply with a stiff brush, scrub the stain, and let it sit for a few minutes.
Rinse thoroughly with clean water until no residue remains.
When To Avoid Tsp
Don't use TSP on sealed or polished concrete because it can damage the finish. It's also harsh on plants and grass, so protect nearby greenery. Only use it in well-ventilated areas, and never mix it with bleach or other cleaners.
13. Scrub with a Deck Brush for Texture
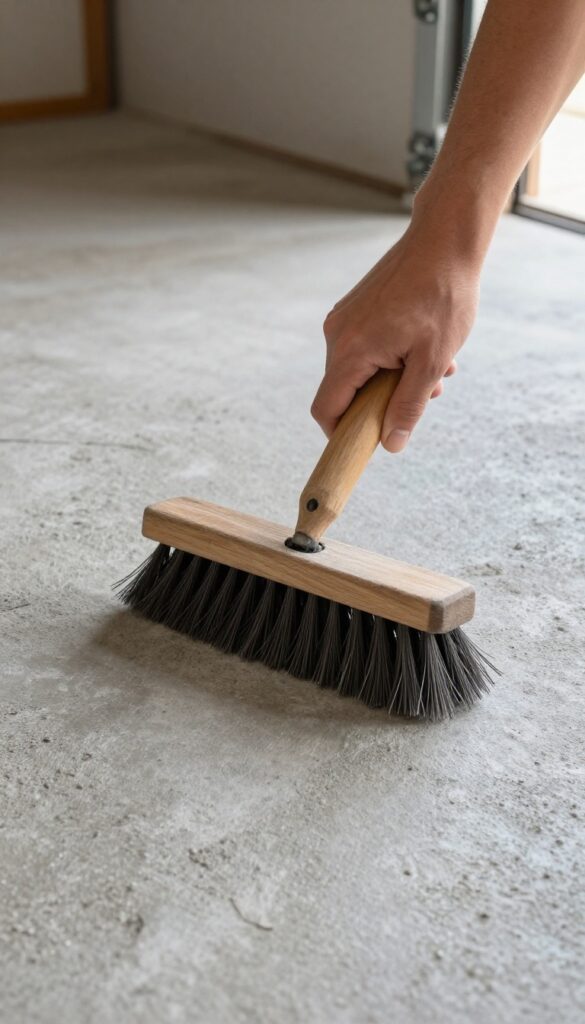
A pressure washer isn't always necessary. Sometimes, good old-fashioned elbow grease with the right tool does the trick. A long-handled deck brush with stiff bristles can reach deep into the pores of concrete, dislodging dirt that a mop or sponge just skims over.
Pair it with your chosen cleaner, and you get the agitation needed to break down grime without damaging the surface.
The key is using the right brush—one with stiff, durable bristles that can handle rough concrete without shedding. A deck brush on a long handle lets you scrub standing up, saving your back. Work in small sections, applying your cleaning solution first, then scrubbing in a circular motion to lift dirt.
Rinse thoroughly with a hose or pressure washer on low setting to avoid pushing debris back into the pores.
Why A Deck Brush Works Better Than A Mop
Mops tend to push dirty water around, while a deck brush's bristles physically scrape off embedded grime. The stiffness of the bristles is crucial—too soft and you won't get the texture clean; too hard and you might scratch. Look for brushes labeled for concrete or brick.
Technique Tips For Best Results
Start from the farthest corner and work your way toward a drain or exit. Use overlapping strokes to avoid missing spots. For stubborn stains, let the cleaner sit for a few minutes before scrubbing.
Rinse immediately after scrubbing to prevent residue from drying.
When To Use A Deck Brush Vs. A Pressure Washer
A deck brush is ideal for routine cleaning and for areas where a pressure washer might damage sealant or force water under walls. It's also quieter and safer for beginners. Use the brush for weekly or monthly maintenance, and save the pressure washer for deep seasonal cleans.
14. Use Cat Litter to Absorb Fresh Oil Spills
Oil spills are inevitable in a garage, but you don't have to let them set into a permanent stain. The trick is to act fast. Cat litter—yes, the same stuff you use for the litter box—can be a lifesaver for fresh oil spills.
It’s cheap, works like a sponge, and saves you from scrubbing later. Here’s how to use it effectively.
When you spot a fresh oil spill, grab a bag of clumping cat litter. Pour a generous layer directly over the spill, making sure it covers the entire area. Let it sit for a few hours—overnight for larger spills.
The clay granules will soak up the oil like a sponge. Once it's done, sweep up the litter and dispose of it properly. Any residue can be wiped with a degreaser.
This method pulls the oil out before it bonds with the concrete, preventing a stubborn stain.
Why Clumping Litter Works Best
Clumping cat litter contains bentonite clay, which absorbs liquids and forms solid clumps. This makes it easy to scoop up without leaving a mess. Non-clumping varieties work too, but they can leave a dusty residue that’s harder to clean.
Stick with unscented, basic clumping litter for the best results.
Step-by-step Application
First, cover the spill completely with a thick layer of litter—about a quarter-inch deep. Let it sit for at least two hours, or longer for heavy spills. Then, sweep the litter into a dustpan and discard it in a sealed bag.
For leftover oil residue, spray a degreaser and scrub with a stiff brush. Rinse with water and you’re done.
When To Use This Method
This technique only works on fresh spills—within a few hours. Once the oil has soaked into the concrete and dried, cat litter won’t help. For set-in stains, you’ll need a degreaser or a poultice.
Keep a bag of litter in your garage so you’re ready the moment a spill happens.
15. Rinse with a Garden Hose and Nozzle
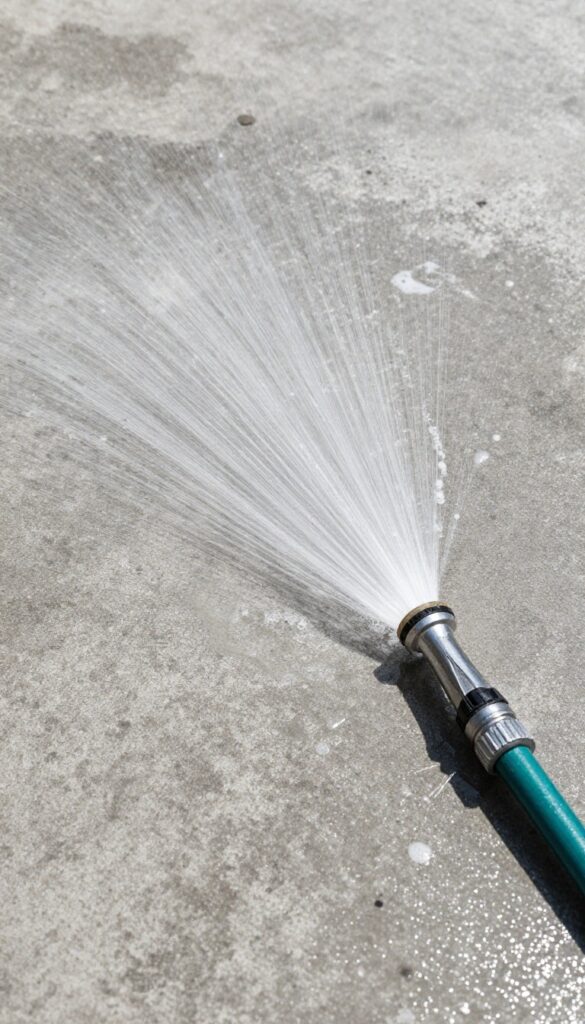
Not every cleaning job calls for a pressure washer. Sometimes a simple garden hose with a good nozzle is all you need. A strong, focused stream can blast away soap residue, loose dirt, and grime without the risk of damaging the concrete or forcing water into cracks.
This method is especially handy for small patios or garage floors where you want a quick, effective rinse without dragging out heavy equipment.
A garden hose with an adjustable nozzle gives you control over water pressure. Set it to a jet or cone spray to target stubborn spots, then switch to a wider pattern for overall rinsing. This approach uses less water than a pressure washer and is gentler on the surface.
It's also quieter and easier to store. For best results, work in sections, rinsing from the highest point downward so dirty water flows away. Let the floor air dry or use a squeegee to speed things up.
Choose The Right Nozzle
Not all nozzles are created equal. Look for one with multiple spray patterns, including a jet setting for concentrated power. A trigger-style nozzle lets you control the flow easily.
Avoid nozzles that produce a weak spray, as they won't effectively remove soap or grime.
Work In Sections For Best Results
Divide your patio or garage floor into manageable areas. Rinse each section thoroughly before moving to the next. This prevents dirty water from pooling and redepositing on already cleaned areas.
Overlap your rinsing strokes to ensure no residue remains.
Combine With A Broom Or Squeegee
For a more thorough clean, use a stiff broom to agitate the surface while rinsing. Alternatively, after rinsing, push excess water off the floor with a squeegee. This speeds up drying and leaves a streak-free finish.
16. Apply a Concrete Etch for Deep Cleaning
Sometimes scrubbing and pressure washing just aren't enough. If your concrete has years of embedded dirt, grease, or mineral deposits locked into the pores, a concrete etch can reset the surface. Etching opens up the pores of the concrete, allowing deep-seated grime to be flushed out.
This method works only on unsealed concrete, so test a small area first. Always wear gloves, goggles, and follow the manufacturer's safety instructions—etching solutions are acidic and can cause burns.
When To Use A Concrete Etch
Concrete etching is best for unsealed, porous concrete that has years of accumulated stains. If water beads up on the surface, the concrete is sealed and etching won't work. Use it before applying a new sealer or stain, or when you want a deep clean that other methods can't achieve.
How To Apply The Etch Safely
Start by sweeping and wetting the concrete. Mix the etching solution according to the label—usually a 1: 4 ratio with water. Apply with a stiff-bristle brush or a pump sprayer, working in small sections.
Let it sit for 5–10 minutes (don't let it dry), then scrub vigorously. Rinse thoroughly with water until all residue is gone. Neutralize with a baking soda solution if recommended.
Post-etch Care
After etching, the concrete will feel rough and porous. Rinse multiple times to remove all acid residue. Let it dry completely before applying any sealer or stain.
The surface is now ready for a fresh coat of sealer or a deep clean that will last.
17. Use a Floor Scrubber Machine for Large Garages
When your garage floor is huge and you're tired of spending hours on your hands and knees, it's time to bring in the big guns. A floor scrubber machine can turn a backbreaking chore into a quick, almost effortless job. These machines are built to cover large areas fast, leaving a consistent clean that's hard to match by hand.
Renting a floor scrubber is surprisingly affordable, especially when you consider the time and effort it saves. Most equipment rental places carry walk-behind or ride-on models with brush attachments designed for concrete. You can usually get one for a half-day or full-day rental.
The key is to choose a machine with a brush that's appropriate for your floor's condition—soft brushes for sealed floors, stiff ones for rough or stained concrete. Before you start, sweep or blow the floor clear of loose debris to avoid scratching. Then fill the machine with warm water and a concrete-safe cleaner, and let it do the work.
The scrubber will agitate the dirt, and a built-in squeegee and vacuum system will suck up the dirty water, leaving the floor damp but mostly dry. For really stubborn stains, you might need to pre-treat them with a degreaser or spot cleaner before running the machine. But overall, this method delivers a deep, uniform clean that makes the whole floor look like new.
Choosing The Right Machine
Not all floor scrubbers are created equal. For a standard two-car garage, a walk-behind model with a 20- to 24-inch cleaning path is plenty. For larger spaces like a three-car garage or workshop, consider a ride-on machine to save your back.
Look for machines with adjustable pressure settings so you can dial in the right amount of scrubbing force. Also, check the tank capacity—larger tanks mean fewer trips to refill and empty.
Prepping The Floor
A little prep goes a long way. Sweep up all loose dirt, dust, and debris. If there are oil stains, apply a degreaser and let it sit for 10–15 minutes before scrubbing.
Remove any large items like shelving or toolboxes to give the machine full access. Make sure the floor is dry before you start, especially if you've used any chemicals, to avoid diluting the cleaning solution.
Post-scrub Care
After the machine has done its job, let the floor air dry completely. You might notice a slight residue if the water was dirty or if you used too much detergent. In that case, a quick rinse with a hose and a squeegee will take care of it.
Once dry, your concrete will look noticeably brighter and cleaner. For added protection, consider applying a concrete sealer after the floor is fully dry.
18. Try Hydrogen Peroxide for Organic Stains
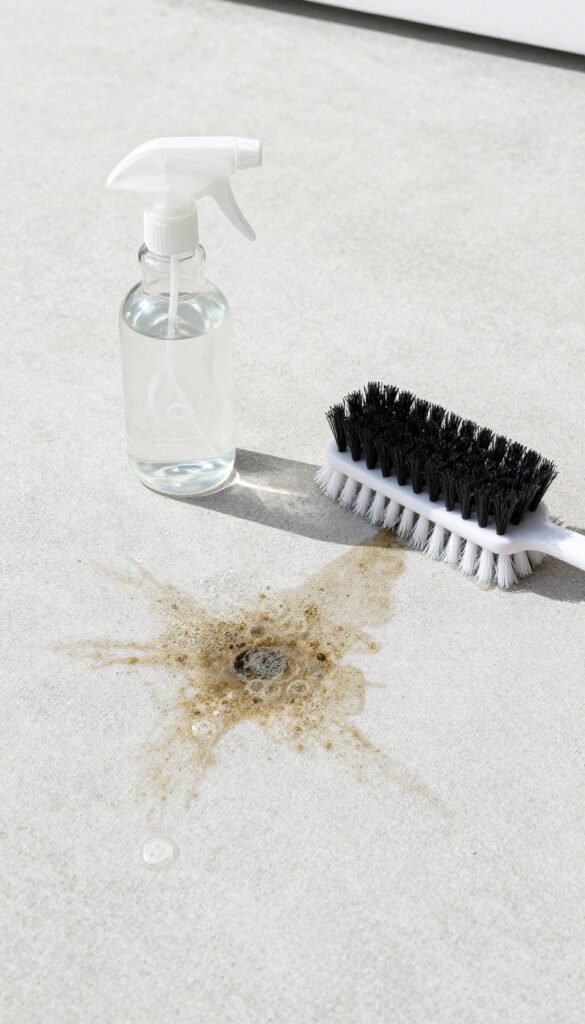
Organic stains like mold, mildew, and food spills can make concrete look grimy and unhealthy. Hydrogen peroxide offers a simple, non-toxic solution that's safe for pets and plants. It works by releasing oxygen bubbles that lift organic matter without damaging the concrete surface.
Grab a bottle of 3% hydrogen peroxide from the pharmacy. Pour it directly onto the stain, let it fizz for about 10 minutes, then scrub with a stiff brush and rinse. For stubborn spots, repeat or use a thicker paste by mixing peroxide with baking soda.
This method is gentle enough for indoor patios and effective on most organic discolorations.
Why It Works So Well
Hydrogen peroxide breaks down into water and oxygen, so there's no harsh chemical residue. The bubbling action physically lifts mold and mildew from the concrete pores. It's also a mild bleach, which helps lighten any remaining discoloration.
Best Uses And Precautions
Use it on moldy patio corners, mildew under planters, or food spills from barbecues. Avoid using it on colored or sealed concrete because it may lighten the finish. Always test in a hidden spot first.
Wear gloves if you have sensitive skin.
19. Use a Steam Cleaner for a Chemical-Free Shine
Steam cleaning is a game-changer for concrete floors when you want a deep clean without harsh chemicals. The high-temperature steam kills bacteria, mold, and mildew while loosening embedded dirt and grime. It works best on sealed concrete, leaving a streak-free finish that looks polished and fresh.
A steam cleaner uses pressurized steam to sanitize and lift dirt without soap or scrubbing. It's especially effective for garage floors with grease residue or patio surfaces with mildew. The heat evaporates quickly, so there's no standing water or slippery residue.
For best results, choose a steam mop or handheld steamer designed for hard surfaces. Move the steamer slowly over the floor to allow the steam to penetrate. Let the surface dry for a few minutes, and you'll have a clean, shiny floor without any chemical smell.
Why Steam Works On Concrete
Steam's high temperature (over 200°F) breaks down grease and oil bonds without needing solvents. It also kills up to 99. 9% of germs and mold spores, making it ideal for patios where kids or pets play.
The steam lifts dirt from pores, and the microfiber pad traps it away. It's safe for sealed concrete, but avoid unsealed or cracked floors as moisture can seep in.
Best Practices For Steam Cleaning
Sweep or vacuum the floor first to remove loose debris. Fill the steamer with distilled water to prevent mineral buildup. Work in small sections, overlapping passes to ensure even coverage.
For stubborn stains, let the steam sit for a few seconds before wiping. After cleaning, allow the floor to dry completely before walking or placing items back.
20. Maintain with Regular Dry Mopping
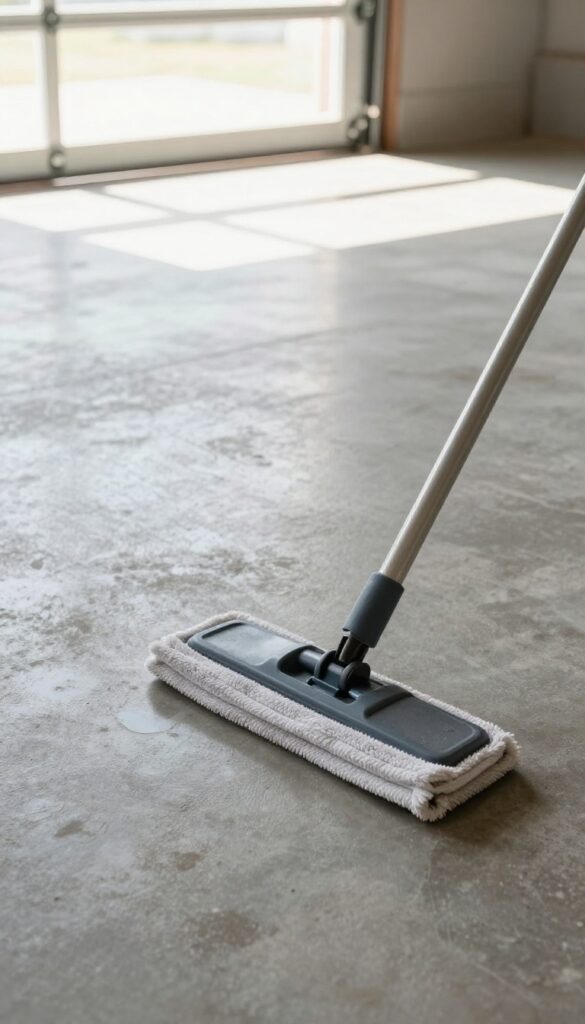
A microfiber dry mop picks up dust and dirt daily. This simple habit keeps your concrete looking clean longer. It stops grime from building up into stubborn stains.
Dry mopping is the easiest way to maintain a clean concrete floor. It takes just a few minutes and prevents dirt from scratching the surface. Make it a daily habit for best results.
Why Dry Mopping Works
Microfiber attracts and traps dust particles instead of pushing them around. This reduces the need for wet cleaning, which can leave residue. It also cuts down on allergens in your garage or patio.
Best Tools For The Job
Use a flat microfiber mop with a washable pad. Avoid string mops or rough cloths that can scratch. A spray mop with a dry setting works well too.
How Often To Dry Mop
For high-traffic areas like a garage, dry mop daily or every other day. Patios may need it once a week. Adjust based on how much dirt tracks in.
Pro Tips For Best Results
Sweep or vacuum large debris first. Then dry mop in straight lines, overlapping each pass. Wash the mop pad after each use to avoid spreading dirt.
FAQ
Can I use bleach on concrete floors?
Yes, but dilute it (1 part bleach to 10 parts water) and rinse thoroughly. Bleach can discolor some concrete and harm nearby plants.
How often should I clean my garage concrete floor?
Sweep weekly and deep clean every 3-6 months. If you work on cars or have heavy traffic, clean more often.
Will vinegar damage concrete?
Diluted vinegar is safe for most concrete, but avoid using it on unsealed or polished concrete as it can etch the surface.
What is the best way to remove oil stains from concrete?
For fresh stains, use cat litter or baking soda. For old stains, try a degreaser or a poultice made from dish soap and water.
Do I need to seal my concrete floor after cleaning?
Sealing is optional but recommended. It protects against stains and makes future cleaning much easier.
Conclusion
A clean concrete floor doesn't have to be a distant dream. With these 20 ideas, you can tackle everything from oil stains to mildew using stuff you probably already have at home. The key is to pick the right method for your specific stain and start with the simplest option.
Remember, regular maintenance makes a huge difference. A quick sweep and an occasional deep clean will keep your garage and patio looking sharp year-round. Now go grab that broom and give your concrete the attention it deserves.


