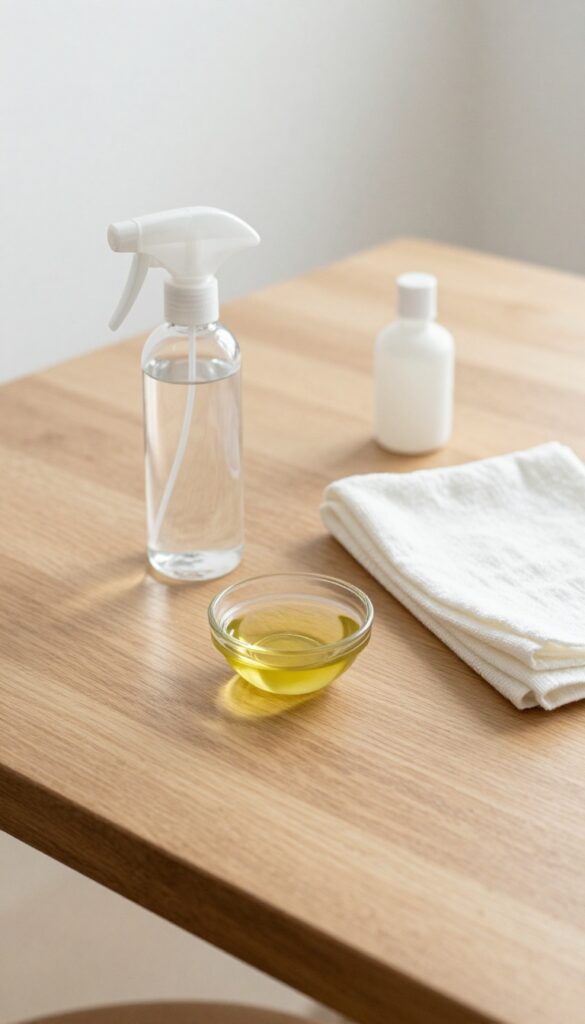
Your wooden furniture deserves more than a quick dusting. Over time, grime, sticky residues, and dullness creep in, making even the finest pieces look tired. The good news?
You don’t need harsh chemicals to bring back that warm glow. These 13 gentle polish methods use everyday ingredients to clean, nourish, and protect your wood. From classic olive oil blends to surprising helpers like mayonnaise and yogurt, each approach targets specific issues—stains, scratches, or daily grime—without stripping the finish.
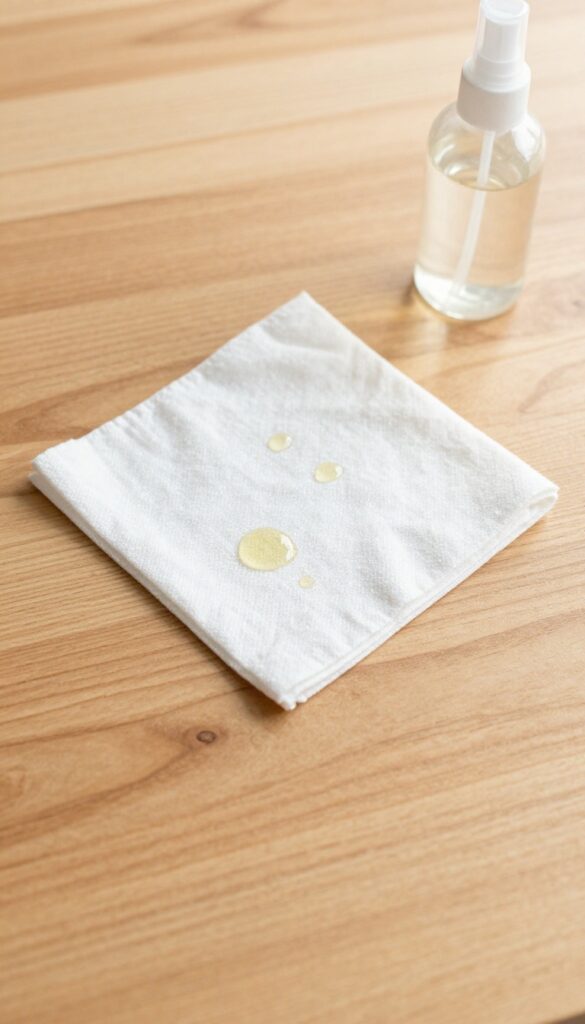
Ready to see your tables and chairs transform? Let’s dive into the simplest, most natural ways to care for your wood furniture.
1. Olive Oil and Vinegar: The Classic Combo
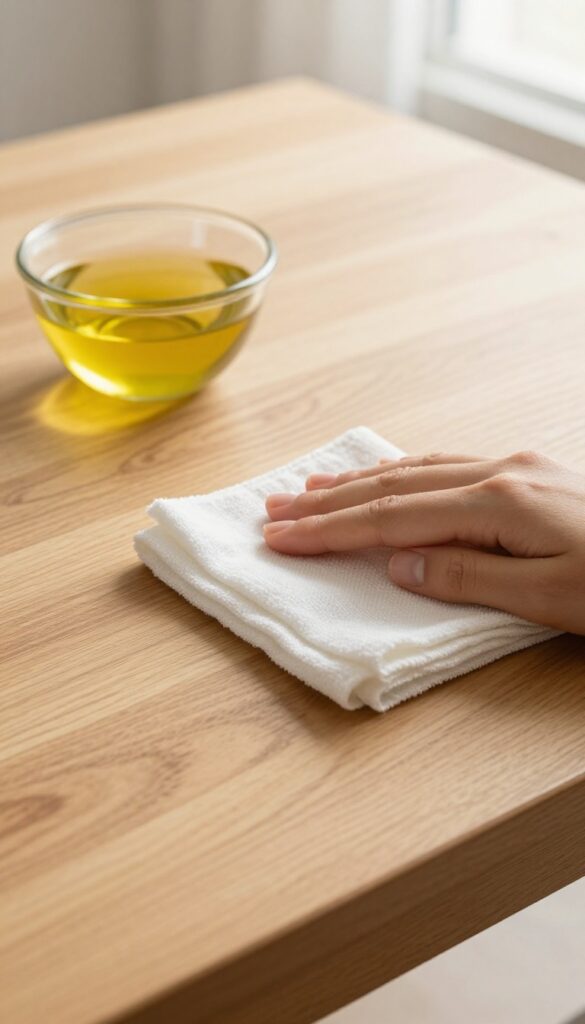
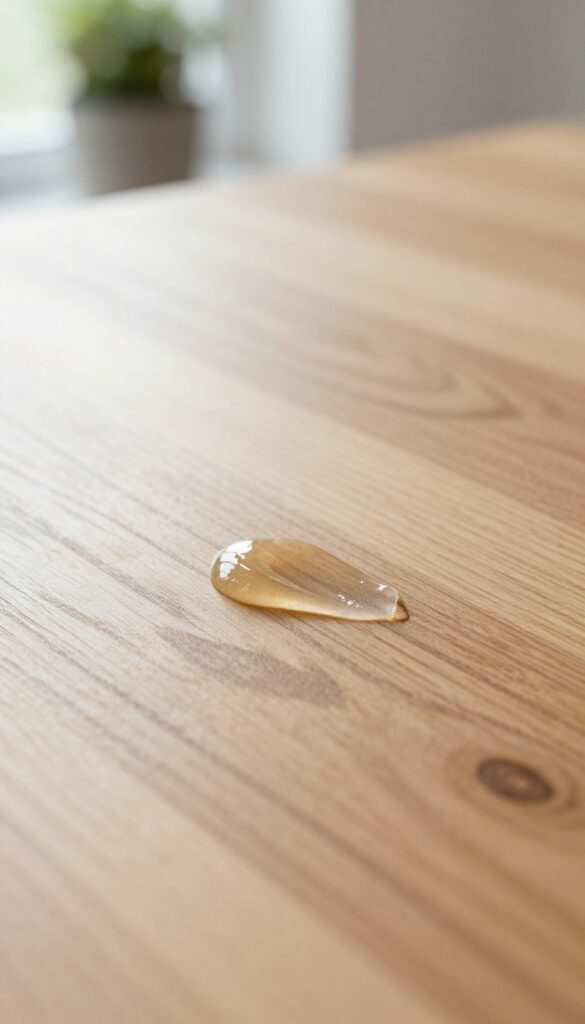
There's a reason this simple mixture has been passed down through generations. Olive oil moisturizes the wood, while vinegar cuts through grease and grime. Together, they create a polish that cleans and conditions in one step, leaving a soft, natural sheen without any waxy buildup.
Getting The Ratio Right
Stick to a 1: 1 ratio—one part olive oil to one part white vinegar. Shake the mixture in a small spray bottle or bowl. Test it on an inconspicuous spot first, especially if your furniture has a delicate finish.
This blend works best on unfinished or sealed wood, not waxed surfaces.
Application Tips For Best Results
Dampen a soft, lint-free cloth with the mixture—don't soak it. Wipe in the direction of the wood grain to avoid streaks. Let the polish sit for a minute, then buff with a dry cloth until the surface feels smooth and looks evenly glossy.
A little goes a long way.
When To Skip This Method
Avoid using olive oil on antique or shellac-finished pieces. The oil can darken the wood over time and attract dust if not buffed thoroughly. For those pieces, stick to a dry dusting or a commercial polish designed for antiques.
2. Lemon Juice and Olive Oil: Fresh and Clean
This dynamic duo cuts through greasy fingerprints and leaves behind a bright, citrusy scent. The acidity of lemon juice breaks down grime, while olive oil moisturizes the wood and enhances its natural luster. It's a perfect choice for kitchen tables or dining chairs that see daily use.
Mixing The Right Ratio
Combine two parts olive oil with one part lemon juice in a small bowl. Stir well. Use fresh lemon juice for best results—bottled versions often contain preservatives that can leave a sticky residue.
Application Tips
Dip a soft, lint-free cloth into the mixture and wring out excess. Wipe the furniture in the direction of the wood grain. Work in small sections to avoid puddling.
Let the polish sit for a minute, then buff with a clean dry cloth until shiny.
When To Avoid This Method
Skip this polish on unfinished or unsealed wood—the moisture from lemon juice can cause swelling or water marks. Test on an inconspicuous spot first. Also avoid overuse; too much oil can attract dust over time.
3. Mayonnaise: Surprising Stain Remover
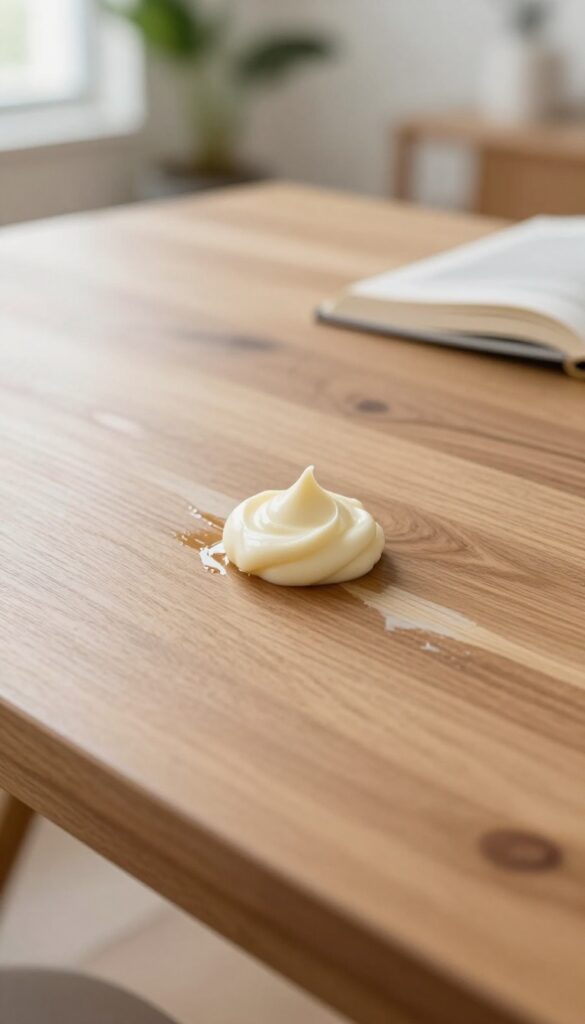
White water rings from sweating glasses or hot mugs can make a coffee table look neglected. Before reaching for a refinishing kit, try this kitchen staple. Mayonnaise contains oils and egg yolks that gently penetrate the wood's finish, pushing out the trapped moisture that causes the cloudy mark.
It's a surprisingly effective trick for fresh stains on finished wood.
To use, apply a thin layer of full-fat mayonnaise directly over the water ring. Let it sit for about an hour—longer for stubborn marks. Then wipe off with a soft cloth and buff gently.
The oils seep into the finish, displacing the moisture and restoring clarity. This works best on sealed wood; avoid on raw or unfinished surfaces. For extra stubborn rings, let the mayo sit overnight but check periodically.
Finish by wiping with a damp cloth and drying immediately.
Why It Works
Mayonnaise is an emulsion of oil and vinegar with egg yolks. The oil penetrates the wood's finish, replacing the water trapped under the surface that causes the white haze. The mild acidity in vinegar helps break down residue without damaging the sealant.
This gentle combination lifts the stain without stripping or sanding.
Best Uses And Precautions
Ideal for white rings on tables, desks, and cabinets with a polyurethane, lacquer, or shellac finish. Do not use on waxed, oiled, or unfinished wood—the oils can soak in unevenly and cause dark spots. Always test on an inconspicuous area first.
If the stain is old or deep, you may need multiple applications.
Step-by-step Application
- Blot any liquid on the surface. 2.
Spread a dime-sized amount of mayo over the ring. 3. Cover with plastic wrap to keep it moist (optional).
- Let sit for 1 hour. 5.
Wipe off with a clean, dry cloth. 6. Buff the area gently.
- If the ring remains, repeat or leave overnight. 8.
Clean the area with a mild soap solution and dry thoroughly.
4. Beeswax and Mineral Oil: DIY Furniture Wax
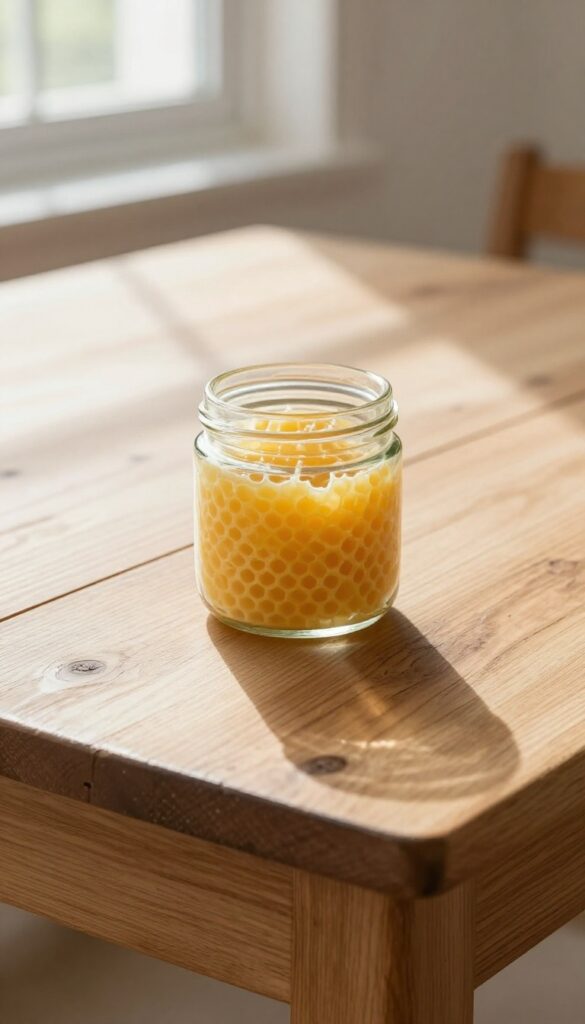
If you want a polish that does more than just shine, this homemade wax is your answer. Beeswax creates a protective barrier that repels dust and moisture, while mineral oil keeps the wood hydrated. Together, they form a nourishing wax that leaves a soft, natural luster without the synthetic additives found in store-bought products.
Why This Combo Works So Well
Beeswax is a natural sealant that fills tiny pores in the wood, preventing dirt and grime from settling in. Mineral oil, on the other hand, penetrates the grain to restore moisture and flexibility. This pairing gives you both protection and nourishment in one application, making it ideal for frequently used pieces like dining tables or chair arms.
How To Make It At Home
Grate 1 part beeswax (by volume) and melt it in a double boiler or a heatproof bowl over simmering water. Once melted, stir in 4 parts mineral oil until fully combined. Pour the mixture into a clean jar and let it cool completely.
It will set into a soft paste. Store it in a cool, dark place, and it will keep for months.
Application Tips For Best Results
Apply a small amount of the wax to a soft, lint-free cloth. Rub it onto the wood in a circular motion, working with the grain. Let it sit for about 15–20 minutes, then buff with a clean cloth until the surface feels smooth and looks subtly glossy.
For heavily used pieces, you can repeat the process once a year to maintain the protective layer.
When To Skip This Method
Avoid using beeswax on shellac or lacquer finishes, as it can cloud or soften them. Test on an inconspicuous area first. Also, don't use it on unfinished or raw wood that you plan to paint or stain later, because the wax can interfere with adhesion.
5. Black Tea: For a Deep, Rich Tone
If your wood furniture has lost its luster and looks a bit washed out, black tea can bring back that rich, warm color. The tannins in black tea naturally enhance the wood's tone and add a subtle sheen without any harsh chemicals. It's a simple, gentle method that works especially well on dark woods like walnut or mahogany.
Brew two to three tea bags in a cup of boiling water, then let it cool completely. Dip a soft cloth into the tea, wring it out well, and wipe the wood in the direction of the grain. Let the tea sit for a few minutes, then buff with a dry cloth.
For deeper color, repeat the process. This method is safe for finished wood but test on an inconspicuous area first.
Why Tannins Work
Tannins are natural compounds found in tea that bind with the wood fibers, subtly darkening the surface and enriching the grain. They also leave behind a mild protective layer that helps repel dust and minor moisture. It's like giving your furniture a gentle, natural stain boost.
Best Woods For Tea Treatment
Black tea works best on unfinished or bare wood, but it can also enhance stained or sealed pieces. Dark woods like cherry, oak, and teak respond especially well. Avoid using it on very light woods like maple or pine, as the tannins may cause uneven discoloration.
Tips For Best Results
Always let the tea cool completely before applying to avoid heat damage. Use a soft, lint-free cloth and work in small sections. For extra shine, follow up with a light coat of olive oil or beeswax polish.
Repeat monthly to maintain the color.
6. Coconut Oil: Natural and Gentle
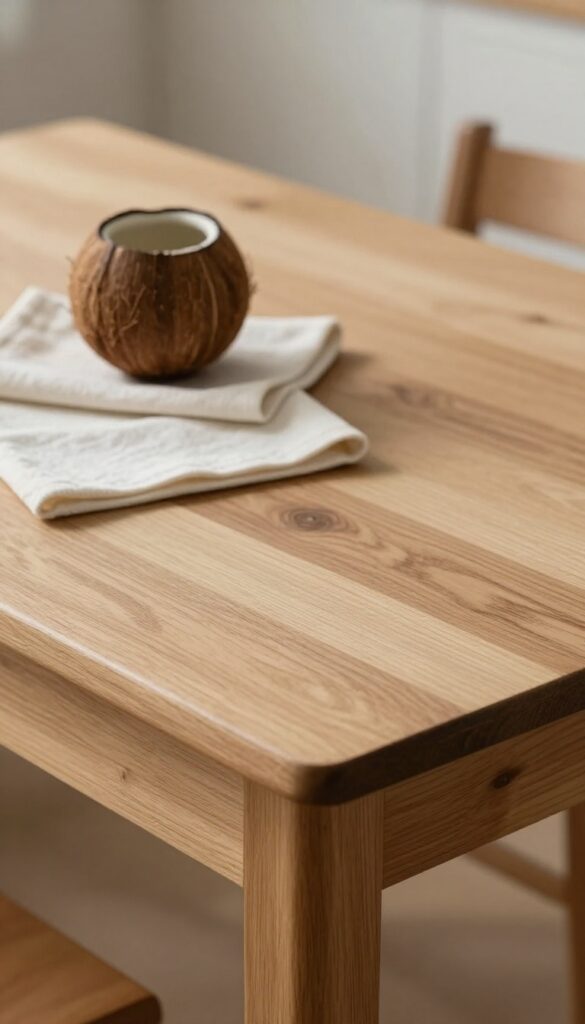
Coconut oil isn't just for cooking or skincare—it's a surprisingly effective wood polish. Its natural fatty acids penetrate the grain to moisturize and revive tired surfaces without leaving a sticky or greasy film. Best of all, it's food-safe, making it ideal for kitchen tables and cutting boards.
Here's how to use coconut oil to clean and condition your wood furniture:
Why Coconut Oil Works
Coconut oil contains medium-chain triglycerides that absorb into wood fibers, replenishing lost moisture. Unlike mineral oil, it doesn't sit on the surface, so your furniture feels dry to the touch after application. It also has mild antibacterial properties, which help remove grime naturally.
How To Apply It
Scoop a small amount of solid coconut oil into a bowl and warm it between your palms until it melts. Dip a soft, lint-free cloth into the oil and rub it onto the wood in the direction of the grain. Use sparingly—too much can make the surface feel slightly tacky.
Let it sit for 5–10 minutes, then buff off any excess with a clean cloth.
When To Use This Method
Coconut oil is best for unfinished or lightly finished wood, such as butcher blocks, bamboo, or raw oak. It's also great for reviving dry, weathered pieces. Avoid it on high-gloss or lacquered surfaces, as the oil may not absorb and could leave a haze.
7. Vinegar and Olive Oil Spray: Quick Daily Cleaner
For everyday dust and light grime, this two-ingredient spray is hard to beat. Vinegar cuts through grease and disinfects, while olive oil moisturizes the wood and leaves a soft sheen. A few drops of lemon or lavender essential oil mask the vinegar smell and add a fresh scent.
It’s safe for finished wood, but avoid it on waxed or unsealed surfaces.
This spray works best on finished wood like lacquered, varnished, or painted pieces. Shake well before each use because oil and vinegar separate quickly. Mist lightly onto a microfiber cloth—never directly onto furniture—then wipe with the grain.
Buff with a dry section of the cloth for a streak-free glow. Use it weekly or as needed, but don’t overdo it: too much oil can build up and attract dust over time.
Why This Combo Works
Vinegar is a mild acid that dissolves grime and kills bacteria without harsh fumes. Olive oil penetrates the wood’s surface, replacing lost moisture and enhancing the natural grain. Together, they clean and condition in one step.
The essential oil isn’t just for smell—it also adds antimicrobial properties and makes the polish feel more luxurious.
How To Make And Use It
In a clean spray bottle, combine 1/4 cup white vinegar, 3/4 cup olive oil, and 10–15 drops of your favorite essential oil. Shake vigorously before each use. Spray onto a soft, lint-free cloth (microfiber works great) until damp, not soaking.
Wipe furniture in the direction of the grain, then flip the cloth to a dry side and buff gently. Store at room temperature; it stays fresh for several weeks.
When To Skip This Method
Avoid this spray on unfinished, raw, or waxed wood—the oil can soak in unevenly and the vinegar may damage the surface. Also test on an inconspicuous area first, especially on antique or delicate finishes. If your wood has a matte or satin finish, the oil might make it look slightly glossier, so adjust your expectations.
8. Furniture Polish with Essential Oils: Custom Scent
Store-bought polishes often come with synthetic fragrances that can be overpowering or irritating. Making your own polish with essential oils lets you choose a scent you love while still getting a clean, natural shine. Lemon and orange oils are popular for their fresh, uplifting aroma and natural cleaning properties.
This simple polish combines olive oil as a moisturizing base with essential oils for fragrance and light cleaning. It works well on finished wood and leaves a pleasant, subtle scent that lingers without being overwhelming.
Why Lemon And Orange Work Best
Citrus essential oils contain d-limonene, a natural solvent that helps cut through grease and grime. Lemon oil is especially good at removing sticky residues, while orange oil is gentler and adds a warm, sweet scent. Both are safe for finished wood when diluted properly.
How To Mix And Apply
In a small bowl, combine 1 cup of olive oil with 10 drops of your chosen essential oil. Stir well, then dip a soft cloth into the mixture and wring out any excess. Apply in the direction of the wood grain, then buff with a dry cloth for a smooth finish.
Store leftover polish in a sealed glass jar.
Scent Variations To Try
For a woodsy twist, swap citrus for 8 drops of cedarwood and 2 drops of lavender. Or try 6 drops of grapefruit and 4 drops of rosemary for a bright, herbal blend. Always test a small hidden area first to ensure the oil doesn't affect the finish.
9. Petroleum Jelly: For Scratches and Scuffs
Light scratches and scuff marks are inevitable, but you don't need a professional refinisher to make them disappear. A simple household staple—petroleum jelly—can work wonders on minor surface damage. It fills in shallow scratches and conditions the wood, making marks far less noticeable.
Petroleum jelly is a surprisingly effective remedy for shallow scratches and scuffs on finished wood. Its thick, oily consistency seeps into the damaged area, swelling the wood fibers and masking the scratch. Plus, it leaves a subtle shine that blends the repair with the surrounding finish.
How To Apply
Start with a clean, dust-free surface. Scoop a small amount of petroleum jelly onto your fingertip or a soft cloth. Rub it gently into the scratch, following the grain of the wood.
Don't overdo it—a thin layer is enough. Let it sit overnight so the jelly can fully penetrate. In the morning, buff the area with a clean, dry cloth until any excess is removed and the surface looks even.
Best Uses And Limitations
This trick works best on finished wood with shallow scratches that haven't penetrated the stain. It's ideal for scuffs from shoes, pet claws, or moving objects. However, it won't fix deep gouges or scratches that go through the finish into bare wood.
For those, you'll need a wood filler or touch-up marker. Also, avoid using petroleum jelly on unfinished or raw wood, as it can leave a greasy stain that's hard to remove.
Pro Tips For Best Results
For extra stubborn scratches, warm the petroleum jelly slightly between your fingers before applying—it spreads more easily. If the scratch is still visible after buffing, repeat the process. You can also mix a tiny drop of matching wood stain with the jelly for colored finishes, but test on a hidden spot first.
Always buff thoroughly to prevent a sticky residue that attracts dust.
10. Walnut Meat: Hide Scratches Naturally
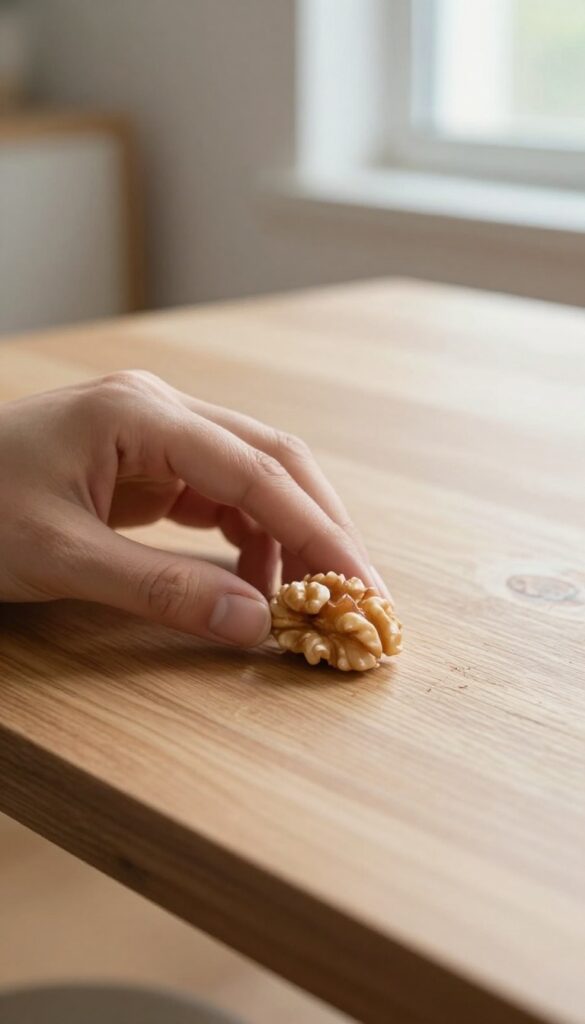
Scratches on wood furniture are frustrating, but you can often fix them with something you might already have in your pantry: a raw walnut. This trick works best on minor surface scratches that haven't penetrated the stain. The natural oils in the walnut help darken the exposed wood, making the scratch blend in with the surrounding finish.
It's a quick, no-mess solution that costs pennies and takes just a minute.
How It Works
Walnuts contain natural oils that darken wood fibers. When you rub the meat of a raw walnut over a scratch, the oil seeps into the exposed wood, staining it to match the surrounding area. This works especially well on darker woods like walnut, cherry, or mahogany, but can also help on lighter woods with careful application.
Step-by-step Guide
First, make sure the scratched area is clean and dry. Take a raw walnut and crack it open to expose the meat. Rub the meat side directly over the scratch in a back-and-forth motion for about 30 seconds.
Let the oil sit for a minute, then buff the area with a soft cloth to remove any excess. Repeat if needed for deeper scratches.
When To Use This Method
This technique is ideal for light to moderate surface scratches on finished wood. It won't work on deep gouges or scratches that have gone through the stain into bare wood. Also, avoid using walnuts on antique or valuable pieces, as the oils could affect the original finish.
Always test on an inconspicuous spot first.
11. Beer and Olive Oil: Unlikely Duo
Beer and olive oil might sound like a strange pairing, but together they make a surprisingly effective wood polish. The alcohol in beer cuts through grease and grime, while the olive oil moisturizes and adds a subtle shine. This combo works best on finished wood that's not too delicate—think dining tables, chairs, or cabinets that see regular use.
Just be sure to use a flat beer (or let it go flat first) to avoid sticky residue.
This method is ideal for cutting through everyday grime without harsh chemicals. The alcohol gently lifts dirt, and the oil leaves a soft luster. It's a quick fix when your furniture looks dull but doesn't need deep conditioning.
Always test on an inconspicuous spot first, especially on antique or porous wood.
How To Mix And Apply
Combine 1/2 cup of flat beer with 1 tablespoon of olive oil in a small bowl. Stir well. Dip a soft cloth into the mixture, wring it out slightly, and wipe the furniture in the direction of the grain.
Use a second dry cloth to buff away any excess. The result is a clean, lightly polished surface with no sticky film.
When To Use This Combo
This polish is great for wood that's grimy from food spills or handprints—like kitchen tables or dining chairs. It's not recommended for unsealed or raw wood, as the moisture can cause damage. Stick to finished pieces and avoid over-saturating the cloth.
Storage And Shelf Life
Mix only what you need for each use. The mixture doesn't store well—beer can go rancid, and separation occurs quickly. Discard any leftover solution and make fresh next time.
This keeps your polish effective and prevents unpleasant odors.
12. Yogurt: Gentle Cleaner for Antiques
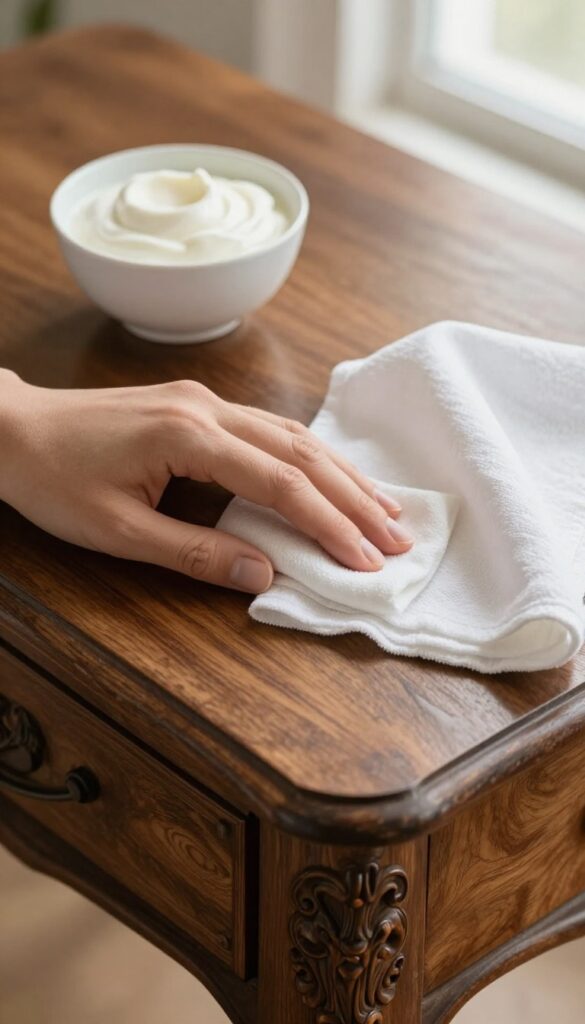
Plain yogurt isn't just for breakfast—it's a surprisingly effective cleaner for antique wood furniture. The lactic acid in yogurt cuts through grime without stripping the patina or finish that gives antiques their character. This method is especially useful for pieces with delicate surfaces or ornate carvings where you want to avoid harsh chemicals.
To use yogurt as a cleaner, apply a small amount of plain, full-fat yogurt to a soft, lint-free cloth. Gently wipe the wood in the direction of the grain, focusing on areas with visible dirt or residue. The yogurt's enzymes break down oils and dirt while the fat moisturizes the wood.
After cleaning, buff the surface with a dry cloth to remove any residue and restore a subtle sheen. This technique works best on finished wood; avoid using it on raw or unsealed surfaces as moisture can cause damage.
Why Yogurt Works On Antiques
Antique furniture often has a delicate, aged finish that can be damaged by commercial cleaners. Yogurt's lactic acid is mild enough to clean without stripping the patina, while its fat content helps condition the wood. This makes it ideal for preserving the historical character of heirloom pieces.
How To Apply Yogurt Properly
Always use plain, full-fat yogurt—avoid flavored or low-fat varieties that contain sugars or additives. Dip a soft cloth into a small amount of yogurt and wring out excess. Wipe the wood gently, working in small sections.
For carved details, use a soft toothbrush to reach crevices. Finish by wiping with a damp cloth and drying immediately.
When To Avoid This Method
Do not use yogurt on unsealed, raw, or waxed wood, as moisture can seep in and cause warping or water stains. Also avoid it on veneer that is already lifting or damaged. Always test on an inconspicuous area first.
If the wood feels tacky after cleaning, you may have left residue—wipe again with a clean, damp cloth.
13. Commercial Polish with a Twist: Upgrade Store-Bought
Not all store-bought polishes are created equal. Some do a fine job cleaning, but they often lack the conditioning power that natural oils provide. The fix is simple: add a few drops of jojoba oil to your favorite commercial polish.
This small upgrade boosts moisture and leaves a richer, more natural sheen without altering the polish's cleaning ability.
Jojoba oil is a lightweight, non-greasy oil that closely mimics the natural oils in wood. When mixed with a store-bought polish, it helps replenish moisture lost to dry air or sunlight. The result is a finish that looks deeper and feels smoother to the touch.
Plus, jojoba oil is odorless, so it won't clash with any fragrance in your polish. To try this, simply add 3 to 5 drops of jojoba oil per ounce of polish. Shake gently to combine.
Apply as you normally would—spray onto a soft cloth, not directly onto the furniture. Buff in the direction of the grain. You'll notice the wood feels more nourished and less dry after each use.
This trick works best for finished wood like lacquer, varnish, or polyurethane. Avoid using it on raw or unfinished wood, as the oil can soak in unevenly. Stick to a light hand; too much oil can leave a residue.
Once a month is plenty for most pieces.
Why Jojoba Works So Well
Jojoba oil is actually a liquid wax ester, not a true oil. That means it won't go rancid or turn sticky over time. It absorbs slowly, giving the wood a lasting, natural-looking glow.
It also helps prevent dust from sticking as much as some other oils do.
How To Mix And Apply
Use a clean, empty spray bottle or add the oil directly into the bottle of polish. Shake well before each use. Apply to a microfiber cloth, then wipe onto the furniture in thin, even strokes.
Buff with a dry section of the cloth to bring out the shine. Test on a hidden spot first to make sure the combination works with your specific polish.
When To Use This Method
This upgraded polish is great for monthly maintenance on dining tables, chairs, and cabinets that see regular use. It's especially helpful during winter when indoor heating dries out wood. For pieces that look dull but aren't dirty, this method can revive the luster without a full refinishing.
FAQ
Can I use these polishes on any wood furniture?
These methods are safe for sealed wood surfaces. Avoid on unfinished or waxed wood unless specified.
How often should I polish wood furniture?
Once every 1-2 months is enough. Over-polishing can build up residue.
Will olive oil go rancid on furniture?
If applied sparingly and buffed well, it won't. Use small amounts and wipe off excess.
Can I use these on antique furniture?
Yes, but test in an inconspicuous area first. Antiques may have delicate finishes.
What's the best way to remove excess polish?
Use a clean, dry microfiber cloth to buff until no residue remains.
Conclusion
Your wood furniture doesn't need harsh chemicals to look its best. These gentle polish methods show that a little care with natural ingredients goes a long way. Pick a couple that fit your routine and stick with them.
Your tables, chairs, and cabinets will stay beautiful for years without the worry of damage or buildup. Enjoy the warm glow you've earned.

I’m Pallab Kishore, the owner of Little Pets Realm — an animal lover and pet care enthusiast sharing easy tips, healthy recipes, and honest advice to help every small pet live a happy, healthy, tail-wagging life.


