Mold in shower grout is more than an eyesore—it can be a health hazard. That black or greenish fuzz creeping along your tile lines is tough to remove, but not impossible. You don't need to call a professional or replace the grout.
With the right approach and a little elbow grease, you can make it look new again. This guide walks you through 15 distinct steps, each designed to tackle mold from a different angle.
Some use common household items, others rely on specialized cleaners. Pick the ones that fit your situation, or go through all of them for a complete deep clean.
1. Assess the Severity of the Mold
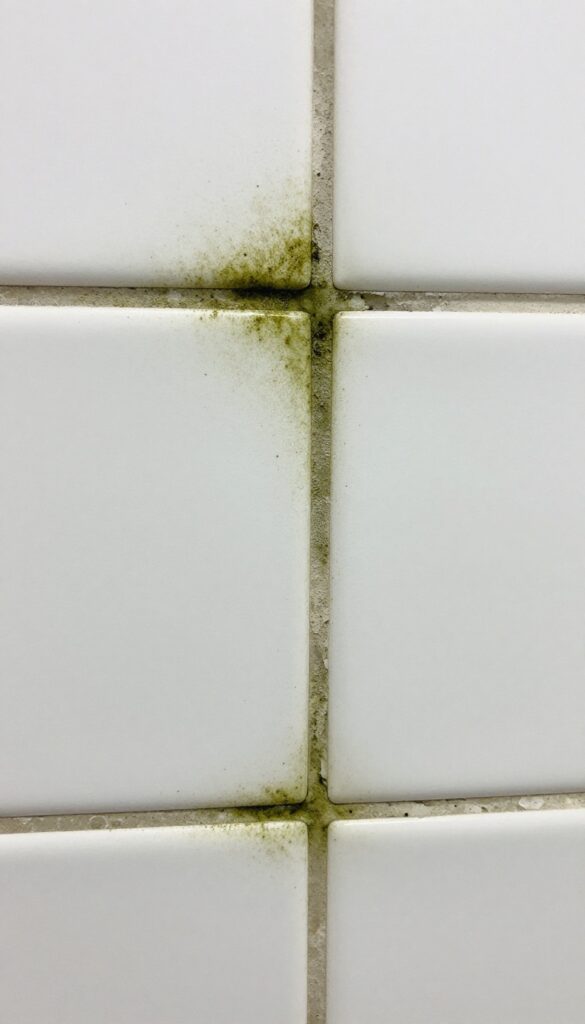
Not all mold is created equal. Before you grab a scrub brush, take a close look at what you're dealing with. Surface mold is relatively easy to wipe away, but if it's taken root deep inside the grout, you'll need a more aggressive approach.
Give the area a good sniff too—a musty odor often means the mold has penetrated beyond the surface.
Start by examining the grout lines closely. Look for discoloration that goes beyond the surface, like dark streaks or spots that seem to bleed into the grout. Check if the grout is crumbling or flaking, which indicates moisture damage and deeper mold growth.
Also, pay attention to any musty smell—that's a telltale sign of mold that's been there for a while. If the grout feels soft or spongy, the mold may have compromised its integrity, and you might need to consider regrouting instead of just cleaning.
Visual Inspection
Look for black, green, or brown patches that extend beyond the surface. Use a flashlight to check for shadows or staining deep in the grout lines. If the discoloration is only on the surface, you're in luck—it'll come off easier.
The Sniff Test
A persistent musty or earthy smell usually means moisture is trapped behind the grout. This indicates deeper mold growth that might need stronger cleaners or even replacement.
Check For Damage
Press gently on the grout with a fingernail or a screwdriver. If it crumbles or feels soft, the mold has likely weakened it. In that case, cleaning alone won't cut it—you may need to remove and replace the grout.
2. Gather Your Cleaning Arsenal
Before you start scrubbing, take a few minutes to round up everything you'll need. Running back and forth for a missing brush or a fresh bottle of vinegar breaks your rhythm and gives mold time to settle back in. Having your supplies within arm's reach keeps the momentum going and makes the whole process feel less like a chore.
The right tools and cleaners make all the difference. You don't need a fancy kit—most items are already in your pantry or under the sink. Here's what to grab and why each one earns a spot on your cleaning squad.
The Basics: Baking Soda, Vinegar & Hydrogen Peroxide
Baking soda is your gentle abrasive—it scrubs without scratching tile. White vinegar cuts through soap scum and kills many mold spores. Hydrogen peroxide (3%) bleaches stains and disinfects.
These three handle most mold jobs without harsh fumes.
Heavy Hitters: Bleach & Commercial Cleaners
For stubborn black mold, bleach is a powerful option. Dilute it 1: 10 with water and never mix it with ammonia or vinegar. If you prefer a ready-made solution, look for a mold-specific spray with sodium hypochlorite or quaternary ammonium compounds.
Always test on a hidden spot first.
Tools Of The Trade: Brushes, Sprayers & Safety Gear
A stiff-bristled brush (like a grout brush or an old toothbrush) reaches deep into grout lines. A spray bottle lets you apply liquids evenly. Don't skip gloves and a mask—mold spores and cleaning chemicals can irritate skin and lungs.
Good ventilation is a must.
3. Ventilate the Bathroom
Before you start scrubbing, take a moment to set up proper ventilation. Mold spores are lightweight and easily become airborne when disturbed. You don't want to inhale them or have them settle elsewhere in your home.
Good airflow also speeds up drying, which is crucial for preventing regrowth.
Open Windows And Doors
If your bathroom has a window, open it wide. If not, crack the door open. This creates a cross-breeze that carries spores out of the room.
Even a small gap makes a difference. If you have multiple windows, open them all for maximum airflow.
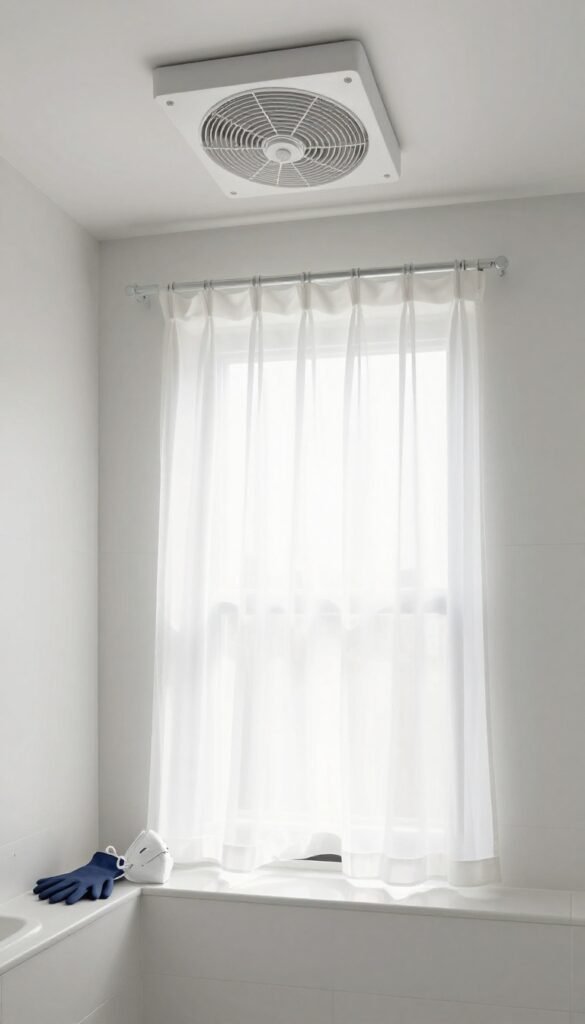
Run The Exhaust Fan
Turn on the bathroom exhaust fan and let it run throughout the cleaning process. Make sure it's vented to the outside, not just recirculating air. A good fan pulls moisture and airborne particles out of the room.
Leave it running for at least 30 minutes after you finish cleaning.
Wear A Mask And Gloves
Even with ventilation, it's smart to protect yourself. Wear an N95 mask to filter out mold spores, and rubber gloves to keep harsh cleaners off your skin. Safety glasses are a good idea too, especially if you're using bleach or other strong chemicals.
4. Apply a Baking Soda Paste
Baking soda is a gentle powerhouse when it comes to cleaning mold. It's abrasive enough to scrub away grime but soft enough not to scratch your tiles or grout. Mixed into a paste, it clings to vertical surfaces and works its magic over time.
Why Baking Soda Works
Baking soda is mildly alkaline, which helps break down mold spores and neutralize odors. Its fine grit provides mechanical scrubbing action without damaging the grout. Plus, it's non-toxic, so you can use it safely in a bathroom without harsh fumes.
How To Make The Paste
In a small bowl, combine three parts baking soda with one part water. Stir until it forms a thick, spreadable paste. If it's too runny, add more baking soda; if too dry, add a drop more water.
The consistency should be like toothpaste.
Application Tips
Use an old toothbrush or a small spatula to apply the paste directly onto the moldy grout lines. Press it in so it fills the grooves. Let it sit for 10 minutes—this gives the baking soda time to lift the mold from the porous grout.
Don't let it dry completely; if it starts to crack, spritz lightly with water.
Scrubbing And Rinsing
After the wait, scrub the grout with a damp brush using circular motions. The paste will act as a gentle abrasive. Rinse thoroughly with warm water and wipe away residue with a clean cloth.
Repeat on stubborn spots if needed.
5. Scrub with a Stiff Brush
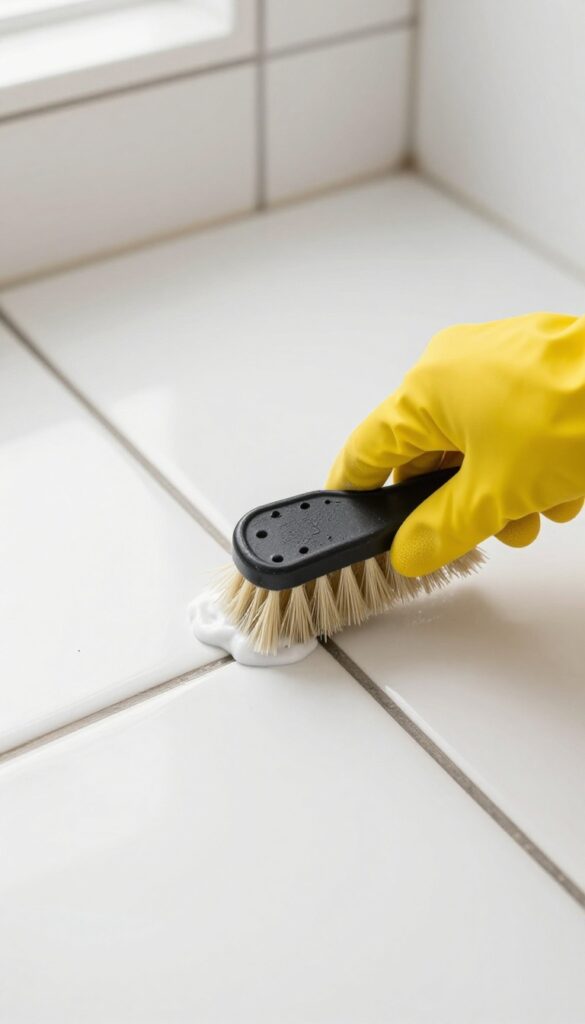
Now that your paste has had a few minutes to work, it's time to get physical. Scrubbing is where the real magic happens. The combination of the cleaning agent and mechanical action lifts mold out of the grout's pores.
Choose The Right Brush
A grout brush has stiff, narrow bristles that fit perfectly into grout lines. If you don't have one, an old toothbrush works just as well. Avoid wire brushes—they can scratch tile or damage grout.
Use Firm Circular Motions
Press the bristles into the grout and scrub in small circles. Apply enough pressure to agitate the mold, but not so much that you wear down the grout. Focus on one small section at a time.
Work In Small Sections
Tackle a 2×2 foot area before moving on. This keeps the paste from drying out and ensures you give each spot enough attention. Rinse the brush occasionally to avoid spreading mold.
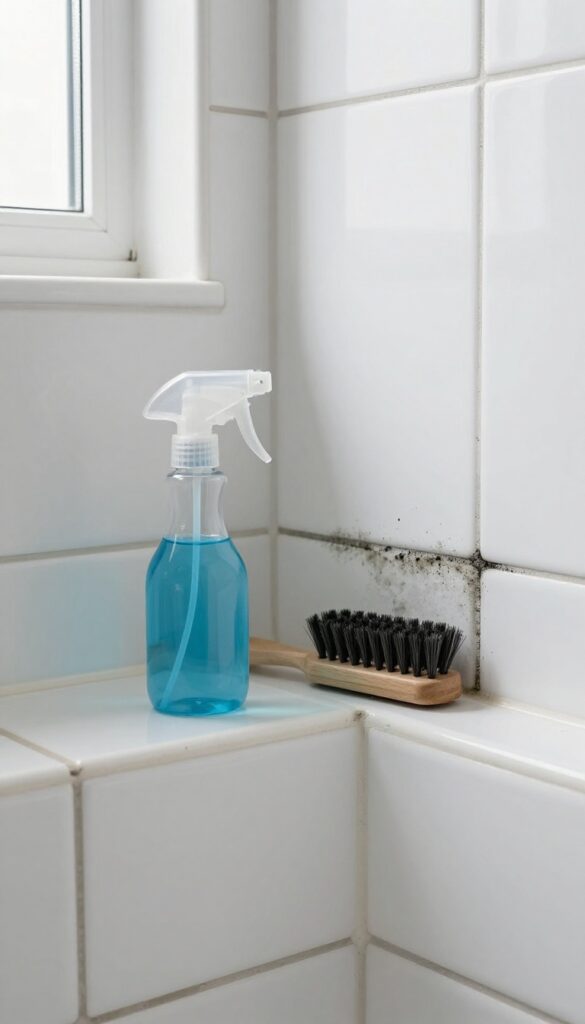
6. Rinse and Repeat with Vinegar

After scrubbing with baking soda, it's time to bring in the vinegar. White vinegar is a natural acid that kills many mold species on contact. It's cheap, safe, and surprisingly effective when used correctly.
Rinse the grout thoroughly with water to remove all baking soda residue. Then spray undiluted white vinegar directly onto the grout lines. Let it fizz and bubble for about 5 minutes—that reaction is what breaks down the mold.
Scrub again with a stiff brush, then rinse well with water. Repeat if you still see dark spots. This step works best on light mold; for heavy growth, you may need a stronger cleaner later.
Why Vinegar Works
Vinegar's acetic acid disrupts mold cell walls and kills many common strains. It's non-toxic and won't release harsh fumes, making it ideal for enclosed bathrooms. Just don't mix it with bleach—that creates toxic chlorine gas.
How To Apply For Best Results
Use a spray bottle to coat the grout evenly. Let it sit for the full 5 minutes without drying out. If the vinegar evaporates too fast, reapply.
Scrub with a grout brush or old toothbrush, focusing on stained areas. Rinse with warm water and wipe dry with a microfiber cloth.
When To Repeat
If mold lingers after one round, repeat the process. Stubborn spots may need 2-3 applications. For deep-set mold, let the vinegar sit for up to 15 minutes before scrubbing.
Always rinse thoroughly between rounds to avoid residue buildup.
7. Try Hydrogen Peroxide for Stubborn Spots
Some mold stains just won't quit, no matter how much you scrub. That's when you need a stronger weapon. Hydrogen peroxide is a fantastic alternative to bleach—it kills mold, whitens grout, and doesn't fill your bathroom with toxic fumes.
It's safe on most tile and grout, and you probably already have a bottle in your medicine cabinet.
Hydrogen peroxide works by releasing oxygen bubbles that break down mold at the cellular level. It's particularly effective on porous surfaces like grout, where mold roots can hide. Unlike bleach, which only whitens the surface, hydrogen peroxide penetrates deeper to kill the growth.
Plus, it's environmentally friendly and won't damage your tile or grout over time.
How To Apply Hydrogen Peroxide
Start with a 3% hydrogen peroxide solution, the standard concentration found in drugstores. Pour it into a spray bottle for easy application, or soak a cotton ball and press it onto stubborn spots. Spray the affected grout lines generously, making sure to saturate them.
Let it sit for 10 minutes—you'll see it start to fizz as it works. Don't let it dry completely; if it does, reapply.
Scrubbing And Rinsing
After 10 minutes, grab a stiff-bristled brush and scrub the grout lines. The peroxide will have loosened the mold, so this step should be easier than before. Work in small sections, scrubbing back and forth.
Rinse thoroughly with warm water to remove any residue. If you see any remaining stains, repeat the process or move on to another method in this list.
Safety Tips And Precautions
Hydrogen peroxide is generally safe, but it can bleach fabrics and irritate sensitive skin. Wear gloves to protect your hands, and avoid contact with dark-colored grout or natural stone, as it may cause discoloration. Test on a small hidden area first.
Keep the bathroom well-ventilated, and never mix hydrogen peroxide with vinegar or bleach—it creates harmful gases.
8. Use Bleach as a Last Resort
Sometimes, despite your best efforts with natural cleaners, the mold just won't budge. That's when you might consider bringing out the big guns: bleach. But here's the thing—bleach is powerful, but it's also harsh.
It can damage your grout over time, making it brittle or discolored. So only use it when other methods have failed, and handle it with care.
Bleach is a strong disinfectant that kills mold on contact. But it doesn't penetrate porous surfaces like grout, so it may only bleach the surface mold, leaving the roots alive. Over time, repeated bleach use can erode the grout, causing it to crack or crumble.
That's why it's a last resort, not a go-to.
Mix Safely
Always dilute bleach with water. A 1: 3 ratio (one part bleach to three parts water) is strong enough to kill mold without being overly aggressive. Use a spray bottle or a small bowl.
Never mix bleach with ammonia or vinegar—that creates toxic fumes. Wear gloves and eye protection, and make sure the bathroom is well-ventilated.
Apply With Precision
Dip a stiff-bristled brush into the bleach solution and apply it directly to the moldy grout lines. Try to avoid getting bleach on the tiles, especially if they're colored or natural stone—bleach can etch or discolor them. Work in small sections so the solution doesn't dry out before you rinse.
Rinse Thoroughly
Let the bleach sit for no more than 10 minutes. Then rinse with plenty of warm water. Use a damp cloth or a spray bottle to remove all traces of bleach.
Any residue left behind can continue to damage the grout. After rinsing, dry the area with a clean towel to prevent new mold growth.
9. Steam Clean for Deep Penetration
If you want a chemical-free way to blast mold out of deep grout pores, a handheld steam cleaner is your best friend. The high-temperature steam kills mold spores on contact while loosening the grime that's been hiding in the cracks. It's especially effective for stubborn, embedded mold that scrubbing can't reach.
Using steam is straightforward, but a few tips make all the difference. Start by filling your steamer with water and letting it heat up fully. Test the steam on an inconspicuous grout line first to ensure it doesn't damage the tile.
Work in small sections, holding the nozzle about an inch from the grout and moving slowly. The steam will soften the mold and debris, which you can then wipe away with a dry microfiber cloth. For best results, follow up with a rinse and a quick dry to prevent moisture from lingering.
Why Steam Works So Well
Steam penetrates the porous surface of grout better than liquid cleaners. The heat kills mold at its roots without introducing harsh chemicals, making it safe for households with kids or pets. Plus, it's fast—you can cover a standard shower in under 15 minutes.
Choosing The Right Steamer
A handheld steamer with a small brush attachment is ideal for grout lines. Look for one that reaches at least 200°F for effective mold killing. Avoid large floor steamers, as they're too bulky for vertical surfaces.
Post-steam Care
After steaming, wipe the area dry with a clean cloth to remove any loosened residue. Open a window or run the exhaust fan to help the grout dry completely. This step prevents new mold from taking hold in the damp environment.
10. Apply a Commercial Grout Cleaner
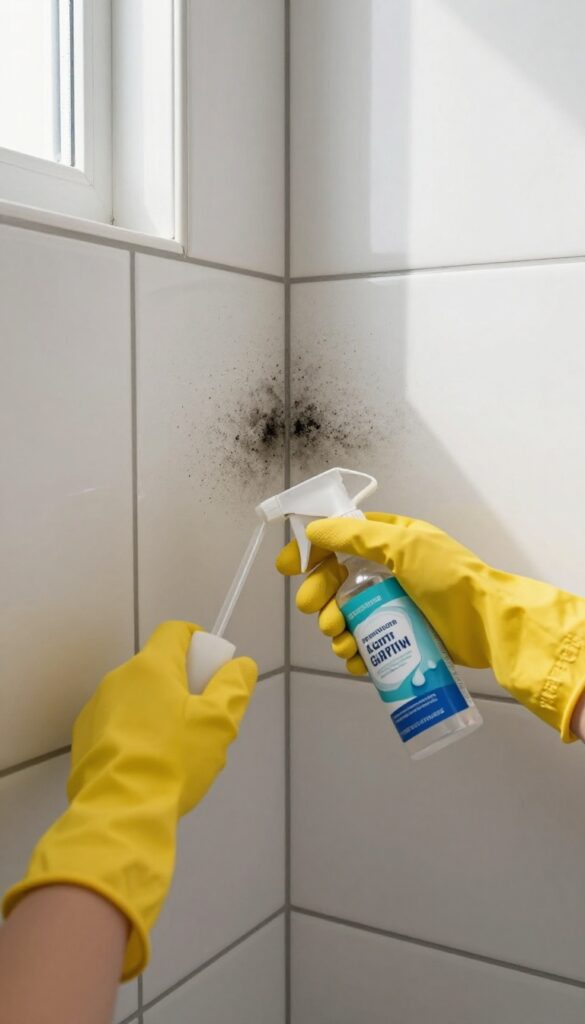
When natural solutions fall short, it's time to bring out the big guns. Commercial grout cleaners are specially formulated to break down mold, mildew, and deep-set stains that home remedies can't touch. They come in gels, foams, sprays, and liquids, each with its own application method.
Choose one that matches your grout type and the severity of the mold.
Commercial cleaners contain stronger active ingredients like bleach, hydrogen peroxide, or sodium hydroxide. They're designed to penetrate porous grout and kill mold at the root. Always read the label first—some require dilution, others are ready-to-use.
Wear rubber gloves and eye protection, and ensure the bathroom is well-ventilated. Apply the product as directed, usually by spraying or squeezing directly onto the grout lines. Let it sit for the recommended time (often 5–15 minutes) so it can work into the pores.
Then scrub with a stiff brush, rinse thoroughly with water, and wipe dry. Avoid mixing different cleaners, especially bleach with ammonia or vinegar, as that creates toxic fumes.
Choosing The Right Cleaner
Look for words like "mold remover, " "grout cleaner, " or "mildew stain remover" on the label. Gels and foams cling to vertical surfaces better than thin liquids, making them ideal for shower walls. For colored grout, check if the product is safe—some bleach-based cleaners can discolor it.
Read reviews or ask at a hardware store if you're unsure.
Application Tips For Best Results
Before applying, wipe the shower surface dry so the cleaner isn't diluted. Apply generously, covering the grout lines completely. Use an old toothbrush or a grout brush to work the product into the grooves.
For stubborn spots, let it sit a few extra minutes, but don't let it dry out—reapply if needed. Rinse thoroughly with warm water and dry with a clean cloth to prevent residue.
Safety First
Always wear gloves and goggles. Open a window or turn on the exhaust fan to avoid inhaling fumes. Keep children and pets away.
If you have respiratory issues, consider wearing a mask. Never mix commercial cleaners with other household chemicals. After cleaning, wash your hands and any tools used.
11. Seal the Grout After Cleaning
You've scrubbed, rinsed, and dried the grout. Now it's finally mold-free. But if you stop here, you're leaving the door wide open for mold to come back.
Sealing the grout locks in all that hard work and creates a protective shield that repels moisture and stains.
Sealing is the final step that turns a deep clean into a long-term solution. Without a sealer, porous grout soaks up water like a sponge, creating the perfect environment for mold spores to settle and grow. A good penetrating sealer fills those tiny pores and makes the surface non-absorbent.
This doesn't just prevent mold—it also makes future cleaning much easier because dirt and soap scum can't cling as tightly. Choose a sealer specifically designed for grout, not tile. Penetrating sealers are best because they soak into the grout rather than sitting on top.
Avoid film-forming sealers that can peel or discolor over time. Apply the sealer with a small brush or applicator bottle, carefully staying on the grout lines and wiping off any excess from the tile surface immediately. Let it cure for the time recommended on the label—usually 24 to 48 hours—before exposing the grout to water.
Reapply the sealer every 6 to 12 months, depending on how much use your shower gets. High-moisture bathrooms may need it more often. A simple water droplet test can tell you when it's time: sprinkle a few drops on the grout; if they bead up, the sealer is still working.
If they soak in, it's time to reseal.
Why Sealing Matters
Grout is naturally porous. Without a sealer, moisture seeps in and creates a breeding ground for mold and mildew. Sealing blocks that moisture path, making your grout resistant to stains and microbial growth.
It also strengthens the grout, reducing cracks and crumbling over time.
How To Apply Sealer Correctly
Start with completely dry grout—wait at least 24 hours after cleaning. Use a penetrating grout sealer and apply it with a small brush or a squeeze applicator. Work in small sections, making sure the sealer soaks into the grout lines.
Wipe away any excess from the tile surface right away to avoid hazy residue. Let it cure fully before using the shower.
When To Reseal
Plan to reseal every 6 to 12 months. Showers that get heavy daily use may need it every 6 months. To test, sprinkle a few drops of water on the grout.
If they bead up, the sealer is still active. If they soak in quickly, it's time to reseal. Regular resealing keeps your grout protected and mold-free.
12. Improve Bathroom Ventilation
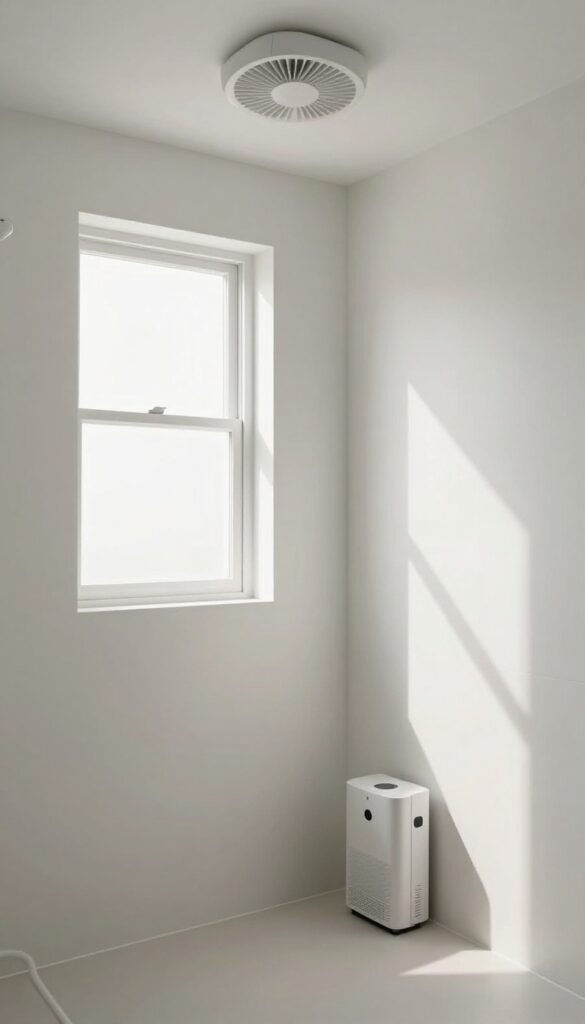
Mold loves moisture, and your bathroom is basically a spa for spores. Even after a deep scrub, if the air stays humid, the mold will be back before you know it. Tackling ventilation is your best long-term defense.
Upgrade Your Exhaust Fan
If your current fan sounds like a dying lawnmower and barely moves air, it's time for an upgrade. Look for one rated for your bathroom size (CFM). Run it during your shower and for at least 20 minutes after.
A timer switch makes this automatic.
Open The Door And Window
Simple but effective. Crack a window or leave the bathroom door open after showering. Cross-breeze speeds up drying.
If you don't have a window, a small clip-on fan aimed at the wet area helps a ton.
Use A Dehumidifier
For bathrooms that stay damp no matter what, a compact dehumidifier is a game changer. Set it to keep humidity below 50%. Empty the tank regularly, or get a model that drains into a sink.
13. Switch to a Squeegee Routine
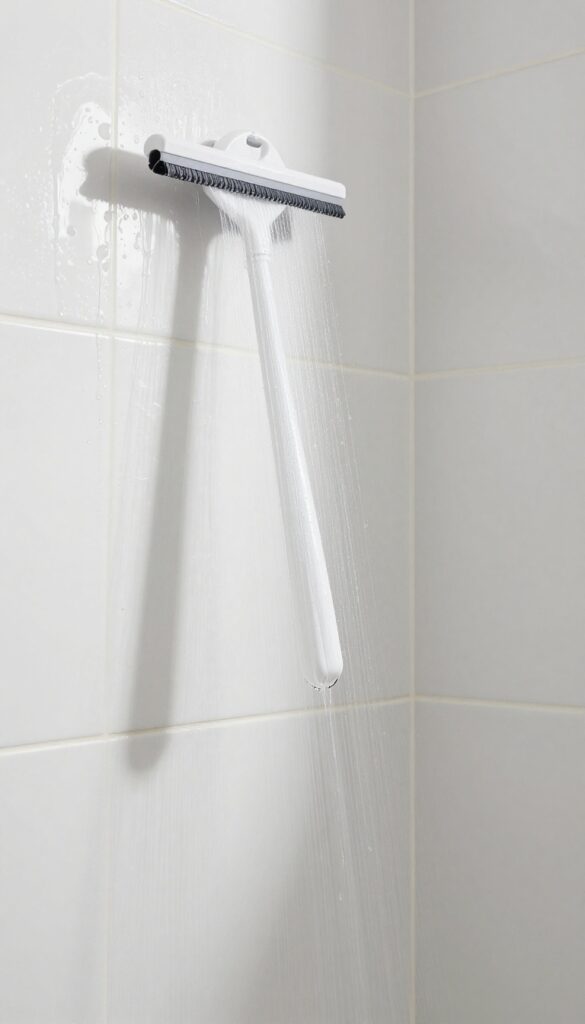
You've scrubbed, rinsed, and dried the grout. Now comes the easy part: keeping it clean. A squeegee isn't just for windows—it's your grout's best friend.
By removing standing water after every shower, you cut off the moisture that mold needs to thrive. This 30-second habit can drastically reduce how often you need to deep clean.
Mold spores are everywhere, but they only grow when moisture lingers. A squeegee wipes down tiles and grout lines, leaving them nearly dry. Over time, this simple step prevents the buildup of soap scum and hard water deposits that trap moisture.
It's the cheapest, easiest preventive measure you can take.
Why It Works
Mold needs three things: food, warmth, and moisture. Your shower provides all three. By squeegeeing, you remove the moisture element.
Grout is porous, so water seeps in quickly. A quick swipe before you step out stops that absorption. In just a few weeks, you'll notice less grime and fewer mold spots.
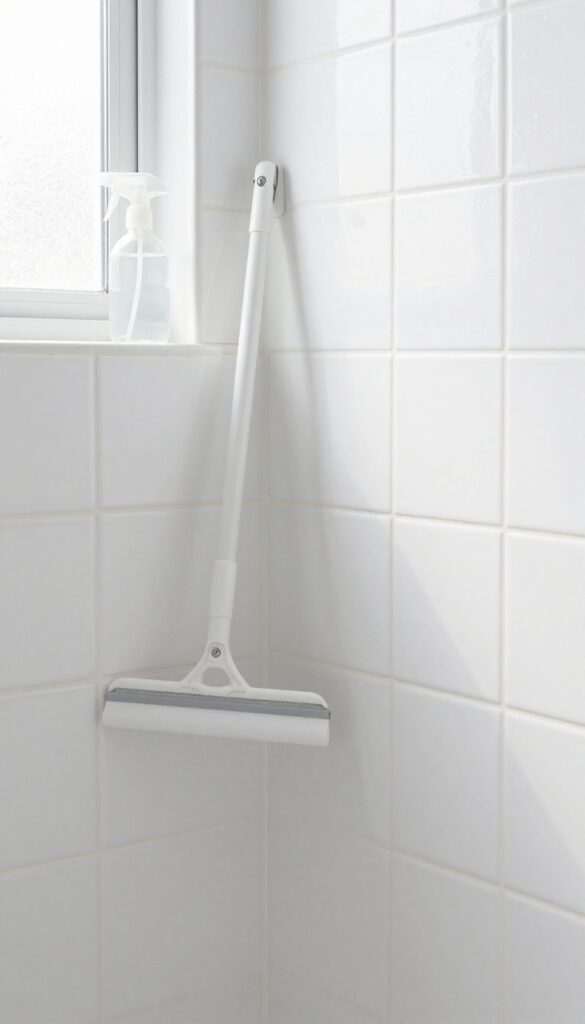
How To Squeegee Effectively
Start at the top corner of your shower wall. Pull the squeegee across in a straight line, overlapping each stroke slightly. Work your way down, then do the same horizontally for grout lines.
Don't forget the corners and edges. A 12-inch squeegee with a rubber blade works best. Replace the blade every few months for a streak-free finish.
Build The Habit
Keep the squeegee in the shower, hanging on a hook or resting in a caddy. After your final rinse, spend 30 seconds squeegeeing while you're still in the shower. It becomes automatic after a week.
Pair it with a quick towel-dry of the squeegee blade to prevent mildew on the tool itself.
14. Use a Mold-Resistant Grout for Repairs
Sometimes scrubbing and sealing just aren't enough. If your grout is old, cracked, or crumbling, mold will keep finding a way back. Replacing it with mold-resistant grout is a more permanent fix.
These grouts contain additives that actively prevent mold growth, so you won't have to repeat this deep scrub routine anytime soon.
Mold-resistant grout is a smart upgrade for any shower. It's formulated with antimicrobial agents that inhibit mold and mildew at the source. While replacing grout is a bigger project than scrubbing, it's a one-and-done solution that saves you time and frustration down the road.
Plus, it gives your shower a fresh, clean look.
What Makes Grout Mold-resistant?
Standard grout is porous, which means it absorbs moisture and becomes a breeding ground for mold. Mold-resistant grout, on the other hand, is made with additives like microban or other antimicrobial compounds. These ingredients create a surface that mold spores can't easily cling to or grow on.
Some types also have a denser, less porous structure that resists water absorption.
When To Replace Vs. Repair
If your grout is still intact but stained, scrubbing and sealing are fine. But if it's crumbling, deeply cracked, or has recurring mold that won't go away, replacement is the better route. Mold can penetrate deep into damaged grout, making it impossible to fully clean.
Replacing with mold-resistant grout gives you a fresh start and a cleaner, healthier shower.
How To Replace Grout Yourself
Start by removing the old grout with a grout saw or oscillating tool. Be careful not to damage the tiles. Vacuum out all the dust, then apply the new mold-resistant grout with a rubber float.
Press it firmly into the joints and wipe off excess with a damp sponge. Let it cure according to the manufacturer's instructions, usually 24 to 48 hours. Once cured, you can apply a grout sealer for extra protection.
15. Schedule Regular Deep Cleans
You've scrubbed, rinsed, and dried the grout. Now what? The key to keeping mold away is consistency.
Setting a regular deep-cleaning schedule prevents spores from taking hold again. It also means less elbow grease each time because you're tackling buildup before it becomes stubborn.
Mark your calendar for a deep clean every 1-2 months. Use a mild cleaner or the baking soda paste method. This routine keeps your shower looking fresh and reduces scrubbing effort over time.
Why Frequency Matters
Mold spores are always floating in the air. They land on grout and start growing within 24-48 hours if moisture is present. A monthly deep clean disrupts this cycle before colonies form.
You'll catch early spots while they're still easy to wipe away.
The Baking Soda Method
Mix baking soda with a little water to form a paste. Apply it to grout lines, let it sit for 10 minutes, then scrub with a stiff brush. Rinse well.
This gentle abrasive lifts dirt and mild mold without harsh chemicals. It's safe for frequent use.
Quick Maintenance Tips
Between deep cleans, keep your shower dry. Squeegee walls after each use and leave the door open for airflow. A weekly spray with a vinegar-water solution (1: 1) also helps.
These small habits make deep cleans faster and more effective.
FAQ
Can I use vinegar and bleach together to clean mold?
No, never mix vinegar and bleach. The combination creates toxic chlorine gas, which is dangerous to inhale. Use them separately, and rinse thoroughly between applications.
How do I know if mold is completely removed from grout?
After cleaning, the grout should return to its original color with no dark spots. A musty smell also indicates lingering mold. Use a white cloth to wipe the area—if no discoloration appears, it's clean.
Is it safe to use bleach on colored grout?
Bleach can discolor or lighten colored grout. Test on a small hidden area first. For colored grout, stick to hydrogen peroxide or a commercial cleaner safe for colored surfaces.
How often should I seal shower grout?
Seal grout every 6 to 12 months, depending on usage and humidity. A simple water test can tell you if it's time: sprinkle water on the grout—if it beads up, the seal is still good; if it absorbs quickly, reseal.
Can mold in grout cause health problems?
Yes, mold can trigger allergies, asthma, and respiratory issues. People with weakened immune systems are especially vulnerable. Removing mold promptly and preventing its return is important for indoor air quality.
Conclusion
Mold in shower grout doesn't have to be a permanent problem. With these 15 steps, you can tackle it from mild to severe cases. The key is persistence and choosing the right method for your situation.
Once it's clean, focus on prevention—better ventilation, regular squeegeeing, and sealing the grout. Your shower will look better and be healthier for everyone. A little effort now saves you from a bigger headache later.

I’m Pallab Kishore, the owner of Little Pets Realm — an animal lover and pet care enthusiast sharing easy tips, healthy recipes, and honest advice to help every small pet live a happy, healthy, tail-wagging life.


