Vinyl plank flooring is a champ at handling daily life—until you use the wrong cleaner and dull the finish. That glossy surface is surprisingly delicate; harsh chemicals or too much water can leave it cloudy or warped. The trick is knowing exactly what works and what doesn't.
These 15 steps take you from daily dusting to deep cleaning without causing a single scratch. No wax, no vinegar, no guesswork. Just safe, effective methods that keep your floors looking new for years.
Ready to clean like a pro without damaging that beautiful surface? Let's get started.
1. Dry Dust Daily with a Microfiber Mop
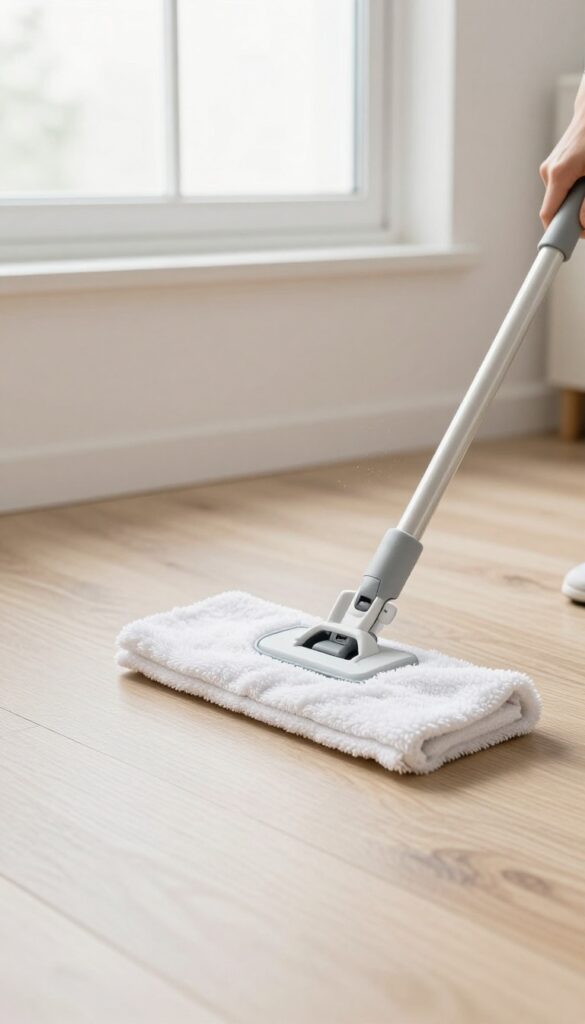
Grit and dirt are the biggest enemies of vinyl plank floors. Tiny particles act like sandpaper, scratching the surface every time you walk across them. A quick daily dry dusting removes that abrasive layer before it can do any damage.
Microfiber mops are ideal because they trap dust and dirt in their fibers rather than pushing it around. Avoid traditional brooms with stiff bristles—they can leave micro-scratches that dull the finish over time. For best results, use a light, sweeping motion and rinse or replace the mop head when it gets dirty.
Why Microfiber Works Best
Microfiber has an electrostatic charge that attracts dust like a magnet. It grabs particles instead of scattering them, so you pick up more grit in fewer passes. Plus, it's gentle enough to use on even the most delicate vinyl surfaces.
How To Choose A Good Microfiber Mop
Look for a mop with a washable, reusable head and a flat design that glides easily under furniture. Avoid looped or shaggy fibers that can snag on edges. A 12-inch or 18-inch head covers more ground and speeds up the job.
Daily Routine Tips
Make dry dusting part of your morning or evening routine. Focus on high-traffic areas like hallways, kitchens, and entryways. If you have pets, consider dusting twice a day—pet hair and dander add up fast.
2. Vacuum Carefully with a Soft Brush Attachment
You might think any vacuum will do, but that's where many people go wrong. The wrong vacuum can leave fine scratches that dull the surface over time. A soft brush or hard floor setting is your best friend here.
Vacuuming is a quick way to remove dirt before it gets ground into the floor. But beater bars—those spinning brushes designed for carpets—can be too aggressive for vinyl. They can leave tiny scratches that catch light and make the floor look worn.
The fix is simple: use a soft brush attachment or switch your vacuum to hard floor mode. If your vacuum doesn't have that option, a canister vac with a dedicated floor nozzle works beautifully. Just glide it over the surface without pressing down.
This weekly habit keeps grit from turning into scratches.
Why Beater Bars Are Bad News
Beater bars are meant to agitate carpet fibers, not smooth vinyl. Their stiff bristles can leave micro-scratches that accumulate over time. Even if you don't see them right away, they'll show up as a dull haze in bright light.
So if your vacuum has a beater bar, turn it off or raise it high enough that it doesn't touch the floor.
The Right Vacuum Tools For Vinyl
Look for a soft brush attachment or a hard floor tool with soft bristles or felt strips. Canister vacuums often come with a dedicated floor head that's gentle and effective. Stick vacuums with a hard floor setting also work well.
The key is to avoid anything that feels scratchy to the touch.
How Often To Vacuum
Once a week is a good baseline, but high-traffic areas or homes with pets may need more frequent vacuuming. The goal is to remove dirt before it gets trampled into the surface. A quick pass every few days can make a big difference in keeping your floors scratch-free.
3. Damp Mop with Warm Water Only
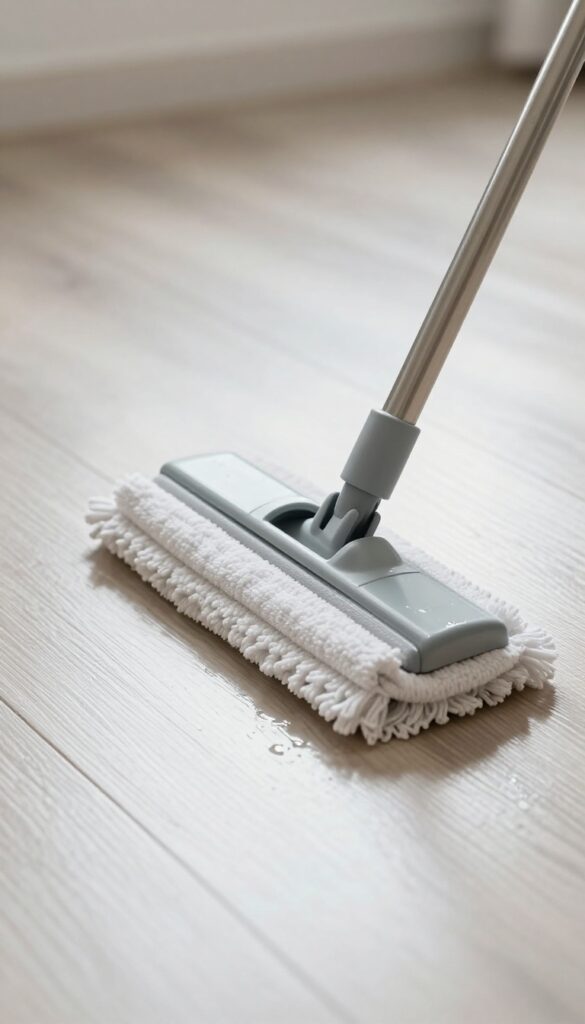
When your vinyl plank floors just need a quick refresh, skip the fancy cleaners. Warm water alone does the job without any risk of residue or dullness. The key is keeping it light—think damp, not wet.
For routine cleaning, warm water is often enough. Dampen the mop, wring it well, and wipe—never soak the floor. Excess moisture can seep into seams and cause warping or peeling over time.
A microfiber mop is ideal because it picks up dirt without leaving lint behind. If you're dealing with sticky spots, a few drops of mild dish soap can help, but rinse thoroughly with a clean damp mop afterward.
Why Warm Water Works
Warm water loosens everyday grime and light dirt without the need for chemicals. It's gentle on the finish and evaporates quickly, reducing the chance of moisture damage. Plus, it's free and always available.
How To Damp Mop Correctly
Fill a bucket with warm water. Dip your microfiber mop, then wring until it's just barely damp—no dripping. Mop in sections, rinsing the mop head frequently.
Change the water if it gets dirty to avoid spreading grime around.
What To Avoid
Never use hot water (it can soften the adhesive) or soak the floor. Avoid steam mops—they force moisture into seams. And skip vinegar or bleach; they can dull the finish over time.
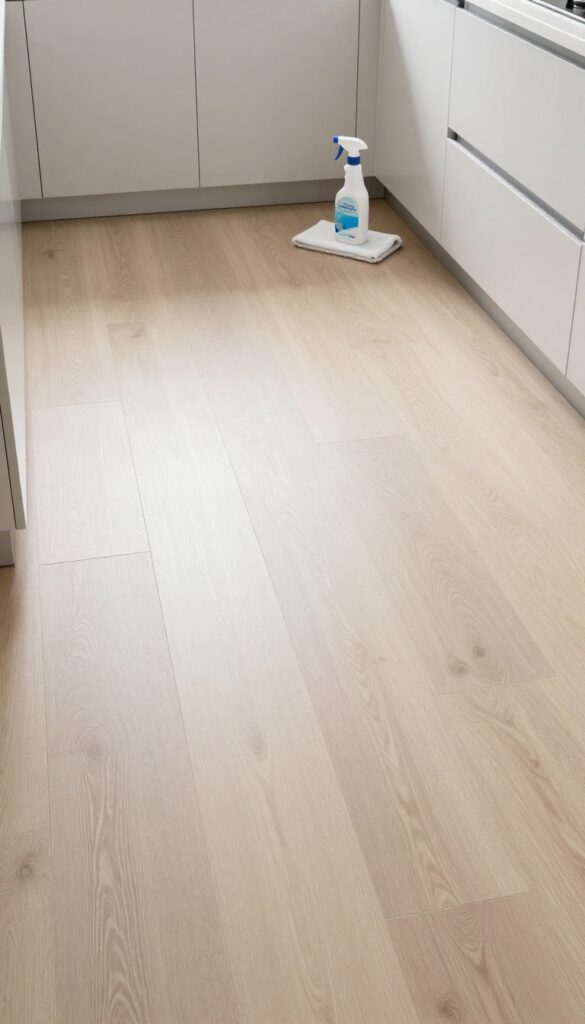
4. Choose a pH-Neutral Vinyl Floor Cleaner
When plain water doesn't cut it—think sticky spills or greasy footprints—you need a cleaner that's tough on grime but gentle on your floor. The wrong product can strip the protective layer or leave a dull film. That's why pH-neutral cleaners are the gold standard for vinyl plank flooring.
Not all floor cleaners are created equal. Many all-purpose sprays contain ammonia, bleach, or harsh abrasives that can etch or discolor vinyl over time. A pH-neutral cleaner is formulated to be gentle—typically around a pH of 7—so it cleans without reacting with the flooring material.
Always check the label for "safe for vinyl" or "pH-balanced" before buying. Avoid anything that says "wax, " "oil, " or "shine enhancer, " as those can leave residue that attracts dirt.
What To Look For On The Label
Scan the ingredient list for terms like "non-abrasive, " "non-toxic, " and "biodegradable. " Steer clear of products with ammonia, bleach, or citrus oils. Many brands like Bona, Zep, and Armstrong make dedicated vinyl floor cleaners.
If you're unsure, a simple test: mix a drop of cleaner with water and check the pH with a test strip—aim for 6. 5 to 7. 5.
How To Use It Correctly
Dilute the cleaner according to the instructions—more is not better. Over-concentrated solutions can leave a sticky film. Apply with a spray bottle or a damp mop, then follow with a dry microfiber mop to pick up excess moisture.
Never pour cleaner directly onto the floor; it can pool in seams and cause warping.
Diy Ph-neutral Alternative
If you prefer a homemade solution, mix a few drops of mild dish soap (like Dawn) with warm water. Avoid vinegar or baking soda—they're too acidic or abrasive. Test your DIY mix on a small hidden area first to ensure it doesn't dull the finish.
5. Spot Clean Spills Immediately
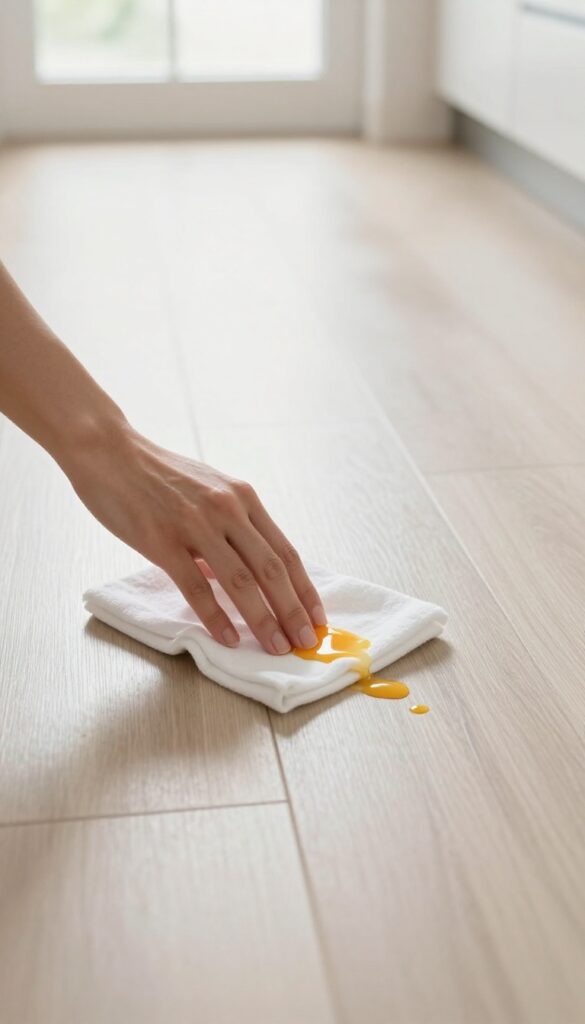
Spills happen, but on vinyl plank floors, timing is everything. Let a puddle of juice or a splash of cooking oil sit too long, and you're asking for stains or moisture creeping into the seams. The fix is simple: grab a soft cloth or paper towel and wipe it up right away.
No scrubbing, no harsh sprays—just quick action that saves you from bigger problems down the road.
The golden rule for spot cleaning is to blot, not rub. Rubbing can push the liquid deeper into the seams or spread it across the surface, making the mess worse. Instead, gently press a clean, absorbent cloth onto the spill until it's soaked up.
For sticky spills like syrup or wine, follow up with a damp microfiber mop and a pH-neutral cleaner to remove any residue. Avoid using paper towels with rough textures that could scratch the finish.
Why Speed Matters
Vinyl plank floors have a protective wear layer, but it's not invincible. Spills left overnight can seep into the seams and cause the planks to swell or discolor. Acidic liquids like lemon juice or vinegar can etch the surface over time.
By cleaning up immediately, you prevent permanent damage and keep your floors looking pristine.
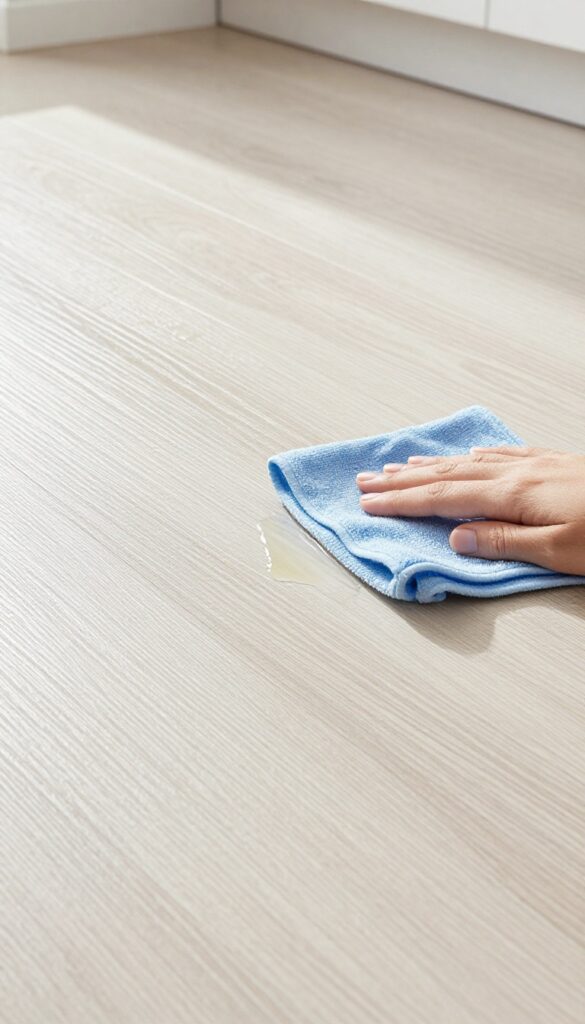
What To Use For Different Spills
For water-based spills like coffee or soda, a dry paper towel works fine. For oily spills like salad dressing or grease, first blot with a paper towel, then wipe the area with a damp cloth and a drop of dish soap. Rinse with a clean damp cloth to avoid soap residue.
Never use abrasive sponges or scrub brushes—they can dull the finish.
The One Tool You Should Always Have Handy
Keep a microfiber cloth or a roll of soft paper towels in a nearby cabinet or under the sink. That way, you can grab it the second a spill happens. Microfiber is ideal because it's absorbent and gentle, and it won't leave lint behind.
Having it within arm's reach makes spot cleaning a no-brainer.
6. Remove Sticky Residue with Rubbing Alcohol
Sticky messes from tape, glue, or stickers can be a real headache on vinyl plank floors. You might be tempted to scrape them off, but that's a fast track to scratches and permanent damage. Instead, reach for a gentle solvent that dissolves the gunk without harming the finish.
Isopropyl alcohol is your best friend here. It's strong enough to break down adhesive but mild enough to leave your floor's protective layer intact. The key is using it sparingly and rinsing afterward so no residue remains.
Rubbing alcohol is a safe and effective way to remove sticky residue from vinyl plank floors. It evaporates quickly and won't dull the finish like some harsh chemicals can. Follow these steps to get your floors spotless without any damage.
What You'll Need
Grab a clean, soft cloth (microfiber works best), a bottle of isopropyl alcohol (70% or higher), and a small bowl of plain water. That's it. No need for special cleaners or abrasive pads.
Step-by-step Application
Dab a corner of the cloth into the alcohol—don't soak it, just dampen it. Gently rub the sticky area in small circles. You should see the residue start to lift almost immediately.
For stubborn spots, let the alcohol sit for a few seconds before rubbing.
Rinse And Dry
Once the residue is gone, dip a clean part of the cloth in water and wipe the area to remove any alcohol traces. Then dry with a dry cloth or let it air dry. This step prevents any potential dullness from the alcohol sitting on the floor.
When To Avoid This Method
If your vinyl planks are unsealed or have a matte finish, test the alcohol on a hidden corner first. Some matte finishes can be sensitive. Also, never pour alcohol directly onto the floor—always apply it to the cloth to control the amount.
7. Tackle Grease with Dish Soap and Water
Grease spots from cooking or handling oily products can be stubborn on vinyl plank floors. You need something that cuts through the grime without stripping the finish. A gentle dish soap and water solution is your best bet—it's effective, safe, and won't leave a residue if you rinse properly.
For greasy areas, mix a few drops of mild dish soap with warm water in a bucket. Dampen a mop or soft cloth, wring it out well so it's barely wet, and mop the greasy spot. Then go over the same area with a clean mop dipped in plain water to remove any soap film.
Dry with a soft towel if needed.
Why Dish Soap Works On Grease
Dish soap is designed to break down oils and fats, making it perfect for cutting through kitchen grease on your floors. Unlike harsh degreasers, mild dish soap won't damage the protective wear layer of vinyl planks. Just make sure you choose a gentle formula without bleach or strong fragrances.
Rinsing Is Non‑negotiable
Soap residue can attract dirt and leave a dull film on your floors. That's why rinsing with plain water is a crucial second step. Use a separate mop or thoroughly rinse your first mop before going over the area again.
For small spots, a spray bottle with plain water and a microfiber cloth works well.
Drying Prevents Moisture Damage
Even though vinyl plank is water-resistant, standing moisture can seep into seams or edges over time. After cleaning, dry the area with a soft towel or allow it to air dry with good ventilation. This simple habit keeps your floors looking great and prevents potential issues.
8. Erase Scuff Marks with a Magic Eraser
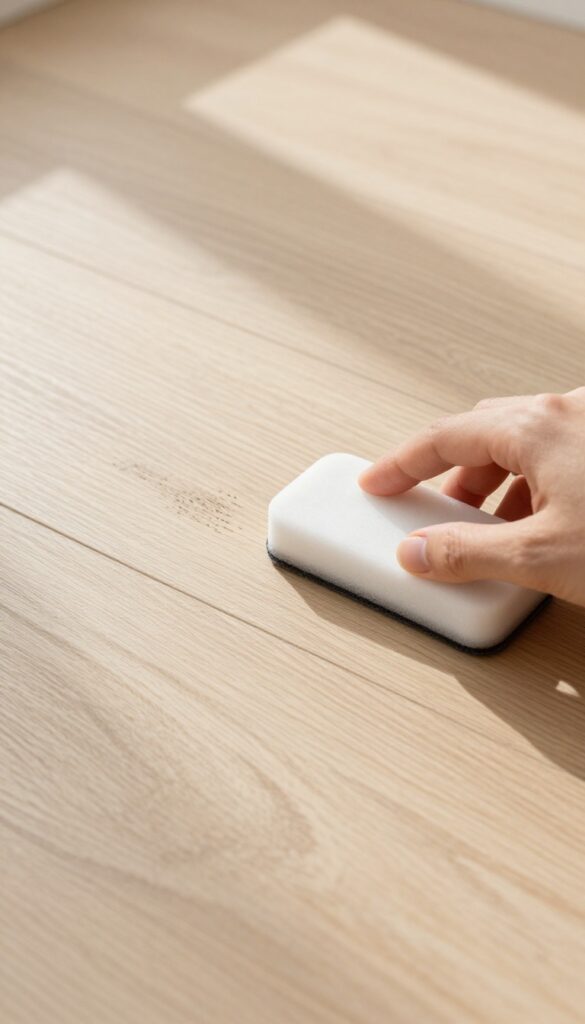
Scuff marks from shoes, furniture, or toys can make even clean vinyl plank floors look dingy. But you don't need harsh chemicals to remove them. A simple melamine foam eraser—often sold as a magic eraser—can lift those marks with just a little water and gentle pressure.
Before you start, make sure the floor is free of loose dirt or grit. Wet the magic eraser slightly and squeeze out excess water—it should be damp, not dripping. Gently rub the scuff mark in a circular motion.
The foam acts like fine sandpaper, so light pressure is key. Too much force can dull the finish. Always test in an inconspicuous spot first, like inside a closet, to confirm the eraser doesn't leave a hazy patch.
If it does, switch to a different method. After erasing, wipe the area with a damp microfiber mop to remove any residue. Your floors will look scuff-free without any damage.
Why Magic Erasers Work
Melamine foam is micro-abrasive, meaning it gently sands away stubborn marks without scratching most surfaces. On vinyl plank flooring, it's effective against scuffs from rubber soles, dark sneakers, or dragged furniture. The key is using it damp—dry foam can be too abrasive.
How To Avoid Damaging The Finish
Always test first. Some vinyl finishes are more sensitive than others. Rub lightly and check after a few strokes.
If you see any dullness or haze, stop immediately. Also, never use a magic eraser on textured or matte vinyl floors—it can wear down the texture unevenly.
When To Skip This Method
If your vinyl planks have a high-gloss or waxed finish, a magic eraser might strip that shine. In those cases, try a baking soda paste or a specialized vinyl floor cleaner instead. Also avoid using it on deep scratches or gouges—it won't fix those and could make them more noticeable.
9. Deep Clean with a Steam Mop (Low Setting)
Steam mops can be a game-changer for vinyl plank floors, but only if you use them right. The heat and moisture can damage the planks if you're not careful, so a gentle approach is key. Stick to the lowest steam setting and keep the mop gliding to avoid lingering heat in one spot.
Before you break out the steam mop, double-check that your vinyl flooring is waterproof and click-lock style. Not all vinyl can handle steam, and using it on glue-down or non-waterproof planks can void your warranty. Once you're sure, fill the mop with distilled water to prevent mineral buildup, and start in an inconspicuous area to test for any adverse reaction.
Move the mop in smooth, continuous passes, and never let it sit still—even for a second. The goal is to lift grime with steam, not to soak the floor. After steaming, let the floor air-dry completely before walking on it or replacing furniture.
Check Your Warranty First
Many vinyl plank warranties explicitly prohibit steam cleaning. If yours does, skip this method entirely. Even if it's allowed, test a small hidden area first to make sure the heat doesn't cause warping or discoloration.
Use Distilled Water Only
Tap water contains minerals that can leave a cloudy residue on your vinyl. Distilled water prevents that and extends the life of your steam mop. It's a small step that makes a big difference.
Keep It Moving
The biggest risk with a steam mop is heat damage from pausing. Always keep the mop in motion, and avoid using it on areas with damaged seams or gaps where moisture could seep in. A steady, unhurried pace is perfect.
10. Avoid Wax, Polish, and Shine Enhancers
It’s tempting to grab a bottle of floor polish or wax to make your vinyl planks gleam, but that’s a fast track to trouble. These products are designed for porous surfaces like wood or stone, not for vinyl’s sealed top layer. Instead of adding shine, they create a sticky film that traps dirt, dulls the finish, and makes floors dangerously slippery.
Vinyl plank flooring comes with a factory-applied wear layer that provides all the luster it needs. Adding wax or polish only masks that finish and leads to buildup that’s hard to remove. Over time, the coating can yellow, peel, or attract grime that no amount of sweeping will fix.
Stick to cleaning methods that respect the original surface.
Why Wax And Polish Don’t Belong On Vinyl
Vinyl is non-porous, so wax and polish can’t soak in—they just sit on top. This creates a sticky layer that grabs dirt, dust, and shoe residue. Within weeks, your floors look dingier than before.
Plus, the residue can make the surface slick, posing a slip hazard, especially in kitchens or bathrooms.
How To Remove Buildup If You Already Used Them
If you’ve already applied a shine product, don’t panic. Mix a solution of warm water and a few drops of mild dish soap. Use a soft mop to gently scrub the floor, then rinse thoroughly with clean water.
For stubborn buildup, a 50/50 mix of water and isopropyl alcohol can help dissolve the residue. Always test in a hidden spot first.
Better Ways To Maintain A Natural Shine
Regular dry mopping or vacuuming prevents scratches that dull the surface. For a light boost, use a vinyl-specific cleaner that’s pH-balanced. Microfiber mops with a spray bottle let you control moisture.
That’s all you need—no extra products required.
11. Use Doormats to Reduce Dirt Traction
The easiest way to keep your vinyl plank floors clean is to stop dirt before it ever touches them. Doormats are your first line of defense, trapping grit, sand, and moisture that would otherwise scratch or stain the surface. A good mat at every entrance can cut your cleaning time in half.
Choose The Right Mat Material
Not all doormats are vinyl-friendly. Avoid rubber-backed mats that can discolor or stick to the floor, especially in humid conditions. Instead, opt for mats with a natural fiber like coir or a fabric top with a non-staining latex or felt backing.
These catch debris effectively without damaging the planks.
Place Mats Strategically
Put a mat outside each exterior door to scrape off heavy dirt, and another just inside to catch what’s left. Don’t forget garage and patio entrances—those are major dirt highways. A long, absorbent mat in the kitchen near the sink can also catch splashes and crumbs.
Maintain Mats Weekly
A mat full of dirt is just a dirt reservoir. Shake out or vacuum doormats at least once a week—more often in rainy or snowy weather. Wash fabric mats according to the label, and replace them when they start to fray or lose their grip.
Clean mats protect your floors; dirty ones just redistribute grime.
12. Protect High-Traffic Areas with Rugs
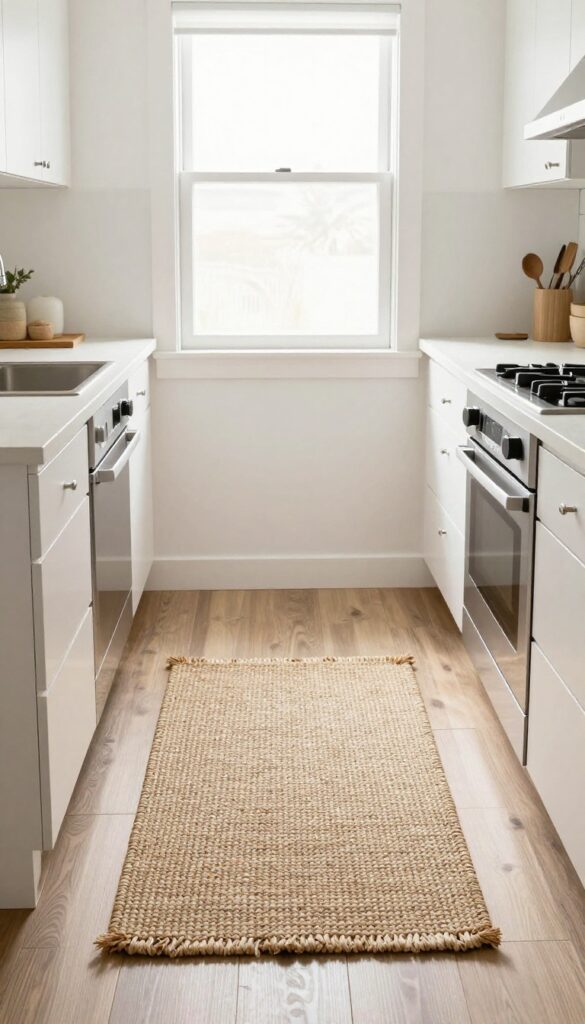
Hallways and kitchens take the brunt of daily foot traffic, and that constant wear can eventually dull or scratch your vinyl plank floors. Placing rugs in these zones is a simple, stylish way to shield the finish. Just make sure you choose rugs with non-staining backing—rubber or latex can leave yellow marks that are tough to remove.
Rugs act as a barrier against dirt, grit, and scuffs, but the wrong backing can cause more harm than good. Look for rugs labeled as non-staining or with felt or natural fiber backings. Avoid rubber or PVC-backed rugs, especially in areas where moisture might get trapped.
Vacuum rugs regularly to prevent trapped dirt from grinding into the floor underneath.
Choosing The Right Rug Backing
The backing is what touches your floor, so it matters. Felt or woven cotton backings are safe bets. If you love a rubber-backed rug, place a felt rug pad underneath to create a buffer.
Test a small corner of the rug in an inconspicuous spot before committing.
Placement Tips For Maximum Protection
Put rugs in front of sinks, stoves, and entryways—anywhere people stand or walk repeatedly. Make sure rugs lie flat to prevent tripping and to avoid trapping moisture underneath. Use rug grippers designed for vinyl floors to keep them in place without adhesive residue.
Cleaning Under Rugs
Lift rugs at least once a week to sweep or vacuum the area underneath. Dirt and dust can accumulate quickly, and trapped moisture can lead to mold or discoloration. If you notice any dampness, dry the floor thoroughly before replacing the rug.
13. Lift Furniture Instead of Dragging It

Moving furniture across vinyl plank floors is one of the fastest ways to damage them. That scraping sound isn't just annoying—it's the sound of your floor's protective layer being gouged or peeled away. The fix is simple: always lift, never drag.
When you slide a chair, table, or sofa across the floor, the weight concentrates on the legs and creates deep scratches or even tears in the vinyl. Once the top layer is compromised, dirt and moisture can seep in, causing permanent discoloration or warping. Lifting furniture completely off the floor eliminates this risk entirely.
For heavy pieces, ask for help or use a furniture dolly. For lighter items, just bend your knees and lift. It takes an extra second but saves you from costly repairs down the line.
Felt Pads Are Your Best Friend
Even when you lift furniture, felt pads provide an extra layer of protection. Stick them onto the bottom of chair legs, table legs, and sofa feet. They reduce friction if the furniture shifts slightly and prevent scratches from any rough edges on the leg.
Replace them every few months or when they get dirty or worn.
What About Sliding Chairs?
If you have dining chairs that get pushed in and out daily, it's unrealistic to lift them every time. In that case, use chair leg caps made of rubber or soft plastic. They glide smoothly without scratching.
Just avoid hard plastic caps—they can still leave marks. Check them regularly for trapped grit and clean them off.
14. Clean Pet Accidents with Enzymatic Cleaner
Pets happen. Whether it’s a puddle of urine or a pile of vomit, the way you clean it matters for your vinyl plank floors. Standard cleaners might remove the visible mess but often leave behind odors that encourage repeat accidents.
Worse, scrubbing too hard can damage the protective wear layer.
The secret to a truly clean floor after a pet accident is an enzymatic cleaner designed for hard surfaces. These cleaners use natural enzymes to break down proteins in urine and vomit, eliminating both the stain and the smell at the source. Unlike bleach or ammonia-based products, they won't dull your vinyl's finish or cause discoloration.
Blot, Don’t Rub
As soon as you spot the accident, grab a clean cloth or paper towel and blot up as much moisture as possible. Press firmly to absorb liquid from the seams and edges. Rubbing will spread the mess deeper into the floor and can push liquid into gaps between planks, leading to warping or odor trapped underneath.
Choose The Right Cleaner
Look for an enzymatic cleaner specifically labeled for hard surfaces like vinyl, laminate, or tile. Avoid products meant for carpets only—they may leave a residue that attracts dirt. Spray the cleaner generously over the affected area, covering about an inch beyond the visible stain.
Let it sit for the time recommended on the label, usually 5 to 15 minutes, so the enzymes can fully break down the proteins.
Rinse And Dry
After the dwell time, use a damp microfiber mop or cloth to wipe away the cleaner. Follow with a dry cloth to remove excess moisture. Never let puddles sit on vinyl plank floors.
Once dry, check for any lingering odor. If you still smell something, repeat the process. A second application often finishes the job.
15. Refresh Floors with a Vinegar Solution (Occasionally)

Sometimes your vinyl planks need a little extra love beyond routine cleaning. A gentle vinegar solution can cut through stubborn grime and leave floors looking refreshed. But here’s the catch: vinegar is acidic and can damage the finish if overused.
Use it sparingly and always rinse thoroughly.
For those times when your floors feel sticky or dull despite regular cleaning, a vinegar solution can be a safe, natural option. The key is dilution and frequency. Mix 1/2 cup of white vinegar per gallon of warm water.
Damp mop the floor—never soaking wet—and follow immediately with a plain water rinse to remove any vinegar residue. Limit this treatment to once every few months. Overuse can strip the protective wear layer, making floors look cloudy or etched.
Always test on a hidden area first.
Why Vinegar Works And When To Use It
Vinegar is mildly acidic, which helps break down grease, soap scum, and mineral deposits that plain water can’t budge. It’s also non-toxic and inexpensive. Use this method only when your floors feel grimy or look hazy after standard cleaning.
For everyday maintenance, stick to a pH-neutral cleaner.
The Right Way To Apply And Rinse
Fill a bucket with warm water and add the vinegar. Dip your mop and wring it until it’s just damp—not dripping. Mop in sections, then go over the same area with a clean mop dipped in plain water and wrung well.
This rinse step is crucial; leftover vinegar can attract dirt and dull the finish over time. Dry the floor with a soft microfiber cloth or let it air dry.
When To Skip The Vinegar
Avoid vinegar on floors that are waxed, unsealed, or have a matte finish. It can also react badly with some grout or cause discoloration. If your floors are under warranty, check the manufacturer’s guidelines—many recommend against vinegar.
When in doubt, use a cleaner specifically designed for vinyl plank flooring.
FAQ
Can I use bleach on vinyl plank floors?
No. Bleach can discolor and damage vinyl. Stick to pH-neutral cleaners or mild dish soap.
How often should I mop vinyl plank floors?
Damp mop every 1-2 weeks, or more often in high-traffic areas. Daily dry dusting is recommended.
Is it safe to use a steam mop on vinyl plank flooring?
Only if your vinyl is waterproof and the manufacturer allows it. Use the lowest setting and keep the mop moving. Check your warranty first.
What should I do if my vinyl floor looks dull?
First, ensure it's clean—residue can cause dullness. If still dull, avoid wax or polish. A gentle vinegar rinse (1/2 cup per gallon) may help, but use sparingly.
Can I use a Swiffer WetJet on vinyl plank floors?
Yes, but use the formula designed for hardwood or vinyl. Avoid the 'multi-purpose' version which may contain harsh chemicals.
Conclusion
With these 15 steps, your vinyl plank floors will stay spotless without a scratch. Stick to a quick sweep and damp mop routine to keep dirt from building up. Your floors will keep their shine for years with just a little consistent care.
Remember, the right tools and gentle products make all the difference. Enjoy your beautiful, damage-free floors.

I’m Pallab Kishore, the owner of Little Pets Realm — an animal lover and pet care enthusiast sharing easy tips, healthy recipes, and honest advice to help every small pet live a happy, healthy, tail-wagging life.


