Hardwood, tile, laminate, vinyl—each floor surface demands a different cleaning approach, but you don't need a closet full of specialized products to keep them spotless. Everyday ingredients like vinegar, baking soda, and dish soap can tackle everything from sticky spills on vinyl to dull patches on hardwood.
These 25 floor cleaning solutions are practical, budget-friendly, and tailored to your specific floor type. Whether you're dealing with scuff marks, grout lines, or carpet stains, each idea offers a straightforward fix using items you likely already have.
Let's get your floors gleaming without the guesswork.
1. White Vinegar and Water for Hardwood Floors
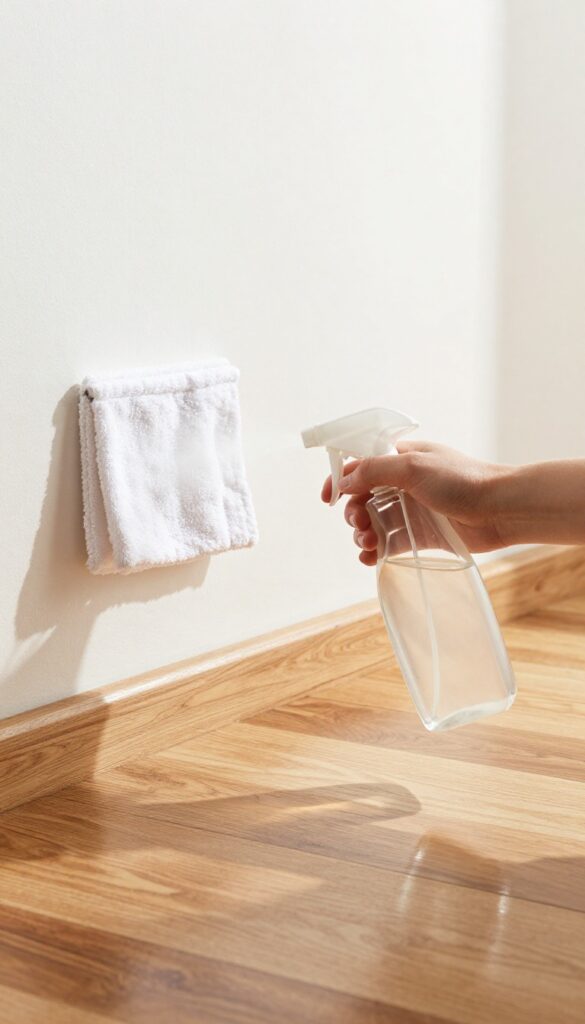
If you have hardwood floors, you already know they need a gentle touch. Harsh chemicals can strip the protective finish over time, leaving them looking dull and lifeless. A simple mixture of white vinegar and water does the job without the risk.
The acidity cuts through dirt and grime while staying pH-balanced enough to preserve the sealant. Just stick to a 1: 10 ratio—one part vinegar to ten parts water—and use a damp mop, not a soaking wet one. Too much moisture is the enemy of hardwood, causing warping and cupping.
This solution leaves a clean, streak-free shine that lasts.
White vinegar and water is a classic, trusted solution for hardwood floors. It's cheap, non-toxic, and effective. The key is getting the ratio right and applying it correctly.
A 1: 10 mix ensures the vinegar is diluted enough to avoid damaging the finish. Always use a microfiber mop or cloth, and wring it out thoroughly before mopping. Work in small sections and let the floor air-dry.
Avoid using this solution on unsealed or waxed hardwood, as the vinegar can penetrate and cause damage. For best results, mop no more than once a week and spot-clean spills immediately.
Why Vinegar Works Without Damaging Finish
Vinegar is a mild acid that breaks down dirt, grease, and soap residue without being corrosive. When diluted to 10%, it's gentle enough for sealed hardwood. The acidity also helps remove dulling film that builds up from cleaning products.
Unlike commercial cleaners, vinegar leaves no sticky residue, so floors stay cleaner longer. Just avoid using it on waxed or oiled floors, as it can strip those finishes.
How To Mop Without Warping Wood
Excess moisture is the biggest threat to hardwood. Always wring your mop until it's just damp—no dripping. Use a spray bottle to lightly mist the floor with the solution, then wipe with a dry microfiber cloth.
Or dip the mop, wring thoroughly, and mop in the direction of the grain. Never pour the solution directly onto the floor. Work in small areas and dry immediately if puddles form.
This method keeps your floors clean and safe.
When To Skip This Method
If your hardwood is unsealed, waxed, or has visible gaps, skip the vinegar. The moisture can seep into cracks and cause swelling or mold. Also avoid it if your floors are older and the finish is worn.
In those cases, use a specially formulated hardwood cleaner or just a dry dust mop. For sealed, modern hardwood, this vinegar solution is a reliable, budget-friendly choice.
2. Castile Soap and Warm Water for Tile Floors
Tile floors are durable, but they can show every streak and smudge if you use the wrong cleaner. Castile soap—a plant-based, biodegradable soap—is a gentle yet effective option that lifts dirt from ceramic and porcelain tiles without leaving a sticky residue. It’s especially good for busy households where you need a clean floor without harsh chemicals.
Castile soap is incredibly versatile, and it works beautifully on tile. Unlike some commercial cleaners that can dull the finish over time, castile soap is mild enough for daily use. It’s also safe for sealed grout, which is a common trouble spot.
The key is to use it sparingly—just a few drops per gallon of warm water is plenty. Too much soap can leave a film, so err on the side of less. Mop as usual, and be sure to rinse with plain water afterward to remove any residue.
Your tiles will come out clean, shiny, and streak-free.
Why Castile Soap Works So Well On Tile
Castile soap is made from natural oils like olive, coconut, or hemp, which means it’s gentle on surfaces but tough on dirt. Its low-sudsing formula rinses cleanly, which is crucial for tile because leftover soap can attract more dirt. Plus, it’s pH-neutral, so it won’t damage the glaze on ceramic or porcelain tiles.
How To Mix And Apply It
Fill a bucket with warm water and add 1 to 2 teaspoons of liquid castile soap. Stir gently to avoid excess suds. Dip your mop, wring it well, and clean the floor in sections.
For best results, use a microfiber mop head—it picks up dirt without scratching. After mopping, go over the floor with a clean mop dipped in plain water to remove any remaining soap.
Tips For Grout And Stubborn Spots
For grout lines, mix a few drops of castile soap with a little baking soda to form a paste. Apply it with an old toothbrush, scrub gently, then wipe clean. For sticky spots or dried-on spills, let the soapy water sit for a minute before mopping.
Always test a small, hidden area first if you’re unsure about your tile’s finish.
3. Rubbing Alcohol and Water for Streak-Free Laminate
Laminate floors look great when they're clean, but they're notorious for showing streaks and water spots if you use the wrong cleaner. The solution? A simple mix of rubbing alcohol and water.
The alcohol evaporates almost instantly, so there's no time for residue to form. Plus, it's gentle enough to use regularly without damaging the laminate's protective layer.
This two-ingredient cleaner is as easy as it gets. Mix 1 cup of rubbing alcohol with 1 gallon of warm water in a bucket. That's it—no soap, no vinegar, no harsh chemicals.
The alcohol cuts through grease and grime while the water dilutes it enough to be safe for everyday use. Just mop as usual, and you'll see the difference immediately.
Why It Works So Well
Laminate flooring has a sealed top layer that can be sensitive to excess moisture. Rubbing alcohol evaporates much faster than water, so it doesn't seep into seams or cause swelling. It also has a slight degreasing power that lifts fingerprints and light dirt without leaving a film.
The result is a clean, shiny floor with zero streaks.
How To Apply It Right
Use a microfiber mop or a spray bottle for best results. If you're mopping, wring the mop out well—damp, not wet. For spot cleaning, spray the solution directly on the stain and wipe with a microfiber cloth.
Avoid using too much liquid, and never let puddles sit on the floor. Work in small sections so the solution dries quickly.
When Not To Use It
Skip this mix on unsealed laminate or floors with damaged seams, as alcohol can penetrate and cause swelling. Also, avoid it on floors treated with wax or polish, since alcohol can strip those finishes. For most modern laminate floors, though, it's perfectly safe and effective.
4. Hydrogen Peroxide and Baking Soda for Grout Lines
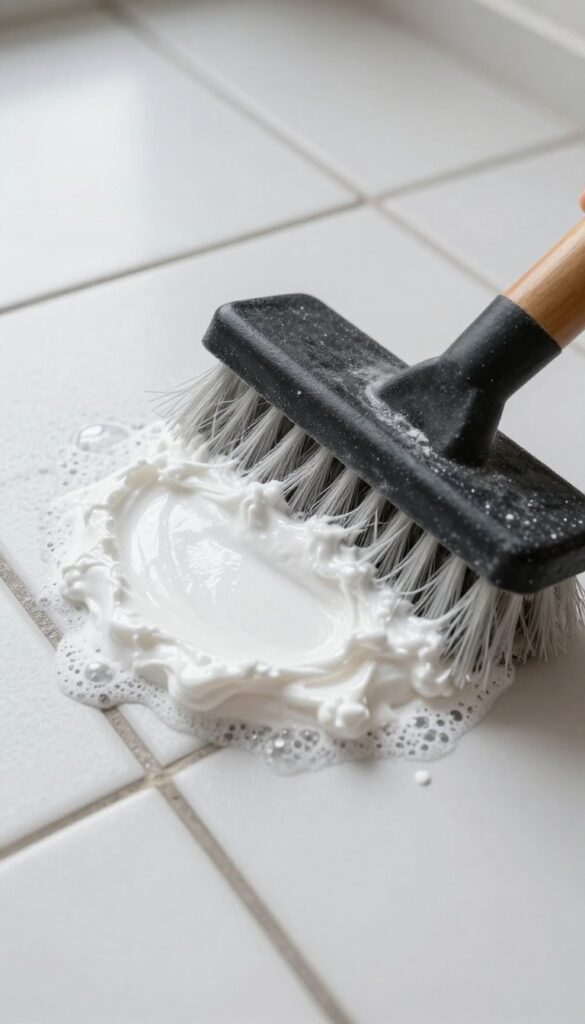
Grout lines are magnets for dirt and mildew, and they can make even the cleanest tile floor look dingy. A simple paste of hydrogen peroxide and baking soda whitens and disinfects without the harsh fumes of bleach.
Mix baking soda with enough hydrogen peroxide to form a thick paste. Apply it to the grout lines, let it sit for 10–15 minutes, then scrub gently with a stiff brush. Rinse with water and wipe dry.
The peroxide bubbles away grime while baking soda gently abrades stains. This combo is safe for most tile types, but test on a hidden spot first.
Why It Works So Well
Hydrogen peroxide is a natural bleach and disinfectant that breaks down organic matter. Baking soda adds mild abrasion to lift ground-in dirt without scratching the tile. Together, they create an oxygenating reaction that lifts stains from porous grout.
Application Tips For Best Results
For stubborn stains, let the paste sit longer—up to 30 minutes. Use an old toothbrush or a grout brush to work it into the lines. Rinse thoroughly to avoid a white residue.
If your grout is sealed, this method is still safe, but avoid over-scrubbing.
5. Dish Soap and Warm Water for Vinyl Floors
Vinyl flooring is tough, waterproof, and easy to maintain, but it can still look dull if you use harsh chemicals. A simple mix of dish soap and warm water is all you need to keep it shiny and clean. This gentle solution cuts through grease and grime without stripping the protective layer.
Why It Works
Dish soap is designed to break down oils and food residues, making it perfect for kitchen and high-traffic areas. Warm water helps dissolve dirt faster than cold water, and the mild formula won't damage vinyl's finish. Just a few drops per gallon is enough.
How To Apply
Mix a few drops of mild dish soap into a bucket of warm water. Mop the floor using a well-wrung mop—too much water can seep into seams. Work in sections, rinsing the mop frequently.
No need to rinse afterward unless you see suds; just let it air dry.
What To Avoid
Stay away from abrasive scrubbers, bleach, or ammonia-based cleaners. They can dull or discolor vinyl. Also avoid using too much soap, as it leaves a sticky residue that attracts dirt.
Stick to a gentle dish soap like Dawn or a similar brand.
6. Olive Oil and Vinegar for Linoleum Floors
Linoleum is a natural flooring material that needs a bit of TLC to keep its color and finish. Harsh chemicals can dry it out, but a simple mix of olive oil and vinegar works as both a cleaner and a conditioner. The vinegar cuts through grime, while the olive oil leaves a light, protective sheen.
Just go easy on the oil—too much and you'll have slippery spots.
This DIY solution is perfect for routine cleaning when your linoleum looks a little lackluster. It's gentle enough for weekly use and helps extend the life of your floor.
The Right Ratio
Mix 1 cup of warm water with 1/2 cup of white vinegar and 1 teaspoon of olive oil. Shake well in a spray bottle. The oil will separate, so give it a quick shake before each use.
How To Apply
Lightly mist the floor one section at a time, then wipe with a damp mop or microfiber cloth. Don't soak the linoleum—excess moisture can seep into seams. Buff dry with a clean cloth for extra shine.
When To Skip This
Avoid this mix on unsealed or worn linoleum. The oil can penetrate and attract dirt. Also, never use it on waxed floors—the vinegar will strip the wax.
Stick to manufacturer-recommended products for those surfaces.
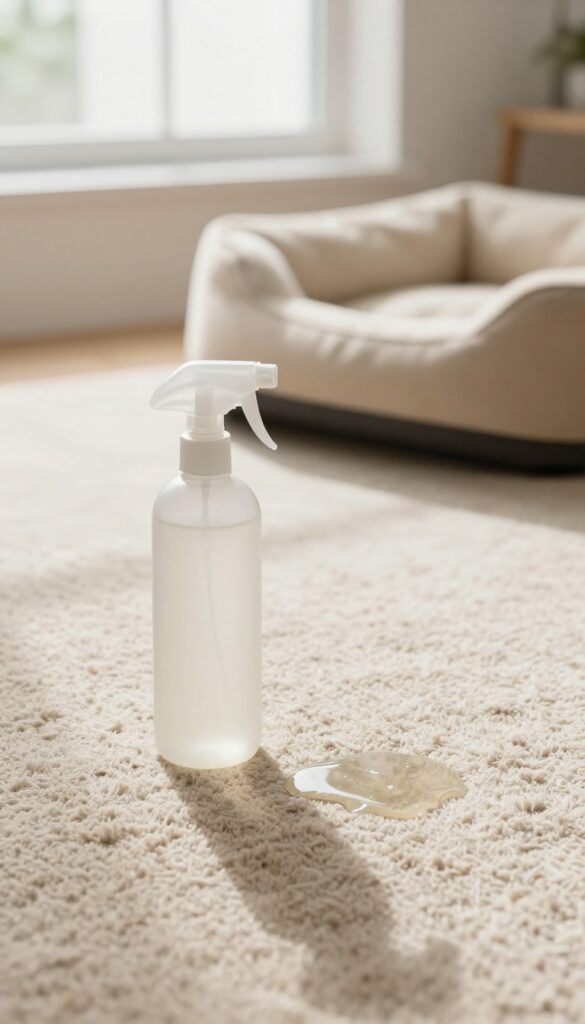
7. Club Soda for Fresh Spills on Carpet
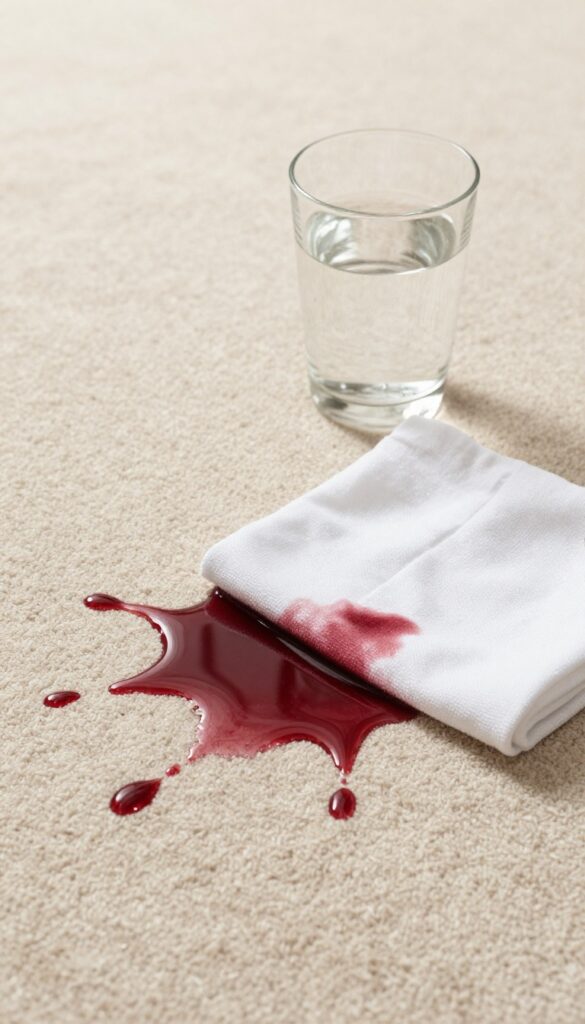
Carpet stains are a fact of life, but you don't need a harsh chemical spray to handle fresh spills. Club soda—that fizzy drink sitting in your fridge—works surprisingly well because the carbonation helps lift the stain from the fibers. The key is to blot gently, not rub, so the mess doesn't spread or sink deeper.
When a spill happens, act fast. Grab a clean cloth or paper towel and blot up as much liquid as possible. Then pour a small amount of club soda directly onto the stain—enough to saturate it without soaking through to the padding.
Let it fizz for a minute or two, then blot again with a dry cloth. Repeat until the stain fades. This method works best on fresh spills like coffee, juice, or wine.
For older stains, you might need a more intensive treatment, but club soda is a great first line of defense.
Why Carbonation Works
The bubbles in club soda are carbon dioxide, which helps break the bond between the stain and the carpet fibers. The slight acidity also helps dissolve water-soluble stains. Unlike some store-bought cleaners, club soda is gentle and won't discolor most carpets.
Blotting Vs. Rubbing
Rubbing a stain might seem effective, but it actually pushes the liquid deeper into the carpet and can fray the fibers. Always blot from the outside of the stain inward to contain it. Use a white cloth to avoid transferring dye.
When To Use Club Soda
This trick is best for fresh, water-based stains. For greasy or oily spills, club soda won't do much—you'll need a degreasing agent. Also, test on an inconspicuous area first to make sure your carpet is colorfast.
8. Borax and Lemon Juice for Stubborn Carpet Stains
Some carpet stains just won't budge with store-bought sprays. That's where a simple paste of borax and lemon juice comes in—it's tough on set-in spots like coffee or wine but gentle enough for most carpet fibers. Always test on a hidden area first to be safe.
Mix equal parts borax and fresh lemon juice to form a thick paste. Apply it directly to the stain, let it sit for 15–20 minutes, then scrub gently with a soft brush. Rinse with a damp cloth and blot dry.
The borax lifts the stain while the lemon juice breaks down residue and leaves a fresh scent.
Why This Combo Works
Borax is a natural mineral that acts as a mild abrasive and deodorizer. Lemon juice contains citric acid, which helps dissolve organic stains like coffee, wine, and food spills. Together, they create a paste that penetrates deep into carpet fibers without harsh chemicals.
Application Tips
Don't rub the paste in—that can push the stain deeper. Instead, dab it on and let it sit. For older stains, let the paste dry completely, then vacuum it up.
Always blot with a clean white cloth to check if the stain is transferring.
Safety And Testing
Borax is safe for most synthetic carpets, but it can cause fading on wool or silk. Test on an inconspicuous spot before using. Keep the area well-ventilated, and avoid using this paste on carpets that are sensitive to acidic cleaners.
9. Steam Cleaning for Deep-Clean Hardwood
Steam cleaning isn't just for tile and grout—it works wonders on sealed hardwood floors when done right. A steam mop with a microfiber pad uses high-temperature vapor to lift embedded dirt and kill bacteria without leaving chemical residue behind. It's a deep-clean method that refreshes your floors naturally, especially between thorough wet-mopping sessions.
Steam cleaning uses heat and moisture to break down grime that regular sweeping misses. For hardwood, the key is using a mop that distributes steam evenly and a microfiber pad that traps dirt instead of pushing it around. The process sanitizes the surface without the need for harsh detergents, making it ideal for homes with kids or pets.
Just be sure your floors are properly sealed—unsealed wood can warp or discolor from excess moisture.
Choosing The Right Steam Mop
Not all steam mops are hardwood-friendly. Look for one with adjustable steam settings so you can dial down the moisture for wood floors. A mop with a large water tank and quick heat-up time saves you from stopping mid-clean.
Microfiber pads should be machine-washable and thick enough to absorb grime without scratching the finish.
Step-by-step Steam Cleaning Routine
Start by sweeping or vacuuming to remove loose debris. Fill the steam mop with distilled water to avoid mineral buildup, then set it to low steam. Glide the mop in the direction of the wood grain, overlapping each pass slightly.
Let the floor air-dry for a few minutes before walking on it. For best results, steam clean every two to four weeks depending on foot traffic.
When To Skip Steam Cleaning
Avoid steam cleaning if your hardwood is unsealed, waxed, or has visible gaps between planks. Excess moisture can seep into the wood and cause swelling, cupping, or finish damage. Stick to damp-mopping with a pH-neutral cleaner for those floors.
Also, never use steam on engineered wood with a thin veneer—check the manufacturer's guidelines first.
10. Baking Soda and Water for Scuff Marks on Vinyl
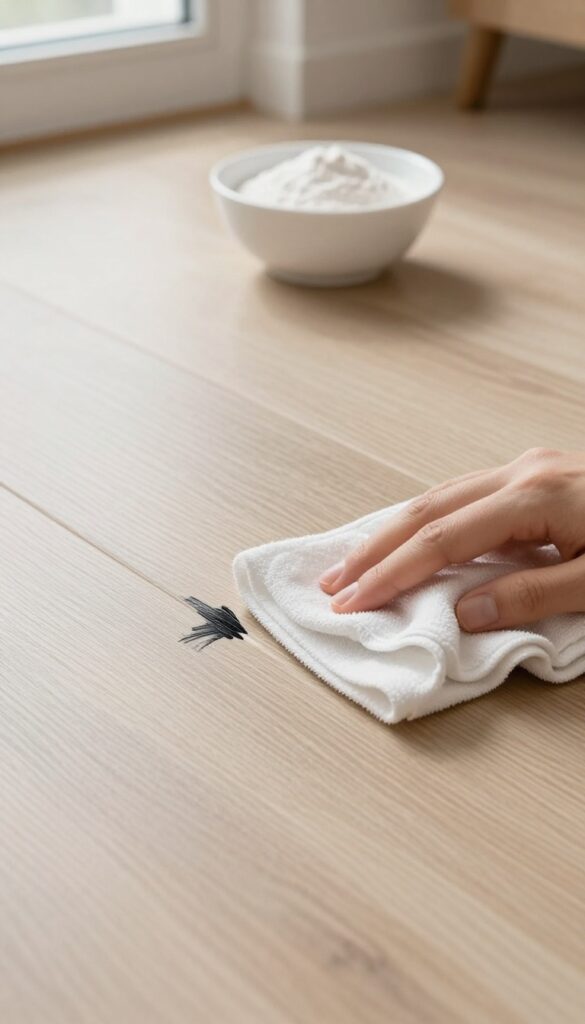
Black scuff marks from shoes or furniture legs can make vinyl flooring look worn and neglected. A simple paste of baking soda and water works as a gentle abrasive that lifts those marks without damaging the surface. It's a quick fix that costs pennies and takes just a minute to mix.
Scuff marks on vinyl are stubborn but respond well to a mild abrasive. Baking soda is soft enough to avoid scratches yet effective enough to erase dark marks. This method is ideal for vinyl sheet flooring, luxury vinyl planks, and vinyl tiles.
How To Make The Paste
Mix three parts baking soda with one part water in a small bowl. Stir until it forms a thick, spreadable paste. Adjust the ratio if needed—add more baking soda for a thicker consistency or a few extra drops of water if it's too dry.
Application Tips
Apply the paste directly onto the scuff mark using a soft cloth or sponge. Rub gently in a circular motion for about 10–15 seconds. Wipe away the residue with a damp cloth and dry the area.
For deeper marks, let the paste sit for a minute before scrubbing.
Why It Works So Well
Baking soda's fine crystalline structure provides just enough abrasion to lift scuffs without scratching the vinyl's wear layer. It's also non-toxic and safe for homes with kids or pets. Unlike harsh solvents, it won't dull the finish over time.
11. Tea Tree Oil and Water for Mold on Tile
Mold in tile grout is stubborn and unsightly, but you don't need bleach to banish it. Tea tree oil is a natural antifungal powerhouse that kills mold spores without harsh fumes. Mixed with water, it creates a gentle yet effective spray safe for daily use on bathroom and kitchen tile.
This simple solution works because tea tree oil disrupts mold cell membranes, preventing regrowth. It's especially good for porous grout where bleach can damage or discolor over time. Plus, the fresh scent is a bonus.
How To Mix And Apply
Combine 1 teaspoon of tea tree oil with 1 cup of water in a spray bottle. Shake well. Spray directly onto moldy grout lines, let sit for 15 minutes, then scrub with a stiff brush.
Rinse with water and wipe dry. No need to rinse if you prefer to leave it for ongoing protection.
Best Surfaces And Safety
Ideal for ceramic, porcelain, and stone tile. Avoid on unsealed natural stone like marble or travertine, as the oil can stain. Always test in an inconspicuous spot first.
Keep the spray away from pets and children until dry.
When To Use This Method
Use weekly for maintenance in damp bathrooms or after heavy showers. For heavy mold, repeat the treatment daily for a week. It's also great for preventing mold on shower curtains and around sinks.
12. Rubbing Alcohol and Vinegar for Glass Tile
Glass tile backsplashes and floors look stunning but show every fingerprint, water spot, and smudge. Commercial glass cleaners work, but they can leave a hazy film if not buffed properly. A simple mix of rubbing alcohol and vinegar cuts through grease and dries streak-free, making glass tile sparkle with minimal effort.
Combine equal parts rubbing alcohol and white vinegar in a spray bottle. Shake gently, then mist the solution onto the glass tile surface. Wipe immediately with a clean, dry microfiber cloth—no need to rinse.
The alcohol evaporates quickly, preventing streaks, while the vinegar dissolves mineral deposits and grime. For stubborn spots, let the solution sit for 30 seconds before wiping.
Why This Mix Works So Well
Rubbing alcohol is a fast-evaporating solvent that lifts oily residues without leaving residue. Vinegar breaks down hard water spots and soap scum. Together, they create a powerful, non-toxic cleaner that dries clear—perfect for glossy glass surfaces.
Unlike ammonia-based cleaners, this blend won't damage glass tile coatings or harm nearby grout.
Best Practices For Application
Always use a lint-free microfiber cloth to avoid streaks. Spray lightly—over-saturating can cause drips that leave marks. Work in small sections, wiping in one direction (top to bottom or side to side) to maintain consistency.
For large glass tile walls, use a squeegee after wiping for a professional, streak-free finish.
Safety And Surface Checks
Test on an inconspicuous area first, especially if the glass tile has a decorative coating or is part of a mixed-material surface. Avoid using on unsealed grout—vinegar can etch it over time. Keep the solution away from natural stone like marble or travertine, as the acid can cause damage.
Store in a labeled spray bottle out of reach of children.
13. Mineral Oil for Unsealed Wood Floors
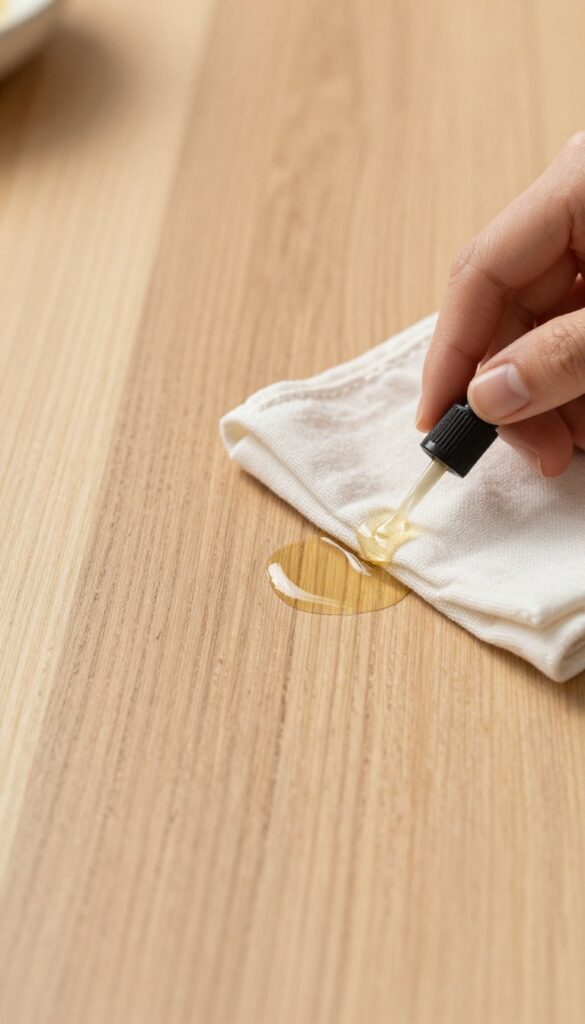
Unsealed wood floors are beautiful but thirsty—they soak up spills and dry out over time. Mineral oil is a food-safe, non-drying oil that nourishes raw wood without leaving a sticky residue. It's a go-to for butcher block countertops and works just as well on unsealed wood floors, giving them a warm, natural glow.
Mineral oil penetrates deep into the wood grain, preventing cracks and splits caused by dryness. It also repels water temporarily, making cleaning easier. Unlike linseed or tung oil, mineral oil won't turn rancid or darken the wood significantly.
Apply a thin coat with a soft cloth, let it soak for 15–20 minutes, then buff off any excess. Repeat every few months or when the wood looks dull.
Why Mineral Oil Works On Unsealed Wood
Unsealed wood lacks a protective topcoat, so it needs a penetrating conditioner rather than a surface sealer. Mineral oil molecules are small enough to slip into the wood's pores, hydrating from within. It doesn't form a film, so the wood stays breathable and maintains its natural texture.
Application Tips For Best Results
Start with a clean, dust-free floor. Pour a small amount of mineral oil onto a microfiber cloth or mop pad, then spread it evenly in the direction of the grain. Work in small sections to avoid puddles.
Let the oil absorb for 15 minutes, then buff with a dry cloth to remove any leftover sheen. Avoid walking on the floor until it's completely dry—usually 2–4 hours.
How Often To Treat Unsealed Floors
Frequency depends on foot traffic and humidity. In dry climates or busy kitchens, apply mineral oil every 2–3 months. In more stable conditions, twice a year is enough.
A simple test: sprinkle a few drops of water on the floor. If it beads up, the oil is still working. If it soaks in quickly, it's time for another coat.
14. Salt and Lemon for Greasy Kitchen Floors
Kitchen floors take a beating—grease splatters, spilled oil, and sticky residues from cooking can leave tile or linoleum looking grimy. Commercial degreasers work, but they often leave behind harsh fumes or a slippery film. A simple scrub made from salt and lemon cuts through the grease naturally, leaving your floors clean and fresh without the chemical smell.
This method is especially effective on ceramic tile, porcelain, and linoleum. Salt acts as a gentle abrasive to lift stuck-on grime, while lemon’s acidity breaks down grease and adds a bright scent. Just be sure to rinse thoroughly—salt residue can attract moisture and leave a dull haze if left behind.
How To Make The Scrub
Mix ½ cup of coarse salt (like kosher or sea salt) with the juice of one large lemon. Stir into a thick paste. If it’s too runny, add more salt; if too dry, add a splash of lemon juice.
Apply the paste directly to greasy spots or spread it over the entire floor with a soft cloth or sponge.
Application Tips
Work in small sections so the paste doesn’t dry out. Scrub gently in circular motions—no need to bear down hard, as the salt does the work. For stubborn grease, let the paste sit for 2–3 minutes before scrubbing.
Rinse with a damp mop and clean water, then dry with a towel or allow to air dry.
What To Avoid
Skip this method on unsealed stone, marble, or laminate—the acid can etch the surface or damage the finish. Also avoid using it on waxed linoleum unless you plan to rewax afterward, as the lemon can strip the wax. Always spot test in an inconspicuous area first.
15. White Vinegar and Essential Oils for General Cleaning
White vinegar is a powerhouse cleaner that cuts through grime on most sealed floors—tile, laminate, vinyl, and even hardwood (if used sparingly). Its strong scent, though, can be off-putting. The fix is simple: add a few drops of lavender, lemon, or tea tree essential oil.
Not only does it mask the vinegar smell, but it also leaves a light, fresh aroma behind. This combo is gentle enough for regular use and tough enough on everyday dirt.
The Right Ratio
Mix 1/2 cup of white vinegar with 1 gallon of warm water. Add 10–15 drops of your chosen essential oil. Shake or stir well.
For a stronger clean on high-traffic areas, increase vinegar to 1 cup per gallon. Always test on a small, hidden spot first, especially on unsealed wood or natural stone.
Best Essential Oils For Floor Cleaning
Lavender is calming and antibacterial. Lemon is degreasing and uplifting. Tea tree is antifungal and great for bathrooms or humid areas.
Peppermint smells invigorating and deters pests. Avoid oils with added fragrance or synthetic perfumes—they can leave residue.
How To Use It
Mop as usual, but don't soak the floor. Use a damp (not wet) mop, and wring it out well. For spray mops, fill the reservoir with the solution.
No need to rinse unless you see streaks—then a quick pass with plain water does the trick. Let air dry for a streak-free finish.
16. Dishwasher Rinse Aid for Spotless Laminate
Laminate floors are notorious for showing every streak and water spot after mopping. You've probably tried adjusting your water ratio or switching mops, but the real secret might already be in your kitchen cupboard. Dishwasher rinse aid isn't just for glassware—it works wonders on laminate, too.
The magic ingredient in rinse aid is a surfactant that reduces water's surface tension. When you add a few drops to your mop bucket, the water sheets off the floor instead of beading up. That means no more cloudy residue or dried-on droplets.
Your floors dry faster and look polished without any extra buffing.
How Much To Use
Don't go overboard—a tablespoon per gallon of warm water is plenty. Too much can leave a slightly sticky film. Start with less and add more if you still see spots.
You can use any brand, but the cheaper ones work just as well.
Best Mop For The Job
A flat microfiber mop is ideal because it distributes the solution evenly and absorbs excess water. Avoid string mops that dump too much liquid onto laminate. Wring it out well—your mop should be damp, not soaking wet.
When Not To Use It
Skip the rinse aid on unsealed laminate or if your floor has visible scratches. The surfactant can seep into damaged areas and cause swelling. Stick to a damp microfiber mop with plain water for those floors.
17. Cornstarch and Water for Polishing Marble
Marble floors add elegance but require gentle care. Harsh chemicals or acidic cleaners like vinegar can etch the surface, leaving dull spots. Cornstarch offers a safe, effective way to restore a soft shine without damaging the stone.
Mix cornstarch with water to form a thick paste, apply it to the marble, let it dry, then buff with a soft cloth. This simple method lifts grime and polishes the surface naturally.
Why Cornstarch Works
Cornstarch is a mild abrasive that gently buffs away dirt and residue without scratching marble. It absorbs oils and leaves a streak-free finish, making it ideal for high-traffic areas.
How To Apply The Paste
Combine 1/4 cup cornstarch with enough water to create a spreadable paste. Apply a thin layer to the floor, let it dry completely (about 15 minutes), then buff with a dry microfiber cloth. For extra shine, repeat weekly.
What To Avoid On Marble
Never use vinegar, lemon juice, or any acidic cleaner on marble. These etch the surface and cause permanent dullness. Stick to pH-neutral or natural options like cornstarch.
18. Hydrogen Peroxide for Disinfecting Concrete
Concrete floors in garages or basements can handle heavy-duty messes—oil drips, mud, and grime—but they also need proper disinfection. Hydrogen peroxide offers a non-toxic way to kill bacteria without the harsh fumes of bleach. It's safe for sealed or unsealed concrete and leaves no sticky residue.
Hydrogen peroxide (3% solution) works as a mild bleach alternative that whitens and disinfects concrete. It's especially useful for areas where you store tools, park cars, or do messy projects. The fizzing action helps lift dirt from porous surfaces, and it evaporates quickly without needing a rinse.
How To Apply It
Pour 3% hydrogen peroxide directly onto the concrete or spray it from a bottle. Let it sit for 10–15 minutes to kill germs and loosen grime. Scrub with a stiff-bristle brush, then mop up the excess.
For tough stains, make a paste with baking soda and hydrogen peroxide, apply it, and let it sit before scrubbing.
Safety Tips
Always test in an inconspicuous spot first, especially on colored or painted concrete. Avoid mixing hydrogen peroxide with bleach or ammonia—it can create toxic fumes. Wear gloves to protect your skin, and keep the area well-ventilated.
When To Use This Method
Use hydrogen peroxide monthly for routine disinfection or after heavy use, like a car repair or gardening session. It's also great for removing mildew or musty smells in damp basements. For oil stains, pair it with a degreaser first, then follow up with hydrogen peroxide to sanitize.
19. Baking Soda and Vinegar for Odor Removal on Carpet
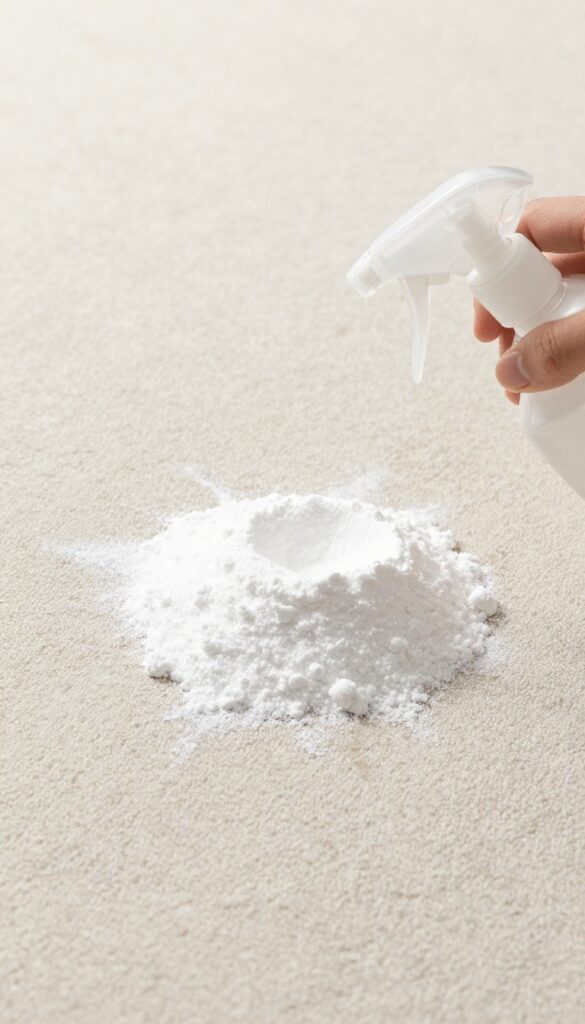
Carpet fibers trap odors from pets, spills, and everyday foot traffic. The classic baking soda and vinegar duo creates a fizzy reaction that lifts smells out of the fibers without harsh chemicals. After the solution dries, a quick vacuum leaves your carpet smelling fresh.
This method works best on set-in odors rather than fresh spills. The combination neutralizes both acidic and alkaline odor molecules, making it effective for pet accidents, smoke, or musty smells. Always test a small hidden area first to ensure your carpet dye is colorfast.
Mixing The Solution
Sprinkle a generous layer of baking soda over the smelly area. In a spray bottle, mix equal parts white vinegar and water. Lightly mist the baking soda until it fizzes—don't soak the carpet.
Let the fizzing action work for 5-10 minutes.
Drying And Vacuuming
Allow the mixture to dry completely, which may take a few hours depending on humidity. Once dry, vacuum thoroughly to remove all baking soda residue. For stubborn odors, repeat the process or let the baking soda sit overnight before misting.
Tips For Best Results
Use distilled white vinegar to avoid staining. Avoid over-wetting to prevent mold or mildew growth. For pet odors, add a few drops of enzyme cleaner to the vinegar solution to break down proteins.
Always keep the room well-ventilated.
20. Glycerin and Water for Shiny Vinyl
Vinyl floors can lose their luster over time, especially in high-traffic areas. A simple mix of glycerin and water brings back that glossy finish without leaving a sticky residue. Glycerin is a natural humectant that attracts moisture, helping the solution spread evenly and dry to a brilliant shine.
This two-ingredient solution is incredibly easy to make and use. Combine 1 tablespoon of glycerin with 1 gallon of warm water in a bucket. Mop the floor as usual, but avoid soaking it—vinyl doesn't like excess moisture.
Let it air dry, and you'll notice a streak-free gloss that lasts for days.
Why Glycerin Works
Glycerin is a clear, odorless liquid derived from plant oils. It's non-toxic and safe for vinyl, unlike some commercial polishes that contain harsh chemicals. The glycerin molecules bond with the vinyl surface, filling in microscopic scratches and creating a smooth, reflective layer.
Application Tips
Use a microfiber mop for best results—cotton mops can leave lint. Wring the mop well so it's damp, not wet. Work in small sections, and rinse the mop frequently to avoid spreading dirt.
For extra shine, buff the floor with a dry microfiber cloth after mopping.
When To Avoid This Method
If your vinyl floor has a matte finish or is textured, skip the glycerin—it can make those surfaces look patchy. Also, avoid using too much glycerin; a little goes a long way. Stick to the recommended ratio to prevent any slippery film.
21. Rubbing Alcohol and Dish Soap for Grease on Garage Floors
Garage floors take a beating—oil drips, tire marks, and grease stains are practically part of the deal. But you don't need harsh chemicals to cut through that grime. A simple mix of rubbing alcohol and dish soap works wonders on concrete, breaking down grease without damaging the surface.
It's cheap, effective, and you probably already have both ingredients on hand.
To make this degreaser, combine 1 cup of rubbing alcohol with 1 tablespoon of dish soap in a bucket of warm water. The alcohol dissolves oil while the soap lifts it away. Apply the solution to the stain, let it sit for a few minutes, then scrub vigorously with a stiff-bristled brush.
Rinse thoroughly with a hose or wet mop. For stubborn old stains, apply the solution directly and let it soak for 10–15 minutes before scrubbing. This method works best on sealed concrete; if your garage floor is unsealed, test a small spot first to avoid discoloration.
Why It Works So Well
Rubbing alcohol is a solvent that breaks down the molecular bonds in grease and oil, making them easier to rinse away. Dish soap contains surfactants that trap the loosened grime, so it doesn't just spread around. Together, they create a powerful yet gentle cleaner that won't harm concrete or leave a slippery residue.
Best Practices For Application
Always sweep or vacuum the floor first to remove loose dirt. Apply the solution with a mop or spray bottle, focusing on stained areas. Use a stiff brush—a deck brush or a scrub brush with firm bristles—and work in circular motions.
Rinse well with clean water to avoid any soapy film. For large areas, a pressure washer can speed up the rinse step.
Safety Tips
Rubbing alcohol is flammable, so keep the area well-ventilated and avoid open flames. Wear gloves to protect your hands from prolonged contact with the solution. If you have pets or kids, keep them away until the floor is completely dry.
Store any leftover mixture in a labeled container out of reach.
22. Vinegar and Dish Soap for Sticky Residue on Tile
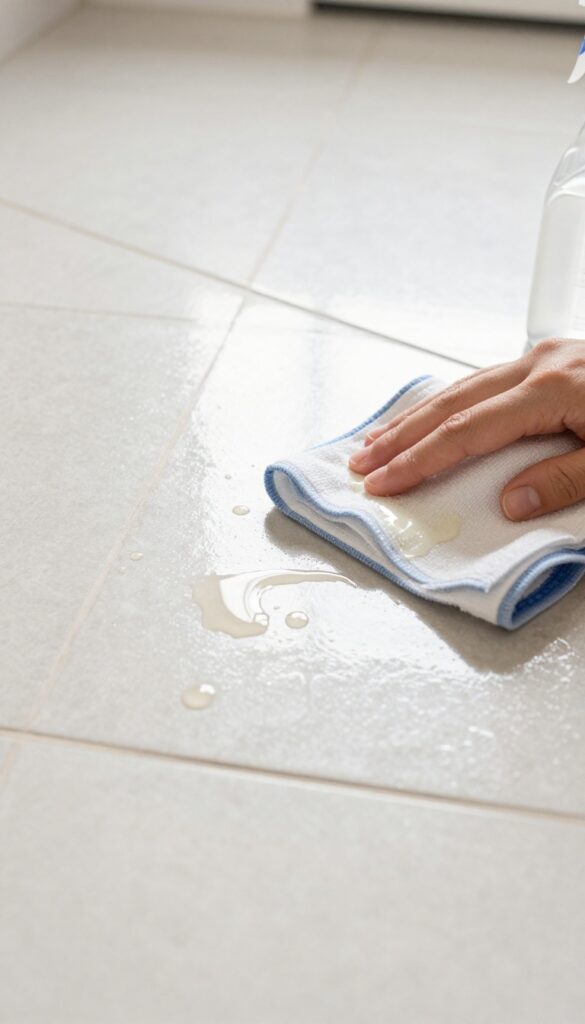
Sticky residue from tape, stickers, or labels can make ceramic tile look messy and feel grimy. Instead of scrubbing endlessly, a simple mix of vinegar and dish soap cuts through the adhesive quickly. Let it sit for a few minutes to soften the gunk, then wipe clean.
This solution is especially useful for kitchen backsplashes, bathroom walls, or entryway tiles where stickers or tape might have been left behind. The vinegar breaks down the adhesive while the dish soap lifts it away without damaging the tile surface. It’s safe for glazed ceramic tiles but avoid using on unglazed or natural stone tiles, as vinegar can etch them.
How To Mix And Apply
Combine equal parts white vinegar and warm water in a spray bottle, then add a few drops of dish soap. Shake gently to mix. Spray the solution directly onto the sticky residue and let it sit for 3–5 minutes.
The longer you let it soak, the easier the residue will wipe off.
Best For Stubborn Adhesives
For older or thicker residue, you may need to reapply and let it soak longer. Use a soft cloth or plastic scraper to gently lift the softened adhesive. Avoid using metal scrapers or abrasive pads, as they can scratch the tile.
Rinse And Dry
After removing the residue, wipe the area with a damp cloth to remove any vinegar smell. Dry with a clean towel to prevent water spots. Your tile will look clean and residue-free without harsh chemicals.
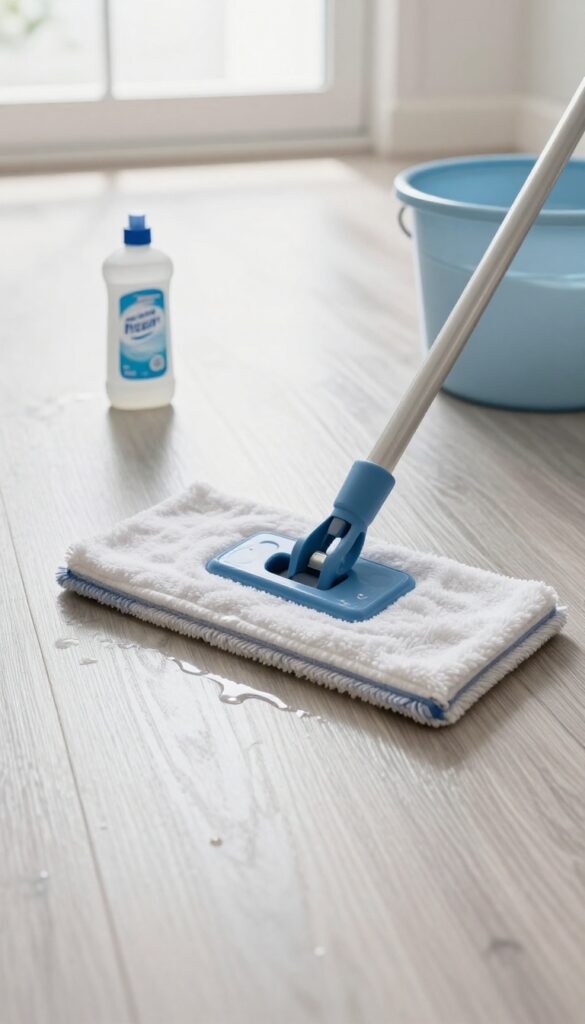
23. Microfiber Mop and Water for Daily Maintenance
Between deep cleans, your floors just need a quick once-over to pick up dust, pet hair, and light debris. A microfiber mop with plain water is the gentlest, most effective method for daily upkeep on almost any sealed hard surface. No chemicals, no residue—just a clean floor in minutes.
A microfiber mop uses electrostatic attraction to grab particles instead of pushing them around. When you add plain water, it loosens dried-on spills and light grime without leaving any sticky film. This method works beautifully on hardwood, laminate, vinyl, tile, and even polished concrete—provided the floor is properly sealed.
For daily maintenance, it's all you need to keep surfaces looking fresh between deeper cleanings.
Why Microfiber Works So Well
Microfiber is made of split fibers that create a large surface area, trapping dust and dirt inside the cloth rather than just moving it. When dampened with water, the fibers become slightly tacky, lifting grime from microscopic pores in the floor finish. This means you get a thorough clean without any chemical residue that could dull or damage the surface over time.
Best Practices For Daily Mopping
Use a spray mop or a bucket with a microfiber pad that you can wring out well—the pad should be damp, not soaking wet. Work in sections, rinsing or swapping the pad when it gets dirty. For best results, sweep or vacuum first to remove loose debris.
Then mop with plain water, and let the floor air dry. This quick routine takes just a few minutes and prevents buildup that leads to dullness.
When To Reach For Something Stronger
Plain water and microfiber handle everyday dust and light soil, but they won't cut through grease, sticky spills, or heavy grime. For those situations, you'll want to use a mild cleaner appropriate for your floor type—like a few drops of dish soap in water for vinyl or a pH-neutral hardwood cleaner. But for 90% of your routine cleaning, water and a good microfiber mop are all you need.
24. Commercial pH-Neutral Cleaner for Engineered Wood
Engineered wood floors have a thin real-wood veneer that can be damaged by harsh chemicals or excessive moisture. A commercial pH-neutral cleaner is the safest store-bought option—it lifts dirt without stripping the protective finish or causing swelling. These cleaners are formulated to be gentle yet effective, making them a solid choice for regular maintenance.
Why Ph-neutral Matters
The protective layer on engineered wood is sensitive to alkaline or acidic cleaners. pH-neutral solutions (around 7 on the scale) won't react with the finish, so your floor stays sealed and shiny. Harsh cleaners can dull the surface over time, while pH-neutral formulas preserve the manufacturer's warranty.
How To Use It Right
Dilute the cleaner according to the label—usually a capful per gallon of water. Use a microfiber mop, not a soaking wet one. Spray the solution onto the mop head, not directly on the floor, to avoid puddles.
Mop in the direction of the wood grain and let it air-dry. No rinsing needed.
Top Brands To Look For
Bona Hardwood Floor Cleaner and Method Squirt + Mop are popular pH-neutral options. Both are safe for engineered wood and leave no residue. Avoid all-purpose cleaners with bleach, ammonia, or wax—they can cloud the finish or leave a sticky film.
25. Enzyme Cleaner for Pet Urine on Carpet
Pet accidents happen, but the lingering smell doesn't have to stick around. Standard carpet cleaners often mask odors temporarily, while enzyme cleaners break down the urine proteins at a molecular level, eliminating the source of the smell. This biological approach is safe for most carpets and highly effective for stubborn, set-in stains.
Enzyme cleaners contain beneficial bacteria that produce enzymes specifically designed to digest organic waste like urine, feces, and vomit. When you apply the cleaner, these enzymes go to work breaking down the proteins and other compounds that cause odor. The key is to follow the instructions carefully—most require a dwell time of 10–15 minutes to allow the enzymes to fully penetrate and react.
After that, blot or rinse as directed. Avoid using heat or steam cleaners before the enzymes have finished, as high temperatures can kill the bacteria and render the product useless.
Why Enzyme Cleaners Work
Unlike chemical deodorizers that simply cover up smells, enzyme cleaners attack the organic compounds directly. The enzymes catalyze the breakdown of uric acid and other proteins into harmless byproducts like carbon dioxide and water. This not only removes the odor but also prevents pets from remarking the same spot, as they no longer detect the scent.
How To Use Them Effectively
First, blot up as much fresh urine as possible with paper towels. Then apply the enzyme cleaner generously to saturate the stain and a small area around it. Let it sit for the recommended time—usually 10–15 minutes—without scrubbing.
After that, blot the area with a clean cloth to lift the moisture. For old or dried stains, pre-wet the area with water to help the enzymes penetrate, then apply the cleaner. Repeat if necessary.
Things To Avoid
Never mix enzyme cleaners with vinegar or ammonia, as these can neutralize the enzymes. Avoid using steam cleaners or hot water extraction immediately after application, because heat can kill the bacteria. Also, don't use enzyme cleaners on wool or silk carpets unless the label specifically says it's safe, as some enzymes can damage natural fibers.
FAQ
Can I use vinegar on all floor types?
No, vinegar is acidic and can damage natural stone like marble or granite. It’s safe for sealed hardwood, tile, and laminate, but always test in a hidden spot first.
How often should I mop my floors?
High-traffic areas benefit from weekly mopping, while less-used rooms can go two weeks. Spot clean spills immediately to prevent stains.
What’s the best way to dry floors after mopping?
Use a dry microfiber mop or a clean towel to remove excess water. Air drying is fine, but avoid walking on wet floors to prevent slips and streaks.
Are homemade cleaners as effective as store-bought?
For most everyday dirt and grime, DIY solutions work well. For heavy stains or sanitizing, you may need a commercial product designed for that specific task.
Can I mix different cleaning solutions together?
Avoid mixing bleach with vinegar or ammonia, as this creates toxic fumes. Stick to one solution per cleaning session unless a recipe specifically calls for combined ingredients.
Conclusion
Your floors deserve care that matches their material and your lifestyle. From budget-friendly vinegar mixes to specialized stone cleaners, these 25 ideas give you a solution for every surface and mess. Pick the ones that target your biggest floor frustrations—whether it's sticky kitchen spills or dull hardwood.
Start with just one or two methods this week. Consistent small habits, like a quick daily sweep or the right weekly mop solution, keep your floors looking their best without overwhelming your routine. Your home will feel fresher, and you'll save money by using what you already have.


