
A cluttered bedroom can make it hard to unwind at the end of the day. When your sleep space feels chaotic, your mind follows suit. That's where a solid cleaning checklist comes in.
You don't need to spend hours scrubbing to make a difference. Small, intentional tasks add up to a room that feels peaceful and inviting. The key is knowing what to focus on and in what order.
This list of 23 bedroom cleaning ideas breaks down the process into manageable steps. Each one targets a specific area or habit, so you can tackle what matters most for your calm sleep space.
1. Strip and Refresh Your Bedding

Your bed is the centerpiece of your sleep space, so starting there makes sense. Fresh sheets do more than look good—they signal to your brain that it's time to rest. Strip everything off and give your bedding the deep clean it deserves.
Begin by removing all sheets, pillowcases, and duvet covers. Wash them in hot water (check care labels first) to kill dust mites and allergens. While they're in the wash, give your mattress a quick vacuum to remove any debris.
Once your linens are dry, make the bed with fresh, crisp sheets. The transformation is instant—your room will feel lighter and more inviting.
Why Hot Water Matters
Hot water (130°F or higher) is the most effective way to eliminate dust mites and bacteria. If your fabrics can't handle hot water, use a laundry sanitizer or add a cup of white vinegar to the rinse cycle. This step is especially important if you suffer from allergies or asthma.
Don't Forget Pillow Protectors
Pillows collect sweat, oil, and dead skin cells over time. Zip-on pillow protectors act as a barrier, keeping your pillows cleaner longer. Wash them every time you wash your sheets, and replace pillows every 1-2 years for optimal support and hygiene.
Make The Bed Right Away
Once your linens are dry, make the bed immediately. A made bed instantly makes the room look tidy and reduces visual clutter. Plus, climbing into a neatly made bed at night feels much more inviting than a rumpled one.
2. Declutter Nightstands and Surfaces
Nightstands and dressers often become catch-all spots for random items. A cluttered surface sends visual noise straight to your brain, making it harder to relax. Clearing these areas is a quick win that instantly makes your bedroom feel more serene.
What To Keep
Limit nightstand items to the absolute essentials: a lamp for soft lighting, a book or e-reader, and maybe a phone charger. If you use a sleep tracker or alarm clock, that's fine too. Everything else—old receipts, empty glasses, random trinkets—should find a home elsewhere.
How To Clear The Clutter
Start by removing everything from the surface. Sort items into three piles: keep, relocate, and trash. Wipe down the surface with a microfiber cloth to remove dust and grime.
Then, only place back the keep pile. For items that belong elsewhere, put them away immediately—don't just move them to another surface.
Maintaining The Clean Look
Make it a daily habit to reset your nightstand each morning. Before you leave the bedroom, take 30 seconds to clear off any new clutter. A quick wipe once a week with a damp cloth prevents dust buildup and keeps surfaces looking fresh.
3. Vacuum Under the Bed
Out of sight often means out of mind, but the space under your bed can be a major source of dust and allergens. Even if you can't see it, that dark zone collects everything from stray socks to dust bunnies big enough to have their own zip code. Giving it a proper vacuum not only improves air quality but also frees up lost items you didn't even know were missing.
Clear The Floor First
Before you start vacuuming, move anything stored under the bed—boxes, bins, or that random shoe you kicked there months ago. Slide them out and set them aside. If your bed is low, you may need to lift the mattress or use a flat tool to scoot items out.
This step makes the actual vacuuming faster and more effective.
Use The Right Attachment
A wide floor nozzle works best for the open area, but switch to a crevice tool along the baseboards and corners where dust bunnies love to hide. If you have a low bed frame, a slim wand attachment can reach deeper. For extra stubborn dust, a brush attachment helps loosen it before suction.
Don't Forget The Bed Frame
While you're down there, run the vacuum along the sides and underneath the bed frame itself. Dust settles on the rails and legs, especially if you have a box spring. A quick pass with a soft brush attachment keeps everything fresh and reduces airborne particles when you move around.
4. Dust Light Fixtures and Ceiling Fans
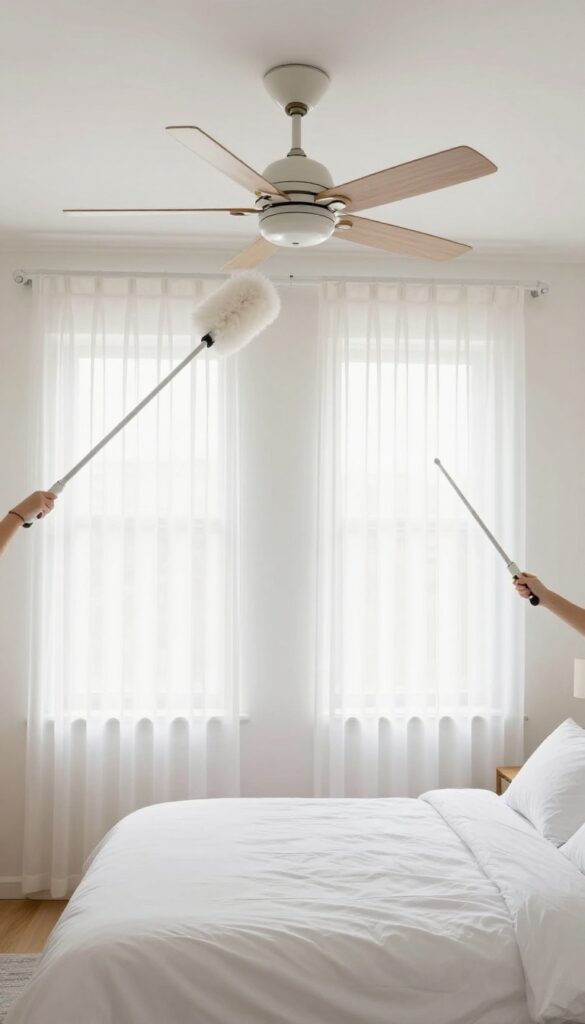
Light fixtures and ceiling fans are easy to overlook, but they collect dust that can float down onto your bed and pillows while you sleep. Cleaning them regularly keeps the air in your bedroom fresher and prevents that layer of grime from settling on your clean sheets.
Grab an extendable duster or a microfiber cloth and work your way around the room. For ceiling fans, use a pillowcase to trap the dust as you wipe each blade so it doesn't fall everywhere. Don't forget lampshades, chandeliers, and any sconces—they all benefit from a quick wipe down every few weeks.
Choose The Right Tool
An extendable duster with a microfiber head is ideal for reaching high fixtures without climbing. For fan blades, a pillowcase slipped over each blade lets you trap dust inside instead of letting it scatter. A damp cloth works well for non-fabric lampshades, while a lint roller can gently clean fabric shades.
Work Top To Bottom
Always dust light fixtures and fans before you clean the rest of the room. That way any dust that falls lands on surfaces you haven't cleaned yet. Start with the highest fixture, then move to lower ones, and finish with the fan if it's above your bed.
Don't Forget The Bulbs
Dusty bulbs can dim the light in your room, making it feel less cozy. Wipe bulbs with a dry cloth only—moisture can damage them. Clean bulbs also run cooler and last longer, so this small step pays off.
5. Wipe Down Baseboards and Trim
Baseboards and trim are like the unsung heroes of a clean room. They frame your space, but they also catch dust, scuffs, and grime that can make the whole room feel dingy. Giving them a quick wipe can instantly brighten the look and feel of your bedroom.
Gather Your Supplies
You don't need much: a damp microfiber cloth, a bucket of warm water with a drop of dish soap, and a magic eraser for stubborn marks. A vacuum with a brush attachment can pre-clean loose dust.
Work From Top To Bottom
Start at the highest point of the trim and work your way down. This way, any dust that falls won't land on already cleaned areas. Pay extra attention to corners where cobwebs like to hide.
Don't Forget Behind Furniture
Slide out furniture when possible, or use a long-handled duster to reach behind beds and dressers. Baseboards in those spots often get ignored and can be surprisingly dirty.
6. Clean Windows and Window Sills
Natural light can do wonders for your mood and sleep-wake cycle, but grimy windows block that goodness. Dust and grime on sills and tracks also find their way into the air you breathe. Giving your windows a thorough cleaning is a quick win for a brighter, fresher bedroom.
Start by removing any curtains or blinds and tossing them in the wash or giving them a quick dust. Then spray your favorite glass cleaner onto the window surface—avoid ammonia-based products if you have tinted windows. Wipe with a lint-free cloth or crumpled newspaper in a zigzag motion to avoid streaks.
For the sills and tracks, use a stiff brush or a vacuum with a crevice tool to loosen dirt, then wipe with a damp cloth. A final pass with a dry microfiber cloth removes any remaining moisture. Let the sunshine in and enjoy the instant lift.
Choose The Right Cleaner
Not all glass cleaners are created equal. For a streak-free shine, opt for a spray that dries quickly and doesn't leave residue. White vinegar diluted with water (1: 1 ratio) works great and is non-toxic.
Avoid cleaners with ammonia if you have window film or tinting.
Tackle Tracks And Sills
Window tracks collect dust, dead bugs, and grime over time. Use an old toothbrush or a small detailing brush to scrub the corners. Vacuum up loose debris first, then spray with a mild cleaner and scrub.
Wipe dry with a cloth to prevent mold.
Let The Light In
Once windows are clean, open curtains or blinds fully during the day. Natural light boosts serotonin and helps regulate your circadian rhythm. If privacy is a concern, sheer curtains diffuse light while still offering a view.
7. Organize Your Closet Doors and Handles
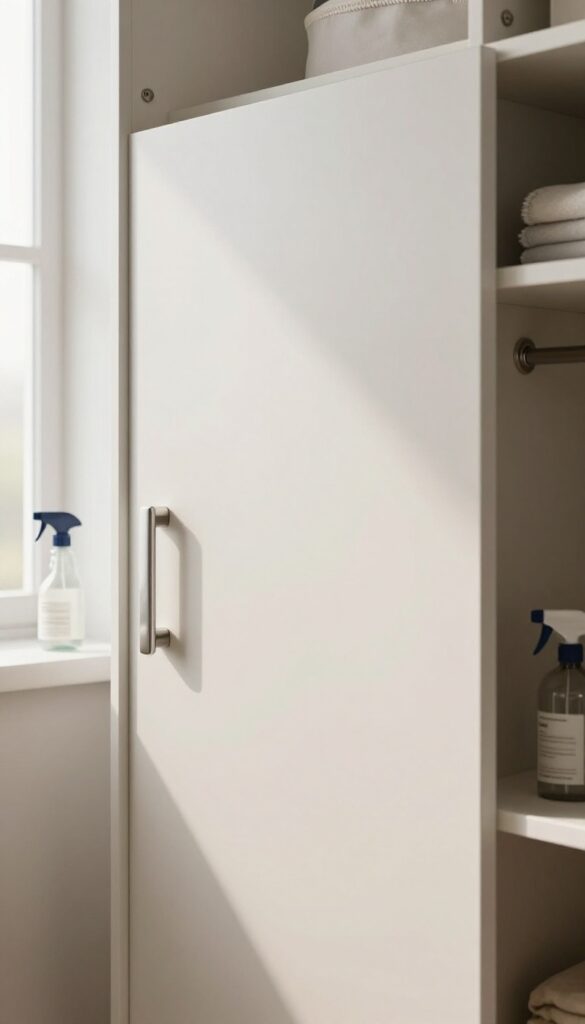
Closet doors and handles are some of the most touched surfaces in your bedroom, but they rarely get the attention they deserve. Over time, fingerprints, dust, and grime build up, making them look dull and feel sticky. Giving them a quick clean not only improves the look of your room but also cuts down on germs.
Start by wiping down the entire surface of your closet doors, whether they're sliding, bi-fold, or standard hinged. Use a microfiber cloth with a gentle cleaner or just soapy water. Don't forget the handles and knobs—these high-contact spots need a disinfectant wipe or a spray of rubbing alcohol.
For glass or mirrored doors, use a streak-free glass cleaner. Finish by drying with a clean cloth to prevent water spots.
Tackle The Tracks And Hardware
If you have sliding closet doors, the tracks can collect dust and debris that make them hard to slide. Vacuum the tracks with a brush attachment, then wipe them down with a damp cloth. Lubricate with a silicone spray if needed.
For bi-fold doors, check the hinges and rollers for dust buildup and clean them with a small brush.
Don't Forget The Top Edge
The top of closet doors is a hidden dust magnet. Run your finger along it—if you feel dust, wipe it with a microfiber cloth or an extendable duster. This simple step prevents dust from falling onto your clothes or floor when you open the door.
Add A Fresh Touch
After cleaning, consider adding a small sachet or a scented hook to the inside of the closet door. It keeps your clothes smelling fresh and adds a calming aroma to your sleep space. Just make sure it doesn't interfere with the door's movement.
8. Freshen Up Your Mattress
Your mattress works hard every night, absorbing sweat, dead skin cells, and dust mites. Over time, these build up and can affect both the smell and feel of your bed. Giving it a quick refresh every few months keeps your sleep space feeling clean and inviting.
Why Baking Soda Works
Baking soda is a natural deodorizer that neutralizes odors instead of just covering them up. It also absorbs excess moisture, which can help prevent mold and mildew growth. Plus, it's non-toxic and safe for most mattress types.
Step-by-step Instructions
Start by stripping all bedding and washing it according to care labels. Sprinkle a generous, even layer of baking soda over the entire mattress surface. Let it sit for at least 15 minutes—longer if you have time.
Then, use the upholstery attachment on your vacuum to thoroughly remove all the baking soda.
Pro Tips For Best Results
For extra freshness, add a few drops of your favorite essential oil to the baking soda before sprinkling. Lavender or eucalyptus work great for relaxation. Also, consider doing this on a sunny day so you can open windows to air out the mattress while the baking soda sits.
How Often To Do This
Aim to freshen your mattress every three to six months. If you have allergies or pets, bump it up to every two months. Regular maintenance not only keeps your bed smelling clean but also extends the life of your mattress.
9. Sort Through Nightstand Drawers
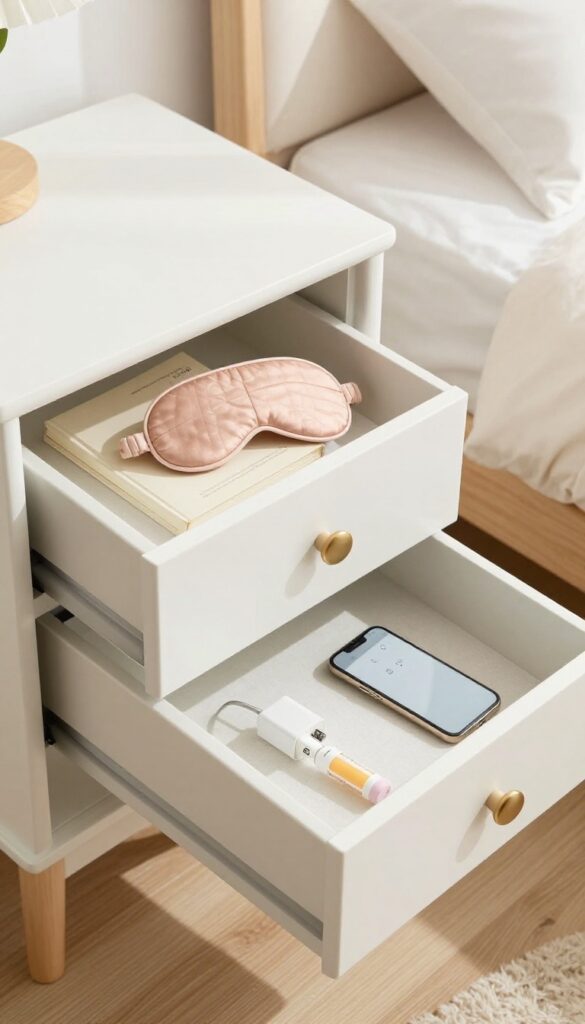
Nightstand drawers often become a catch-all for random items—old receipts, charging cables, lip balms, and who knows what else. When you're trying to wind down, digging through that mess to find your book or glasses is the last thing you need. A quick sort and wipe can turn this small space into a calm, functional zone.
Start by pulling everything out and laying it on your bed or a towel. Toss anything expired, broken, or truly useless—like those dried-out pens or the takeout menus from three apartments ago. Wipe the inside of each drawer with a slightly damp microfiber cloth to remove dust and crumbs.
Once dry, use small drawer dividers or even empty mint tins to keep items like charging cables, lip balm, and reading glasses neatly separated. Reserve the top drawer for things you reach for nightly: a book, a sleep mask, a phone charger. The lower drawer can hold less-frequent items like notepads or backup batteries.
Keeping only what belongs in your nightstand makes your bedtime routine smoother and your sleep space more serene.
What To Toss Without Guilt
Be ruthless with expired medicines, old receipts, dried-out pens, random business cards, and packaging from electronics you no longer own. If you haven't used it in three months, it's probably clutter. Also check for any food wrappers or half-eaten snacks—they attract pests and stale odors.
Organizing For Easy Access
Use small containers or drawer dividers to group similar items. A dedicated spot for your phone charger prevents tangles. A small tray can hold your watch, glasses, and lip balm.
Keep your most-used items in the front so you can grab them without rummaging.
Maintenance Routine
Make it a habit to do a quick nightstand drawer sort every few months. Set a reminder on your phone to check for new clutter. A simple once-over keeps the drawers from becoming a black hole again.
10. Vacuum or Sweep the Floor
Floors take a beating in the bedroom—dust, hair, crumbs, and who knows what else settle into the fibers or cracks. A quick once-over with a broom might handle the visible stuff, but a deep clean makes the whole room feel fresher. When your floor is truly clean, you can walk barefoot without cringing, and the air quality improves too.
Start by moving small furniture like chairs, side tables, or laundry baskets so you can reach every corner. If you have carpet, go over it slowly with a vacuum that has a HEPA filter—this traps allergens and fine dust. For hard floors, sweep or dust-mop first to pick up debris, then follow with a damp mop using a gentle cleaner (avoid harsh chemicals that linger).
Don't forget under the bed; that's a major dust bunny hideout. If your carpet looks dingy or smells, rent a carpet cleaner or use a spot cleaner on high-traffic areas. Let everything dry completely before putting furniture back.
Prep And Move Furniture
Clear the floor of anything that's not furniture—shoes, bags, clutter. Then slide or lift small pieces like nightstands or ottomans to the side. For heavy items like a bed frame, you can vacuum around the legs or use a crevice tool to reach underneath.
This step ensures you're not just cleaning around the mess.
Choose The Right Tool For Your Floor Type
Carpets need a vacuum with strong suction and a rotating brush to lift dirt from deep fibers. Hard floors (wood, tile, laminate) do best with a soft-bristle broom or a microfiber dust mop to avoid scratches. If you have both, switch tools or use a vacuum that has a hard-floor setting.
Don't Skip The Edges And Under Furniture
Use a crevice tool or an attachment to run along baseboards and corners. Under the bed is a prime spot for dust and allergens—use a long-handled duster or a vacuum wand with a flat head. If you can't move the bed, try a flexible dusting tool that slides underneath.
Finish With A Deep Clean For Carpets Or A Mop For Hard Floors
If your carpet has stains or odors, a steam cleaner or a carpet shampooer can refresh it. For hard floors, damp mop with a pH-neutral cleaner (like a diluted vinegar solution or a gentle floor soap). Wring the mop well—too much water can damage wood or leave streaks.
Let the floor air-dry before walking on it.
11. Clean Mirrors and Glass Surfaces
Mirrors and glass surfaces in your bedroom can collect dust, fingerprints, and smudges that dull the whole space. When they're clean, they reflect light and make the room feel larger and more open. It's a small task with a big visual payoff.
Spray a glass cleaner on mirrors and any glass surfaces. Wipe with a microfiber cloth in a circular motion to avoid streaks. This instantly makes the room feel brighter.
Choose The Right Cleaner
You can use a store-bought glass cleaner or make your own with equal parts water and white vinegar. Avoid ammonia-based products if you have tinted mirrors or windows. Microfiber cloths are best because they don't leave lint behind.
Technique Matters
Spray the cleaner onto the cloth, not directly onto the mirror, to prevent drips. Wipe in a circular motion first to loosen grime, then follow with vertical or horizontal strokes for a streak-free finish. Work quickly so the cleaner doesn't dry before you wipe.
Don't Forget Other Glass Surfaces
Nightstand lamps, picture frames, and glass tabletops also benefit from a quick wipe. Dust them first with a dry cloth, then use the glass cleaner. This keeps the whole room looking polished.
12. Wipe Down Electronics and Cords
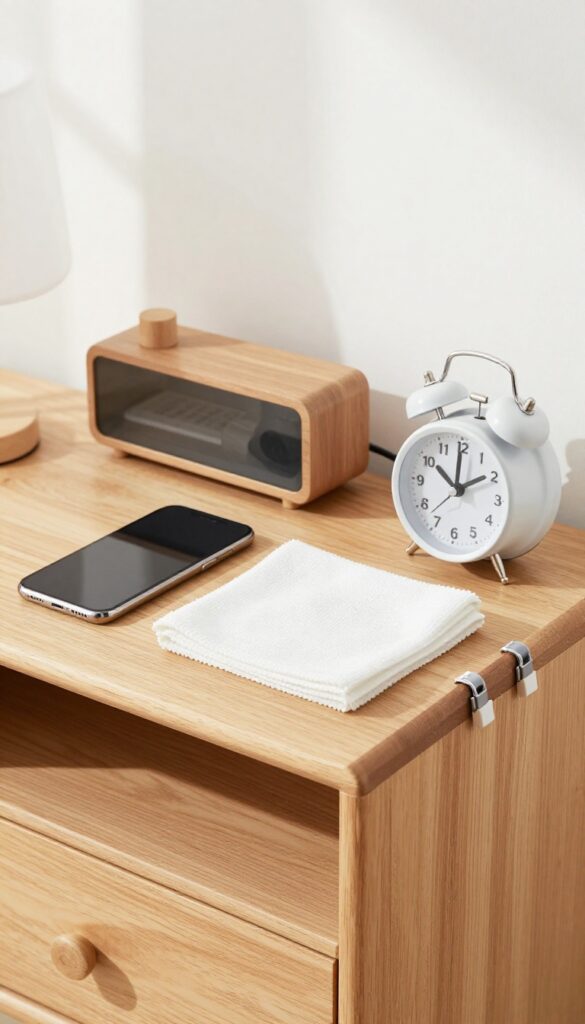
Electronics in the bedroom—TVs, alarm clocks, phone chargers—collect dust fast. That dust can trigger allergies and make the room feel grimy. Plus, tangled cords add visual noise that works against a calm sleep space.
A quick wipe and cord tidy-up can make a surprising difference in how peaceful your room feels.
Dust With The Right Tools
Grab a dry microfiber cloth—no sprays or wet wipes, which can damage screens or seep into ports. Gently wipe the screen, buttons, and surfaces of your TV, alarm clock, lamp bases, and any other electronics. For hard-to-reach spots like vents or speaker grilles, use a soft brush attachment on your vacuum or a clean paintbrush.
Tame The Cord Chaos
Unplug everything and detangle the mess. Use adhesive cord clips to route cables along the edge of your nightstand or behind your dresser. Velcro ties or twist ties keep each cord bundled neatly.
For multiple devices, a small cable management box hides the power strip and extra length. Label cords with simple tags if you have a lot of gadgets.
Maintain The Habit
Add electronics dusting to your weekly cleaning rotation. A quick once-over every Sunday keeps buildup from becoming noticeable. Every few months, unplug and do a deeper clean—check for frayed wires or loose connections.
A tidy tech zone supports better sleep by reducing both allergens and visual clutter.
13. Refresh Throw Pillows and Blankets
Throw pillows and blankets do a lot for the look and feel of your bedroom, but they also collect dust, pet hair, and odors. Giving them a quick refresh makes the whole space feel cleaner and cozier. Plus, it’s one of those tasks that takes just a few minutes but has an instant visual payoff.
Start by fluffing each throw pillow to redistribute the filling and restore its shape. Give blankets a good shake outdoors or over a bathtub to loosen dust and debris. Check the care labels—if they’re machine washable, toss them in with a gentle detergent.
For non‑washable items, a fabric freshener spray or a quick tumble in the dryer on low heat with a dryer sheet works wonders. Once everything is clean and fluffy, arrange them neatly on the bed or a cozy chair. A balanced, intentional placement makes the room look inviting and well‑cared for.
Fluff And Shake
Take each pillow and squeeze, punch, and shake it to break up clumps and restore volume. For blankets, take them outside and give them a vigorous shake to release dust, pet hair, and crumbs. If going outside isn’t an option, shake them over a bathtub or a large trash bag.
Wash Or Freshen
Check the care tags on your pillows and blankets. Machine‑washable items can go in with a gentle cycle and mild detergent. For delicate or non‑washable pieces, use a fabric refresher spray or toss them in the dryer on a no‑heat setting with a dryer sheet for 10 minutes to remove odors.
Arrange For A Cozy Look
Once everything is clean and fluffy, arrange the pillows and blankets with intention. Place pillows at varying angles, and fold or drape blankets over the foot of the bed or the arm of a chair. A neat, layered arrangement instantly makes the bedroom feel more relaxing and put‑together.
14. Clean Under Furniture
The space under your bed, dresser, and nightstands is a magnet for dust bunnies, stray socks, and forgotten clutter. Because it's out of sight, it's easy to ignore—but that neglect can quietly sabotage your clean bedroom goals. A quick sweep or vacuum under furniture makes a surprising difference in air quality and the overall feel of the room.
Moving smaller furniture pieces like chairs or side tables to vacuum or dust underneath is a simple task that pays off. This area often gets neglected and collects dust, pet hair, and debris that can trigger allergies or just make the room feel less fresh. Make it part of your routine cleaning checklist to keep the whole space truly clean.
Why It Matters
Dust and allergens accumulate in hidden spots, affecting the air you breathe while you sleep. Even if the visible surfaces look tidy, neglected floor areas can make the room feel stuffy. A quick clean under furniture removes that hidden grime and helps maintain a healthier sleep environment.
How To Do It Efficiently
Start by moving lightweight items like side tables, chairs, or small bookshelves. For heavier pieces like a bed frame, use a vacuum with a crevice tool or a long-handled duster to reach underneath. If you have a low bed, consider a flat microfiber mop that slides easily under.
Do this every two weeks to prevent buildup.
What To Look For
Besides dust, check for lost items like charging cables, earrings, or pet toys. You might also find crumbs or spilled snacks that attract pests. Give the floor a quick wipe with a damp cloth if needed.
This is also a good time to inspect for any damage or wear on the floor or furniture legs.
15. Organize Your Dresser Top
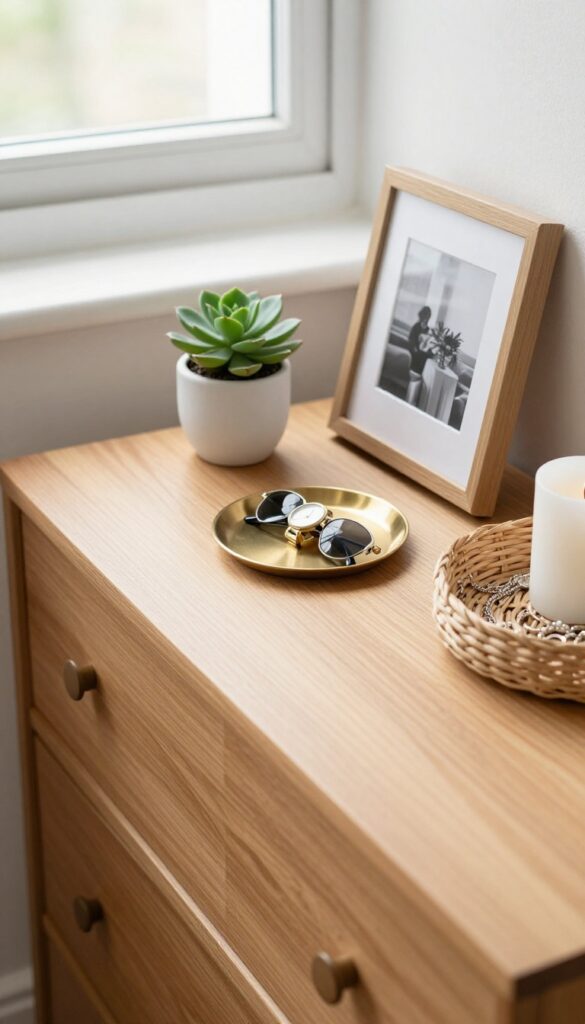
The top of your dresser is prime real estate that often turns into a dumping ground for random items. When it's cluttered, it can make the whole room feel messy. Clearing it off and keeping only what you truly need or love creates a calm focal point.
Start With A Clean Slate
Remove everything from the dresser top. Dust the surface and wipe it down with a damp cloth. This simple step instantly makes the room feel fresher.
Curate What Stays
Only keep a few decorative items like a small plant, a framed photo, or a candle. Reserve space for daily essentials like your wallet or watch. If it doesn't serve a purpose or bring you joy, find it a new home.
Use Trays And Baskets
Group small items like jewelry, keys, or sunglasses in a tray or small basket. This keeps them from spreading out and makes the surface look intentional. Choose containers that match your room's style for a cohesive look.
16. Wash Curtains or Blinds
Your window treatments work hard to block light and add privacy, but they also trap dust, pollen, and odors over time. Washing or cleaning them regularly keeps the air in your bedroom fresher and the space looking crisp. It's one of those tasks that makes a surprisingly big difference in how clean the room feels.
Check Care Labels First
Before you toss anything in the wash, look at the care tag on your curtains. Some are machine-washable on a gentle cycle with cold water, while others need dry cleaning or a simple spot clean. For blinds, the material matters—fabric blinds might be vacuumed, while aluminum or vinyl can handle a damp wipe.
Wash Curtains The Right Way
If your curtains are machine-safe, remove hooks or rings and wash them in cold water on a gentle cycle. Use a mild detergent and skip the fabric softener, which can leave residue. Hang them back up while slightly damp to avoid wrinkles, or tumble dry on low if the label allows.
Dust And Clean Blinds Thoroughly
For blinds, close them flat and run a microfiber cloth or a blind duster over each slat. Then tilt them the other way and repeat. For a deeper clean, wipe each slat with a damp cloth dipped in a mix of water and a few drops of dish soap.
Rinse with a clean damp cloth and let them dry before adjusting.
Don't Forget The Hardware
While you're at it, wipe down the curtain rod or blind track with a damp cloth. Dust and grime collect there too, and cleaning it prevents that buildup from falling onto your freshly washed curtains or blinds.
17. Deep Clean Carpets or Rugs
Carpets and area rugs are cozy underfoot, but they also trap dust, dirt, and allergens deep in the fibers. Even with regular vacuuming, a thorough deep clean every few months makes a noticeable difference. Your bedroom will smell fresher and feel cleaner, especially if you have allergies or pets.
Diy Shampooing Vs. Professional Cleaning
Renting a carpet shampooer from a local hardware store is a budget-friendly option for a deep clean. Make sure to use a cleaner designed for carpets and follow the machine's instructions carefully. If your carpets are heavily soiled or you have stubborn stains, hiring a professional service might be worth the cost.
They use industrial-grade equipment and can often dry your carpets faster.
Prepping The Room
Before you start, remove all furniture from the carpeted area or at least move it to one side. Vacuum thoroughly to pick up loose dirt and debris. Spot-treat any visible stains with a carpet stain remover and let it sit for the recommended time.
This prep work ensures the deep cleaning is more effective.
Drying And Post-cleaning Care
After shampooing, open windows and turn on fans to speed up drying. Avoid walking on the carpet until it's completely dry to prevent re-soiling and mildew. Once dry, vacuum again to lift the fibers and remove any residue.
Your bedroom will feel like new.
18. Purge Unused Items from Closet

Your closet might be the biggest clutter culprit in the bedroom. When it's packed with clothes you never wear, it adds visual noise and makes getting dressed stressful. A quick purge can free up space and calm the whole room.
Set a timer for 15 minutes and grab a trash bag or donation box. Pull out anything you haven't worn in the past year—stained shirts, outdated styles, or pieces that don't fit. Be honest: if it's not serving you, let it go.
Once you've cleared the excess, reorganize what's left by category: tops together, pants together, and so on. This simple reset makes your closet feel airy and your mornings easier.
The 15-minute Rule
Short bursts keep you from getting overwhelmed. Set a timer and work fast—no second-guessing. If you hesitate on an item, it probably means you don't love it enough to keep.
Donate Or Discard
Have a designated spot for donations. Clothes in good condition can go to a local charity. Anything worn out or stained should be tossed or repurposed as rags.
Reorganize By Category
Group similar items together: work shirts, casual tees, jeans, etc. This makes it easier to find what you need and keeps the closet tidy longer. Use matching hangers for a polished look.
19. Disinfect High-Touch Surfaces
Your hands touch dozens of surfaces every day, and your bedroom is no exception. Light switches, doorknobs, remote controls, and phone screens are hotspots for germs and bacteria. Disinfecting these high-touch areas is a quick but powerful step toward a cleaner, healthier sleep space.
Grab a disinfectant spray or wipe that's safe for electronics and surfaces. Focus on the spots you touch most often: light switch plates, door handles, your bedside lamp's switch, and any devices you keep near the bed. Don't forget your phone screen—it's a magnet for germs.
A quick wipe-down once a week keeps these surfaces clean and reduces the spread of illness. It's a small habit that makes a big difference in how fresh your room feels.
What To Focus On
Start with the obvious: light switches and doorknobs. Then move to less obvious spots like remote controls, phone chargers, and the edges of your nightstand. If you have a lamp with a pull chain or touch sensor, include that too.
These are the surfaces your fingers graze without thinking.
Choosing The Right Disinfectant
For hard, non-porous surfaces, a standard disinfectant spray or wipe works well. For electronics like your phone or tablet, use a 70% isopropyl alcohol wipe or a UV sanitizer. Avoid bleach-based products on screens—they can damage the coating.
Always check the manufacturer's guidelines first.
How Often To Do This
Aim for once a week as part of your regular cleaning routine. If someone in your household is sick, bump it up to every few days. It only takes a couple of minutes, so there's no excuse to skip it.
20. Add a Calming Scent
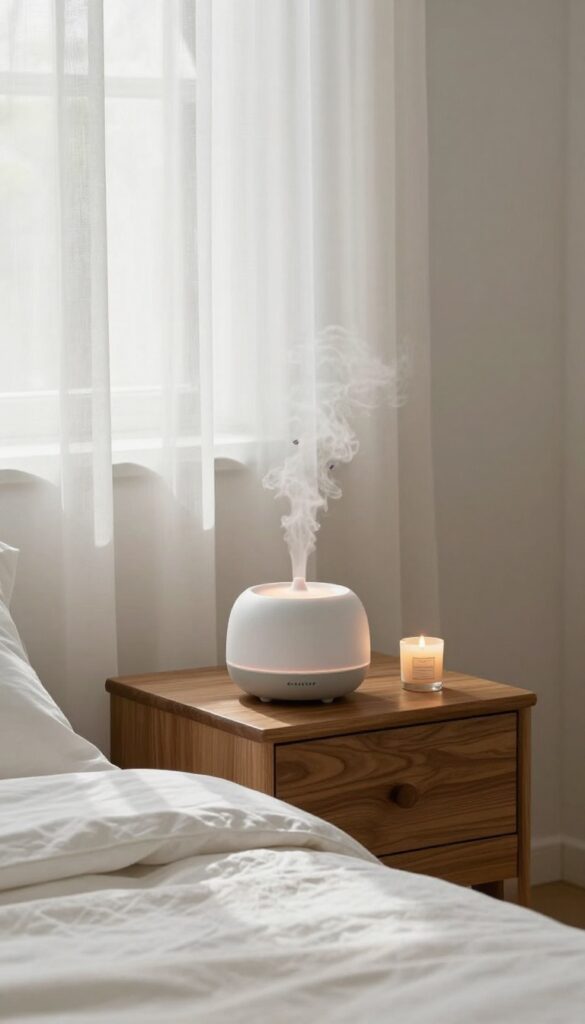
Scents have a powerful effect on your mood and relaxation. After you've cleaned your bedroom, introducing a calming fragrance can deepen the sense of peace and signal to your brain that it's time to wind down. It's a simple final touch that makes your fresh space feel even more inviting.
A pleasant scent can transform a clean room into a true sanctuary. Essential oils like lavender and chamomile are known for their relaxing properties, while a soy candle offers a gentle, natural fragrance without harsh chemicals. Using a diffuser or candle after cleaning helps you associate the scent with a tidy, calm environment, reinforcing your sleep routine.
Choose Your Scent Wisely
Not all scents are created equal for sleep. Lavender is the most studied and proven to promote relaxation and improve sleep quality. Chamomile, vanilla, and sandalwood are also excellent choices.
Avoid citrus or peppermint, which can be energizing. Pick one or two scents you genuinely find soothing.
Pick Your Method
An ultrasonic diffuser disperses essential oils as a fine mist, filling the room evenly. It's safe to leave on for hours. Soy candles provide a soft glow and a subtle scent, but never leave them unattended.
For a low-maintenance option, try a reed diffuser or a linen spray you can spritz on your pillows.
Timing Is Everything
Start your diffuser or light your candle about 30 minutes before you plan to sleep. This gives the scent time to permeate the room without being overwhelming. If using a spray, mist it lightly over your bedding or in the air just before getting into bed.
Consistency helps train your brain to associate the scent with rest.
21. Rotate and Flip Your Mattress
Your mattress takes a beating every night, absorbing your body weight and movement. Over time, that pressure creates dips and uneven wear, which can mess with your sleep quality. Rotating or flipping it regularly helps distribute the wear evenly, keeping your mattress comfortable and supportive for years longer.
Why Rotation Matters
Most mattresses develop sagging spots in the areas where your body rests most, like the hips and shoulders. By rotating the mattress 180 degrees, you shift those pressure points to different zones. This simple move can prevent permanent indentations and help your mattress stay level.
For double-sided mattresses, flipping adds another layer of evenness, doubling the usable surface.
How Often Should You Do It?
A good rule of thumb is to rotate your mattress every three to six months. Some experts recommend doing it with every season change, so it becomes a habit. If you notice a dip forming earlier, rotate sooner.
For flip-friendly mattresses, flip at the same interval. Check your manufacturer's guidelines, though—some modern mattresses are one-sided and shouldn't be flipped.
Tips For Easy Execution
Rotating a mattress is a two-person job, especially for larger sizes. Strip the bed first, then have a partner help you pivot the mattress carefully. If your mattress has a specific top side marked, follow that label.
While you're at it, vacuum the mattress surface and let it air out before putting the sheets back on. This is also a great time to check for stains or wear and address them early.
22. Clean Air Vents and Filters
When was the last time you looked up at your bedroom's air vents? If you can't remember, they're probably coated with dust. Those vents and the filters behind them play a huge role in your indoor air quality.
Dirty vents circulate dust, pollen, and allergens every time your HVAC kicks on, which can irritate your sinuses and make it harder to breathe deeply while you sleep. Cleaning them is a quick win for both your air and your rest.
Start by turning off your HVAC system. Remove the vent covers—most just pop off or have a couple of screws. Take them outside and vacuum both sides with a brush attachment.
Then use the hose to reach into the duct as far as you can. While the covers are off, check your air filter. If it's disposable and looks dirty, replace it.
If it's washable, rinse it with water and let it dry completely before reinstalling. This whole task takes about 15 minutes but can dramatically cut down airborne particles in your room.
Why Clean Air Matters For Sleep
Your body needs clean oxygen to fully relax at night. When dust and allergens circulate, they can trigger coughing, sneezing, or congestion that wakes you up. Studies show that poor indoor air quality is linked to lower sleep quality and more nighttime awakenings.
By clearing your vents and filters, you're removing a major source of airborne irritants.
How Often To Do This
Aim to clean vent covers every three months. Replace or wash your air filter every one to three months depending on the type and how often you run your system. If you have pets or live in a dusty area, bump that up to monthly.
Set a recurring reminder on your phone so you don't forget.
Don't Forget The Return Vents
Return vents pull air back into the system, and they get just as dirty as supply vents. They're often larger and located on walls or ceilings. Vacuum them the same way.
Clean return vents help your system run more efficiently and keep your bedroom air fresher longer.
23. Create a Weekly Maintenance Routine
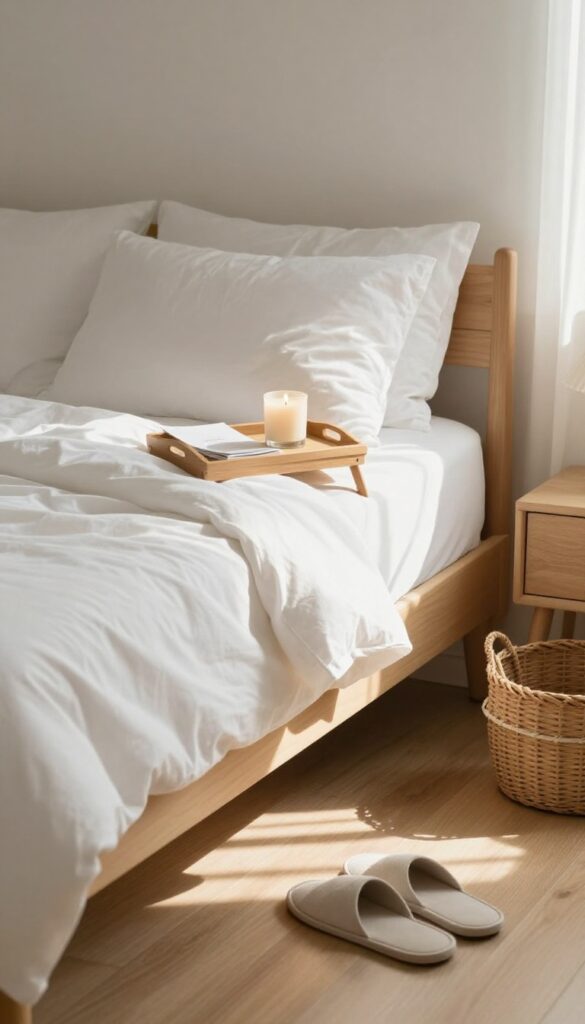
A clean bedroom isn't a one-time event—it's a habit. The trick is to make maintenance feel effortless, not like another chore on your list. By dedicating just 10 minutes a day to one small task, you can keep your sleep space consistently tidy without burning out.
Consistency beats intensity when it comes to keeping your bedroom calm. A weekly maintenance routine turns cleaning into a gentle rhythm rather than a dreaded marathon. Here’s how to build one that sticks.
Pick Your Daily Mini-task
Choose five or six small tasks from this list—like making the bed, wiping down surfaces, or fluffing pillows. Assign each to a weekday so you never feel overwhelmed. Monday might be dusting, Tuesday could be vacuuming under the bed.
The key is to keep it short and specific.
Write It Down And Display It
A simple checklist posted on your mirror or inside a closet door serves as a gentle reminder. You don’t need a fancy app—a sticky note works fine. Seeing your progress each day gives a small sense of accomplishment and keeps you on track.
Make It A Wind-down Ritual
Tie your daily cleaning task to something you already do, like brushing your teeth or brewing your evening tea. That connection turns the chore into a calming pre-sleep ritual. Before you know it, your bedroom stays fresh with minimal effort.
FAQ
How often should I deep clean my bedroom?
Aim for a deep clean every 1-3 months. Weekly maintenance like making the bed and dusting surfaces helps keep it fresh between deep cleans.
What is the best order to clean a bedroom?
Start from top to bottom: dust ceiling fans and light fixtures, then wipe surfaces, clean windows, and finish with vacuuming or mopping the floor.
How can I keep my bedroom dust-free longer?
Use microfiber cloths that trap dust, keep windows closed on windy days, and wash bedding weekly. Also, consider an air purifier with a HEPA filter.
Should I clean my mattress regularly?
Yes, vacuum your mattress every few months and spot clean stains. Use a mattress protector to reduce allergens and extend its life.
What natural cleaners are safe for bedroom surfaces?
A mixture of water and white vinegar works for most surfaces. For wood, use a small amount of olive oil and vinegar. Avoid harsh chemicals near your bed.
Conclusion
A clean bedroom doesn't happen by accident. It takes a little planning and consistent effort, but the payoff is worth it. You'll sleep better and feel more relaxed in a space that's truly yours.
Pick a few ideas from this list and start small. Even one or two changes can make a noticeable difference. Over time, these habits will become second nature, and your calm sleep space will always be ready for you.


