You've spent way too long scrubbing soap scum off the shower door, only to see it streak again the next day. It's frustrating, but the problem isn't you—it's the tools and methods you're using. A few smart swaps can cut your cleaning time in half.
Most bathroom cleaners rely on harsh chemicals that require rinsing and leave residue behind. But you don't need a cabinet full of sprays to get a deep clean.
Everyday items like vinegar, dish soap, and even a dryer sheet can tackle tough grime without the elbow grease. These 17 hacks focus on working smarter, not harder.
1. Use a Dish Soap and Vinegar Spray for Glass Showers
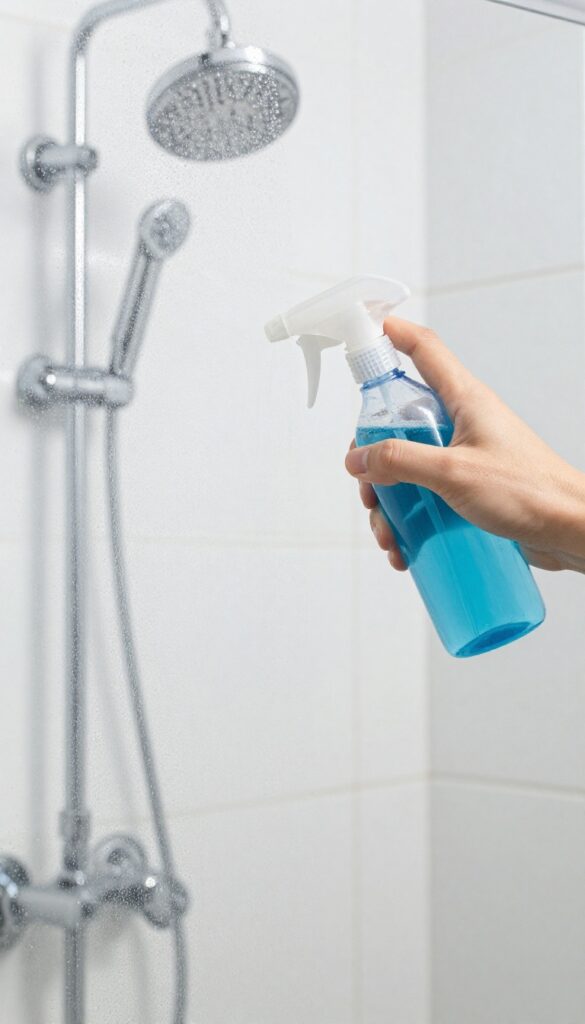
Glass shower doors look great when they're clean, but keeping them that way can feel like a losing battle. That's where this simple DIY spray comes in. It's cheap, effective, and uses ingredients you probably already have in your kitchen.
Mix equal parts white vinegar and blue Dawn dish soap in a spray bottle. Shake gently to combine. Spray the solution generously onto your glass shower doors, making sure to cover all the soap scum and hard water spots.
Let it sit for about 10 minutes—this gives the vinegar time to break down mineral deposits while the soap tackles grease. Then, rinse thoroughly with warm water. For best results, use a squeegee to remove excess water and prevent new spots from forming.
Your doors will come out streak-free and shiny with minimal scrubbing.
Why This Combo Works So Well
Vinegar is acidic, which makes it great for dissolving hard water stains and soap scum. Dish soap is a degreaser that cuts through the oily residue from body washes and shampoos. Together, they tackle both sides of the grime equation.
Plus, blue Dawn is known for being gentle on surfaces but tough on dirt.
Pro Tips For Best Results
Use distilled white vinegar—not apple cider or cleaning vinegar, which can leave residue. Warm the vinegar slightly in the microwave for better cleaning power. If your shower doors have heavy buildup, let the spray sit for 15–20 minutes.
For daily maintenance, spritz and rinse after each shower to prevent buildup from forming.
What To Avoid
Don't use this spray on natural stone like marble or granite, as the acid can etch the surface. Also avoid getting it on metal fixtures—vinegar can corrode certain finishes over time. Rinse everything thoroughly after cleaning to protect your hardware.
2. Dryer Sheets for Soap Scum on Chrome Fixtures
Chrome faucets and showerheads look amazing when they're spotless, but they seem to attract soap scum like a magnet. You can scrub them with a dedicated cleaner, or you can grab a used dryer sheet from the laundry room. The anti-static agents in dryer sheets break down soap scum and leave behind a protective layer that resists future buildup.
Using dryer sheets on chrome is almost too easy. Just take a sheet that's already been through the dryer—no need for a fresh one—and rub it over the fixture. The texture is gentle enough to avoid scratches, and the chemical coating lifts grime without extra effort.
Rinse with water and dry with a microfiber cloth for a streak-free shine.
Why Dryer Sheets Work
Dryer sheets contain fabric softeners and surfactants that reduce static cling. Those same ingredients break down the waxy residue of soap scum and hard water minerals. The sheet's fibers also provide a mild abrasive action that polishes the chrome surface.
It's a chemistry trick that saves you from buying a separate chrome cleaner.
Best Practices For Chrome
Stick to used dryer sheets—new ones are too coated and can leave a film. Focus on faucets, showerheads, and towel bars. Avoid using them on brushed nickel or matte finishes, as the chemicals may dull the surface.
For stubborn spots, let the sheet sit on the fixture for a minute before wiping.
Where Not To Use This Hack
Skip dryer sheets on painted surfaces, acrylic, or natural stone. The chemicals can strip paint or etch porous materials. Also avoid using them on electronic touchscreen faucets, as the residue might interfere with sensors.
Stick to metal fixtures only.
3. Pumice Stone for Toilet Bowl Rings
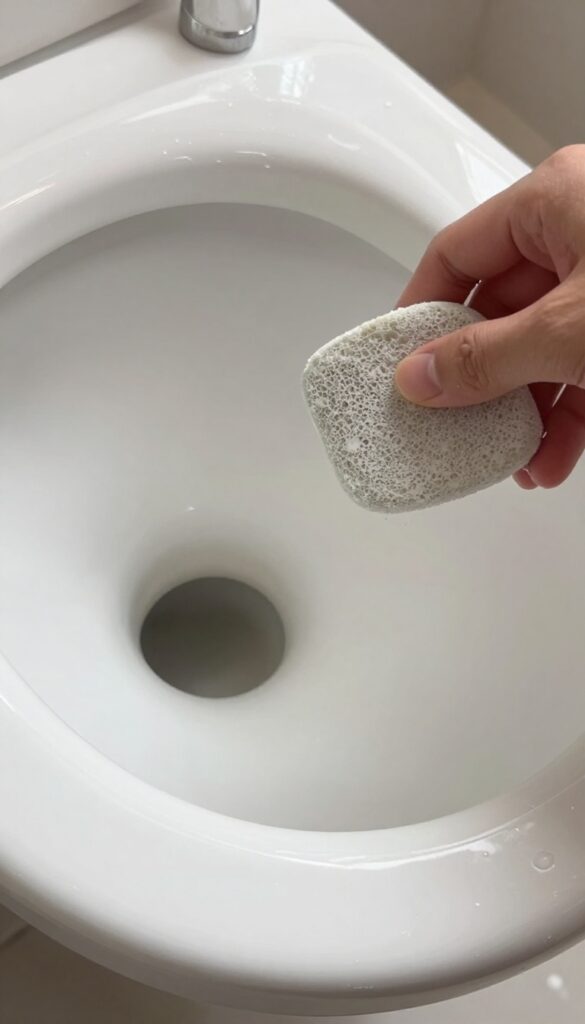
Mineral deposits and rust rings in the toilet bowl can be stubborn, but a pumice stone makes quick work of them. This natural volcanic rock is abrasive enough to scrub away hard water stains without scratching porcelain when used correctly. It's a simple, chemical-free solution that leaves your toilet looking like new.
To use a pumice stone, first wet it thoroughly—never use it dry, as that can cause scratches. Gently rub the stained areas in the toilet bowl with light pressure. The stone will wear down slightly as it works, which is normal.
Rinse the bowl and check your progress; repeat if needed. This method is especially effective for rings that have built up over time.
Why It Works
Pumice is porous and slightly abrasive, making it ideal for removing mineral deposits that cling to porcelain. Unlike harsh chemicals, it physically lifts stains without etching the surface. The key is keeping the stone wet to create a fine grit that polishes as it cleans.
Pro Tips For Best Results
Always use a dedicated pumice stone for toilet cleaning to avoid cross-contamination. Store it in a dry place after rinsing. For tough rings, let a little toilet bowl cleaner sit for a few minutes before scrubbing with the stone—this softens the deposits.
Never use pumice on acrylic or fiberglass fixtures.
Safety And Maintenance
Pumice stones are safe for porcelain but can scratch if used dry. Keep the stone and the bowl wet throughout the process. After cleaning, flush to remove debris, and rinse the stone thoroughly.
Replace the stone when it becomes too small to grip comfortably.
4. Baking Soda and Hydrogen Peroxide for Grout
Grout lines are notorious for trapping dirt and mildew, turning your clean bathroom into a patchwork of gray and black. Commercial grout cleaners can be pricey and harsh, but you likely already have two powerful ingredients in your pantry. Baking soda and hydrogen peroxide work together to lift stains and kill bacteria without toxic fumes.
Grout is porous, which is why it absorbs soap scum and moisture so easily. The abrasive texture of baking soda scrubs away surface grime, while hydrogen peroxide penetrates deeper to whiten and disinfect. This combination is gentle enough for regular use but strong enough to revive dingy grout.
Plus, it's cheap and safe for most tile types.
Make The Perfect Paste
Mix equal parts baking soda and hydrogen peroxide in a small bowl until it forms a thick, spreadable paste. You want it thick enough to cling to vertical grout lines without dripping. If it's too runny, add more baking soda; too thick, add a drop more peroxide.
Apply And Let It Sit
Use an old toothbrush or a small spatula to work the paste into the grout lines. Cover the area completely, then let it sit for 15 minutes. The hydrogen peroxide needs time to bubble and lift stains.
For stubborn spots, let it sit up to 30 minutes, but don't let it dry completely.
Scrub And Rinse
After the wait, scrub the grout with the toothbrush using small circular motions. You'll see the paste turn gray as it lifts dirt. Rinse with warm water and wipe away residue with a damp cloth.
Repeat on heavy stains if needed. Your grout will look noticeably brighter after one go.
5. Shaving Cream for Foggy Mirrors
You step out of a hot shower, ready to start your day, and the mirror is completely fogged up. Waiting for it to clear or wiping it with a towel only makes it worse. There's a better way: shaving cream.
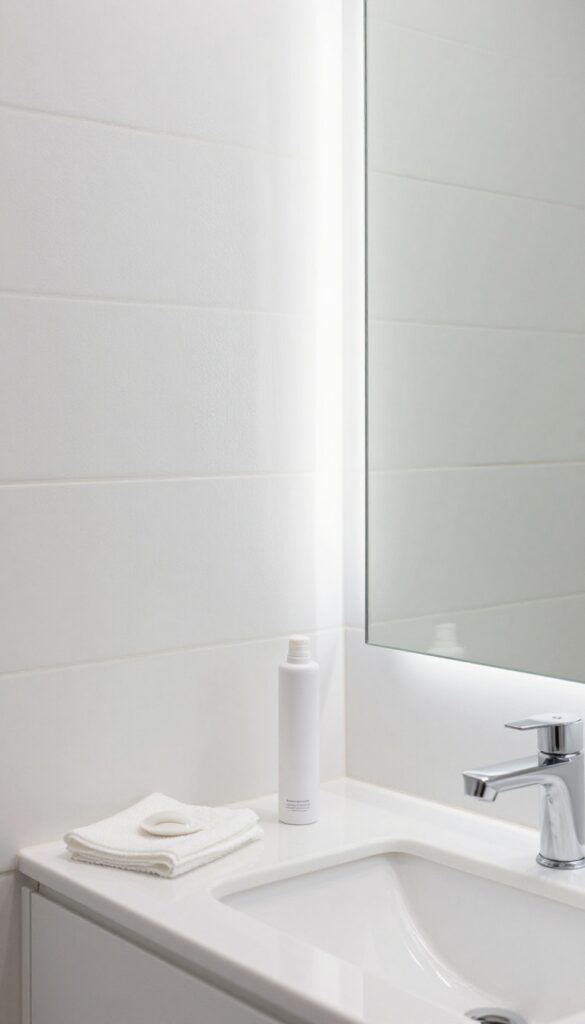
A dollop of shaving cream on a microfiber cloth, wiped across the mirror, then buffed dry leaves a thin protective film. This film prevents fog from forming for days, so your mirror stays clear through multiple showers. It's cheap, fast, and uses something you probably already have.
Why Shaving Cream Works
Shaving cream contains surfactants that create a barrier on the glass. When steam hits the mirror, the water molecules can't condense into fog because they're repelled by the film. It's the same principle behind anti-fog sprays but much cheaper.
How To Apply It Right
Squirt a small amount onto a clean microfiber cloth. Rub it over the entire mirror surface, making sure to cover every inch. Let it sit for about a minute, then buff it off with a dry part of the cloth until the mirror is clear.
No streaks, no residue.
How Long Does It Last?
One application typically keeps fog away for three to five days, depending on humidity and shower temperature. When you start seeing fog again, just reapply. It's a quick routine that saves you from wiping the mirror every morning.
6. Lemon Juice for Hard Water Stains on Faucets
Hard water stains on chrome faucets can make your bathroom look dingy no matter how much you wipe. The white, crusty buildup is actually calcium and magnesium deposits that resist regular soap. But you don't need a harsh descaler—a simple lemon can do the job.
Cut a lemon in half and rub the cut side directly onto the stained faucet. Squeeze gently as you go to release the juice. Let the lemon juice sit for about 5 minutes—the citric acid will start breaking down the mineral deposits.
Then rinse with water and buff dry with a soft cloth. For stubborn spots, dip the lemon half in salt for a gentle abrasive boost.
Why Lemon Works
Citric acid is a natural chelating agent, meaning it binds to minerals like calcium and magnesium, making them soluble in water. This dissolves the hard water scale without scrubbing or harsh chemicals. Plus, lemon leaves a fresh, clean scent.
Best Faucets For This Method
This hack works wonders on chrome, stainless steel, and brass faucets. Avoid using lemon on antique or lacquered finishes, as the acid can damage the coating. Always test a small hidden area first.
Pro Tip For Stubborn Stains
If the stain is thick, wrap the lemon half in plastic wrap and secure it over the faucet with a rubber band. Leave it for 15–20 minutes before rinsing. This gives the acid more time to penetrate without dripping.
7. Toilet Plunger for Clogged Drains (No Chemicals)
When a sink or shower drain slows down, the first instinct is often to grab a bottle of chemical drain cleaner. But those harsh liquids can damage pipes over time and release toxic fumes. A better tool is probably already sitting in your bathroom: the toilet plunger.
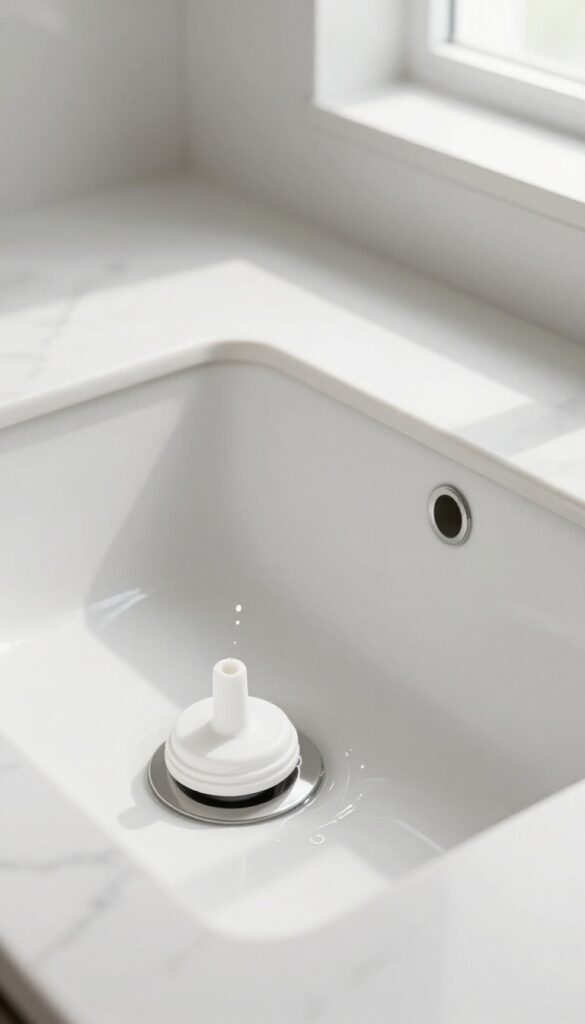
Using a plunger on a sink or shower drain is simple and effective. The key is creating a good seal. For a sink, remove the stopper first and cover the overflow opening with a wet cloth.
For a shower, make sure the water level covers the plunger cup. Then pump vigorously up and down for about 20 seconds. The suction and pressure dislodge hair, soap scum, and gunk without any chemicals.
Repeat if needed, and flush with hot water afterward. This method is faster, safer, and often more effective than store-bought drain cleaners.
Why It Works So Well
A plunger uses mechanical force—not chemical reaction—to clear clogs. The rapid pressure changes break apart blockages and push them through the pipe. It's especially good for hair clogs, which are common in bathroom drains.
Plus, you avoid the risk of chemical burns or pipe corrosion.
Tips For Best Results
Use a dedicated plunger for drains (not the one from your toilet) to avoid cross-contamination. If the water doesn't cover the plunger cup, add a little water. For stubborn clogs, try a few cycles of plunging followed by a flush of boiling water (if pipes are metal) or hot tap water.
When To Call A Pro
If plunging doesn't work after a few tries, the clog might be deeper in the pipe. In that case, a plumber's snake or professional help is needed. But for most everyday clogs, the plunger is your best first move.
8. Microfiber Cloths for Streak-Free Surfaces
Paper towels leave lint and streaks, and sponges just push grime around. Microfiber cloths are a game-changer for mirrors, glass, and chrome. They trap dust and absorb moisture without leaving any residue behind.
Switching to microfiber is one of the easiest upgrades you can make. A damp cloth cleans away soap scum and hard water spots, while a dry one buffs everything to a streak-free shine. No need for glass cleaner—just water works.
Keep a stack of microfiber cloths dedicated to bathroom cleaning, and wash them separately to avoid lint transfer.
Why Microfiber Beats Paper Towels
Paper towels are designed for absorbency, not cleaning. They leave behind tiny fibers that show up as lint on mirrors. Microfiber has split fibers that grab dirt and hold it, so you're not just smearing it around.
The Wet-dry Method For Mirrors
Dampen one microfiber cloth with water (or a drop of dish soap) and wipe the mirror. Immediately follow with a dry microfiber cloth in a circular motion. The result is crystal clear and streak-free.
Caring For Your Microfiber Cloths
Wash microfiber separately from cotton items to prevent lint buildup. Use a gentle detergent and skip fabric softener—it clogs the fibers and reduces effectiveness. Air dry or tumble on low.
9. Denture Tablets for Toilet Bowl Stains
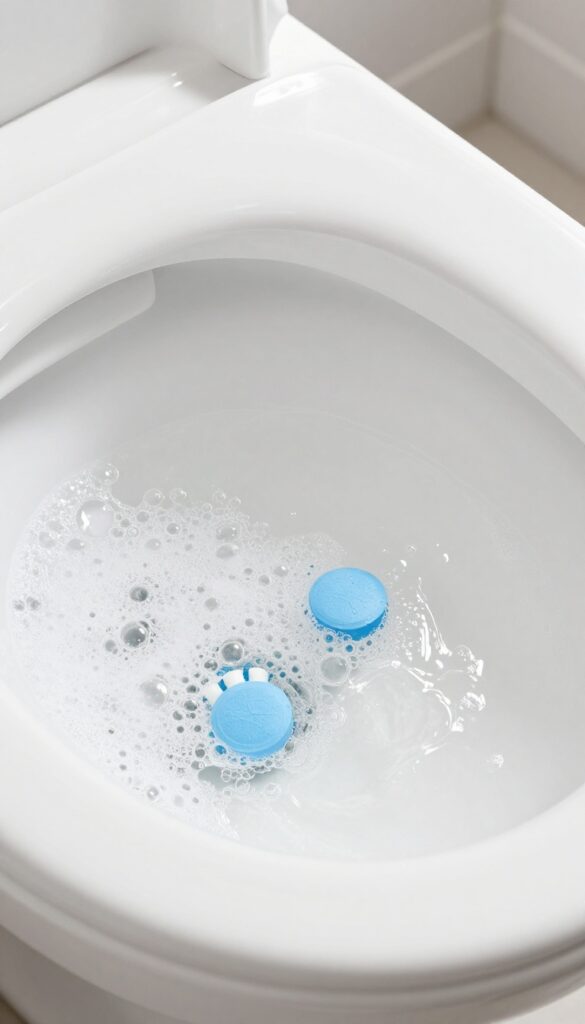
Toilet bowl stains are stubborn, especially those ring-like deposits from hard water and minerals. You could reach for bleach, but that strong smell lingers and can irritate your lungs. Instead, grab a pack of denture cleaning tablets from the pharmacy aisle—they're a game-changer for toilet cleaning without the harsh chemicals.
Denture tablets are designed to dissolve stains and kill bacteria on dentures, and they work just as well on porcelain. The effervescent action lifts grime from the bowl, while the cleaning agents break down mineral deposits and discoloration. Plus, they leave behind a fresh, clean scent—not a bleach bomb.
How To Use Denture Tablets
Drop two tablets into the toilet bowl, making sure they land in the water. Let them fizz and soak for about 20 minutes. The bubbles will work into crevices and under the rim.
After the soak, give the bowl a quick scrub with a toilet brush, then flush. You'll see stains disappear without any harsh scrubbing.
Why It Works So Well
Denture tablets contain sodium bicarbonate, citric acid, and other mild bleaching agents. The fizzing action creates a scrubbing effect without elbow grease, and the ingredients are gentle on porcelain but tough on organic stains. They also deodorize, leaving the toilet smelling clean.
When To Use This Method
This hack is perfect for regular maintenance or for tackling light to moderate stains. For heavy, set-in stains, you might need to repeat the process or let the tablets soak longer. It's also a great option if you have a septic system, since it avoids harsh chemicals.
10. Vinegar and Baking Soda for Showerhead Clogs
A weak or uneven spray from your showerhead usually means mineral deposits have built up inside. You could scrub each tiny nozzle with a toothpick, but there's a much easier way. A simple overnight soak with vinegar does the hard work for you.
Fill a plastic bag with white vinegar, attach it to the showerhead with a rubber band, and soak overnight. In the morning, remove the bag and run hot water for a minute to flush out loosened deposits.
Why Vinegar Works Best
White vinegar is mildly acidic, which dissolves calcium and lime scale without damaging metal or plastic. It's cheap, non-toxic, and far more effective than scrubbing each nozzle by hand.
Step-by-step Soak Method
Fill a quart-sized zip-top bag halfway with white vinegar. Wrap the bag around the showerhead so the nozzles are submerged, then secure it with a rubber band or twist tie. Let it sit for at least 6 hours or overnight.
Remove the bag and run the shower on hot for one minute to flush out debris.
Tackling Stubborn Clogs
If the spray is still uneven after soaking, use a toothbrush or old toothbrush to gently scrub the nozzles while the water is running. For extreme buildup, add a tablespoon of baking soda to the vinegar before soaking—the fizzing action helps loosen deposits.
Preventing Future Buildup
To keep your showerhead clog-free, wipe it dry after each use to reduce mineral deposits. Once a month, do a quick vinegar soak—even if the spray seems fine—to prevent clogs from forming in the first place.
11. Rubbing Alcohol for Soap Scum on Tiles
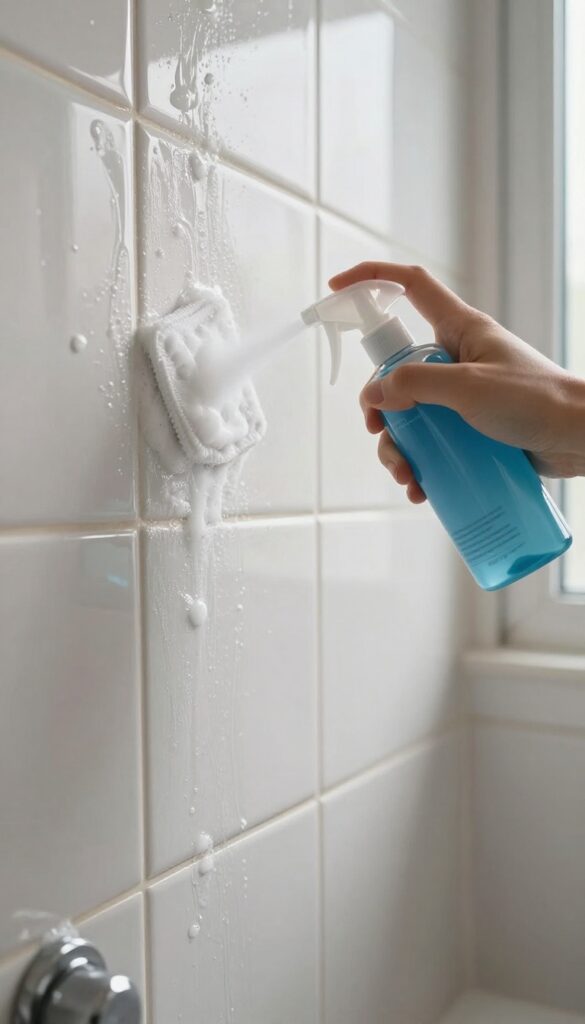
Soap scum builds up fast on ceramic and porcelain tiles, especially around showers and tubs. Commercial sprays often leave a film or require heavy scrubbing. Rubbing alcohol cuts through that grime effortlessly and dries streak-free.
Rubbing alcohol is a simple, effective solution for soap scum. Its solvent properties break down the fatty residue in soap, while its quick evaporation prevents water spots. Just spray it on, wait a minute, and wipe away.
No rinsing needed.
Why It Works So Well
Soap scum is a combination of soap, minerals, and body oils. Rubbing alcohol dissolves the oily components and lifts the minerals, making it easy to wipe off. Unlike vinegar, it won't etch tile glazes or grout.
How To Apply For Best Results
Pour 70% or 90% isopropyl alcohol into a spray bottle. Mist the tiles generously, focusing on areas with visible scum. Let it sit for about 60 seconds.
Then wipe with a microfiber cloth or sponge. For stubborn buildup, use a soft-bristle brush after the dwell time.
Safety And Precautions
Rubbing alcohol is flammable, so keep it away from open flames and heat sources. Ventilate the bathroom while using it. Avoid contact with painted surfaces or natural stone tiles, as it may damage the finish.
Test on an inconspicuous area first.
12. Baby Oil for Stainless Steel Fixtures
Stainless steel faucets and handles look great when they're clean, but water spots and fingerprints show up almost instantly. You can polish them to a mirror finish without buying a specialty cleaner—just grab the baby oil from the nursery.
The One-step Shine
Put a few drops of baby oil on a soft, lint-free cloth. Wipe down the faucet or handle in the direction of the grain. The oil fills in microscopic scratches and leaves a smooth surface that water beads up on instead of spotting.
Why It Works Better Than Glass Cleaner
Glass cleaner evaporates too fast and can leave streaks. Baby oil is a mineral oil that stays put, creating a thin protective layer. That layer repels water and fingerprints, so your fixtures stay clean longer.
How Often To Do It
Once a week is plenty for most bathrooms. If you have hard water, you might want to do it every few days at first, then taper off as the protective layer builds up. Just a tiny amount goes a long way—too much will feel greasy.
13. Hydrogen Peroxide for Mildew on Caulk
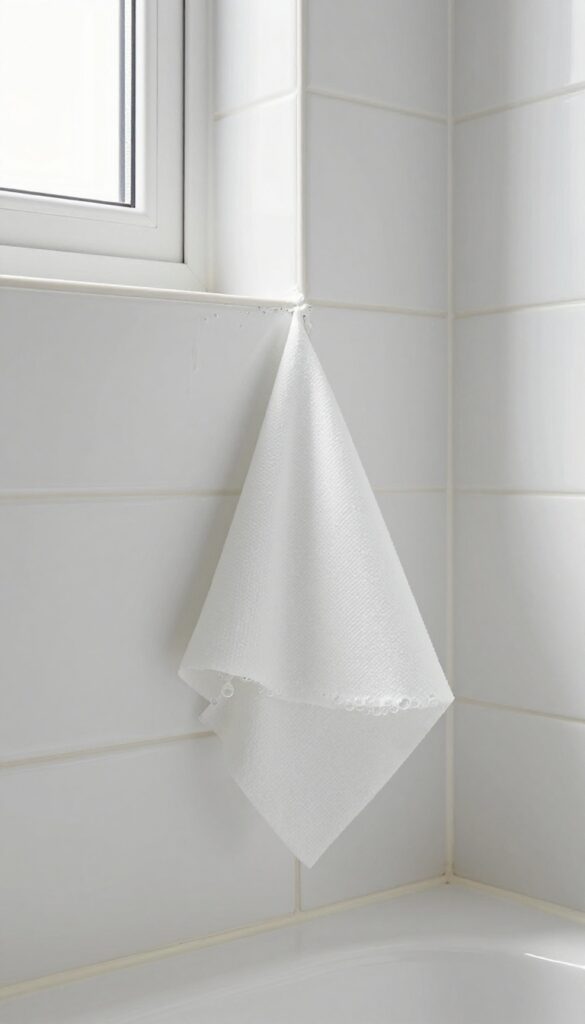
Mildew on caulk is one of those bathroom problems that seems impossible to fix without scraping everything out and starting over. But before you grab a utility knife, try hydrogen peroxide. It's a gentle bleach alternative that kills mold spores and brightens the caulk without the harsh fumes.
How It Works
Hydrogen peroxide breaks down into water and oxygen, releasing oxygen bubbles that lift and kill mold. Unlike bleach, it doesn't produce toxic fumes, making it safer for small bathrooms. The 3% solution from the drugstore is strong enough for this job.
Step-by-step Application
Soak a paper towel in hydrogen peroxide and press it against the mildewed caulk. Make sure it's fully saturated and clings to the surface. Leave it for 30 minutes—don't let it dry out.
After that, remove the towel and wipe the area with a damp cloth. The mildew should be gone, and the caulk will look noticeably whiter.
When To Repeat Or Replace
For heavy mildew, you may need to repeat the process a few times. If the caulk remains stained or starts peeling, it's time to remove and recaulk. Hydrogen peroxide is a great maintenance tool, but it can't fix caulk that's already failing.
14. Vacuum First, Then Mop for Less Grime
Mopping a bathroom floor without vacuuming first is like trying to sweep a dusty garage with a wet rag—you're just pushing dirt around. Hair, lint, and dust settle on bathroom tiles and hide in corners. When you mop over them, they get smeared into a thin, grimy film that dries into streaks.
A quick vacuum pass changes everything.
Most people grab a mop and bucket and start scrubbing, but that actually makes the job harder. Dry debris soaks up moisture and turns into a paste that clings to the floor. By vacuuming first, you lift all that loose dirt away, so your mop can focus on dissolving soap scum and sticky residues instead of chasing dust bunnies.
A simple dry vacuum or a broom works fine—just get the surface clean before adding water.
Use A Crevice Tool For Edges
Bathroom floors collect hair and dust along baseboards, behind the toilet, and under the vanity. A standard vacuum head might miss these spots. Switch to a crevice tool to suck up debris from tight corners and along the toilet base.
This prevents those annoying little clumps from floating into your freshly mopped area.
Sweep Or Vacuum In One Direction
If you're using a broom, sweep debris toward the door rather than back and forth. This keeps dirt from scattering into corners you already cleaned. For vacuums, move in overlapping straight lines from the far end of the room toward the exit.
It's faster and ensures you don't miss any spots.
Mop With A Microfiber Flat Mop
After vacuuming, a microfiber flat mop is your best friend. It picks up fine dust and residues without leaving excess water on the floor. Dip it in a bucket of warm water with a splash of vinegar or a few drops of dish soap, wring it well, and mop in a figure‑eight pattern.
The floor dries quickly with no streaks.
15. Dishwasher Pod for a Sparkling Toilet
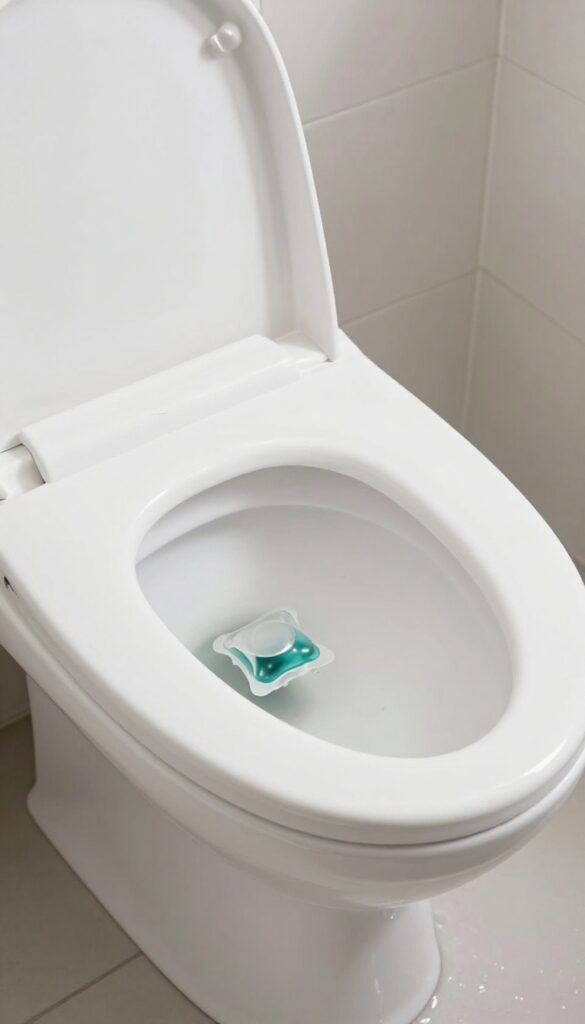
Forget the harsh bleach tablets that fizz and fade fast. A single dishwasher pod can do the heavy lifting in your toilet bowl without the chemical smell. The enzymes and surfactants are designed to break down baked-on food, so toilet grime doesn't stand a chance.
Drop one dishwasher pod into the toilet bowl, let it dissolve completely for about 15 minutes, then scrub with a toilet brush. The enzymes break down stains and leave the bowl shiny without bleach fumes. Flush to rinse.
It's that simple.
Why It Works So Well
Dishwasher pods contain powerful degreasers and enzymes that target organic matter. Toilet stains are mostly mineral deposits and bacteria, but the surfactants lift them away easily. Plus, the pod dissolves slowly, giving it time to work on hard-to-reach areas under the rim.
A Few Things To Keep In Mind
Use only one pod per cleaning—more won't speed things up. Avoid this method if you have a septic system, as the chemicals can disrupt bacterial balance. Also, never combine with bleach or other cleaners, as the mix could create toxic fumes.
When To Use This Trick
This hack is perfect for weekly maintenance or when you need a quick refresh before guests arrive. It's not a substitute for deep scrubbing on heavily stained bowls, but it cuts down the effort significantly. For best results, let the pod sit overnight if the bowl is really dirty.
16. Squeegee After Every Shower for Less Build-Up
Water spots and soap scum love to cling to glass shower doors. The easiest way to prevent them is to stop water from drying on the surface in the first place. A quick squeegee after every shower takes just seconds but saves you from scrubbing later.
Keeping a squeegee in your shower is a game-changer. After you finish, run it over the glass doors and tiles to remove water droplets. This simple habit prevents hard water spots and soap scum from forming, so you can go weeks between deep cleans.
No more battling stubborn buildup.
Choose The Right Squeegee
Not all squeegees are created equal. Look for one with a rubber blade that's soft enough to glide without scratching. A squeegee with a hook or suction cup makes it easy to keep within reach.
Replace the blade when it gets nicked or starts leaving streaks.
Make It Part Of Your Routine
The trick is consistency. Hang the squeegee in the shower so you see it every time. After you turn off the water, take five seconds to squeegee the glass and tiles.
It becomes automatic after a few days, and your bathroom will thank you.
Bonus: Squeegee Your Mirror Too
If your bathroom mirror fogs up and leaves water spots, give it a quick squeegee as well. This keeps it streak-free and reduces the need for glass cleaner. Just make sure the blade is clean to avoid transferring grime.
17. Essential Oils for a Fresh Scent Without Chemicals
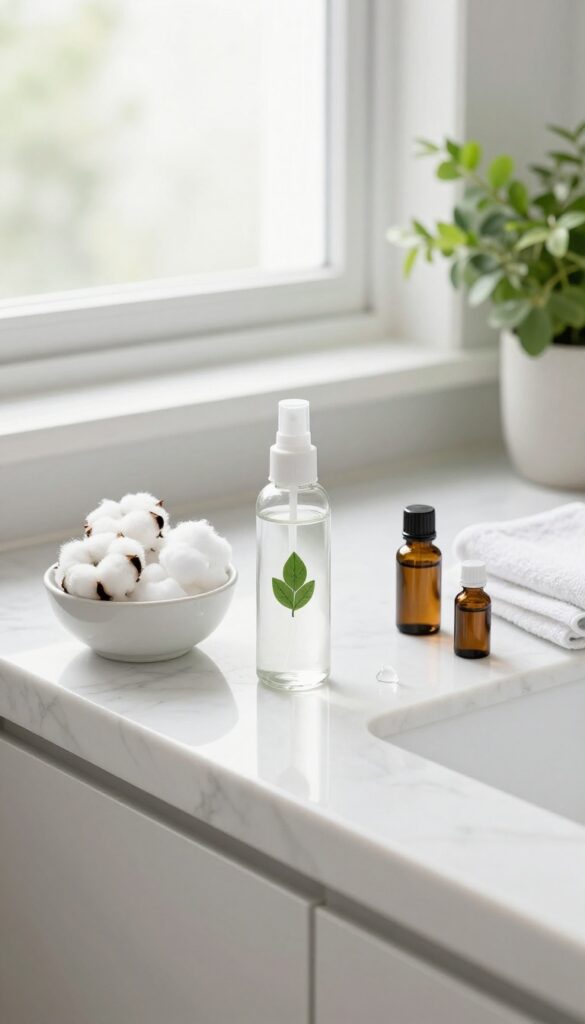
Commercial air fresheners and scented cleaners often mask odors with synthetic fragrances that can irritate sensitive noses. Essential oils offer a natural alternative that actually smells like the real thing. Tea tree and lavender oils are especially handy in the bathroom because they double as mild antimicrobials.
Using essential oils in your bathroom routine is simple and effective. You can add a few drops to your DIY cleaning spray, or place a cotton ball infused with oil in the trash can to keep it smelling fresh. The scent lasts for days, and you avoid the chemical overload of store-bought products.
Diy Scented Cleaning Spray
Mix 1 cup of water, 1 cup of white vinegar, and 10–15 drops of tea tree or lavender oil in a spray bottle. Shake well before each use. This spray cleans mirrors, counters, and sinks while leaving a pleasant, natural aroma.
Tea tree oil also helps fight mold and mildew.
Trash Can Freshener
Drop 3–4 drops of lavender or lemon essential oil onto a cotton ball and place it at the bottom of your bathroom trash can, under the bag. It absorbs odors and releases a subtle scent every time you open the lid. Replace the cotton ball every week.
Toilet Bowl Boost
Add 5 drops of tea tree oil directly into the toilet bowl before scrubbing. Let it sit for 10 minutes, then scrub and flush. The oil helps break down stains and leaves a clean, herbaceous scent without harsh bleach fumes.
FAQ
Can I use vinegar on natural stone surfaces like marble or granite?
No, vinegar is acidic and can etch natural stone. Use a pH-neutral stone cleaner instead.
How often should I clean my showerhead to prevent clogs?
Every three months is ideal. If you have hard water, consider monthly vinegar soaks.
Is it safe to mix hydrogen peroxide and vinegar?
No, mixing them creates peracetic acid, which can be toxic and irritating. Use them separately.
What's the best way to remove mold from silicone caulk?
Hydrogen peroxide works well for surface mold. If the caulk is deeply stained, it's best to remove and replace it.
Can I use a pumice stone on colored toilet bowls?
Yes, but be gentle. Test on an inconspicuous area first, and keep the stone wet to avoid scratching.
Conclusion
These 17 hacks prove that a sparkling bathroom doesn't require harsh chemicals or hours of scrubbing. By using everyday items and smart techniques, you can tackle tough stains, prevent future build-up, and keep your bathroom looking its best with less effort.
Start with one or two hacks that address your biggest pain points, then gradually add more to your routine. Your bathroom will thank you—and so will your free time.


