
Living in a small apartment means every square inch counts—and so does your cleaning time. You want a fresh, tidy space without spending your entire weekend scrubbing.
These 20 apartment cleaning ideas are tailored for tight quarters and busy schedules. They focus on smart shortcuts, budget-friendly hacks, and methods that actually work in compact layouts.
From steam-cleaning your microwave in minutes to using a lint roller on lampshades, each tip is practical and easy to implement. No fluff, just real solutions for a cleaner home.
1. Declutter Before You Clean
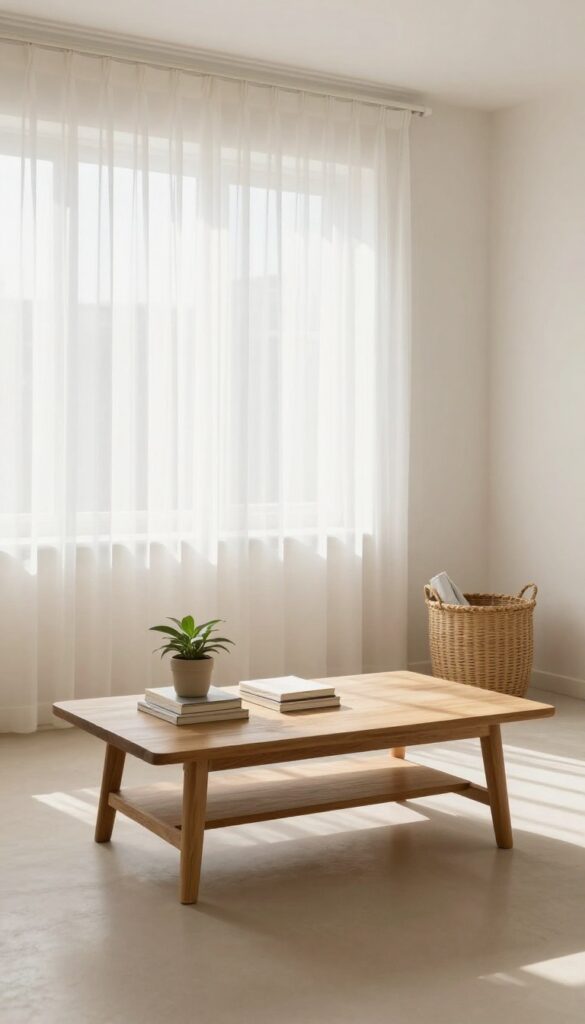
You can scrub all you want, but if surfaces are buried under piles of mail, clothes, and random odds and ends, the space will never feel clean. Decluttering first removes the obstacles so your actual cleaning efforts can shine. It also cuts down on dust-collecting surfaces and makes wiping and vacuuming way faster.
Spend 10 minutes doing a quick sweep of each room before you pick up a spray bottle. Grab a laundry basket or a box and toss in anything that doesn't belong—things to put away, donate, or trash. Once surfaces are clear, you can actually see what needs cleaning and reach every corner without moving stuff around.
The 10-minute Tidy
Set a timer for 10 minutes per room and race against the clock. Grab a basket and quickly collect items that are out of place—shoes, books, remote controls, empty water bottles. Don't overthink it; just get the obvious clutter off floors, tables, and counters.
You'll be surprised how much cleaner the space looks and feels after this short burst.
One-touch Rule For Small Items
When you pick something up, decide immediately where it goes. Don't set it down to decide later. This one-touch rule prevents items from piling up again as you clean.
For example, that stray pen goes back to the drawer, not on the shelf. It keeps your momentum going and stops the clutter from creeping back in.
Donate Or Trash As You Go
Keep a small bag or bin handy for items you no longer need. As you declutter, ask yourself: Have I used this in the last year? Does it serve a purpose?
If the answer is no, toss it or set it aside for donation. This habit prevents the same clutter from reappearing next time you clean.
2. Use a Lint Roller for Lampshades and Fabric
Dust and pet hair love to cling to fabric lampshades, curtains, and upholstery. Vacuuming them can be awkward and sometimes just pushes the debris deeper. A lint roller is a simple, effective tool that grabs everything in one pass without creating a mess.
Keep a lint roller in each room so you can quickly refresh fabric surfaces as part of your daily tidy-up. It works especially well on lampshades where dust is highly visible. Roll it over the shade in overlapping strokes, and you’ll see immediate results.
For curtains, gently roll from top to bottom, and for upholstery, focus on high-contact areas like armrests and cushions. Replace the sheets as they fill up to maintain stickiness.
Why Lint Rollers Beat Cloths
Dusting cloths can redistribute particles into the air, which then settle back onto surfaces. A lint roller traps dust and hair directly onto the adhesive sheet, removing them completely from the room. It’s also faster—no need to rinse or shake out a cloth between uses.
Best Fabrics To Target
Velvet lampshades, pleated shades, and textured upholstery are prime candidates because dust clings to their uneven surfaces. Also hit fabric headboards, throw pillows, and even the top of your curtains where dust accumulates. Avoid using lint rollers on delicate silks or loose-weave materials that could snag.
Pro Tip For Stubborn Pet Hair
If your lint roller fills up quickly with pet hair, try a rubber squeegee or a damp rubber glove first to loosen embedded fur. Then follow with the lint roller to pick up the remaining particles. This two-step method saves adhesive sheets and works faster on heavily furred furniture.
3. Clean Your Microwave with Steam
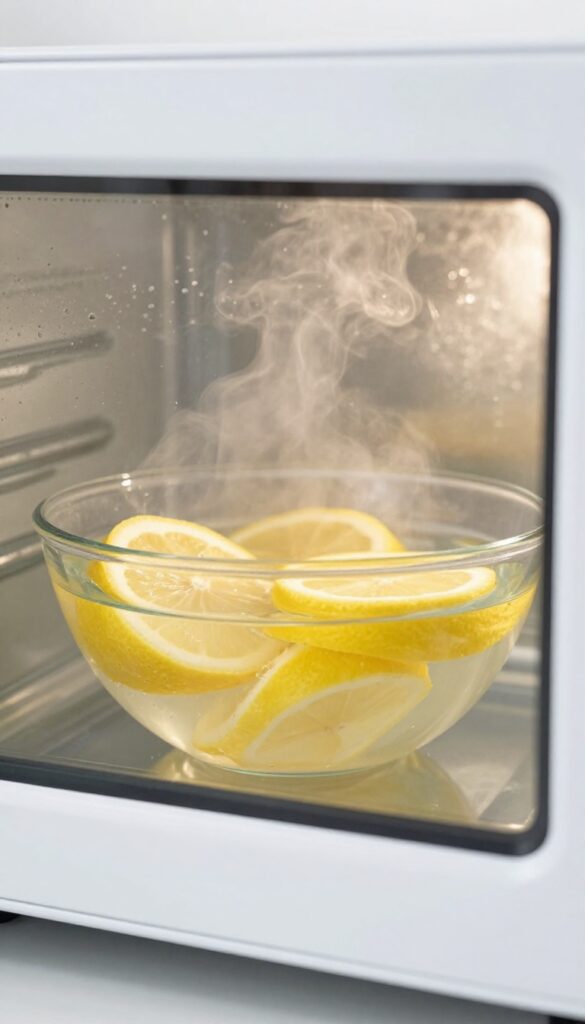
Microwaves are notorious for trapping splatters and odors, especially in small apartments where you use them daily. But you don't need harsh chemicals or endless scrubbing to get them spotless. A simple steam cleaning with lemon does the job in minutes.
Steam cleaning is one of the easiest ways to tackle baked-on food and lingering smells. The heat and moisture loosen grime, while lemon adds a fresh scent and helps cut grease. This method requires almost no effort—just a bowl of water, a lemon, and three minutes of your time.
How It Works
Fill a microwave-safe bowl with about a cup of water. Slice a lemon in half, squeeze the juice into the water, and drop the halves in. Microwave on high for three minutes.
The steam will condense on the walls, softening any stuck-on food. Let it sit for a minute after the timer goes off so the steam can work its magic.
Wipe Down Effortlessly
Carefully remove the bowl (it will be hot). Use a damp cloth or sponge to wipe the interior. The grime should come off easily without scrubbing.
For stubborn spots, dip your cloth in the lemon water for extra cleaning power. Don't forget the turntable and the door.
Bonus Tip For Odors
If your microwave has absorbed strong smells from fish or garlic, this steam treatment neutralizes them naturally. You can also add a few drops of vanilla extract or a cinnamon stick to the water for a pleasant aroma. Repeat weekly to keep your microwave fresh.
4. Vacuum in a Grid Pattern
Most people vacuum in random, haphazard strokes, which means they miss patches of dirt and dust. In a small apartment, those missed spots become noticeable quickly. A simple grid pattern solves that problem and makes your vacuuming more thorough.
Start at one corner of the room and vacuum in straight, overlapping lines, moving from left to right. When you finish that row, shift down slightly and go back the other direction. The overlap ensures no area is skipped, especially along edges and under furniture.
This method also helps you cover the room systematically, so you don't waste time going over the same spot twice. For a small space, it takes just a few extra minutes but leaves the carpet or floor noticeably cleaner.
Why It Works In Small Rooms
Small rooms have less floor area, so every inch matters. Random vacuuming often leaves visible lines or patches of debris. The grid pattern forces you to cover the entire floor methodically, reducing the chance of missing high-traffic zones or corners where dust bunnies hide.
How To Execute The Grid
Before you start, clear the floor of small objects like shoes or cords. Begin at the farthest corner from the door and work your way backward. Use slow, deliberate strokes—rushing defeats the purpose.
Overlap each pass by about half the width of the vacuum head to catch everything.
Bonus Tip For Edges
Use the vacuum's crevice tool along baseboards and corners after the main grid pass. In small apartments, edges collect more dust because they're close to walls and furniture. A quick once-over with the tool keeps the room looking freshly cleaned.
5. Wipe Down Surfaces with Microfiber Cloths
Not all cleaning cloths are created equal. Microfiber is a game-changer for small spaces because it traps dust and dirt without the need for harsh chemicals. Keep a stash of microfiber cloths handy for quick daily wipes—they’re gentle on surfaces and reusable, making them both eco-friendly and budget-friendly.
Microfiber cloths have tiny fibers that grab and hold onto particles instead of pushing them around. Use a damp cloth for kitchen counters to pick up crumbs and spills, and a dry one for electronics like your TV screen or laptop to avoid streaks. Wash them separately from cotton towels to maintain their effectiveness.
Why Microfiber Works Best
Microfiber is made of split fibers that create a static charge, attracting dust like a magnet. Unlike cotton, it doesn’t just spread dirt—it lifts and locks it away. Plus, you can clean most surfaces with just water, reducing your exposure to chemical cleaners.
How To Use Microfiber Effectively
For general dusting, use a dry cloth in a gentle sweeping motion. For sticky messes on counters or stovetops, slightly dampen the cloth with water—avoid soaking it. Always fold the cloth to use a fresh side as you go, and wash them after each use to prevent bacteria buildup.
Caring For Your Microfiber Cloths
To keep microfiber working well, wash them in warm water with mild detergent—skip fabric softener, which clogs the fibers. Air dry or tumble dry on low. Replace cloths when they start to feel less grippy or leave lint behind.
6. Use a Squeegee on Your Shower Walls
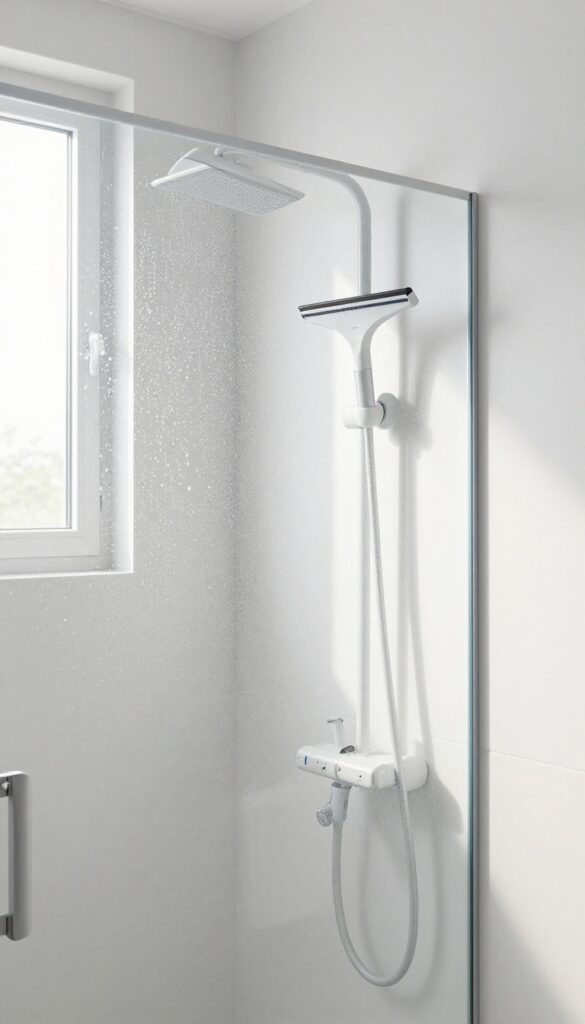
Soap scum and water spots are the enemies of a sparkling shower, but fighting them doesn't have to mean a long, scrub-heavy session. A simple squeegee, used right after your shower, can keep glass and tile looking pristine with almost no effort. It's a 30-second habit that pays off big in the long run.
The key is to keep a squeegee in your shower or hang it on a hook nearby. After you turn off the water, quickly run the squeegee over the walls and door from top to bottom. This removes the water droplets that cause hard water stains and soap residue.
Do it every time, and you'll drastically cut down on the need for harsh cleaners and deep scrubbing.
Why It Works So Well
Hard water contains minerals that leave spots when water evaporates. Soap scum forms when soap combines with those minerals and sticks to surfaces. By removing the water immediately, you prevent both issues.
It's a proactive step that keeps your shower cleaner day-to-day and makes weekly cleaning a breeze.
The Right Tool For The Job
A standard car or window squeegee works fine, but a small shower-specific one with a rubber blade is even better. Look for one with a hook so you can store it right in the shower. Clean the blade occasionally with a damp cloth to keep it effective.
If you have textured tiles, a microfiber cloth can be a gentler alternative.
Make It A Habit
The hardest part is remembering to do it every time. Try pairing it with another post-shower routine, like hanging your towel or turning on the fan. After a week, it'll feel automatic.
You'll notice less grime and a fresher-looking shower, which is a huge win for a small bathroom.
7. Make Your Own All-Purpose Cleaner
Store-bought cleaners are expensive and often loaded with chemicals you don't really need in a small, enclosed space. Making your own all-purpose cleaner is ridiculously easy and costs pennies per bottle. Plus, you can customize the scent to match your mood.
Mix equal parts white vinegar and water in a spray bottle. Add a few drops of essential oil for a fresh scent. Safe for most surfaces.
Why It Works So Well
Vinegar is a natural disinfectant and degreaser that cuts through grime without leaving toxic residue. It's especially effective on glass, countertops, and bathroom surfaces. The water dilutes it just enough to be safe on sealed stone and finished wood.
Choosing Your Essential Oil
Lemon and tea tree oil are top choices for their antibacterial properties and fresh scents. Lavender adds a calming aroma, perfect for a bedroom or living area. Avoid citrus oils on unsealed wood, as they can dull the finish.
Storage And Labeling Tips
Use a glass spray bottle if possible, since vinegar can degrade plastic over time. Label your bottle clearly with the ingredients and date. Store it out of direct sunlight to preserve the essential oil's fragrance.
8. Clean Under Furniture with a Swiffer
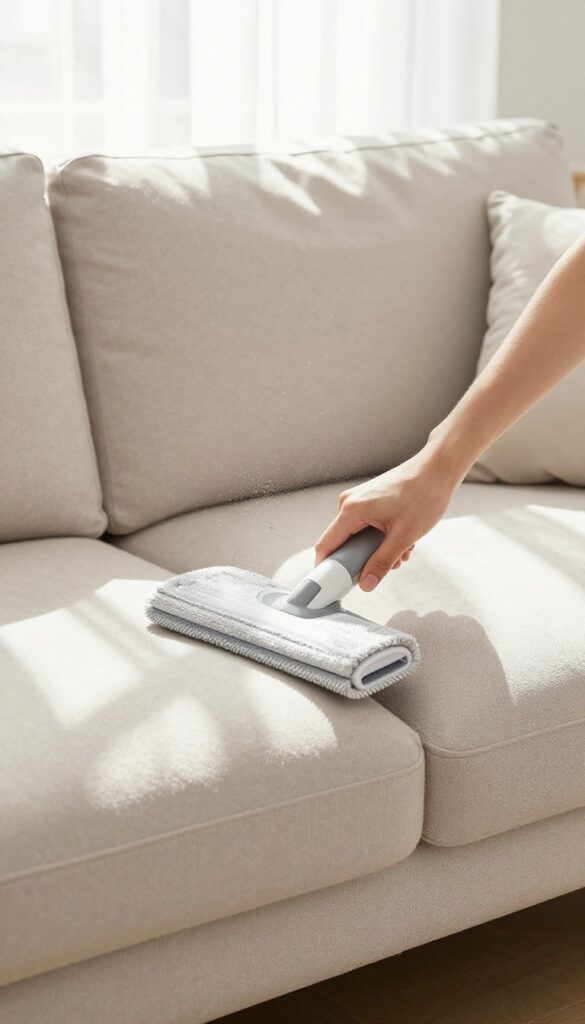
Underneath your sofa, bed, or dresser is a dust bunny haven that rarely sees the light of day. Moving heavy furniture to clean is a hassle, especially in a small apartment where space is tight. A Swiffer or long-handled duster with a microfiber cloth can slide right under most pieces, pulling out dust and debris without you breaking a sweat.
Attach a microfiber cloth to a Swiffer or a long-handled duster to reach under sofas, beds, and cabinets without moving them. This trick works wonders for collecting hair, dust, and crumbs that accumulate in those hard-to-reach spots. For a deeper clean, slightly dampen the cloth to trap more particles.
Why Microfiber Works Best
Microfiber cloths have tiny fibers that grab dust rather than pushing it around. They’re also reusable and washable, making them an eco-friendly choice. When attached to a Swiffer, they provide a wide surface area to cover more ground quickly.
How To Reach Under Low Furniture
For furniture with very little clearance, try using a flat microfiber mop head or a thin dusting wand. You can also attach a cloth to a yardstick or a ruler for extra slim access. Slide it back and forth in a sweeping motion to pull out dust bunnies.
Don’t Forget The Corners
Corners under furniture tend to collect the most dust. Use the edge of the Swiffer or a smaller duster to reach into those tight spots. A quick once-over every week prevents buildup and keeps your apartment feeling fresher.
9. Use a Toothbrush for Grout and Tight Spots
Grout lines, faucet bases, and the corners of window tracks are magnets for grime, but they're too small for most cleaning tools. That's where an old toothbrush becomes your secret weapon. Its small head and stiff bristles get into crevices that sponges and cloths simply can't reach.
Don't toss your old toothbrush—repurpose it for deep cleaning. Dip it in a paste of baking soda and water or a mild cleaner, then scrub grout lines, around sink fixtures, and along tile edges. For extra stubborn spots, let the paste sit for a few minutes before scrubbing.
Rinse with a damp cloth and watch the grime disappear.
Targeting Grout Lines
Bathroom and kitchen grout collects dirt and soap scum over time. A toothbrush lets you work the cleaner directly into the porous surface without damaging the tile. For a deeper clean, use a mixture of hydrogen peroxide and baking soda—it bubbles up and lifts stains naturally.
Faucets And Fixtures
The nooks around faucet handles and the base of the tap are classic spots for hard water deposits and gunk. A toothbrush can scrub these tight curves without scratching the metal. For extra tough buildup, dip the brush in vinegar before scrubbing.
Window Tracks And Sliding Doors
Window tracks collect dust, pollen, and even mold in humid climates. Use a dry toothbrush to loosen debris, then vacuum it up. For sticky residue, add a little dish soap and water.
The bristles fit perfectly into the narrow grooves.
10. Freshen Your Mattress with Baking Soda
Your mattress works hard every night, absorbing sweat, dead skin cells, and dust mites. Over time, it can start to smell a bit stale—especially in a small apartment where airflow is limited. The good news?
A simple box of baking soda can bring it back to life.
Baking soda is a natural deodorizer that neutralizes odors without harsh chemicals. It also helps absorb excess moisture, which is great for keeping your mattress fresh between deep cleans. This method is quick, cheap, and effective.
How To Do It
Strip the bed and give your mattress a quick vacuum to remove loose debris. Sprinkle a generous, even layer of baking soda over the entire surface—don't forget the sides. Let it sit for at least 15 minutes, but for stronger odors, leave it for an hour.
Then vacuum thoroughly, using the upholstery attachment to get into crevices.
Why It Works So Well
Baking soda is alkaline, so it chemically neutralizes acidic odor molecules. It also draws out moisture, which reduces the environment where dust mites and bacteria thrive. Plus, it's gentle enough to use on all mattress types, including memory foam.
Pro Tips For Best Results
For an extra freshness boost, mix a few drops of your favorite essential oil (like lavender or tea tree) into the baking soda before sprinkling. Let the mixture sit for a few hours to infuse. Also, do this on a sunny day if possible—open windows help speed up drying.
Repeat every three months to keep your mattress smelling clean.
11. Clean Your Dishwasher with Vinegar
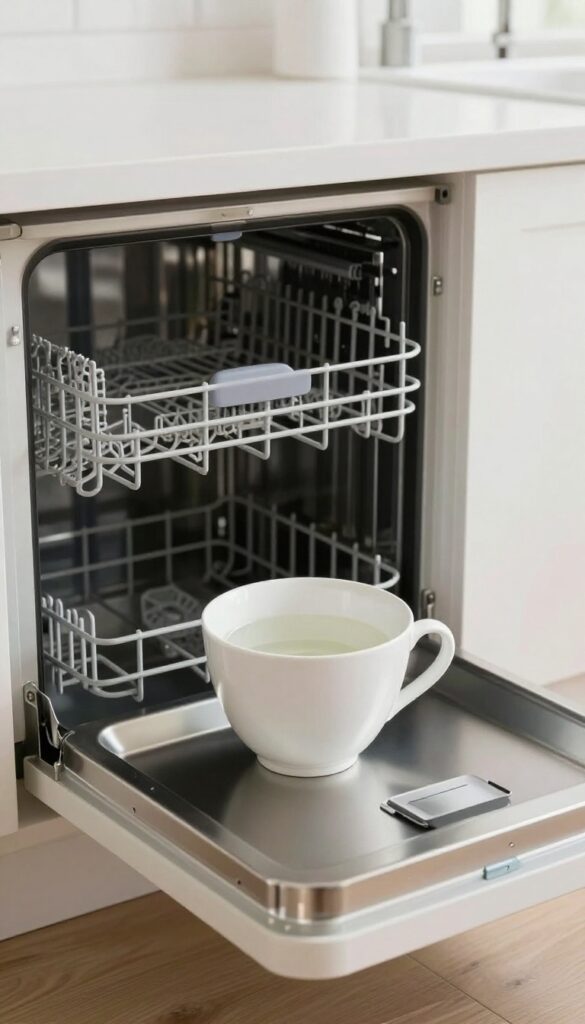
Your dishwasher works hard to clean your dishes, but it needs a little TLC itself. Over time, food particles, grease, and soap scum can build up, leading to funky odors and less effective cleaning. The good news is you can freshen it up with just two pantry staples: white vinegar and baking soda.
Start by removing any food debris from the bottom of the dishwasher and checking the drain filter. Then place a cup of white vinegar in a dishwasher-safe container on the top rack and run a hot water cycle. The vinegar breaks down grease and mineral deposits while deodorizing the interior.
After that cycle finishes, sprinkle a cup of baking soda across the bottom of the dishwasher and run a short hot cycle. The baking soda will neutralize any remaining odors and give your dishwasher a fresh, clean scent. Do this once a month to keep your dishwasher running smoothly and your dishes spotless.
Why Vinegar Works
White vinegar is a mild acid that dissolves hard water deposits, soap scum, and grease without harsh chemicals. It also kills mold and mildew spores that can cause musty smells. Using it in an empty cycle ensures it reaches every nook and cranny, including the spray arms and seals.
The Baking Soda Finish
After the vinegar cycle, a baking soda rinse helps scrub away any leftover residue and leaves the dishwasher smelling fresh. Baking soda is a natural deodorizer and mild abrasive that won't scratch the interior. Just sprinkle it on the bottom and run a short cycle—no need to add more detergent.
Monthly Maintenance Tip
For best results, clean your dishwasher every month. If you notice a persistent odor or visible buildup, you can also wipe down the door gasket and edges with a vinegar-dampened cloth. Avoid using bleach or harsh cleaners, as they can damage the rubber seals and stainless steel interior.
12. Use a Dryer Sheet to Dust Baseboards
Baseboards are one of those spots you know you should clean, but they're easy to ignore until you notice a visible line of dust. The good news is you don't need a special tool or spray—just grab a used dryer sheet. The anti-static properties help attract and hold dust, and they leave behind a subtle fresh scent.
Dryer sheets are designed to reduce static in the dryer, which also makes them excellent at picking up dust without sending it flying into the air. Simply take a sheet (used is fine) and run it along your baseboards. The texture grabs dust easily, and the static-reducing chemicals help prevent new dust from settling as quickly.
It's a quick, no-mess way to keep baseboards looking clean between deeper cleanings.
Why Dryer Sheets Work So Well
Dryer sheets contain fabric softeners and anti-static agents that cling to dust particles. When you wipe a baseboard, the sheet acts like a magnet, pulling dust off the surface and trapping it in the fibers. This means less dust floating around and resettling elsewhere.
How To Do It Right
Use a sheet that's already been through the dryer to save money and reduce waste. Run it along the top edge and face of the baseboard, applying light pressure. For stubborn spots, you can dampen the sheet slightly with water.
Toss the sheet when it's full of dust—no rinsing or washing needed.
Bonus: Freshen The Room
Most dryer sheets have a pleasant scent that lingers lightly after wiping. This can help neutralize musty odors in small apartments, especially near baseboards where dust and pet dander accumulate. Just be mindful if you're sensitive to fragrances—unscented dryer sheets work just as well for dusting.
13. Keep a Trash Bag for Donations
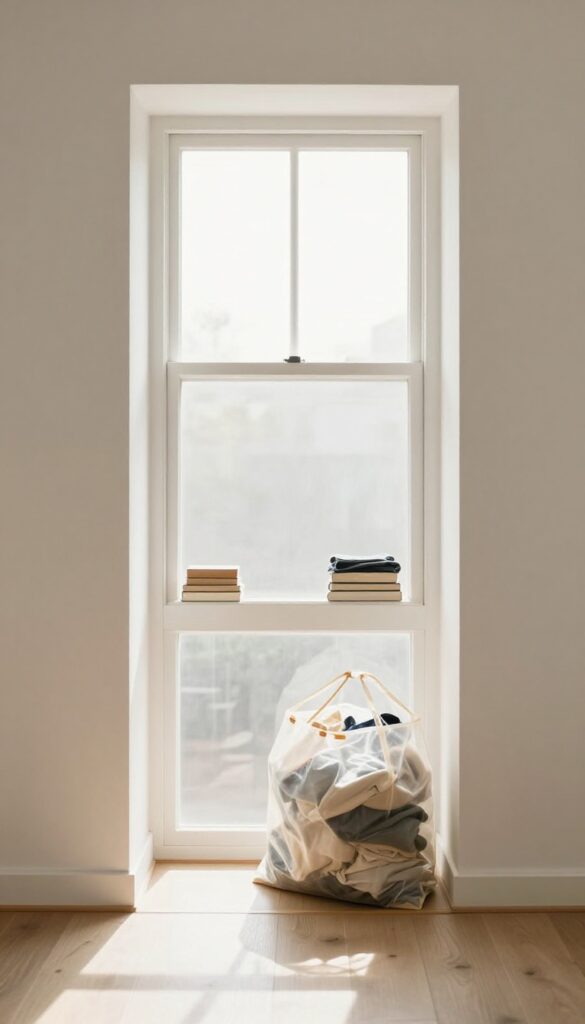
Cleaning often uncovers items you haven't touched in months. Instead of shoving them back into a closet, grab a trash bag and start a donation pile. This simple habit turns decluttering into a natural part of your cleaning routine, and it helps you reclaim precious square footage fast.
As you move through each room, keep a bag or box handy. When you find clothes that no longer fit, gadgets you never use, or decor that doesn't spark joy, toss them in. Once the bag is full—or when you finish cleaning—seal it and put it by the door.
Make a note to drop it off within the week, so the items actually leave your apartment.
Make It A Permanent Station
Designate a small corner of your entryway or closet for a donation bag or bin. Label it clearly. Whenever you come across something you don't need, put it directly there.
This keeps clutter from piling up and makes donating a continuous habit rather than a once-a-year purge.
Set A Drop-off Day
Pick a recurring day each month—like the first Saturday—to take your donations to a local charity or thrift store. Add a reminder on your phone. Having a regular schedule prevents bags from sitting around and ensures your small space stays open and airy.
14. Clean Your Blinds with Tongs and a Cloth
Blinds collect dust like nobody's business, but washing them one slat at a time is tedious. A simple kitchen tool turns the job into a breeze. Grab a pair of tongs and a microfiber cloth, and you'll have clean blinds in minutes.
Wrap a microfiber cloth around the ends of kitchen tongs and secure it with a rubber band. Then slide the tongs along each slat—the cloth grabs dust from both sides at once. This method works for horizontal blinds, vertical blinds, and even plantation shutters.
It's fast, no bending over, and you don't have to remove the blinds.
Why Tongs Work Best
Your fingers are too wide to fit between slats, and a duster often misses the edges. Tongs give you precision and grip. The rubber band keeps the cloth taut so it doesn't slip.
Plus, you can flip the cloth to a clean side as you go.
Pro Tips For Different Blind Types
For wooden blinds, use a dry cloth to avoid moisture damage. For vinyl or aluminum, a slightly damp cloth works for stuck-on grime. For vertical blinds, clamp the tongs at the top and slide down.
For mini blinds, angle the tongs to reach both sides of each slat.
How Often To Clean Blinds
Dust blinds every two weeks to prevent buildup. In a small apartment, dust settles fast, especially near windows. This quick tong trick makes it easy to stay on top of it without a big time commitment.
15. Use a Lint Roller on Your Dryer Vent
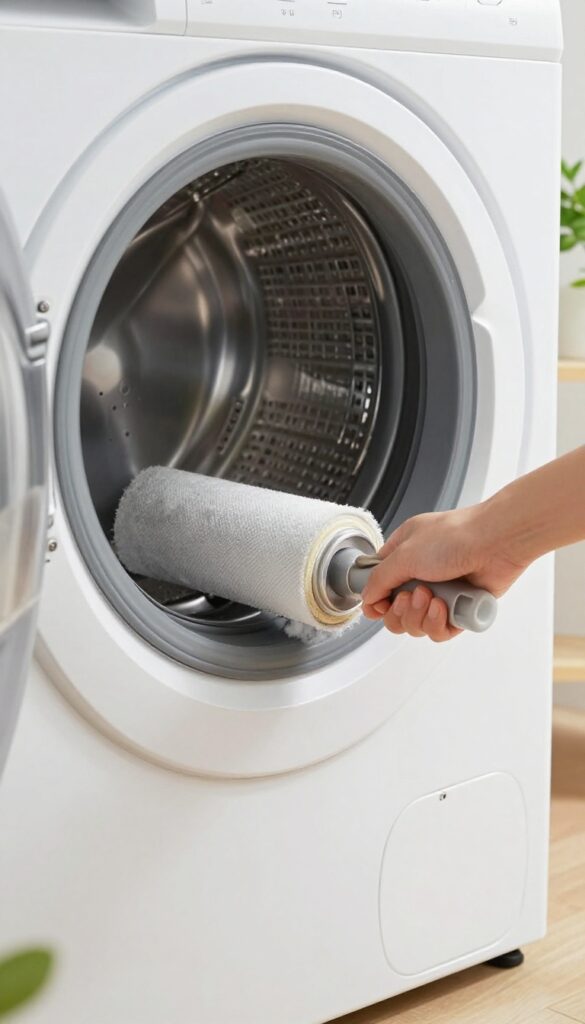
You probably remember to clean the lint trap after every load, but what about the vent opening? Lint builds up there too, and it's a serious fire hazard. A lint roller makes quick work of this often-overlooked spot, keeping your dryer efficient and your home safer.
Grab a fresh lint roller and run it along the inside edge of the dryer vent opening where the hose connects. You'll be surprised how much lint clings there. Do this monthly for best results.
Why The Vent Matters
A clogged vent restricts airflow, making your dryer work harder and use more energy. It also traps heat, which can ignite lint. Cleaning the vent opening reduces this risk and helps your clothes dry faster.
How To Do It
Unplug the dryer and pull it away from the wall if you can. Use the lint roller to clean the vent opening and the first few inches of the hose. For deeper cleaning, use a vent brush kit once a year.
Bonus Tip
While you're at it, run the lint roller over the dryer's exterior vents and any nearby baseboards where lint dust settles. It's a quick way to freshen up the whole laundry area.
16. Wipe Down Cabinet Fronts Weekly
Kitchen cabinets take a beating. Grease splatters from cooking, sticky fingerprints from little hands, and dust settling on top—it all adds up fast. A quick weekly wipe keeps them looking fresh and prevents that grimy buildup that's harder to scrub later.
You don't need special cleaners for this job. A microfiber cloth dampened with warm water and a drop of dish soap works wonders on most cabinet finishes. For wooden cabinets, follow up with a dry cloth to avoid moisture damage.
If you have laminate or painted cabinets, a gentle all-purpose spray is fine—just avoid abrasive sponges that can scratch the surface.
Focus On High-touch Spots
Pay extra attention to areas around handles and knobs—those get the most contact. Also, check the bottom edges of upper cabinets where grease tends to drip down. A quick wipe there each week stops sticky residue from hardening.
Don't Forget The Tops
If your cabinets don't go all the way to the ceiling, dust and grease collect on top. Once a month, run a cloth or duster across those surfaces. It prevents that layer of grime from becoming a permanent stain.
Choose The Right Cloth
Microfiber is your best friend here. It traps grease and dust without leaving lint. Avoid paper towels—they can leave streaks and aren't as effective at picking up oily residue.
17. Clean Your Garbage Disposal with Ice and Salt
Your garbage disposal works hard, but it can get smelly and dull over time. A quick scrub with ice and salt sharpens the blades and freshens things up without harsh chemicals. This trick takes about two minutes and uses ingredients you already have.
It's a simple maintenance habit that keeps your disposal running smoothly and your kitchen smelling clean.
Drop a handful of ice cubes and a tablespoon of coarse salt (like kosher or rock salt) into the disposal. Run cold water and turn it on for about 30 seconds. The ice knocks off debris, the salt acts as an abrasive scrub, and the cold water keeps any grease from melting.
Finish by running a few lemon or orange peels for a fresh citrus scent.
Why Ice And Salt Work
Ice cubes are hard enough to dislodge stuck food particles and sharpen the blades as they're chopped. Salt adds gentle scrubbing power to clean the grinding chamber without damaging the metal. Together, they tackle odors and buildup better than just running water alone.
When To Do This
Aim for once a week, especially if you use your disposal daily. You'll notice less smell and a quieter, more efficient grind. Avoid doing this if you have a septic system—check your owner's manual first.
Extra Freshness Boost
After the ice and salt treatment, toss in a few lemon wedges or lime rinds. The citrus oils leave a clean scent and help cut through lingering grease. Never put coffee grounds or starchy foods like pasta down the disposal—they can clog pipes.
18. Use a Pillowcase to Clean Ceiling Fans
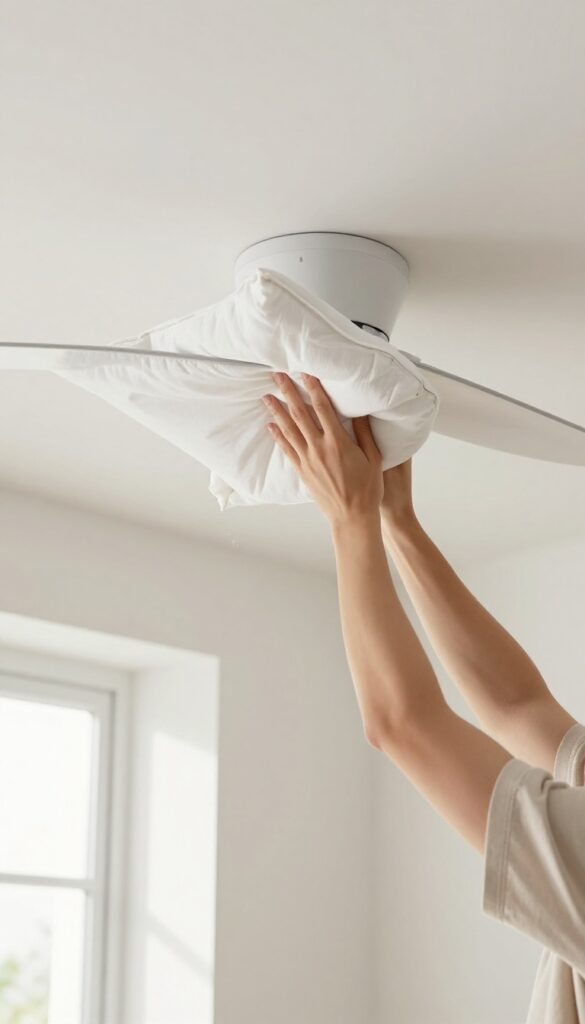
Ceiling fans collect dust fast, and cleaning them usually means dust falling everywhere. A pillowcase makes the job mess-free and quick.
Slide a pillowcase over each fan blade, then pull it off. The dust stays inside the case instead of falling on your floor. This trick works for both standard and angled blades.
Why It Works
The pillowcase traps dust as you slide it over the blade. No dust clouds, no sweeping up later. It's a one-step clean that saves time.
Best Pillowcase To Use
An old cotton pillowcase works best. Avoid slippery fabrics like silk—they don't grip the dust well. A standard size fits most fan blades.
How To Do It
Turn off the fan and let blades stop. Slide a clean pillowcase over one blade until it covers the entire length. Pull it back off gently, trapping dust inside.
Repeat for each blade. Shake the case outside or toss it in the wash.
19. Organize Your Cleaning Caddy
A well-stocked cleaning caddy is a game-changer for small-space living. Instead of hunting for supplies under the sink or in a closet, you grab one portable kit and get to work. It keeps you focused and efficient, especially when you only have a few minutes to tidy up.
Choose The Right Caddy
Pick a caddy with a handle and compartments. A plastic tote with a divided interior works well—it's lightweight, easy to carry, and won't rust. Avoid over-sized caddies that won't fit under your sink or in a cabinet.
Stock The Essentials
Include an all-purpose cleaner, microfiber cloths, a scrub brush, and a pair of rubber gloves. Add a small spray bottle of glass cleaner and a pack of disposable wipes for quick touch-ups. Keep it simple—too many products clutter the caddy and slow you down.
Customize For Your Space
If you have hardwood floors, add a dusting spray. For bathrooms, include a grout brush and a small bottle of bleach spray. Swap seasonal items—like a dusting wand for ceiling fans in summer.
The goal is a caddy that matches your actual cleaning needs.
Store It Accessibly
Keep the caddy in a spot you pass often—under the kitchen sink, on a laundry shelf, or even in a hall closet. The easier it is to reach, the more likely you'll grab it for a quick clean. Bonus: it keeps cleaning supplies organized and out of sight.
20. Set a 10-Minute Daily Tidy Timer

A little effort every day beats a huge cleaning session every weekend. The 10-minute tidy timer turns cleaning into a quick, non-negotiable habit. You'll be amazed how much you can accomplish when you race against the clock.
Grab your phone, set a timer for 10 minutes, and pick one room to tackle. Focus on high-impact tasks like fluffing pillows, wiping counters, and putting away stray items. When the timer goes off, stop—even if you're not done.
The goal is consistency, not perfection.
Why 10 Minutes Works
Ten minutes is short enough to avoid dread but long enough to make a visible difference. It's easy to fit into any schedule, and the daily repetition prevents messes from snowballing. Over a week, that's over an hour of cleaning without the overwhelm.
What To Do In That Time
Start with the most visible clutter: toss trash, return items to their homes, and do a quick surface wipe. In the kitchen, load a few dishes or spray and wipe the counter. In the living room, fold blankets and straighten cushions.
The key is to move fast and stay focused.
Make It A Family Affair
If you live with others, invite them to join the 10-minute tidy. Play upbeat music and turn it into a mini challenge. Everyone picks a zone, and when the timer beeps, you're done.
It turns cleaning from a chore into a quick team effort.
FAQ
How often should I deep clean my apartment?
Aim for a deep clean every 2-3 months, but focus on high-traffic areas like the kitchen and bathroom monthly.
What's the best way to clean small apartment floors?
Vacuum or sweep daily, and mop weekly. Use a microfiber mop for quick, streak-free cleaning.
How can I make my apartment smell fresh without candles?
Simmer citrus peels and cinnamon on the stove, or place bowls of baking soda in closets to absorb odors.
What's the most effective cleaning order for a small space?
Start from the top (ceiling fans, shelves) and work down to floors. Clean dry surfaces first, then wet ones.
How do I clean a small apartment with pets?
Vacuum daily, use a lint roller on furniture, and wash pet bedding weekly. Baking soda helps neutralize odors.
Conclusion
Keeping a small apartment clean doesn't have to be a chore. With these 20 ideas, you can maintain a fresh space without spending hours or a fortune. Pick a few that fit your routine and stick with them.
You'll notice the difference in how your home feels—and how much easier it is to keep it that way. Start with one tip today, and build from there. Your small space can be a clean, comfortable haven with just a little consistent effort.


