Last updated on June 27th, 2026 at 03:17 pm
You've just finished washing your windows, but when the sun hits them, streaks and smudges are everywhere. It's frustrating, especially after all that effort. Streaks happen for a reason—usually the wrong tool or technique.
The good news is that streak-free windows are totally doable with a few simple adjustments. You don't need expensive products or professional help. Just the right approach and a bit of patience.
This guide walks you through 13 practical steps that tackle the most common causes of streaks. Each step solves a specific problem, so you can finally enjoy clear, sparkling windows.
1. Choose the Right Day and Time
Timing is everything when it comes to streak-free windows. If you clean when the sun is blazing, the solution evaporates before you can wipe it off, leaving residue. A cloudy day or a shaded window gives you time to work without racing the sun.
Picking the right moment is the easiest way to avoid streaks. Direct sunlight dries the cleaner too fast, which is the main cause of those annoying lines. Overcast days are ideal because the glass stays cool and the solution stays wet longer.
If you have to clean on a sunny day, work on the side of the house that's in shade, or do it early morning or late afternoon when the sun is low.
Why Sunlight Causes Streaks
When the sun hits wet glass, the water evaporates unevenly. The minerals and soap in the solution get left behind as the water disappears, creating a hazy film. You're basically baking the dirt onto the glass.
That's why even the best cleaner can fail on a bright day.
Best Weather Conditions
Aim for a day that's overcast but not rainy. Humidity is actually your friend here—it slows evaporation. Temperatures between 50°F and 70°F are perfect.
Avoid windy days too, because wind can blow dust onto your wet windows and dry them out faster.
What If You Can't Wait?
If you absolutely must clean on a sunny day, work in sections. Clean one window at a time, and immediately dry it before moving on. Use a microfiber cloth or a squeegee to remove the solution quickly.
You can also spray a fine mist of water on the glass to cool it down first.
2. Gather the Best Tools for the Job
You wouldn't paint a masterpiece with a roller covered in dried paint, and you shouldn't clean windows with the wrong gear. The tools you choose make or break your streak-free results. A few simple swaps can save you time and frustration.
The Squeegee Is Your Best Friend
A good squeegee with a rubber blade is the star of the show. Look for one with a brass or stainless steel handle and a replaceable blade. The rubber should be flexible but firm—not too soft.
A 12- or 14-inch blade works well for most windows. Before each use, wipe the blade with a damp cloth to remove any grit that could cause scratches.
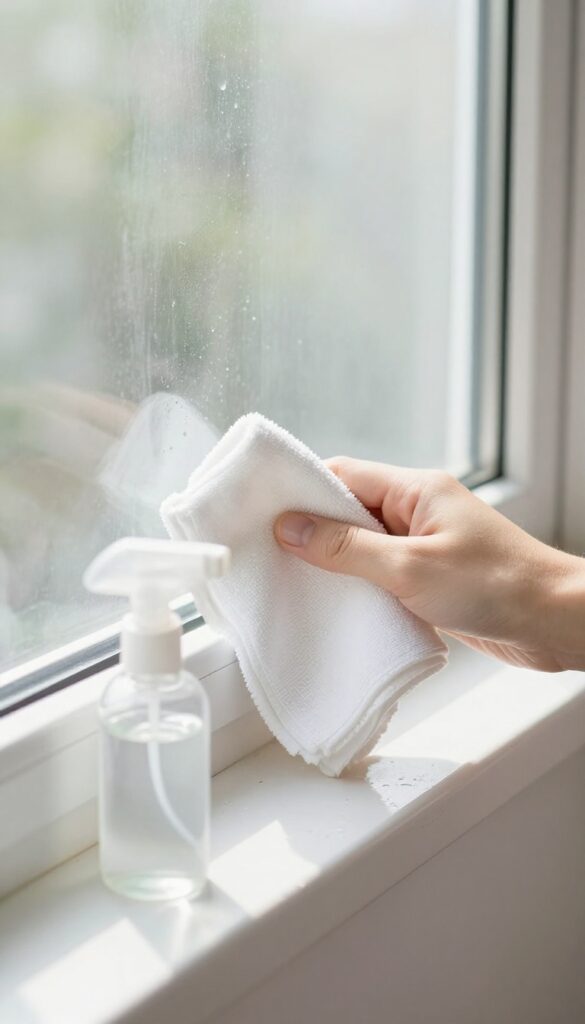
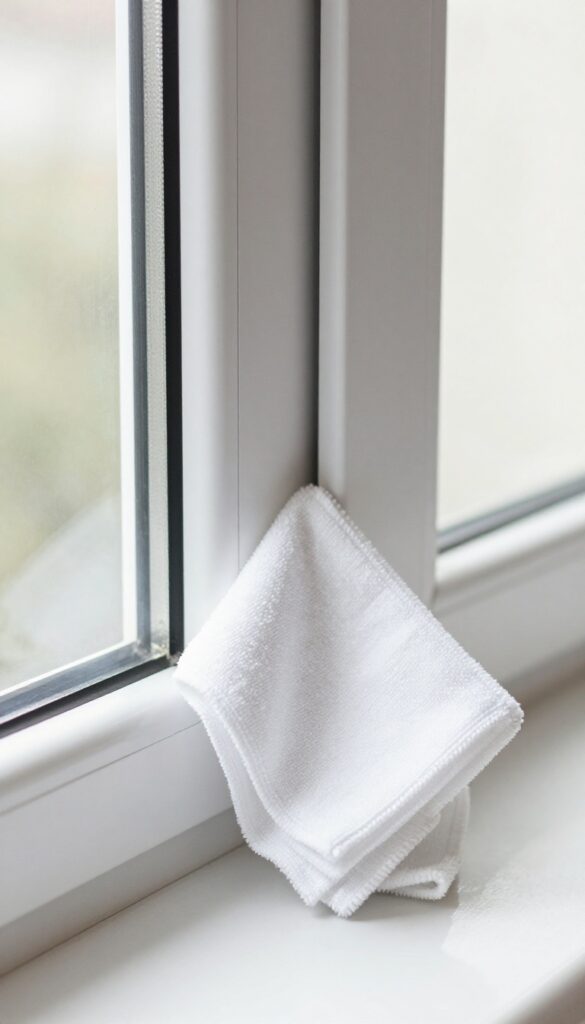
Microfiber Cloths Over Paper Towels
Paper towels leave lint and tiny fibers behind, which show up as streaks when the light hits. Microfiber cloths are lint-free and absorb water without leaving residue. Use one for applying your cleaning solution and a dry one for buffing edges.
Wash them separately from other laundry to avoid picking up lint.
A Bucket And The Right Solution
A simple bucket holds your cleaning mixture. For the solution, mix a few drops of dish soap with warm water, or use a vinegar-and-water blend (1 part vinegar to 10 parts water). Avoid ammonia-based cleaners if you have tinted windows—they can damage the tint.
A small amount of rubbing alcohol in the mix helps it dry faster and prevents streaks.
3. Mix a Simple, Effective Cleaning Solution
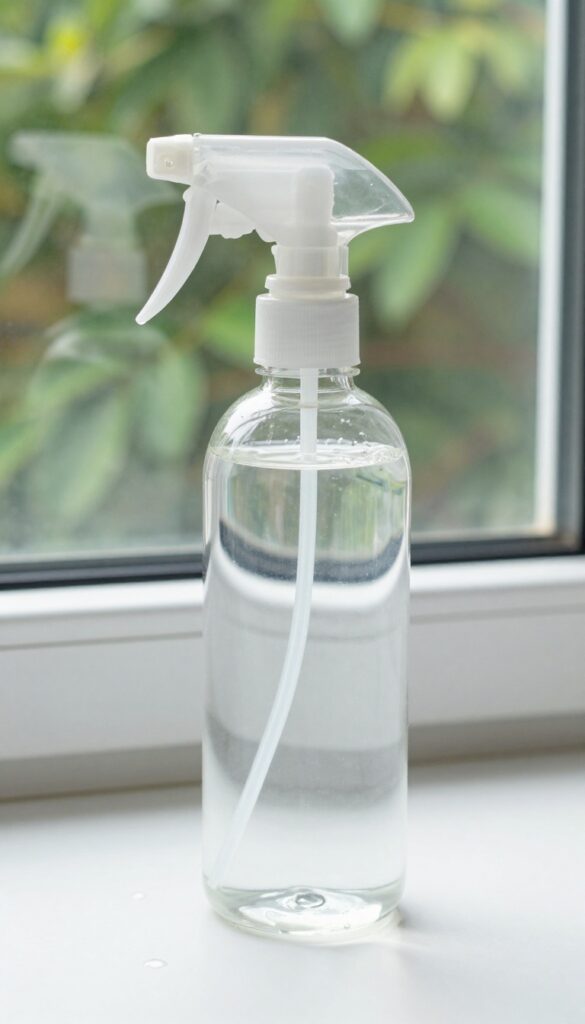
The cleaning solution you use can make or break your window-cleaning results. Many store-bought products leave behind a residue that attracts dirt and causes streaks. A homemade solution is cheaper, greener, and often works better.
You just need two common household ingredients.
The Basic Recipe
Fill a spray bottle with one part water and one part white vinegar. Add a drop of dish soap to break down grease. That's it.
Shake gently to mix. This solution cuts through grime without leaving a film. For extra dirty windows, increase the vinegar ratio slightly.
Why It Works
Vinegar is acidic, which dissolves mineral deposits and grease. Dish soap reduces surface tension, allowing the solution to spread evenly and rinse away dirt. Together, they clean deeply and evaporate quickly, leaving no streaks.
What To Avoid
Stay away from ammonia-based cleaners. They can damage window tints and leave a residue that attracts dust. Also avoid using too much soap—a single drop is plenty.
Excess soap creates suds that are hard to rinse off completely.
4. Remove Dust and Loose Dirt First
Jumping straight to spraying cleaner on dirty windows is a recipe for mud and streaks. Dust, cobwebs, and grit on the frame and sill will turn into a pasty mess the moment liquid hits them. That grime then smears across the glass, leaving behind stubborn streaks that are harder to remove.
Taking a few minutes to prep the window area saves you from scrubbing twice. Use a dry microfiber cloth, a soft brush attachment on your vacuum, or even a duster to wipe down the frame, sill, and tracks. This simple step clears away the loose debris before it can mix with your cleaning solution.
For outdoor windows, a gentle rinse with a garden hose can also knock off heavy dirt before you start washing.
Why Pre-cleaning Matters
When you apply cleaner to a dusty surface, the dust absorbs the liquid and turns into a muddy film. That film spreads across the glass as you wipe, leaving behind a dull, streaky residue. Pre-cleaning ensures your cleaner stays clean and works effectively on the glass alone.
Tools That Make It Easy
A vacuum with a brush attachment is perfect for sucking up debris from corners and tracks. For quick jobs, a microfiber duster or a dry cloth works well. Just make sure the tool is clean so you aren't just moving dust around.
If you're cleaning multiple windows, keep a separate cloth for dry dusting to avoid cross-contamination.
Don't Forget The Sill And Tracks
The sill and tracks collect a surprising amount of grit and grime. Use a small brush or an old toothbrush to loosen dirt from crevices, then vacuum it up. This prevents that dirt from washing onto the glass when you spray your cleaner.
Clean tracks also help your window slide smoothly later.
5. Wet the Window Thoroughly
Once your solution is ready, it's time to apply it. But don't just spritz and wipe. You need to wet the entire window surface evenly.
This step loosens dirt and grime so they lift off easily, rather than getting smeared around.
Grab a clean sponge or a microfiber cloth. Dip it into your cleaning solution and start from the top of the window. Work your way down in overlapping strokes, making sure every inch is covered.
Don't forget the edges and corners. A thorough wetting ensures no dry spots where dirt can cling.
Why Wetting Matters
A dry window repels water, causing the solution to bead up and run off before it can do its job. By fully wetting the glass, you create a thin film that dissolves dirt and allows your squeegee or cloth to glide smoothly. This prevents streaks from forming.
The Right Tool For The Job
A sponge with a scrub pad on one side works great for heavy grime. For everyday cleaning, a soft microfiber cloth is gentle and absorbs well. Avoid using paper towels or old rags that might leave lint behind.
The goal is to cover the glass with a thin, even layer of solution.
Work In Sections
If you're cleaning large windows, work in manageable sections. Wet one section at a time so the solution doesn't dry before you wipe it off. This is especially important in direct sunlight or warm weather, where solution can evaporate quickly and leave residue.
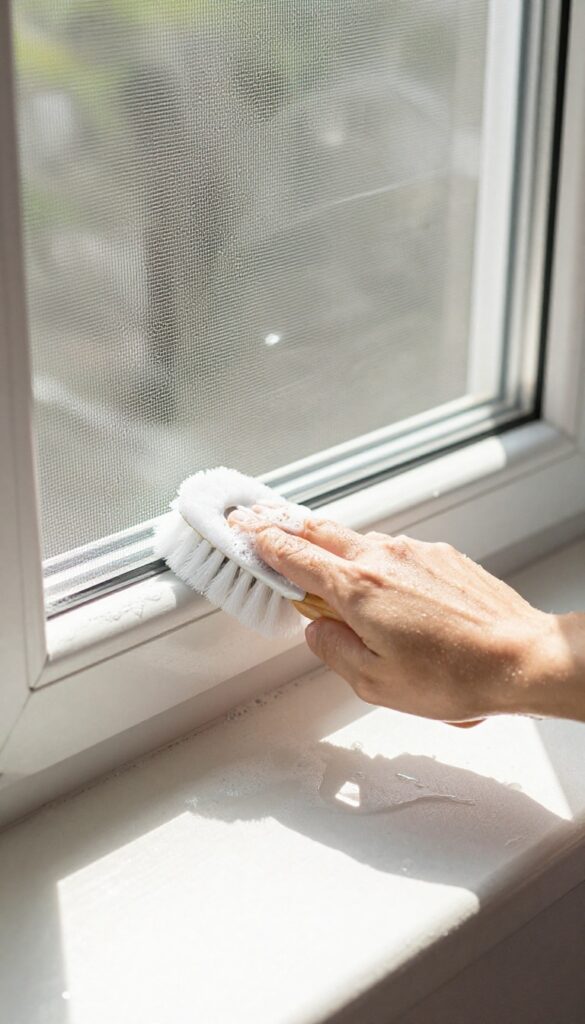
6. Scrub Away Stubborn Spots
Even after a good wash, some spots just won't budge. Dried-on bird droppings, tree sap, or hard water stains can cling to glass like they own the place. Scrubbing them the wrong way can leave scratches or haze, so a gentle touch is key.
For those tough spots, reach for a non-abrasive pad—like a microfiber cloth or a soft sponge—and a bit of extra cleaning solution. Gently rub in a circular motion, applying light pressure. If that doesn't work, try a soft-bristled brush (like a toothbrush) for precision.
Avoid steel wool or harsh scrubbers; they'll scratch the glass permanently.
What To Use For Stubborn Spots
Stick with non-abrasive tools: microfiber cloths, soft sponges, or a soft nylon brush. For extra stubborn spots, a plastic scraper (like a razor blade holder) can be used carefully at a 45-degree angle, but only on wet glass to avoid scratches.
How To Tackle Bird Droppings And Sap
Soften the mess first by soaking a cloth in warm, soapy water and pressing it against the spot for a minute. Then gently wipe away. For tree sap, rubbing alcohol or a bit of hand sanitizer on a cloth can break it down without harming the glass.
Dealing With Hard Water Stains
Hard water spots are mineral deposits. Use a mixture of equal parts white vinegar and water, apply it to the stain, let it sit for a minute, then scrub gently. For really stubborn rings, a paste of baking soda and water can work wonders—just rinse thoroughly after.
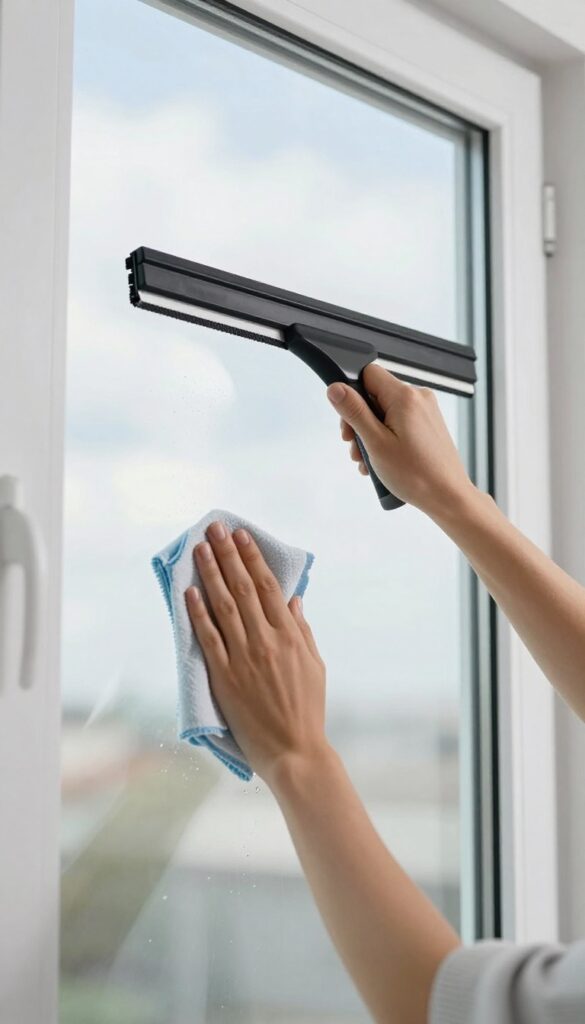
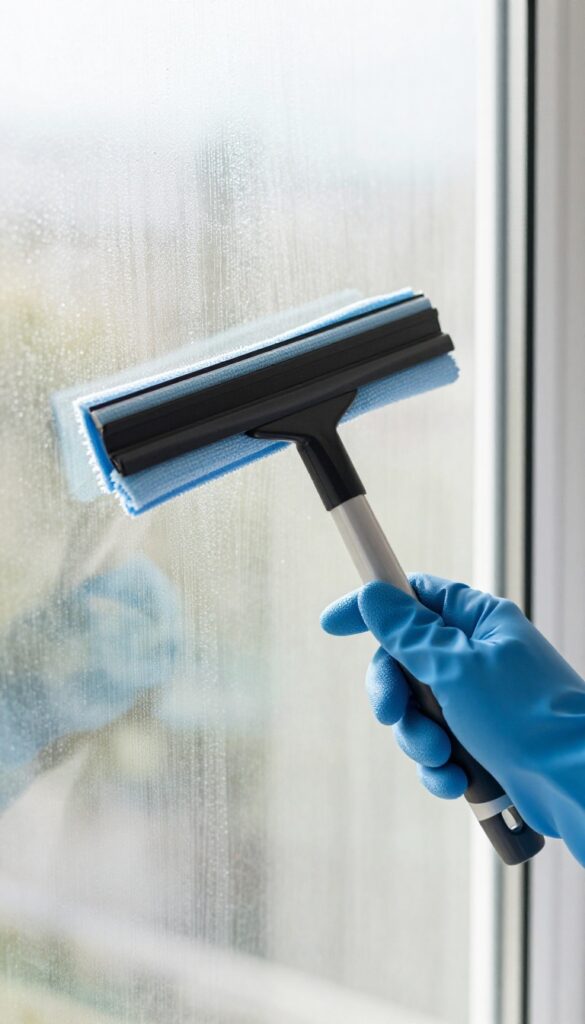
7. Use a Squeegee with a Smooth, Overlapping Stroke
The squeegee is your best friend for streak-free windows, but only if you use it correctly. A haphazard, zigzag motion will leave streaks and missed spots. The key is to work methodically from top to bottom, using smooth, overlapping strokes that cover every inch of glass.
Start At The Top And Pull Straight Down
Position the squeegee at the top corner of the window, angled slightly so the blade makes full contact. Pull it down in one steady, straight line. Don't stop halfway or change direction mid-stroke.
A consistent speed prevents the water from drying before you wipe it away.
Wipe The Blade After Each Pass
After each downward stroke, wipe the squeegee blade dry with a clean, lint-free cloth. This removes the dirty water and soap residue that would otherwise be dragged across the glass. A damp blade is a recipe for streaks, so make this a habit.
Overlap Your Strokes By An Inch Or Two
When you move to the next section, overlap the previous stroke by about one to two inches. This ensures you don't leave a thin line of water that dries into a streak. The overlap also helps blend the edges so the glass dries uniformly clear.
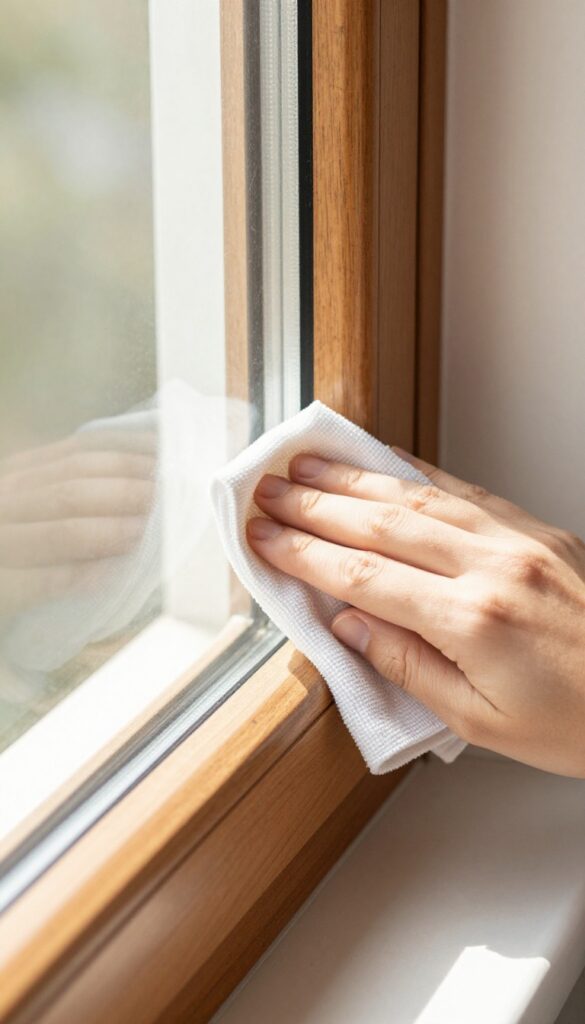
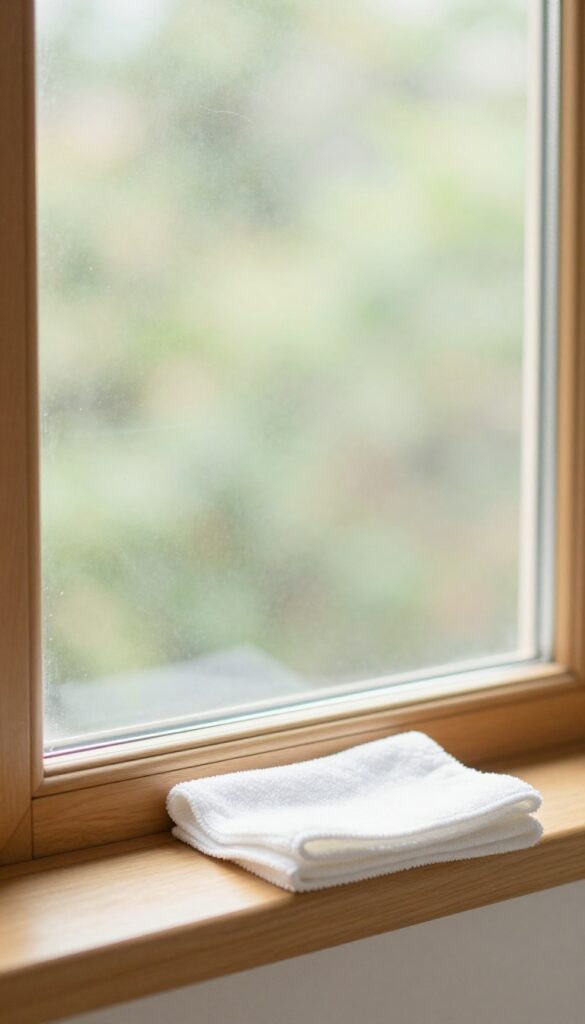
8. Dry the Edges and Corners with a Microfiber Cloth
Even the best squeegee technique leaves a little water along the edges and in the corners. If you ignore that moisture, it will drip down the glass and dry into new streaks. A quick pass with a dry microfiber cloth solves that problem in seconds.
This final touch makes the difference between windows that look clean and windows that truly sparkle.
Why Edges And Corners Are Streak Magnets
Water naturally pools at the bottom edge of the glass and in the corners where the squeegee can't reach. As gravity pulls that water down, it leaves a trail of dissolved minerals and cleaning solution. By the time it dries, you've got a visible streak that ruins the whole pane.
Drying these spots immediately prevents that chain reaction.
The Right Cloth For The Job
Not every cloth works well for drying edges. A microfiber cloth is ideal because it absorbs water without leaving lint or fibers behind. Avoid paper towels—they can leave dust and are less absorbent when damp.
Keep a dedicated dry microfiber cloth in your cleaning kit just for this step.
How To Dry Without Redepositing Dirt
Use a clean, dry section of the cloth and wipe along the bottom edge first, then each corner. Work from the edge inward so you don't push water back onto the clean glass. If the cloth gets too wet, flip it to a dry side or switch to a fresh one.
A single damp cloth can smear moisture rather than absorb it.
9. Clean Both Sides for a Uniform Finish
It's easy to focus on the outside grime and forget the inside, but cleaning only one side leaves a mismatched look. Dust, fingerprints, and cooking grease build up indoors too, and they show just as much in sunlight. For truly uniform windows, both sides need the same treatment.
A simple trick helps you spot which side still has streaks: clean one side horizontally and the other vertically. That way, if you see a streak, you know exactly which surface to redo. Start with the inside, then move to the outside, or vice versa—just keep the direction consistent per side.
Why Direction Matters
When both sides are cleaned in the same direction, a streak on one side can blend into a streak on the other, making it hard to locate the problem. By alternating directions, you create a visual cue. Horizontal strokes on the inside and vertical on the outside means any leftover residue will cross the pattern and stand out immediately.
Inside First, Then Outside
Tackle the interior panes first while your solution is fresh and your tools are clean. Inside windows usually have lighter dirt, so you can work quickly. Then move outside, where you might need a stronger solution or more elbow grease for pollen, bird droppings, or hard water spots.
This order also prevents dripping dirty water onto already-clean interior glass.
Check In Different Light
After cleaning both sides, step back and look at the glass from different angles. Natural light from the sun reveals streaks best, but if it's overcast, use a flashlight or a bright lamp held at an angle. Move around the room to catch reflections that highlight missed spots.
A final wipe with a dry microfiber cloth on any trouble areas finishes the job.
10. Tackle Screens and Tracks for a Complete Job
Windows aren't just glass. Screens and tracks collect dust, pollen, and grime that can make clean windows look dirty again. Ignoring them leaves a half-finished job.
But a few extra minutes makes everything look fresh.
Start by removing the screens carefully. Most pop out with a gentle push or lift. Lay them flat on a driveway or patio.
Use a soft brush or vacuum with a brush attachment to remove loose dirt. Then wash with mild dish soap and warm water. Rinse with a hose and let them dry completely before reinstalling.
For tracks, use a stiff brush (an old toothbrush works great) to scrub out debris. Vacuum up the loosened dirt, then wipe with a damp cloth. Let tracks dry fully to prevent mold or mildew.
Screen Cleaning Made Simple
Screens are delicate. Avoid harsh chemicals or pressure washers. A gentle soap solution and soft sponge are all you need.
Rinse thoroughly and dry in the shade to prevent water spots. Reinstall only when completely dry to avoid trapping moisture.
Track Cleaning Tips
Tracks often have stubborn dirt in corners. Use a crevice tool on your vacuum, then scrub with a toothbrush dipped in soapy water. For stuck-on grime, a putty knife wrapped in a cloth can help.
Finish with a dry cloth to remove any residue.
11. Avoid Common Mistakes That Cause Streaks
You might be doing everything right but still ending up with streaks. Often, it's a few simple habits that ruin the finish. Let's fix those.
Streaks are usually the result of using too much soap, cleaning in direct sunlight, or forgetting to dry your squeegee blade. These small errors create residue and uneven drying. By avoiding them, you'll get crystal-clear glass every time.
Don't Overdo The Soap
More soap doesn't mean cleaner windows. In fact, too much leaves a film that attracts dust and causes streaks. Use just a few drops of dish soap per bucket of water, or better yet, try a rinse agent like vinegar.
Avoid Direct Sunlight
Cleaning windows in direct sun makes the solution dry too quickly, leaving streaks behind. Choose a cloudy day or work on the shady side of your house. If you must clean in sun, work in small sections and dry immediately.
Wipe Your Squeegee Blade
After each pass, wipe the squeegee blade with a dry cloth. A wet or dirty blade drags dirty water back across the glass, creating streaks. Keep a microfiber cloth handy for this.
12. Try a DIY Vinegar Solution for Extra Shine
Sometimes the best glass cleaner is already in your kitchen. A simple vinegar solution cuts through grease and grime without leaving behind any residue. It's cheap, non-toxic, and surprisingly effective.
For a streak-free finish, skip the store-bought sprays filled with dyes and fragrances. White vinegar's acidity breaks down oils and minerals that cause streaks, while water helps it spread evenly. The result is glass so clear it almost looks invisible.
The Perfect Ratio
Mix one part white vinegar with two parts warm water in a spray bottle. Warm water helps the vinegar dissolve grime faster. Shake gently to combine—no need for soap or other additives.
How To Apply
Spray the solution lightly onto the glass, then wipe with a microfiber cloth or squeegee. Work in small sections so the solution doesn't dry before you wipe it off. For tough spots, let it sit for 30 seconds before wiping.
When To Avoid Vinegar
Don't use vinegar on windows with tinted film or on glass with metal frames—the acid can damage them. Stick to plain water or a mild dish soap solution for those surfaces.
13. Maintain Your Windows Between Deep Cleans
Deep cleaning your windows is a big job, but keeping them sparkling in between doesn't have to be. A little regular maintenance saves you time and effort when it's time for a full wash. Plus, it prevents dirt from building up and turning into stubborn grime.
The key is to stay on top of dust and fingerprints before they set. A quick wipe-down every few weeks makes a huge difference. You'll be surprised how much easier your deep cleans become when you're not battling layers of dirt.
Quick Wipe Routine
Grab a damp microfiber cloth and give your windows a once-over. Focus on areas that get touched often, like window sills and handles. This simple habit takes just a few minutes but keeps streaks at bay.
What To Avoid
Skip paper towels and old rags—they leave lint and streaks. Stick to microfiber, which traps dust without scratching. Also, avoid harsh chemicals that can damage window seals over time.
Seasonal Check
After storms or windy days, check for dirt splatters or pollen. A quick rinse with water and a wipe can prevent those spots from baking into the glass. Your windows will thank you come deep clean day.
FAQ
What is the best homemade window cleaner?
A mixture of 1 part white vinegar to 2 parts water works great. Add a drop of dish soap to cut grease. Avoid using too much soap, as it can leave a film.
Why do my windows still look streaky after cleaning?
Streaks often come from cleaning in direct sunlight, using too much cleaner, or not drying the squeegee blade between strokes. Also, dirty tools can transfer grime back onto the glass.
Can I use newspaper to dry windows?
Yes, newspaper is lint-free and can work well for drying, but it may leave ink on your hands. Microfiber cloths are a more convenient and reusable option.
How often should I clean my windows?
For most homes, cleaning windows twice a year is enough. If you live near a busy road or in a dusty area, you might need to clean them more often.
Is it better to clean windows with a squeegee or a cloth?
A squeegee gives the most streak-free finish, especially on large panes. For small windows, a microfiber cloth can work if you buff the glass dry quickly.
Conclusion
You've now got a full arsenal of streak-free window cleaning methods that actually work. The secret isn't a fancy product—it's the right technique and a little patience.
Pick the tools that fit your windows best, and you'll breeze through the job next time. Keep a squeegee and microfiber cloth handy, and you'll never settle for smeary glass again.

I’m Pallab Kishore, the owner of Little Pets Realm — an animal lover and pet care enthusiast sharing easy tips, healthy recipes, and honest advice to help every small pet live a happy, healthy, tail-wagging life.


