Last updated on June 27th, 2026 at 03:17 pm
Grout lines turning gray or even black can make a freshly mopped floor still look dirty. The porous surface traps dust, spills, and soap scum that regular mopping can’t reach.
These 13 steps cut through that buildup, restoring your tile’s original brightness without harsh scrubbing marathons. Each method targets a specific layer of grime—from baking soda paste for everyday dirt to oxygen bleach for deep whitening.
You’ll finish with sealed, stain-resistant grout that stays clean longer. No need for expensive tools or toxic fumes, just a systematic approach that actually works.
1. Sweep and Vacuum Thoroughly
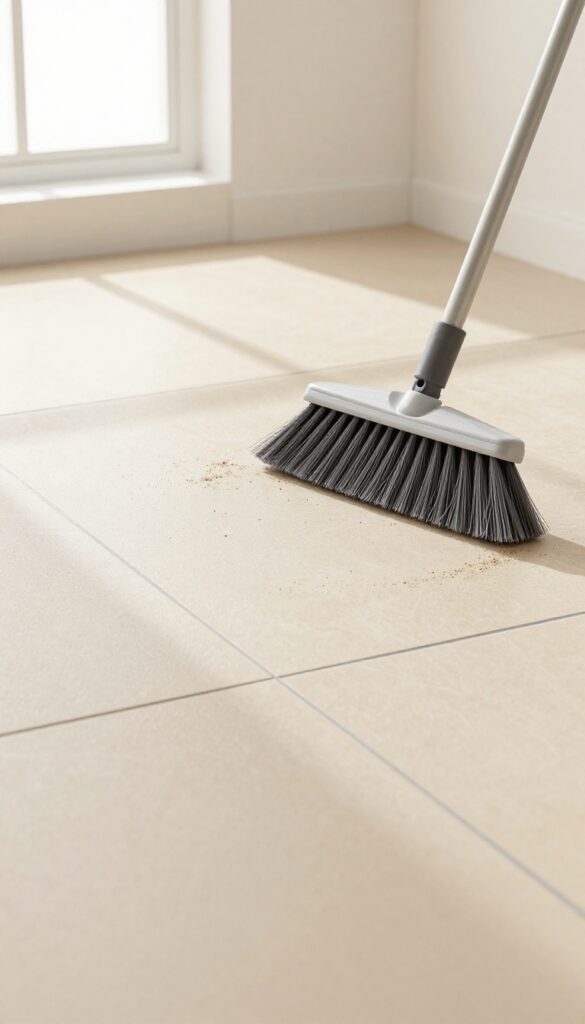
Before you bring out any cleaning solution, you need to clear the deck. Loose dirt, pet hair, and crumbs sitting on the tile will turn into mud the second you add moisture. A quick sweep or vacuum removes that surface layer so your cleaner can actually reach the grout pores.
Grab a broom with stiff bristles or a vacuum with a hard-floor attachment. Sweep the entire floor, paying extra attention to the grout lines where debris likes to hide. If you vacuum, skip the beater bar to avoid scratching the tile.
For corners and edges, use a dustpan or a narrow nozzle attachment. This step takes just a few minutes but makes everything that follows more effective. You’ll see less streaking and fewer missed spots.
Why A Clean Surface Matters
Grout is porous, like a sponge. If you wet it while dirt is still on top, that grime gets pushed deeper into the pores. Once trapped, it’s much harder to remove.
Sweeping first prevents this backfire and keeps your cleaning solution working on the stain, not the loose dust.
Best Tools For The Job
A microfiber dust mop picks up fine particles without scattering them. For deep grout lines, a stiff-bristled brush attachment on your vacuum works wonders. Avoid using a standard broom on wet floors later—it can push dirty water into the grout.
How Often To Sweep
Make this a daily habit in high-traffic areas like kitchens and entryways. Weekly is fine for bathrooms. The less dirt sits on the grout, the less often you’ll need a deep clean.
Prevention is the easiest part of grout care.
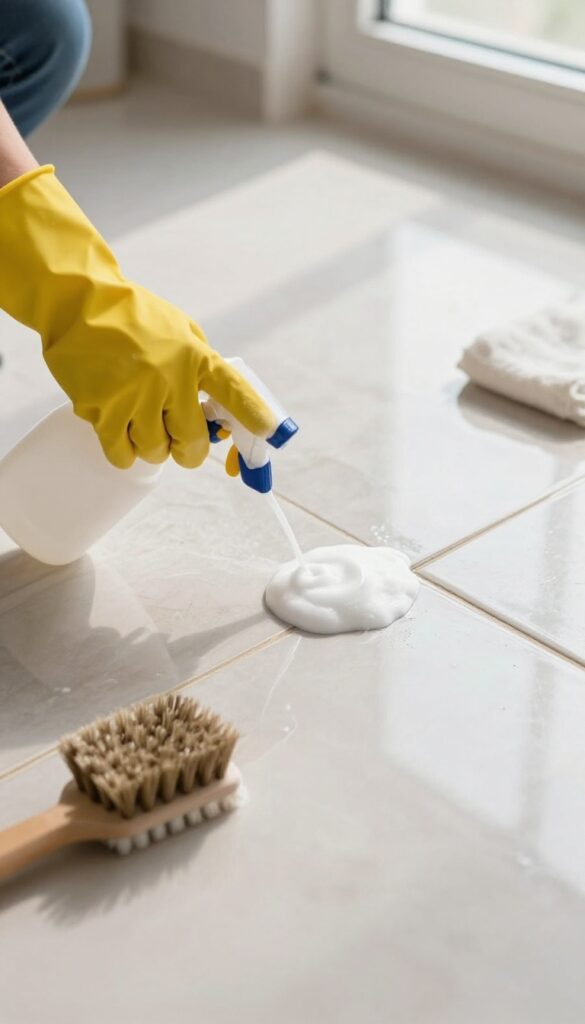
2. Mix a Baking Soda Paste
Baking soda is a gentle abrasive that lifts grime without scratching tile or grout. When mixed into a thick paste, it clings to vertical grout lines and penetrates porous surfaces. This simple step breaks down everyday dirt and soap scum that regular mopping leaves behind.
Start with a small bowl and combine three parts baking soda with one part water. Stir until you get a spreadable paste—think peanut butter consistency. Too runny?
Add more baking soda. Too thick? Add a few more drops of water.
Apply the paste directly onto the grout lines using an old toothbrush, a grout brush, or even your finger (wear gloves if you prefer). Make sure every line is covered. Let it sit for 10 minutes.
During this time, the baking soda works to loosen embedded dirt and absorb odors. Don't let it dry completely; if it starts to crack, spritz lightly with water.
Why Baking Soda Works So Well
Baking soda is mildly alkaline, which helps dissolve acidic grime like coffee spills or soap scum. Its fine crystals provide gentle scrubbing power that won't damage the grout or tile surface. Plus, it's non-toxic and safe around kids and pets.
How To Apply The Paste Effectively
Use a small brush to work the paste into the grout lines, ensuring full coverage. For wide grout lines, a grout brush with stiff bristles works best. For narrow lines, an old toothbrush is perfect.
Press firmly but not too hard—let the baking soda do the work.
Letting It Sit For Maximum Impact
The 10-minute dwell time is crucial. If the paste dries out, the cleaning action stops. If your grout is heavily soiled, you can let it sit for up to 15 minutes, but keep it moist by covering with a damp cloth or spritzing with water.
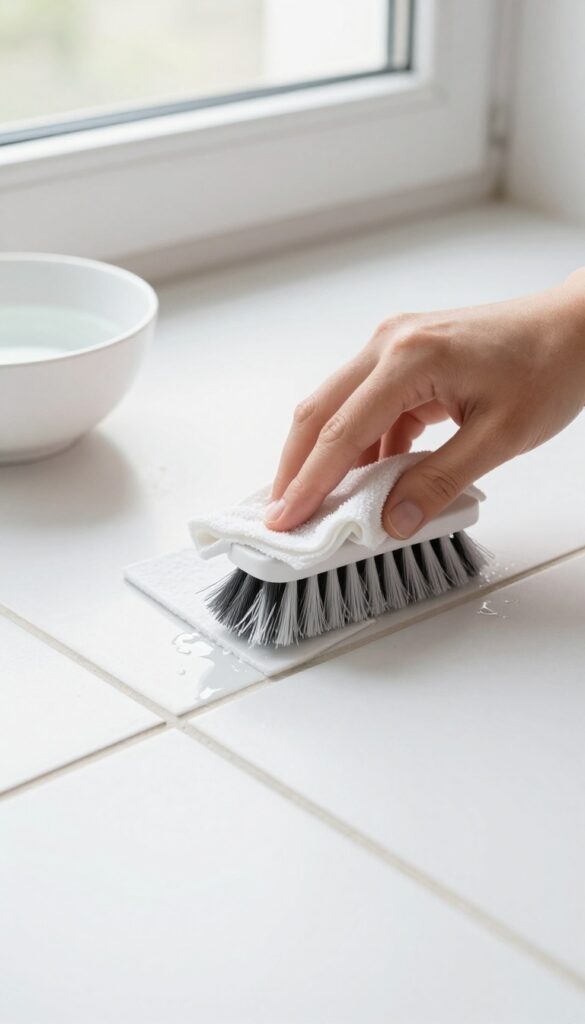
3. Scrub with a Stiff Brush
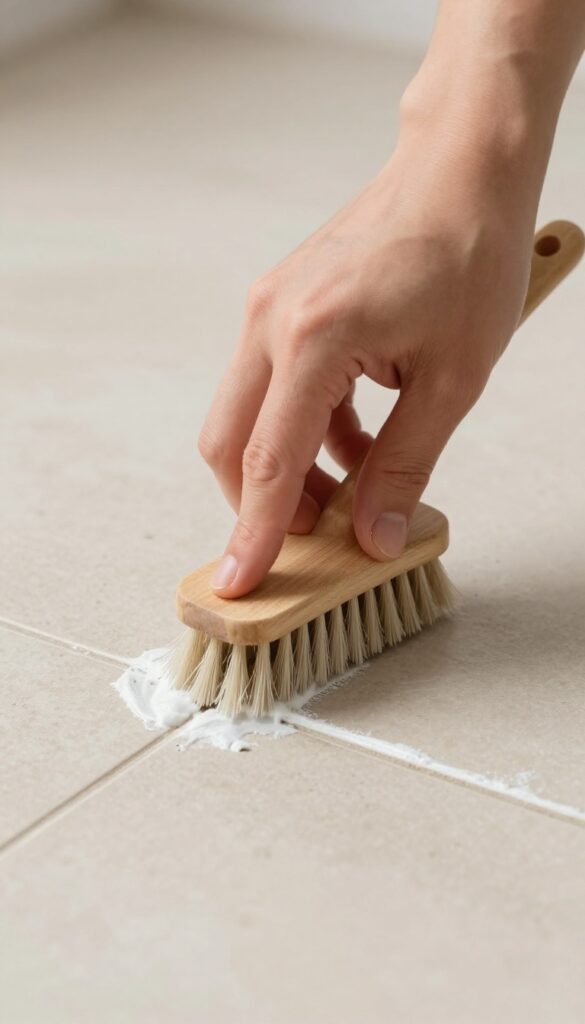
Now that your baking soda paste has had a few minutes to work, it's time to agitate. A stiff brush is your best friend here—it gets into the porous grout lines where sponges can't reach. Don't be shy; a little elbow grease makes a big difference.
Use a grout brush or an old toothbrush to scrub the paste into the lines. Focus on small sections at a time for thorough cleaning. Work in a circular motion to lift dirt from the pores.
Rinse the brush frequently to avoid spreading grime. For stubborn spots, add a bit more paste and scrub again.
Choose The Right Brush
A dedicated grout brush has stiff, angled bristles that fit perfectly into grout lines. An old toothbrush works well for tight corners. Avoid wire brushes—they can scratch tile surfaces.
Work In Small Sections
Tackle about a 2×2 foot area at a time. This keeps the paste from drying out and ensures you give each spot enough attention. Overlap slightly between sections to avoid missing any lines.
Apply The Right Pressure
Press firmly but not so hard that you bend the bristles. Let the brush do the work. If you're not seeing progress, let the paste sit a few more minutes before scrubbing again.
4. Spray with Vinegar Solution
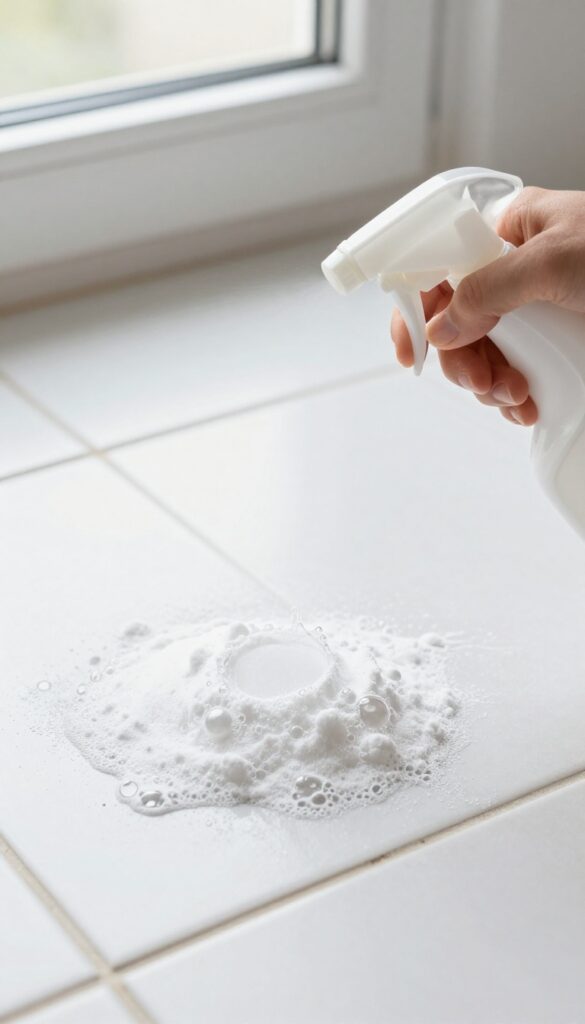
Once the baking soda paste has settled in, it’s time for the second half of this dynamic duo. White vinegar reacts with baking soda to create a fizzy action that loosens stubborn grime right out of the pores. This step is quick but effective—just a spritz and a short wait.
Why The Fizz Matters
The chemical reaction between the alkaline baking soda and acidic vinegar produces carbon dioxide bubbles. Those bubbles help lift dirt and soap scum from deep within the grout, making it easier to wipe away later. It’s a gentle but powerful lift that doesn’t require heavy scrubbing.
How To Apply The Vinegar Mix
Fill a spray bottle with equal parts white vinegar and water. Shake gently to combine. Mist the solution directly over the baking soda paste, covering all the grout lines.
You’ll see immediate fizzing—that’s the reaction working. Let it sit for about 5 minutes to fully penetrate.
What To Expect After 5 Minutes
After the wait, the fizzing will have subsided, and the paste may look slightly looser. The grout should appear lighter as the grime is lifted. Don’t rinse yet—the next step will scrub and remove everything together.
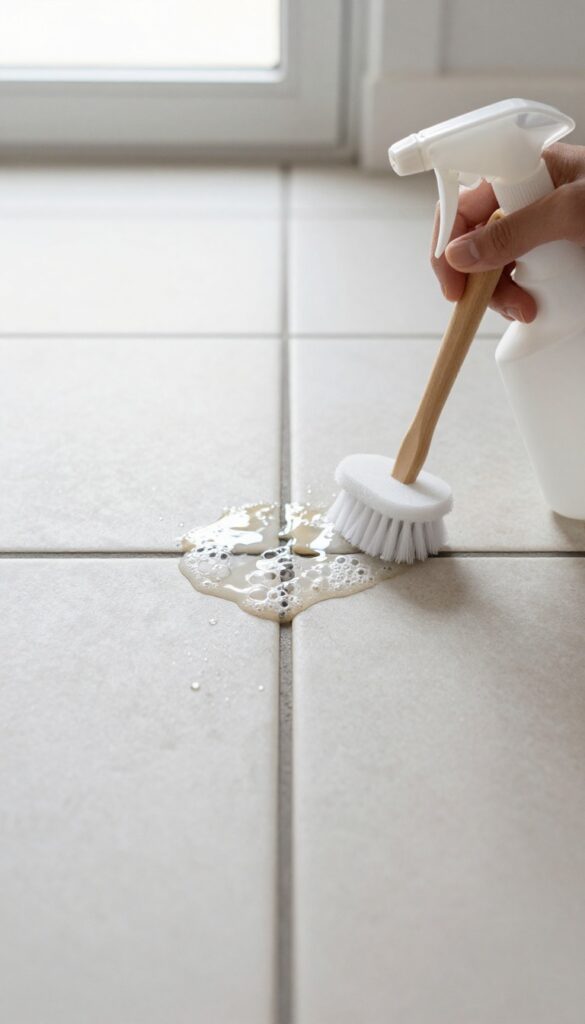
5. Rinse and Wipe Away Residue
After all that scrubbing, you’ve loosened the grime, but it’s still sitting on the grout. If you skip rinsing properly, that dirty paste just dries back into place, and you’re back to square one. A thorough rinse is what separates a clean floor from a floor that just looks clean for an hour.
Grab a clean bucket of warm water and a microfiber cloth or sponge. Wring it out well—you want it damp, not soaking. Wipe down the grout lines, rinsing the cloth frequently in the bucket.
Change the water as soon as it looks cloudy. For large areas, a spray bottle with plain water can help you control the moisture. Follow up with a dry microfiber cloth to pick up any remaining moisture and prevent streaking on the tile.
Change Your Water Often
Dirty water spreads dirt. Every time you dip your cloth, you’re picking up grime. If the water turns murky, dump it and refill with fresh warm water.
It’s a small step that makes a huge difference in the final result.
Use The Right Cloth
Microfiber is ideal because it traps particles instead of pushing them around. Avoid sponges that have been used for dishes—they can leave soap residue. A dedicated cleaning cloth or a pack of cheap microfiber towels works perfectly.
Blot, Don’t Rub
When wiping, use a blotting motion rather than aggressive rubbing. This lifts the residue without forcing it deeper into the grout pores. For stubborn spots, a slightly damp cloth left on the area for a minute can help dissolve any remaining paste.
6. Try Hydrogen Peroxide for Stubborn Stains
Some stains just won't budge with gentle cleaners. Grease splatters near the stove or dark marks in high-traffic areas often need a stronger touch. That's where hydrogen peroxide comes in—it's a natural bleach alternative that lifts deep-set discoloration without the harsh fumes of chlorine bleach.
Hydrogen peroxide works by releasing oxygen bubbles that break down organic stains. It's safe for most grout types and won't damage tile surfaces. For best results, use a 3% solution (the standard drugstore strength) and apply it directly to the grout lines.
Let it sit for about 15 minutes to penetrate the stain, then scrub with a stiff brush and rinse thoroughly with water. Repeat if needed for particularly stubborn spots.
When To Use Hydrogen Peroxide
Reserve hydrogen peroxide for darker stains that resist baking soda or vinegar. It's especially effective on coffee spills, wine drips, and grease marks. Avoid using it on colored grout, as it may lighten the pigment.
Always test on a small, hidden area first.
Application Tips For Best Results
Apply hydrogen peroxide with a spray bottle or a small brush to keep it on the grout lines. Cover the area with plastic wrap to prevent evaporation and let it work longer. After scrubbing, rinse with clean water and dry with a microfiber cloth to prevent moisture from seeping into the grout.
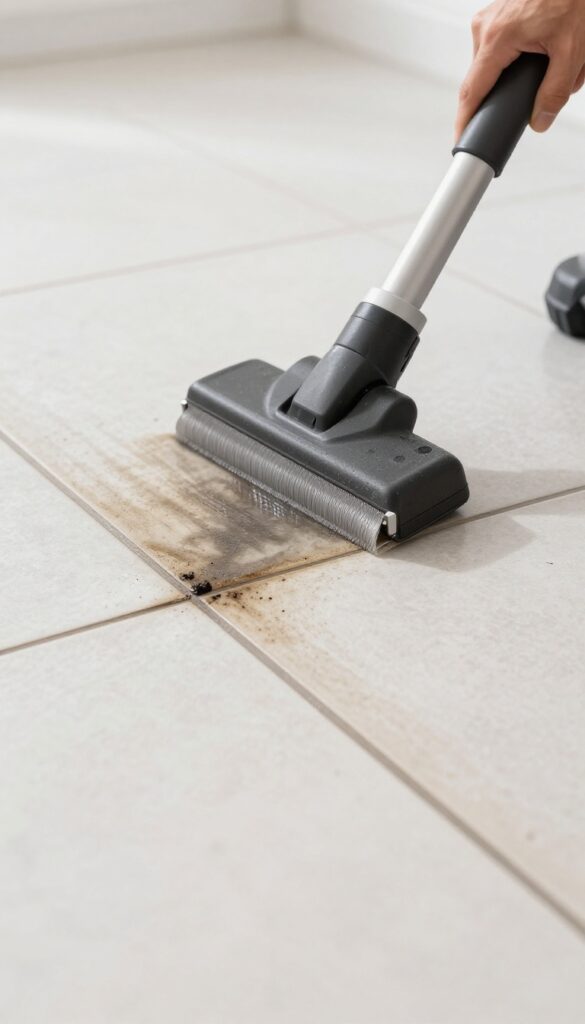
7. Use a Steam Cleaner for Deep Grime
For grout that's been neglected for months or years, a steam cleaner can be a game-changer. It uses high-temperature steam to loosen deeply embedded dirt and kill mold spores without chemicals. The heat breaks down greasy residue and soap scum that scrubbing alone can't touch.
Choose The Right Steam Cleaner
Look for a model with a grout nozzle or a small brush attachment. Handheld steam cleaners work well for bathrooms and small areas, while larger floor steam mops can cover more ground. Avoid using a steam cleaner on unsealed or damaged grout, as the moisture can worsen cracks.
Prepare The Area
Sweep or vacuum the floor to remove loose debris. Fill the steam cleaner with water according to the manufacturer's instructions. Let it heat up fully—usually 30 to 60 seconds—until steam is produced steadily.
Steam And Wipe Technique
Hold the nozzle about an inch above the grout line and move it slowly along the joint. The steam will loosen the grime, which you can then wipe away with a clean microfiber cloth. Work in small sections to prevent the dirt from drying back onto the grout.
Follow Up With A Dry Cloth
After steaming, immediately wipe the area with a dry cloth to remove any dissolved residue. This step prevents streaking and leaves the grout ready for sealing if desired. For stubborn spots, repeat the process or let the steam sit for a few seconds before wiping.
8. Apply a Commercial Grout Cleaner
Sometimes the DIY route just doesn't cut it. If baking soda, vinegar, or hydrogen peroxide left your grout looking dingy, a dedicated commercial cleaner is your next logical move. These products are formulated specifically to dissolve the mineral deposits, soap scum, and mildew that household staples can't always handle.
You don't need to reach for the harshest chemical on the shelf. A pH-neutral grout cleaner is gentle on your tiles and safe for most grout types, including sealed and unsealed. Just follow the label directions to the letter, and always wear gloves—these solutions are strong enough to irritate skin after prolonged contact.
Commercial grout cleaners come in sprays, foams, and liquids. They work by penetrating the porous grout surface and breaking down the bond between the stain and the material. Most require a short dwell time—usually 5 to 15 minutes—before you scrub or rinse.
Avoid letting the product dry on the grout, as that can leave a residue. A little goes a long way. Apply the cleaner directly to the grout lines, not the whole tile, to minimize waste and reduce the risk of etching natural stone tiles.
Use a small brush or an old toothbrush to work the product into the grout. After scrubbing, rinse thoroughly with clean water and dry the area with a microfiber cloth. If you're dealing with stubborn dark stains or mold, look for a cleaner with a bleach alternative or oxygen bleach.
These are less harsh than chlorine bleach but still effective at whitening. For colored grout, stick with a pH-neutral option to avoid fading or discoloration.
Choosing The Right Cleaner
Not all grout cleaners are created equal. For everyday grime, a mild pH-neutral spray works fine. For heavy buildup, a gel or foam that clings to vertical surfaces is better.
Check the label for compatibility with your tile type—some cleaners can etch marble or travertine. If your grout is colored, test the cleaner in an inconspicuous spot first.
Application Tips For Best Results
Apply the cleaner sparingly along the grout lines, not the tile face. Let it sit for the recommended dwell time—don't rush this step. Use a stiff-bristled brush to agitate the grout, focusing on stained areas.
Rinse with a damp sponge or cloth, changing the water frequently to avoid redepositing dirt. Dry the area immediately to prevent water spots.
Safety First
Always wear rubber gloves and work in a well-ventilated area. Some cleaners emit strong fumes, so open windows or use a fan. Avoid mixing different cleaners—combining an acidic cleaner with a bleach-based one can produce toxic chlorine gas.
Keep children and pets away until the area is dry and rinsed.
9. Seal the Grout After Cleaning
You've put in the work to get your grout looking fresh again. Now it's time to lock in that clean and make future maintenance much easier. Sealing your grout creates a protective barrier that repels moisture, dirt, and stains, so you won't have to deep clean as often.
Sealing is a straightforward step that pays off for months or even years. The key is to choose the right sealer and apply it carefully to avoid messing up your tile.
Choose The Right Sealer
There are two main types: penetrating sealers that soak into the grout and membrane-forming sealers that sit on top. For most tile floors, a penetrating sealer is best because it won't peel or discolor over time. Look for a product labeled for use on grout and suitable for your tile type.
Apply With Precision
Use a small applicator bottle with a fine tip to apply the sealer directly onto the grout lines. This gives you control and keeps sealer off the tile surface. Work in small sections, applying a thin bead along each grout line.
Let it sit for the time recommended on the label, then wipe away any excess from the tile with a clean cloth.
Let It Cure Fully
After sealing, allow the grout to cure for at least 24 hours before walking on the floor or getting it wet. Check the sealer's instructions for exact drying times. Once cured, your grout will be much more resistant to stains and easier to clean with just a damp mop.
10. Maintain with Regular Spot Cleaning
Deep cleaning your grout is a big win, but it won't last if you let spills sit. The secret to keeping that fresh look is consistent spot cleaning. A few minutes each week stops grime from building up again.
Why Spot Cleaning Matters
Grout is porous, so spills seep in fast. Once dirt settles, it's harder to remove. Regular spot cleaning prevents stains from setting and keeps your deep clean results lasting months longer.
Quick Daily Habits
Wipe up spills immediately with a damp cloth. For sticky messes, use a soft brush with a bit of mild cleaner. This simple habit stops grout from darkening over time.
Weekly Grout Refresh
Once a week, give your grout a quick scrub. Mix a few drops of dish soap with warm water, dip a stiff brush, and go over the lines. Rinse with water and dry with a towel.
It takes five minutes and makes a huge difference.
11. Use a Magic Eraser for Quick Touch-Ups
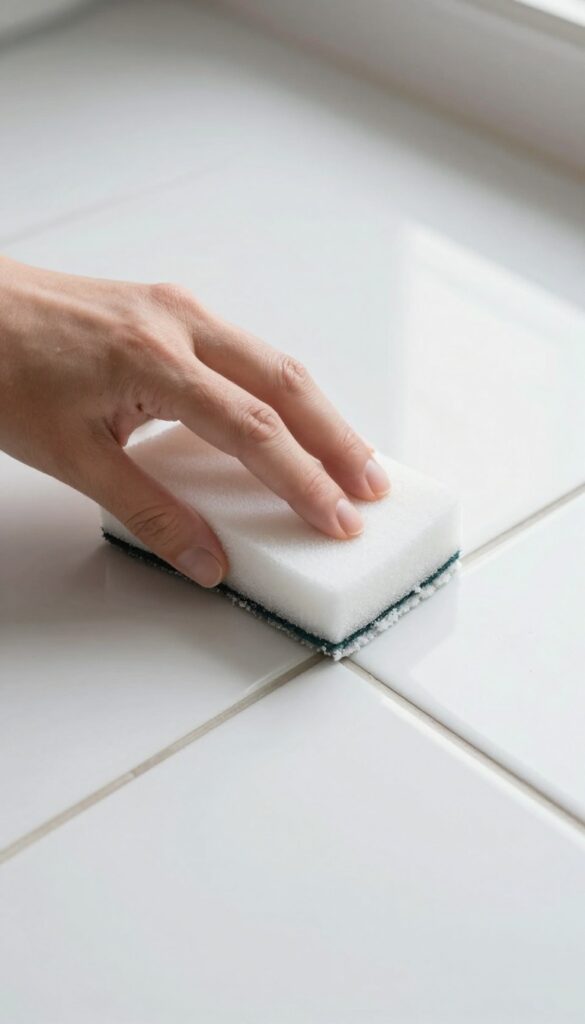
When you need a fast fix for a few dingy spots, a melamine sponge—often sold as Magic Eraser—can work wonders. It's not a deep cleaner, but it excels at lifting surface stains without the elbow grease. Keep one in your cleaning caddy for those moments when you want a quick refresh without pulling out the heavy-duty supplies.
A melamine sponge works like fine sandpaper, gently abrading the top layer of grout to remove discoloration. It's ideal for high-traffic areas or spots near the stove where grease splatters land. Just dampen the sponge, wring it out, and lightly rub the grout lines.
You'll see the grime transfer to the sponge almost instantly. Rinse the sponge frequently and repeat until the lines look brighter. This method is best for light to moderate stains; for deep-set dirt, you'll need a stronger cleaner.
When To Reach For A Magic Eraser
Use it for quick touch-ups between deep cleans. It's perfect for freshening up grout in the kitchen after cooking or in the bathroom after a week of use. It's also great for spot-treating stains from spills like coffee or wine before they set in.
But don't rely on it for heavy mold or decades-old grime.
How To Use It Effectively
Cut the sponge into smaller pieces to get more mileage. Dampen it with water—no soap needed—and squeeze out excess. Gently rub the grout lines in a back-and-forth motion.
Avoid pressing too hard, as the sponge can wear down quickly and may damage the grout if you're too aggressive. Rinse the sponge often and replace it when it starts to crumble.
What To Avoid
Don't use a Magic Eraser on unsealed grout, as the abrasion can remove the top layer and make it more porous. Test in an inconspicuous area first. Also, avoid using it on natural stone tiles, as it can cause etching.
Stick to ceramic or porcelain tiles for best results.
12. Try Oxygen Bleach for Whitening
If your grout has turned a dull gray or yellow and regular cleaners aren't cutting it, oxygen bleach can bring back the brightness. Unlike chlorine bleach, it's gentler on your tiles and doesn't leave harsh fumes. This method works especially well on light-colored grout that needs a lift without damaging the surrounding tile.
Oxygen bleach, often sold as a powder (like OxiClean), releases oxygen bubbles when mixed with water. These bubbles penetrate grout pores to lift embedded stains and whiten the surface. It's a non-toxic alternative that's safe for most tile types, including ceramic and porcelain.
Mixing The Paste
Combine oxygen bleach powder with warm water in a bowl until it forms a thick paste—similar to toothpaste consistency. Use about 1 part water to 2 parts powder, adjusting as needed. Work in a well-ventilated area, though the fumes are minimal.
Application And Dwell Time
Spread the paste over the grout lines using a small brush or your finger (wear gloves). Make sure it fills the grooves. Let it sit for 20 minutes—don't let it dry out completely; if it starts to crack, lightly mist with water.
The oxygen bubbles need time to work.
Scrubbing And Rinsing
After the dwell time, scrub the grout with a stiff-bristled brush or an old toothbrush. You'll see the paste turn gray as it lifts dirt. Rinse thoroughly with clean water and wipe away residue with a damp cloth.
Repeat on stubborn spots if needed.
13. Call a Professional for Restoration
Sometimes the DIY route just doesn't cut it. If your grout is cracked, missing, or deeply stained despite your best efforts, a professional restoration might be the smartest move. Pros have industrial-grade tools and expertise that can make old tile floors look brand new without you spending hours on your hands and knees.
Professional grout restoration typically involves deep cleaning, regrouting, and sealing. The process starts with a thorough cleaning using high-pressure steam or chemical treatments that lift years of embedded dirt. Then, any damaged grout is removed and replaced with fresh material.
Finally, a high-quality sealer is applied to protect against future stains. This service can cost between $2 and $10 per square foot depending on the extent of work, but it often delivers results that DIY methods can't match. For heavily soiled or damaged grout, it's a worthwhile investment that extends the life of your flooring.
When To Call A Pro
Consider professional help if you notice widespread cracking, missing chunks, or mold that keeps returning despite cleaning. Also, if your grout is more than 10 years old and has never been sealed, a pro can assess whether regrouting is needed. For large areas (over 100 square feet), the time and effort saved often justify the cost.
What To Expect From The Service
A typical restoration includes cleaning with industrial-grade equipment, replacing damaged grout, and applying a penetrating sealer. The process can take one to three days depending on the area size. Afterward, your grout will be uniformly colored, stain-resistant, and much easier to maintain.
Ask for a warranty on workmanship—many companies offer one to two years.
Choosing The Right Professional
Look for specialists in tile and grout restoration, not general cleaners. Check online reviews, ask for before-and-after photos, and get at least three quotes. Verify they use low-VOC sealers and eco-friendly cleaning options if that matters to you.
A good pro will also provide care instructions to keep your grout looking fresh longer.
FAQ
How often should I clean grout on tile floors?
For maintenance, clean grout every 2-3 months. High-traffic areas may need monthly attention. Deep cleaning with a paste or steam can be done once or twice a year.
Can I use bleach to clean grout?
Bleach can whiten grout but may damage the sealant and cause discoloration over time. It's better to use oxygen bleach or hydrogen peroxide for safer whitening.
What is the best homemade grout cleaner?
A baking soda and vinegar paste is effective for most grout. For tougher stains, add hydrogen peroxide. Always test on a small area first.
How do I prevent grout from getting dirty again?
Seal the grout after cleaning and reapply sealer every 1-2 years. Wipe up spills quickly and use a doormat to reduce dirt tracked onto the floor.
Can I use a steam mop on grout?
Yes, but use a steam mop with a grout attachment for best results. Avoid excessive moisture on unsealed grout, as it can weaken the material over time.
Conclusion
Your grout doesn't have to stay dingy. With these 13 steps, you've lifted years of embedded dirt and restored your tile floors to their original brightness.
The key is consistency: a quick weekly wipe-down and immediate spot treatment will keep your grout looking fresh for months. Now that you've seen how clean grout transforms a room, you'll never let it slide again.

I’m Pallab Kishore, the owner of Little Pets Realm — an animal lover and pet care enthusiast sharing easy tips, healthy recipes, and honest advice to help every small pet live a happy, healthy, tail-wagging life.


