
You scrub the toilet and wipe the mirror, but somehow the bathroom still feels off. That's because deep cleaning isn't just about the obvious surfaces—it's about the corners, the tracks, and the hidden grime you've been ignoring.
A full scrub can feel overwhelming, but breaking it down into 23 targeted checklist items makes it manageable and surprisingly satisfying. From descaling your showerhead to disinfecting the toilet brush holder, each step tackles a specific problem that builds toward a truly fresh bathroom.
Ready to transform your space without the guesswork? Let's get started.
1. Clear Out Everything
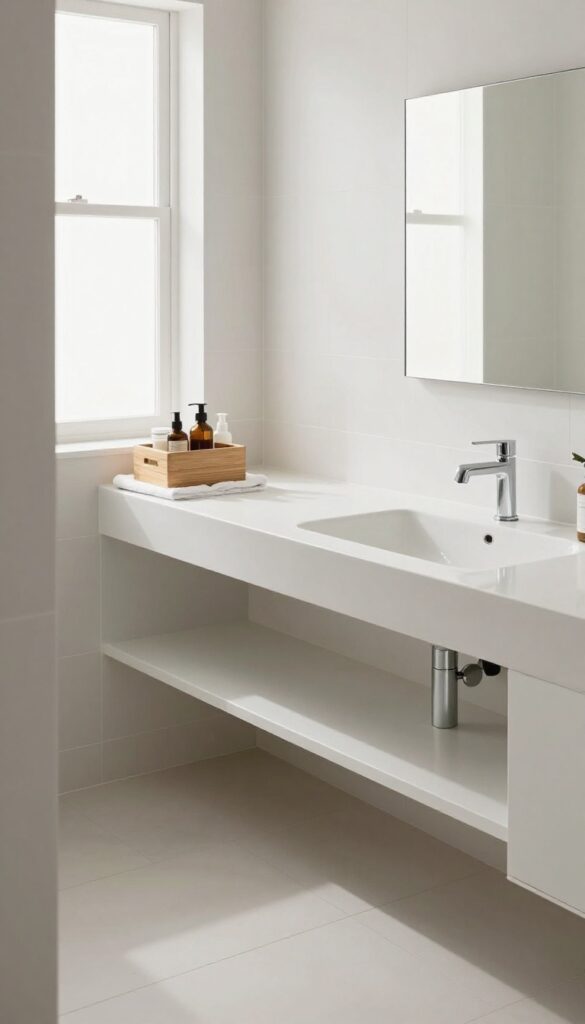
Before you can scrub, you need a blank slate. Every bottle, toothbrush, and decorative jar sitting on your counters or shelves just gets in the way. Moving them out gives you full access to every surface and prevents your cleaning products from leaving residue on your belongings.
This step also forces you to look at what you actually have. You might find expired products, empty bottles, or items you forgot about. It's a quick declutter that makes the rest of the deep clean more effective.
Start by removing everything from countertops, shelves, the shower caddy, the tub ledge, and the floor. Place items in a box or on a towel outside the bathroom. Wipe down each item as you go to remove dust or grime.
This step takes just a few minutes but sets you up for a thorough scrub without obstacles.
Why Starting Empty Matters
When you clean around objects, you miss spots. Grime builds up underneath bottles and behind organizers. Clearing everything out lets you reach those hidden areas and ensures every inch gets attention.
It also makes the cleaning process faster because you're not working around clutter.
What To Do With The Stuff You Remove
Sort items into three piles: keep, toss, and relocate. Check expiration dates on products like sunscreen, medications, and makeup. Wipe down bottles and containers before returning them.
Use this opportunity to reorganize—group similar items together and store daily use products in easy-to-reach spots.
Don't Forget The Floor And Shower
Bath mats, trash cans, and hampers often hide dirt and moisture. Take them out of the room entirely. Shower caddies and soap dishes should be emptied and set aside.
This clears the way for scrubbing floors and shower walls without having to move things around mid-clean.
2. Dust Ceiling Corners and Light Fixtures
Ceiling corners and light fixtures are easy to overlook, but they collect surprising amounts of dust, cobwebs, and even mold spores. When you're aiming for a full scrub, starting high up ensures that any loosened debris falls onto surfaces you'll clean later, not the other way around. Tackling this first also gives you a visible sense of progress right away.
Grab an extendable duster or a microfiber cloth wrapped around a broom handle to reach ceiling corners and the tops of light fixtures. For exhaust fan covers, remove them if possible and soak in warm, soapy water while you dust. Wipe down the fan blades and housing with a damp cloth, then dry and reattach the cover.
Don't forget light bulbs—dust there can dim your bathroom's brightness. Finish by wiping the pull chains or switches on ceiling fixtures.
Why Start At The Top
Dust and cobwebs settle on high surfaces first. By cleaning them early, you avoid re-soiling already scrubbed areas. It's also safer: you won't have to lean over wet floors or freshly cleaned countertops later.
Tools That Make It Easy
An extendable duster with a bendable head lets you reach corners without a ladder. For stubborn grime, a microfiber cloth sprayed with all-purpose cleaner works wonders. A vacuum with a brush attachment can also suck dust from vents and light fixtures.
Don't Skip The Exhaust Fan
The fan cover traps dust and lint, reducing efficiency and circulating allergens. Remove it, wash with mild detergent, and use a soft brush to clean the blades. This simple step improves air quality and prevents motor strain.
3. Wash Walls and Baseboards
Walls and baseboards are the silent collectors of bathroom grime. Splashes from the sink, toothpaste flecks, and dust settle on these surfaces, creating a film that can dull the room over time. A quick wipe-down makes a surprising difference in how clean the space feels.
Mix warm water with a mild detergent and wipe down walls, especially around the toilet and sink. Pay attention to baseboards where dust and grime collect.
Choose The Right Cleaner
For painted walls, stick to a gentle cleaner like dish soap or a vinegar-water solution. Avoid harsh chemicals that can strip paint. For tile walls, a mild bleach solution works well to kill mold and mildew.
Test a small area first if you're unsure.
Work From Top To Bottom
Start at the ceiling and work your way down to avoid dripping dirty water onto already-cleaned areas. Use a microfiber cloth or a sponge mop for larger wall sections. Rinse frequently to prevent streaks.
Don't Forget The Baseboards
Baseboards trap dust and grime, especially near the toilet. Use a small brush or an old toothbrush to scrub along the edges. Wipe with a damp cloth afterward.
For stubborn spots, a magic eraser works wonders without damaging the paint.
4. Deep Clean the Showerhead
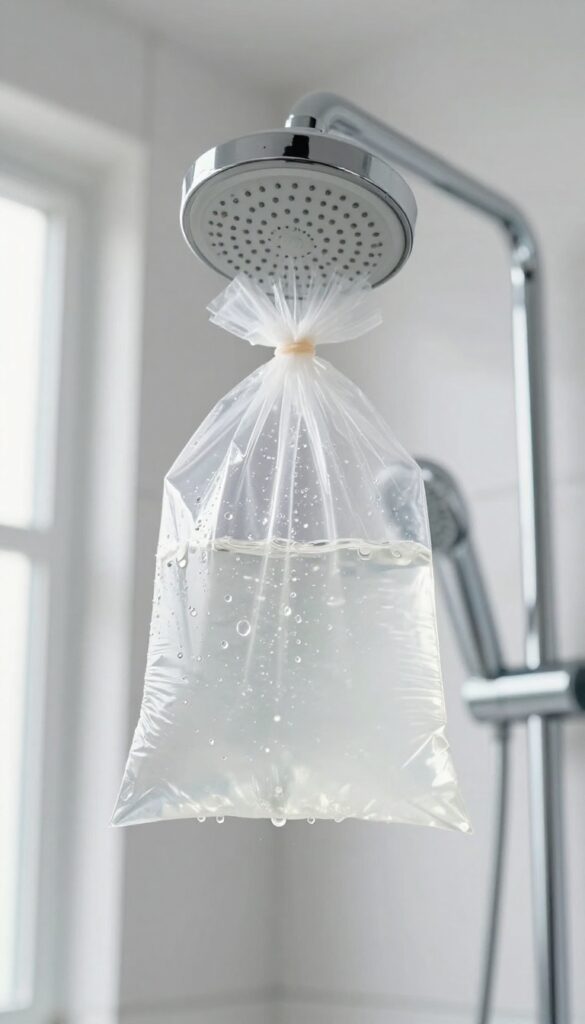
A clogged showerhead doesn't just look bad—it can mess with water pressure and even spray bacteria. Mineral deposits from hard water build up over time, blocking those tiny nozzles. Giving it a proper soak restores flow and keeps your shower feeling fresh.
Start by filling a sturdy plastic bag with white vinegar—enough to fully submerge the showerhead. Secure the bag around the neck of the fixture with a rubber band or zip tie, making sure it's watertight. Let it soak for at least an hour; for heavy buildup, leave it overnight.
After soaking, remove the bag and run the shower for a few minutes to flush out loosened deposits. Wipe down the exterior with a cloth, and use an old toothbrush to gently scrub any stubborn spots. That's it—your showerhead is back to like-new condition.
Why Vinegar Works
White vinegar is mildly acidic, which dissolves alkaline mineral deposits like calcium and lime without harsh chemicals. It's safe for most metal and plastic showerheads, and it's cheap. For extra stubborn buildup, you can heat the vinegar first (but let it cool slightly before soaking).
What If You Have A Handheld Showerhead?
If your showerhead detaches, you can simply remove it and submerge the head in a bowl of vinegar. Let it soak for the same amount of time, then rinse and reattach. This method is even easier and ensures full coverage.
Preventing Future Buildup
To keep your showerhead clean longer, wipe it dry after each use with a microfiber cloth. Once a month, run the shower on hot for a few minutes to help prevent deposits from hardening. If you have hard water, consider installing a showerhead filter.
5. Scrub Shower Doors and Tracks
Glass shower doors look sleek until soap scum and hard water stains turn them cloudy. And the tracks? They're basically grime magnets.
Giving them proper attention makes your whole shower feel brand new.
Tackle Glass Doors With The Right Cleaner
Avoid harsh abrasives that can scratch the glass. A simple paste of baking soda and white vinegar works wonders—apply it with a soft sponge, let it sit for 10 minutes, then rinse. For stubborn spots, a dedicated non-abrasive glass cleaner or a squeegee after each use helps prevent buildup.
Don't Forget The Door Seals
Those rubber or magnetic strips along the edges collect mold and mildew. Wipe them down with a diluted bleach solution or a vinegar spray. If they're already discolored or peeling, it might be time to replace them—new seals make a huge difference in both appearance and preventing leaks.
Deep Clean The Tracks
Tracks are narrow and easy to ignore, but they harbor soap scum, hair, and mystery gunk. Use an old toothbrush or a small detailing brush to scrub every groove. For stuck-on debris, a putty knife wrapped in a cloth can help.
Finish by rinsing with warm water and drying with a microfiber cloth to prevent new buildup.
6. Tackle Grout and Caulk
Grout and caulk are the unsung heroes of a clean bathroom—until they aren't. Over time, grout traps soap scum and mildew, while caulk cracks and peels, creating a breeding ground for mold. Giving these areas some love makes a huge difference in how fresh your bathroom looks and smells.
Start by applying a commercial grout cleaner or a paste of baking soda and water to the tile grout. Let it sit for 10–15 minutes, then scrub with a stiff brush. Rinse thoroughly with water.
For stubborn stains, a mixture of hydrogen peroxide and baking soda can work wonders. For caulk, inspect the seals around the tub, shower, and sink. If you see cracks, gaps, or black mold, it's time to remove the old caulk with a caulk remover tool or utility knife.
Clean the area, let it dry completely, then apply a fresh bead of silicone caulk. Smooth it with a caulk finishing tool or your finger dipped in soapy water. Allow it to cure for 24 hours before exposing it to water.
Grout Cleaning Deep Dive
For heavily soiled grout, use a grout brush or an old toothbrush to work the cleaner into the lines. If you have a steam cleaner, it's a game-changer—the steam loosens dirt and kills mold without chemicals. Rinse well and dry with a microfiber cloth to prevent new mildew from forming.
Caulk Replacement Step By Step
Removing old caulk can be tedious, but a caulk removal tool makes it easier. After scraping, use a razor blade for stubborn bits. Clean the surface with rubbing alcohol to remove any residue.
Apply painter's tape on both sides of the joint for a neat line, then apply the caulk. Remove the tape immediately after smoothing for a professional finish.
Preventative Maintenance Tips
To keep grout and caulk looking good longer, dry the walls and floor after every shower with a squeegee or towel. Use a daily shower spray to reduce soap scum buildup. Reapply grout sealer every six months to protect against moisture and stains.
7. Clean the Toilet Inside and Out
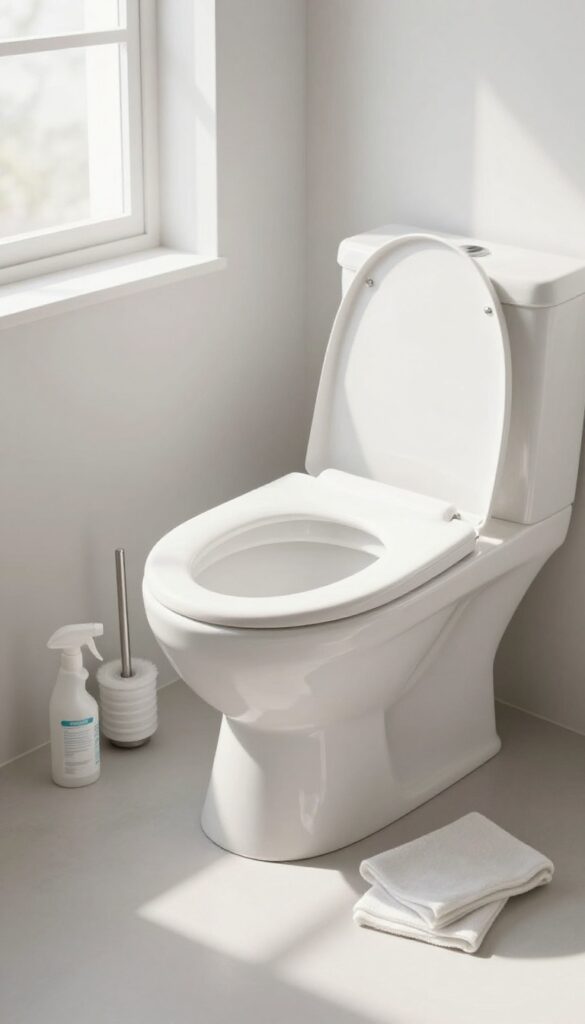
The toilet gets a lot of attention during regular cleaning, but deep cleaning means going beyond a quick swipe. You need to tackle both the bowl and every exterior surface to eliminate bacteria, stains, and odors. This step ensures your toilet is truly sanitary, not just visually clean.
Inside The Bowl
Pour one cup of baking soda into the toilet bowl, then add one cup of white vinegar. The mixture will fizz and help loosen stains and mineral deposits. Let it sit for 10–15 minutes, then scrub thoroughly with a toilet brush, paying extra attention under the rim and around the siphon jet.
Flush to rinse.
Exterior Surfaces
Wipe down the entire exterior with a disinfecting cleaner or a vinegar-water solution. Don't forget the base where it meets the floor, the sides, the tank, and the lid. Use a small brush or an old toothbrush to clean around the bolts and hinges.
Behind And Around The Seat
Lift the seat and clean the hinges and the area underneath with a disinfectant wipe or a cloth. Also clean the rim between the seat and the bowl. This area collects urine splashes and dust, so be thorough.
8. Disinfect the Toilet Brush and Holder
The toilet brush and its holder are often the dirtiest items in the bathroom, yet they rarely get cleaned. Every time you scrub the toilet, the brush picks up bacteria and then sits in a moist holder, creating a breeding ground for germs. Deep cleaning means giving this tool the attention it deserves.
Soak The Brush In A Disinfecting Solution
Fill a bucket with a mixture of one part bleach to nine parts water, or use undiluted white vinegar if you prefer a non-bleach option. Submerge the brush head completely and let it soak for at least 30 minutes. This kills bacteria, breaks down residue, and deodorizes the bristles.
After soaking, rinse thoroughly with hot water and let it air dry with the bristles pointing down.
Scrub The Holder Inside And Out
The holder often has a dark, damp interior where mold and grime hide. Spray the inside and outside with a disinfectant cleaner or rubbing alcohol, then scrub with a small brush or an old toothbrush. For plastic holders, you can run them through the dishwasher on a hot cycle.
For ceramic or metal, hand wash with hot soapy water and dry completely before reassembling.
Prevent Future Grime Buildup
To keep the brush and holder cleaner longer, always let the brush drip dry in the toilet bowl for a few minutes before returning it to the holder. You can also place a small cup of baking soda or a charcoal bag in the holder to absorb moisture and odors. Aim to deep clean both items once a month to maintain hygiene.
9. Wash Shower Curtain and Liner
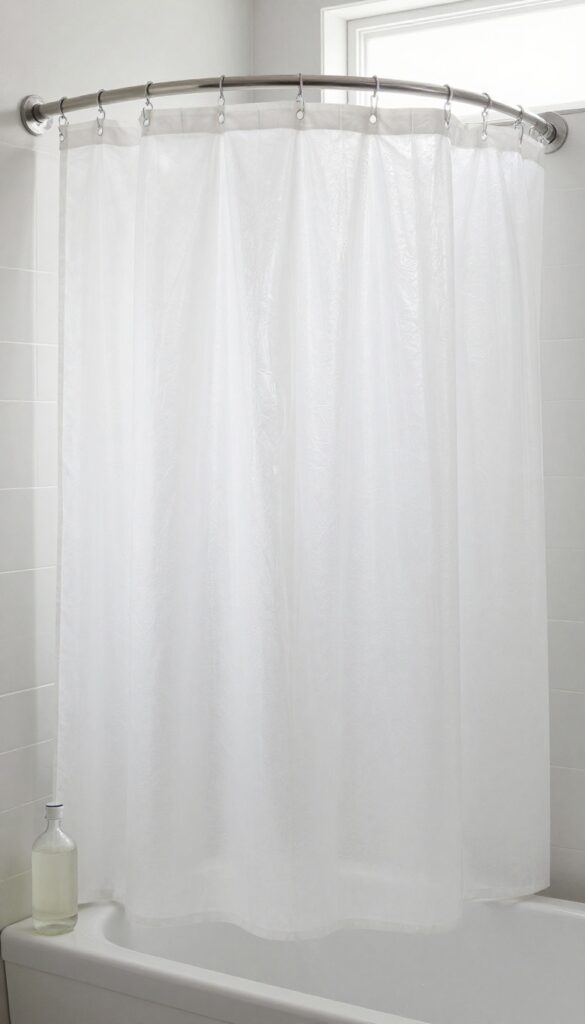
Your shower curtain and liner are basically grime magnets. They trap soap scum, body oils, and mildew every time you shower. But when was the last time you actually washed them?
If you can't remember, it's time to add this step to your deep cleaning checklist.
Fabric shower curtains and liners can go right in the washing machine. Use a gentle cycle with warm water, your regular detergent, and add one cup of white vinegar to the rinse cycle. The vinegar breaks down soap residue and kills mildew spores without harsh chemicals.
After the wash, hang everything back up immediately—don't let them sit in the dryer. Letting them air-dry on the rod prevents wrinkles and stops mildew from forming in a damp pile.
Check The Care Label First
Most fabric liners and curtains are machine-washable, but always check the tag. Some delicate materials like polyester blends with special coatings might need a cold wash or a gentle cycle. If the label says 'dry clean only, ' you can still hand wash in a tub with mild soap and vinegar.
When in doubt, a quick spot test on a hidden corner saves you from ruining the fabric.
Don't Forget The Hooks And Rings
While the curtain is in the wash, take a few minutes to clean the hooks or rings. Soap scum and rust can build up on them. Soak metal hooks in a bowl of vinegar for 15 minutes, then scrub with an old toothbrush.
Plastic rings can go in a mesh laundry bag and run through the dishwasher on the top rack. This small step keeps everything fresh and prevents rust stains on your new curtain.
How Often To Do This
For a truly deep clean, wash your shower curtain and liner every one to two months. If you notice mildew spots or a musty smell sooner, don't wait—toss them in the machine right away. Between washes, spray the liner with a daily shower cleaner and squeegee it after each use to cut down on buildup.
Consistent care makes the deep wash way easier.
10. Descale Faucets and Handles
Faucets and handles get touched constantly, but they also collect hard water deposits and soap scum that regular wiping won't remove. Over time, that buildup makes them look dull and feel rough. Descaling them brings back the original shine and makes your whole bathroom look cleaner.
Start by soaking a soft cloth in white vinegar and wrapping it around the faucet base and handles. Let it sit for 15 minutes—the acid in the vinegar dissolves mineral deposits. After that, unwrap and scrub gently with an old toothbrush to get into crevices.
Wipe away any residue with a damp cloth, then buff dry with a microfiber towel for a streak-free shine.
Why Vinegar Works Best
White vinegar is acidic enough to break down calcium and lime scale without damaging most metal finishes. It's cheap, non-toxic, and safe for frequent use. Avoid harsh chemical descalers that can corrode chrome or brushed nickel over time.
Tackling Stubborn Deposits
For thick, crusty buildup, make a paste of baking soda and vinegar and apply it directly to the deposits. Let it bubble for 10 minutes, then scrub with a nylon brush. Repeat if needed.
For extra tough spots, use a plastic scraper gently to avoid scratching.
Finishing For Maximum Shine
After descaling, rinse thoroughly with water and dry with a clean microfiber cloth. Buff in circular motions to bring out the luster. For extra protection, apply a tiny amount of car wax or a dedicated metal polish to create a barrier against future buildup.
11. Polish the Mirror
A streaky mirror can make even the cleanest bathroom look messy. But with the right technique and a few simple supplies, you can get a crystal-clear reflection every time. The secret lies in how you apply the cleaner and which cloth you use.
Start by dusting the mirror with a dry microfiber cloth to remove any loose particles. Then spray your glass cleaner or a 50/50 vinegar-water solution onto a clean microfiber cloth—never directly onto the mirror, as excess liquid can seep behind the edges and damage the silvering. Wipe in circular motions, then finish with vertical or horizontal strokes to buff away any remaining streaks.
For tough spots like toothpaste splatters or dried water spots, let the cleaner sit for a few seconds before wiping. Avoid paper towels, which leave lint behind, and steer clear of ammonia-based cleaners if your mirror has a tinted or coated surface.
Choose The Right Cleaner
Store-bought glass cleaners work well, but a simple DIY mix of equal parts white vinegar and distilled water is just as effective and leaves no harsh chemical residue. If your mirror has stubborn hard water stains, try a paste of baking soda and vinegar, applied gently with a soft cloth.
Master The Drying Technique
After wiping, use a dry microfiber cloth to buff the mirror in one direction—top to bottom or side to side. This final pass removes any leftover moisture and ensures a streak-free shine. For extra sparkle, finish with a crumpled sheet of newspaper (the ink acts as a mild abrasive).
12. Empty and Clean Cabinets and Drawers
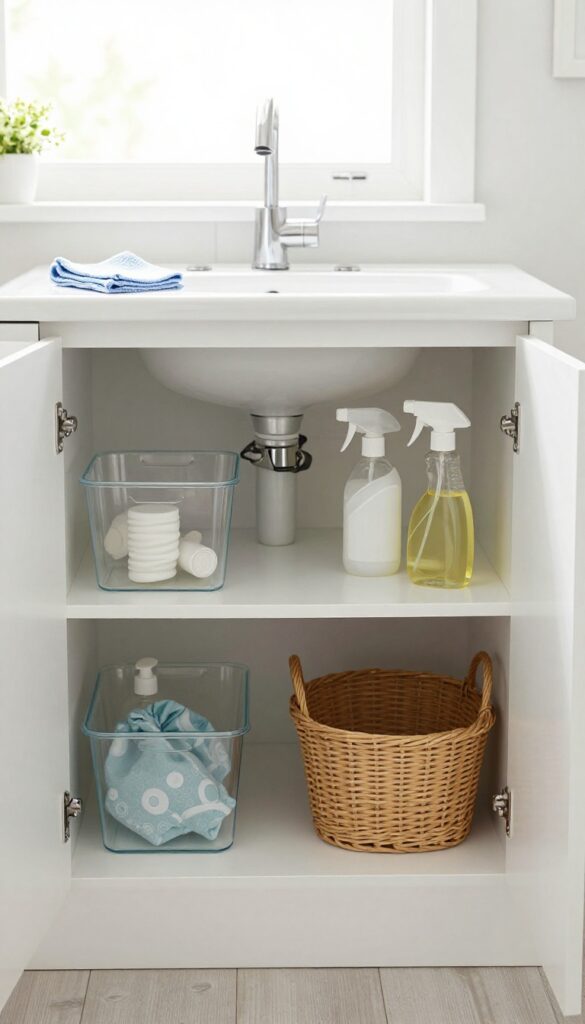
Under-sink cabinets and drawers are prime hiding spots for dust, hair, and mystery spills. Out of sight often means out of mind, but these spaces collect grime just like any other surface. A deep clean here makes a huge difference in overall bathroom freshness.
Start by removing everything from the cabinets and drawers. Toss expired products, empty bottles, and anything you haven't used in months. Wipe down the interiors with a disinfectant spray or a vinegar-water solution.
Pay attention to corners and edges where grime builds up. Let everything dry completely before putting items back. Use small bins or trays to group like items—first-aid supplies, extra toiletries, cleaning products—so you can find things easily later.
Declutter First
Pull out every single item. Check expiration dates on medicines, makeup, and cleaning products. Recycle or toss anything past its prime.
This is also a good time to donate unopened hotel toiletries or half-used bottles you'll never finish.
Disinfect Every Surface
Spray the inside of cabinets and drawers with a disinfectant. Let it sit for a few minutes to kill bacteria and mold. Wipe down with a microfiber cloth, getting into corners and along the edges.
For stubborn sticky spots, use a gentle scrub brush.
Dry And Reorganize
Leave cabinet doors and drawers open for at least 30 minutes to air dry. While waiting, wipe down the items you're keeping. Use drawer dividers or small baskets to keep categories separate.
Label bins if it helps. Replace everything neatly, keeping frequently used items within easy reach.
13. Organize Medicine Cabinet
Your medicine cabinet might look tidy from the outside, but open it up and you'll likely find expired pain relievers, crusty toothpaste tubes, and bottles you haven't touched in years. Organizing it is a deep cleaning task that also makes your daily routine smoother. Once you clear out the old and arrange what's left, you'll actually be able to find what you need without rummaging.
Check Expiration Dates
Pull everything out and lay it on the counter. Check every bottle, tube, and box for expiration dates—medications lose potency over time, and toiletries can grow bacteria. Toss anything expired or empty, and recycle the packaging if possible.
This step alone frees up significant space.
Wipe Down Shelves
With the cabinet empty, vacuum or wipe away dust, hair, and stray powder. Use a disinfecting spray or a mild soap solution on the shelves and interior walls. Let it dry completely before putting anything back so you don't trap moisture.
Arrange By Frequency Of Use
Place daily essentials like toothbrushes, toothpaste, and face wash at eye level or on the most accessible shelf. Move weekly or monthly items like first-aid supplies or extra razors to higher or lower shelves. Group similar items together—all oral care in one spot, all medications in another—so you can grab what you need without digging.
14. Scrub the Sink and Countertops
The sink and countertops might get wiped down regularly, but a deep scrub reveals hidden grime that routine cleaning misses. This step focuses on removing soap scum, toothpaste residue, and hard water deposits for a truly clean surface.
Start by clearing the countertops of all items—toothbrush holders, soap dispensers, and decor. Then, apply a non-abrasive cleaner or make a paste with baking soda and water. Scrub the sink basin, paying special attention to the drain area and the rim where gunk accumulates.
For the faucet base, use an old toothbrush to reach tight spots. Rinse thoroughly and dry with a microfiber cloth to prevent water spots.
Tackle The Faucet Base And Drain
The area around the faucet base often collects hard water stains and soap scum. Use a small brush or an old toothbrush dipped in a vinegar-water solution to scrub these crevices. For the drain, remove the stopper if possible and clean it separately.
Pour baking soda down the drain followed by vinegar, let it fizz for 10 minutes, then flush with hot water to break down buildup and odors.
Don't Forget The Countertop Edges
Countertop edges, especially near the sink, trap grime and dried toothpaste. Wipe them down with a damp cloth and a mild cleaner. For stubborn spots, use a baking soda paste and a soft sponge.
Rinse well to avoid residue, which can attract more dirt.
Polish And Protect Surfaces
After scrubbing, dry all surfaces with a clean microfiber cloth to prevent water spots and streaks. For an extra shine, apply a small amount of glass cleaner to the faucet and countertop. This step not only makes everything look clean but also creates a protective barrier against future grime.
15. Clean the Drain and Pop-Up Stopper
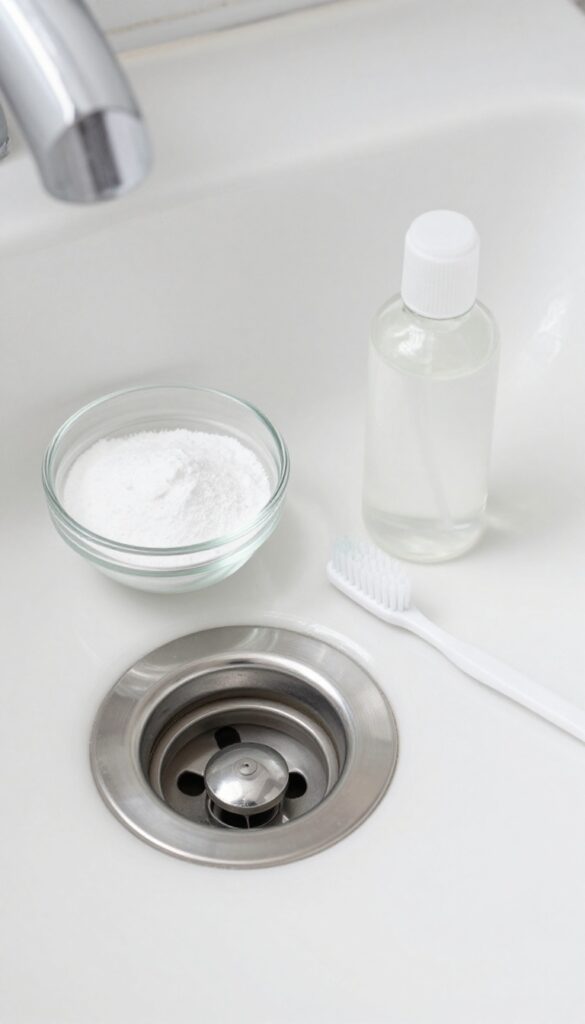
Drains and pop-up stoppers are magnets for hair, soap scum, and gunk. Even if the sink looks clean, a slow-draining basin is a telltale sign that gunk is building up below the surface. Tackling this hidden area not only improves drainage but also eliminates odors that can linger in the bathroom.
Remove And Disassemble The Stopper
Start by lifting the pop-up stopper out of the drain. Most stoppers either pull straight up or have a pivot rod underneath the sink that you can unscrew. Once it's out, use an old toothbrush or a small brush to scrub off all the hair and slime.
Rinse it thoroughly with hot water and set it aside.
Flush The Drain With Baking Soda And Vinegar
With the stopper removed, pour about half a cup of baking soda directly into the drain. Follow it with a cup of white vinegar. The fizzing reaction helps break down grease and organic buildup.
Let it sit for 10 to 15 minutes, then flush the drain with a pot of boiling water. This natural combo deodorizes and clears minor clogs without harsh chemicals.
Reassemble And Test
After the drain is clear, reinstall the pop-up stopper. Make sure the pivot rod aligns correctly and the stopper moves up and down smoothly. Run hot water for a minute to confirm the drain flows freely.
A quick wipe of the stopper's surface with a disinfectant spray finishes the job.
16. Wash Towels and Bath Mats
Towels and bath mats absorb moisture daily, making them a breeding ground for bacteria, mold, and mildew. Even if they smell fine, they can harbor buildup from body oils, dead skin, and laundry residue. A deep clean goes beyond a regular wash cycle to reset them completely.
Start by sorting towels and mats by color and fabric type. Wash them separately from other laundry to avoid lint transfer and ensure thorough cleaning. Use hot water (the hottest setting your fabric can handle) to kill germs and dissolve oils.
Add your regular detergent plus one cup of white vinegar to the rinse cycle—it breaks down residue and neutralizes odors without harsh chemicals. For an extra boost, skip fabric softener; it coats fibers and reduces absorbency. Instead, add half a cup of baking soda to the wash cycle to deodorize and brighten.
Dry on high heat until completely bone-dry—even slightly damp towels can develop mildew within hours. If possible, fluff them in the dryer with a wool dryer ball or clean tennis ball to restore softness.
Why Vinegar Works
White vinegar is a natural disinfectant and deodorizer. It cuts through soap scum and mineral deposits that regular detergent leaves behind. The acetic acid in vinegar also helps balance pH, which keeps colors bright and fibers soft.
Just don't mix vinegar with bleach—it creates toxic chlorine gas.
How Often To Deep Clean
Bath towels should be washed after three to four uses, but a deep clean with vinegar should happen once a month. Bath mats need more frequent attention—every one to two weeks—because they sit on damp floors and trap moisture. If your mat has a rubber backing, check the care label; high heat can damage it.
Drying Tips For Maximum Freshness
Always dry towels and mats immediately after washing. If you line-dry, do it in direct sunlight—UV rays naturally kill bacteria. For machine drying, use the highest heat setting safe for the fabric.
Shake out mats before placing them in the dryer to prevent clumping. If mildew odor lingers after drying, rewash with vinegar and dry again.
17. Vacuum and Mop the Floor
After tackling the walls, fixtures, and storage areas, the floor is your final frontier—and it's often the grimiest. Hair, dust, and dried toothpaste splatters accumulate quickly, especially in corners and around the toilet base. A proper floor scrub not only makes the room look cleaner but also removes allergens and bacteria that settle at your feet.
Start by clearing the floor of any rugs, mats, or stray items. Then give the entire surface a thorough vacuum or sweep, focusing on edges and under the toilet where debris hides. Follow up with a mop using a cleaner safe for your flooring type—avoid harsh chemicals on natural stone or unsealed grout.
For best results, use a microfiber mop and change the water when it gets dirty.
Prep And Clear The Area
Remove bath mats, trash cans, and any other items from the floor. Shake out or vacuum the mats separately. This gives you unobstructed access to every inch of the floor, especially those hard-to-reach spots behind the toilet and under the sink.
Vacuum Or Sweep Thoroughly
Use a vacuum with a crevice tool to suck up hair and dust along baseboards and in corners. If you prefer sweeping, use a rubber broom to capture hair more effectively. Don't forget to get under the toilet rim and around the pedestal—these areas collect surprising amounts of grime.
Mop With The Right Cleaner
Choose a floor cleaner that matches your flooring: a neutral pH cleaner for tile and stone, or a gentle formula for vinyl or laminate. Dip a microfiber mop into the solution, wring it well, and work in sections. Rinse the mop head frequently and change the water if it becomes visibly dirty.
Pay extra attention to corners and under the toilet, where grime builds up.
Dry And Replace Mats
Let the floor air dry completely before placing mats or rugs back. If you're in a hurry, use a dry microfiber cloth to speed up drying. Once dry, return the mats—preferably freshly washed or vacuumed—and enjoy the clean, fresh feel underfoot.
18. Clean the Exhaust Fan
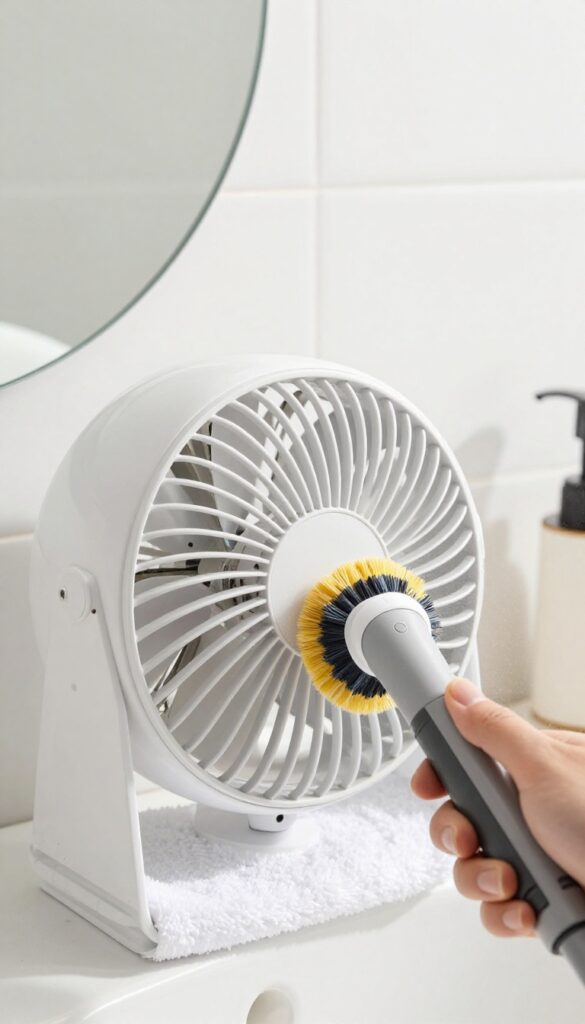
The exhaust fan works hard to remove moisture and odors, but it rarely gets any attention. Over time, dust and grime build up on the blades and motor, reducing efficiency and potentially causing noise or fire hazards. A thorough cleaning restores airflow and keeps the fan running quietly.
Start by turning off the power at the breaker or switch to avoid any risk of shock. Remove the cover—usually held by clips or screws—and soak it in warm, soapy water for a few minutes. Scrub away the dust and grease, then rinse and dry completely.
While the cover dries, use a vacuum with a brush attachment to gently remove dust from the fan blades and motor housing. For stubborn residue, a microfiber cloth lightly dampened with all-purpose cleaner works well. Avoid getting any liquid into the motor.
Once everything is clean and dry, reattach the cover and restore power.
Safety First: Power Down
Before you touch anything, turn off the fan at the circuit breaker. This prevents accidental activation and protects you from electrical shock. If you're unsure which breaker controls the fan, switch off the bathroom's main breaker.
Cleaning The Cover
Remove the cover and soak it in warm water with a few drops of dish soap. Use a soft brush or sponge to scrub away dust and grease. Rinse thoroughly and let it air dry on a towel.
For plastic covers, avoid abrasive cleaners that could scratch the surface.
Vacuuming The Blades And Motor
With the cover off, use a vacuum's brush attachment to gently remove loose dust from the fan blades and motor. Be careful not to bend the blades. For caked-on dust, a dry microfiber cloth or a soft paintbrush can help dislodge it.
Never spray liquid directly into the motor.
19. Wipe Down Light Switches and Outlets
Light switches and outlets are among the most touched surfaces in any room, but they're easy to overlook during a deep bathroom scrub. Every time you flip the switch with damp or soapy hands, you leave behind grime and germs. A quick wipe-down makes a big difference in both hygiene and appearance.
Why They Need Attention
Bathroom light switches and outlets collect fingerprints, dust, and bacteria from frequent use. Moisture from steamy showers can also cause grime to build up around the edges. Over time, that buildup can discolor the plates and even interfere with the switch mechanism.
How To Clean Them Safely
Start by turning off the circuit breaker for that room if you plan to remove the cover plates—it's an extra safety step. Use a disinfectant wipe or a microfiber cloth dampened with rubbing alcohol to clean the switch, the surrounding wall, and the plate. For tight crevices, a cotton swab dipped in alcohol works wonders.
Let everything air dry before flipping the breaker back on.
Don't Forget The Outlets
Outlets near the sink or counter can collect toothpaste splatter, hairspray residue, and dust. Wipe the plastic face and the wall around it with a barely damp cloth—never spray liquid directly into the outlet. A dry toothbrush can help dislodge debris from the slots.
20. Sanitize Trash Can
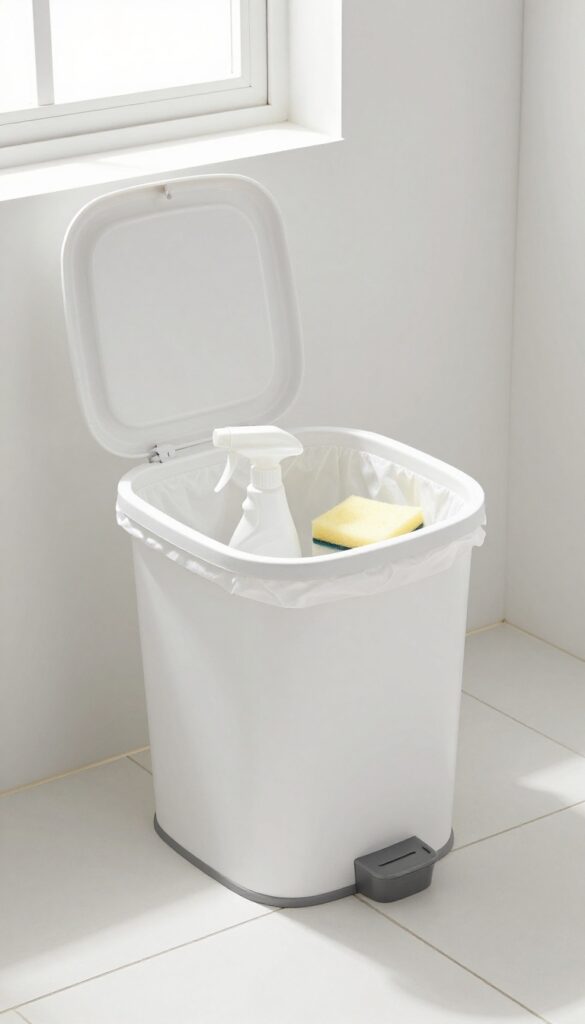
The trash can is one of the most overlooked items in a bathroom deep clean. It collects damp tissues, cotton swabs, and other waste, creating a perfect environment for bacteria and odors. Even if you change the liner regularly, the can itself needs a proper scrub.
Empty And Rinse
Start by removing the liner and any lingering debris. Take the can outside or place it in the bathtub. Rinse it with warm water to loosen stuck-on grime.
Scrub With Disinfectant
Use a sponge or brush with soapy water or a bathroom disinfectant. Pay extra attention to the bottom and rim where residue builds up. For stubborn spots, let the cleaner sit for a few minutes before scrubbing.
Dry And Reline
Rinse thoroughly and shake off excess water. Let the can air dry completely—moisture trapped under a new liner can cause mold. Once dry, insert a fresh liner and place it back.
21. Clean the Tub or Shower Floor
The tub or shower floor takes the brunt of every wash, but it's often the last thing we scrub. Soap scum, body oils, and hard water deposits build up over time, creating a slippery film that's both unsightly and unsanitary. A dedicated scrub here makes a huge difference in how clean your bathroom feels.
Choose The Right Cleaner
For most tub and shower floors, a non-abrasive cleaner is key to avoid scratching the surface. A mix of baking soda and dish soap works wonders on acrylic and fiberglass, while a mild bathroom spray is safe for tile and stone. Avoid harsh chemicals that can damage finishes or leave residue.
Focus On Corners And Grout Lines
Grime loves to hide in corners and along grout lines. Use an old toothbrush or a grout brush to scrub these areas thoroughly. Pay special attention to the edges where the floor meets the wall—these spots often collect the most buildup.
Don't Forget The Drain Cover
The drain cover traps hair, soap residue, and debris, which can lead to slow drainage and odors. Remove the cover if possible, scrub it separately, and use a brush to clean the drain opening. Rinse well to flush away any loosened gunk.
Rinse Thoroughly
After scrubbing, rinse the entire floor with warm water until no soap residue remains. Leftover cleaner can leave a film that attracts dirt faster. Use a handheld showerhead or a bucket of clean water to ensure a complete rinse.
22. Refresh the Air
After all that scrubbing, rinsing, and disinfecting, the bathroom might still hold onto lingering odors. The final step in a deep clean is refreshing the air so the room smells as clean as it looks. A few simple tricks can neutralize smells without harsh chemicals.
Place a small bowl of baking soda in a corner or on a shelf to absorb odors over time. For a quick burst of freshness, add a few drops of your favorite essential oil—like lemon, lavender, or tea tree—onto a cotton ball and tuck it out of sight. Open a window or turn on the exhaust fan to circulate fresh air and speed up drying.
This simple habit keeps the bathroom smelling clean between deep cleans.
Natural Odor Absorbers
Baking soda is a powerhouse for neutralizing smells. Set out an open container in a discreet spot, like under the sink or on the back of the toilet tank. Replace it monthly.
You can also mix a few drops of essential oil into the baking soda for a subtle scent boost.
Quick Scent Boosters
For an instant refresh, dampen a cotton ball with essential oil and place it in a corner, inside a cabinet, or behind the toilet. Citrus oils like orange or grapefruit are especially uplifting. Avoid synthetic air fresheners that just mask odors.
Ventilation Matters
After deep cleaning, open a window or run the exhaust fan for at least 15 minutes. This clears out moisture, chemical fumes, and any lingering mustiness. Good airflow also helps prevent mold and mildew from returning.
23. Restock Essentials
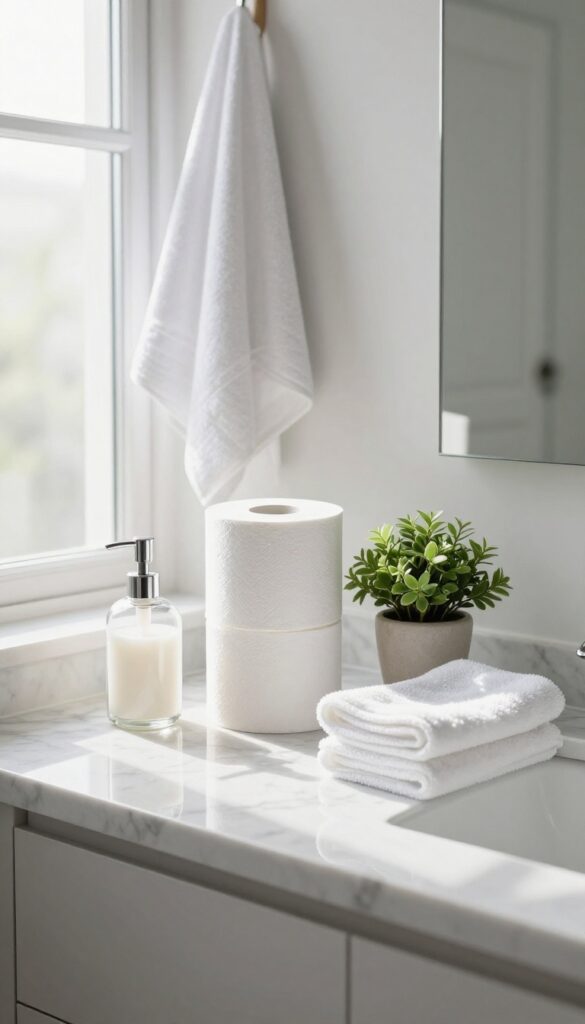
After all that scrubbing, rinsing, and disinfecting, the bathroom might still feel incomplete if the daily essentials are missing or messy. Restocking is the final touch that turns a clean space into a truly welcoming one. It's about making sure everything you need is within reach and neatly presented.
Restocking isn't just about refilling—it's about creating a seamless, pleasant experience every time someone uses the bathroom. Start by checking all the basics: toilet paper, hand soap, tissues, and any other frequently used items. Replace empty rolls and refill soap dispensers to avoid that frantic mid-use scramble.
Then, fold fresh towels and arrange them neatly on the rack or hooks. A tidy towel display instantly elevates the room's feel. Don't forget small touches like a new bar of soap or a fresh hand towel for guests.
These details show care and make the bathroom feel hotel-quality.
Check And Replace Supplies
Go through your bathroom inventory: toilet paper, hand soap, tissues, cotton swabs, and any other daily-use items. Replace anything that's running low or empty. Consider keeping a backup stash in a nearby cabinet so you can restock quickly next time.
Fold And Arrange Towels
Fresh towels should be folded neatly and placed on the rack or hooks. For a spa-like look, roll hand towels and place them in a basket or on the counter. Make sure bath towels are evenly spaced and not bunched up.
Add Final Touches
Small extras make a big difference. Put out a new soap dispenser, a small plant, or a candle. Check that the trash can has a fresh liner.
These finishing touches signal that the deep clean is complete and the space is ready to enjoy.
FAQ
How often should I do a deep clean of my bathroom?
Aim for a deep clean every one to three months, depending on usage and household size. High-traffic bathrooms may need monthly attention.
What is the best cleaner for soap scum?
White vinegar or a baking soda paste works well on soap scum. For stubborn buildup, use a commercial cleaner designed for bathrooms.
How do I prevent mold in the shower?
Keep the bathroom well-ventilated by using an exhaust fan or opening a window. Squeegee shower walls after each use and wash the curtain regularly.
Can I use bleach on colored grout?
Bleach can discolor colored grout. Instead, use a mild cleaner or a baking soda and hydrogen peroxide paste to clean without fading.
How do I clean a showerhead without removing it?
Fill a plastic bag with vinegar, secure it over the showerhead with a rubber band, and let it soak for an hour. Then remove and run water for a few minutes.
Conclusion
A deep bathroom scrub doesn't have to be an all-day affair. By breaking it down into these 23 focused checklist items, you can tackle each corner methodically without feeling overwhelmed. Start with the tasks that bother you most and build from there.
Once you've done a full scrub, maintaining it becomes much easier. Pick a few of these ideas to turn into weekly habits, and your bathroom will stay fresher between deep cleans.


