
Last updated on September 4th, 2026 at 02:30 pm
Does your dog go wild for anything meaty? You're not alone. Many pups would choose a savory treat over a sweet one any day.
That's why we've rounded up 10 meaty homemade dog treat recipes that are quick to whip up and packed with flavor. These recipes are designed with busy dog owners in mind. No fancy equipment or hard-to-find ingredients.
Just simple, dog-safe foods like chicken, beef, and liver, turned into treats your pup will beg for. Whether you need a training reward, a special snack, or something to stuff in a puzzle toy, there's a recipe here for you. Let's get cooking for your furry meat lover!
1. Peanut Butter and Bacon Bites
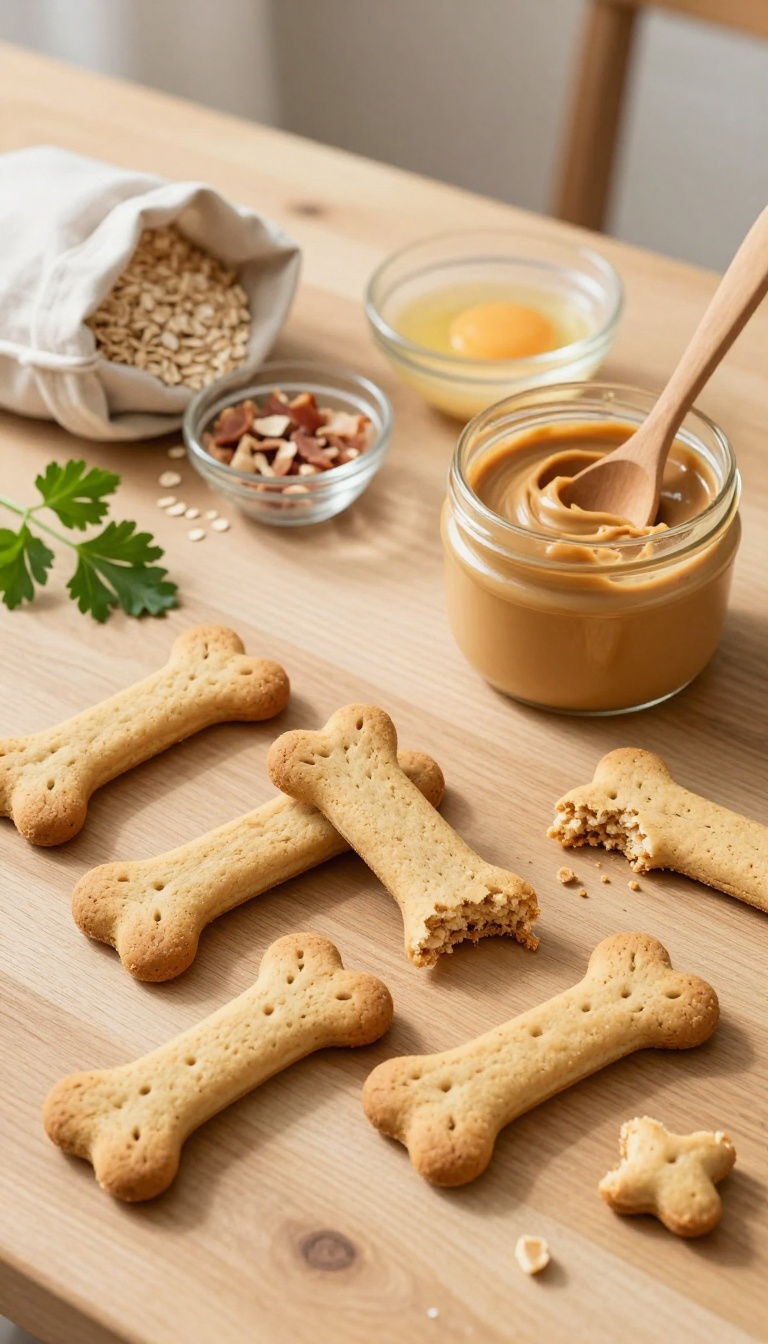
Bacon and peanut butter are two flavors that most dogs can't resist, and when you bake them into a crunchy bite, you've got a treat that's perfect for training sessions or just because. These little biscuits come together quickly with pantry staples, so you can whip up a fresh batch any time your pup deserves something special. The smoky bacon pairs beautifully with the rich peanut butter, creating a savory snack that will have tails wagging from the first sniff.
Ingredients
- 1 1/2 cups whole wheat flour (or oat flour for a grain-free option)
- 1/2 cup rolled oats
- 1/3 cup natural peanut butter (xylitol-free)
- 1/2 cup cooked bacon, crumbled (about 4 slices)
- 1/2 cup low-sodium chicken broth (or water)
- 1 egg, beaten
Instructions
- Preheat your oven to 350°F (175°C) and line a baking sheet with parchment paper.
- In a large bowl, mix the whole wheat flour and rolled oats. Add the peanut butter, crumbled bacon, chicken broth, and beaten egg, then stir until a dough forms. If the dough is too dry, add a little more broth, one tablespoon at a time.
- Turn the dough out onto a lightly floured surface and roll it to about 1/4-inch thickness. Use a bone-shaped cookie cutter or any small cutter to stamp out treats, then place them on the prepared baking sheet.
- Bake for 20–25 minutes, or until the treats are golden and firm to the touch. Let them cool completely on a wire rack before serving.
Serving Tip
Store these bites in an airtight container in the refrigerator for up to two weeks, or freeze them for up to three months. For smaller dogs, break the treats into smaller pieces to keep portion sizes appropriate. Use them as training rewards or a special afternoon snack—just remember to adjust your dog's daily calorie intake to account for the extra treats.
2. Chicken and Sweet Potato Chews
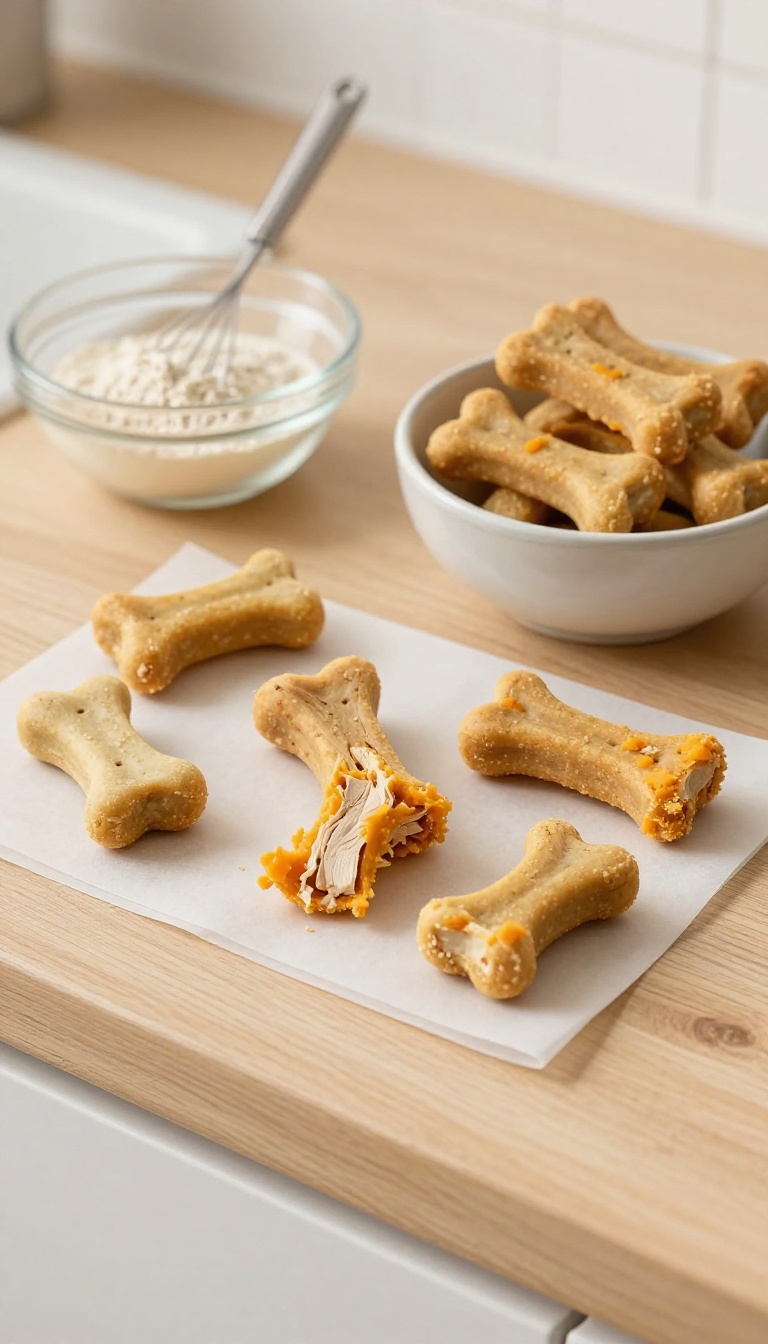
For dogs who love a soft, tender bite, these chicken and sweet potato chews are a simple homemade win. They come together quickly with just a few dog-safe ingredients, so you can whip up a fresh batch without much fuss. The natural sweetness of the potato pairs perfectly with savory shredded chicken, making these treats a crowd-pleaser for picky pups.
Ingredients
- 1 cup cooked, shredded chicken (no bones, skin, or seasoning)
- 1 cup mashed sweet potato (cooked and cooled)
- 1 ½ cups oat flour (or more as needed)
- 1 large egg
Instructions
- Preheat your oven to 350°F (175°C) and line a baking sheet with parchment paper.
- In a large bowl, mix the shredded chicken, mashed sweet potato, egg, and oat flour until a soft dough forms. Add a little extra flour if the dough is too sticky.
- Roll the dough to about ¼-inch thickness on a lightly floured surface, then cut into small, bite-sized shapes or strips.
- Place the treats on the prepared baking sheet and bake for 20–25 minutes, until they are firm but still slightly soft in the center.
- Let them cool completely before serving or storing.
Serving Tip
Because these chews are soft, they're perfect for senior dogs or pups with dental issues. Store them in an airtight container in the fridge for up to a week, or freeze them for up to three months. Break into smaller pieces for training treats or give whole as a satisfying snack.
3. Beef Liver Brownies
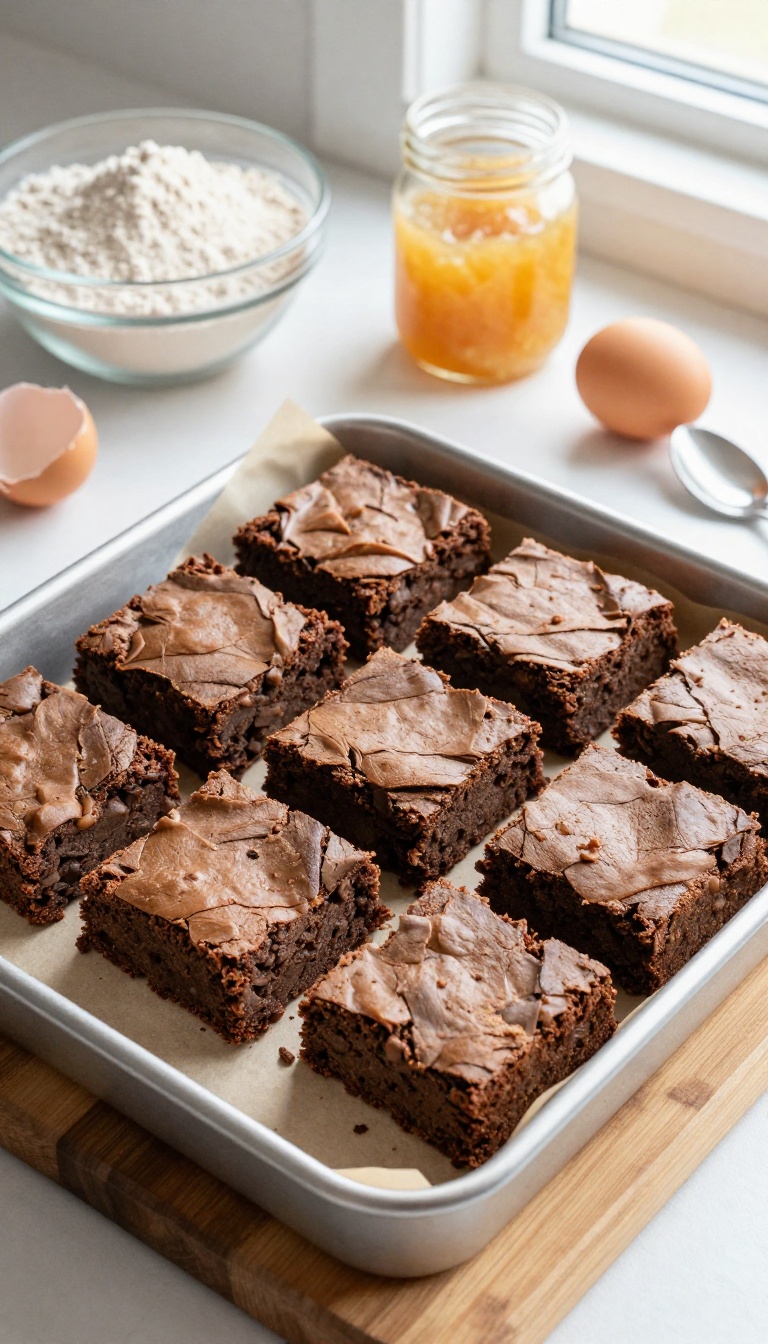
These brownie-style treats are a savory twist on a classic favorite, packed with beef liver for a rich, meaty flavor that most dogs can't resist. They're quick to mix up with simple pantry staples, making them a practical choice for busy pet parents who want to spoil their pups without spending hours in the kitchen. The texture is soft and chewy, perfect for training sessions or just a fun afternoon snack.
Ingredients
- 1/2 pound beef liver, chopped
- 1 cup whole wheat flour (or oat flour for a grain-free option)
- 1 large egg
- 1/4 cup plain unsweetened applesauce
- 1 tablespoon coconut oil, melted
Instructions
- Preheat your oven to 350°F (175°C) and line an 8×8-inch baking dish with parchment paper.
- In a food processor, blend the beef liver until smooth. Add the egg, applesauce, and coconut oil, and process again until well combined.
- Transfer the mixture to a bowl and stir in the flour until a thick batter forms.
- Spread the batter evenly into the prepared dish and bake for 25-30 minutes, until a toothpick inserted in the center comes out clean.
- Let cool completely before cutting into small, bite-sized squares.
Serving Tip
Store these brownies in an airtight container in the refrigerator for up to 5 days, or freeze for up to 3 months. Because liver is rich, start with small pieces to see how your dog tolerates them, and use as an occasional treat rather than a daily snack.
4. Turkey and Apple Sausage Slices
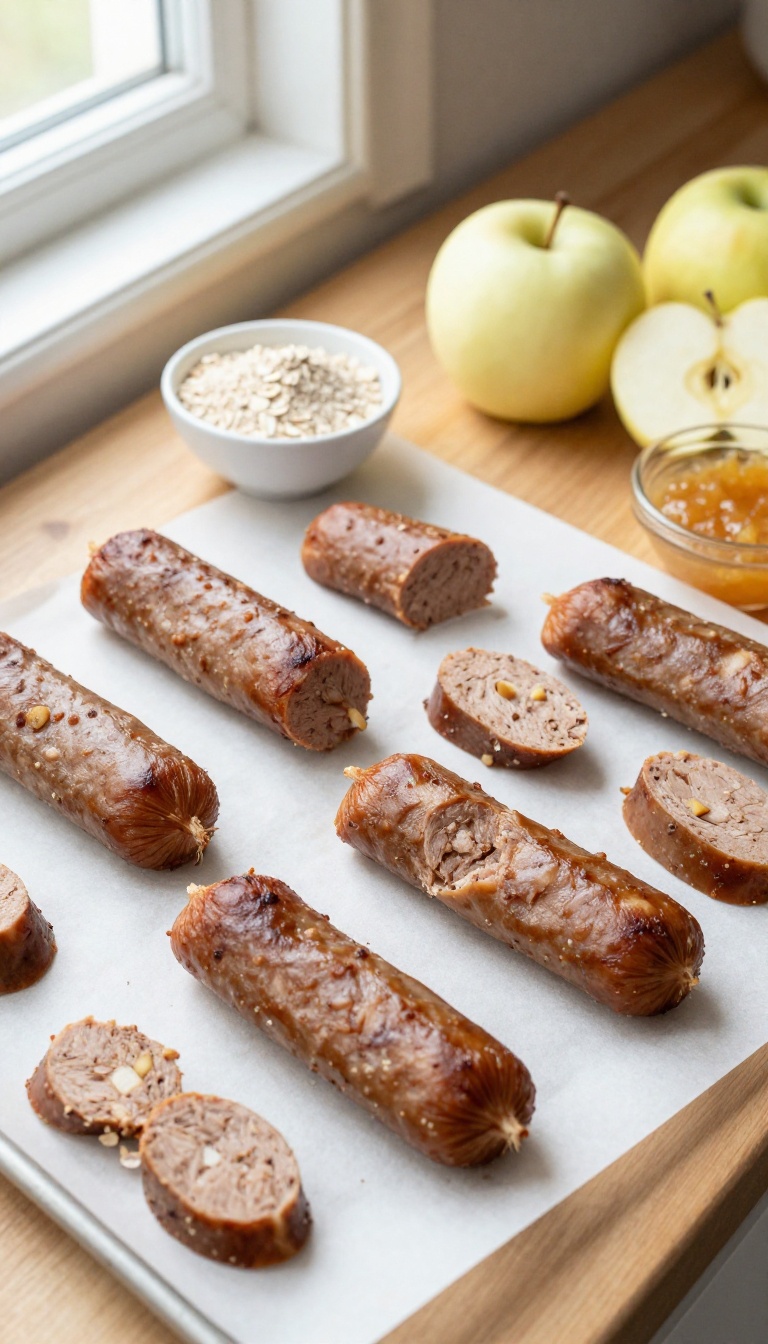
These little slices are a fun twist on the usual meaty treat, combining lean ground turkey with the natural sweetness of apple. They bake up into soft, chewy morsels that are easy on your dog's stomach and perfect for training or just spoiling them. The best part?
They come together in minutes, so you can have a fresh batch ready without a lot of fuss.
Ingredients
- 1 lb ground turkey (lean)
- 1 small apple, peeled, cored, and finely grated
- 1/2 cup oat flour (or rolled oats blended into flour)
- 1 large egg
- 1/4 cup unsweetened applesauce (optional, for extra moisture)
Instructions
- Preheat your oven to 350°F (175°C) and line a baking sheet with parchment paper.
- In a large bowl, combine the ground turkey, grated apple, oat flour, egg, and applesauce (if using). Mix well until everything is evenly incorporated.
- Shape the mixture into small sausage-like logs, about 1 inch thick and 2 inches long, and place them on the prepared baking sheet.
- Bake for 20-25 minutes, or until the slices are cooked through and slightly firm to the touch. Let them cool completely before serving.
Serving Tip
These turkey and apple slices are great for portion control—store them in an airtight container in the fridge for up to 5 days, or freeze for longer storage. For training, cut them into smaller bite-sized pieces. Always supervise your dog when giving treats, and adjust portion sizes based on your dog's size and dietary needs.
5. Salmon and Oatmeal Patties
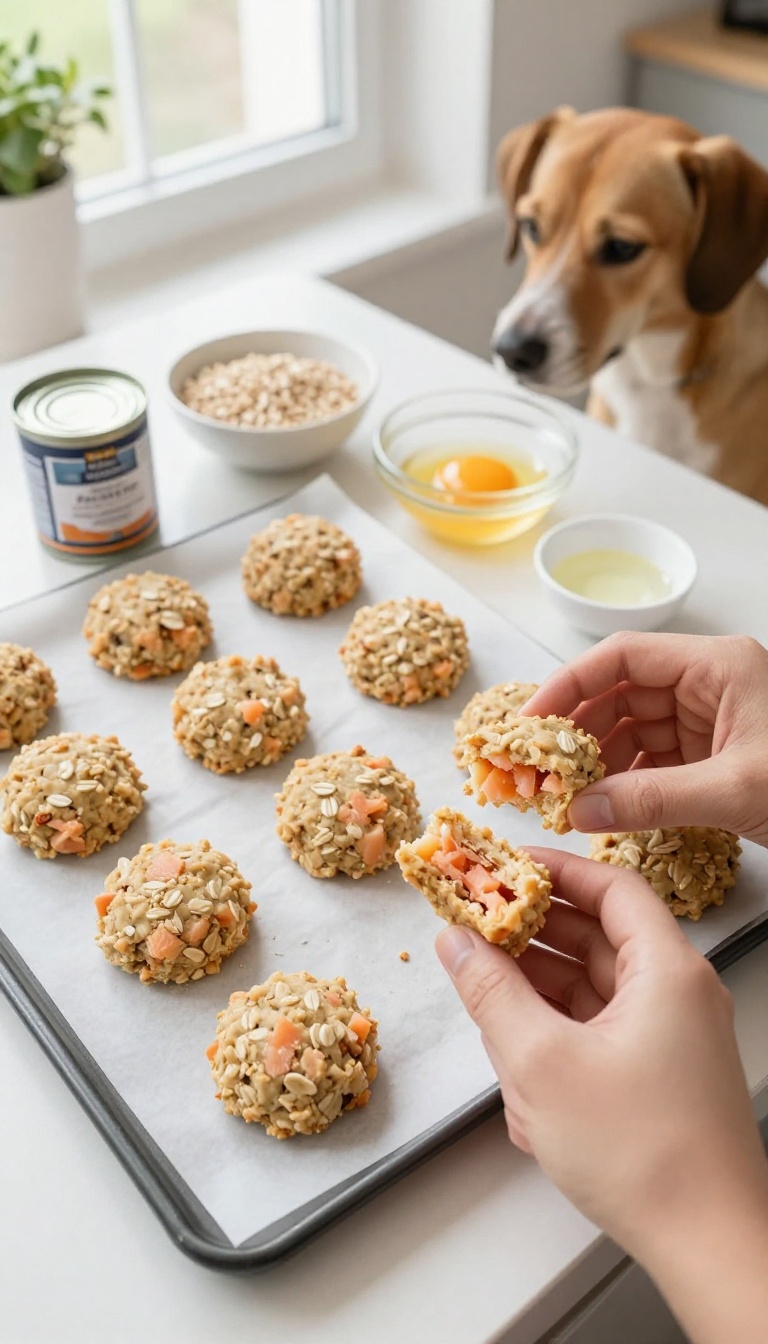
If your pup goes wild for fishy flavors, these no-bake patties are about to become a kitchen staple. Made with canned salmon and rolled oats, they come together in minutes and skip the oven entirely—perfect for busy weeknights or a quick weekend treat. The omega-3s in salmon support a shiny coat and healthy joints, while oats provide gentle fiber for digestion.
Plus, the soft, chewy texture makes them ideal for dogs of all ages, from puppies to seniors.
Ingredients
- 1 can (6 oz) of wild-caught salmon, drained and flaked (check for bones and remove if large)
- 1 cup rolled oats (not instant)
- 1 large egg, beaten
- 2 tablespoons plain unsweetened applesauce
- 1 tablespoon coconut oil, melted
Instructions
- In a medium bowl, combine the flaked salmon, rolled oats, beaten egg, applesauce, and melted coconut oil. Mix well until everything is evenly moistened and forms a thick, sticky mixture.
- Scoop out tablespoon-sized portions and shape them into small patties, about 1/2 inch thick. Place them on a parchment-lined baking sheet or plate.
- Refrigerate for at least 30 minutes to let the patties firm up. They will set as they chill, making them easy to handle.
- Serve as-is, or for a firmer texture, you can also dehydrate them in a food dehydrator at 160°F for 2–3 hours, or bake at 350°F for 10 minutes if you prefer a crunchier treat.
Serving Tip
- These patties are best served chilled or at room temperature. Store them in an airtight container in the fridge for up to 5 days, or freeze for up to 3 months—just thaw in the fridge before serving. For smaller dogs, break the patties into bite-sized pieces; for larger breeds, you can serve a whole patty as a satisfying snack.
- Always supervise your dog while they enjoy any treat.
6. Pork and Pumpkin Meatballs
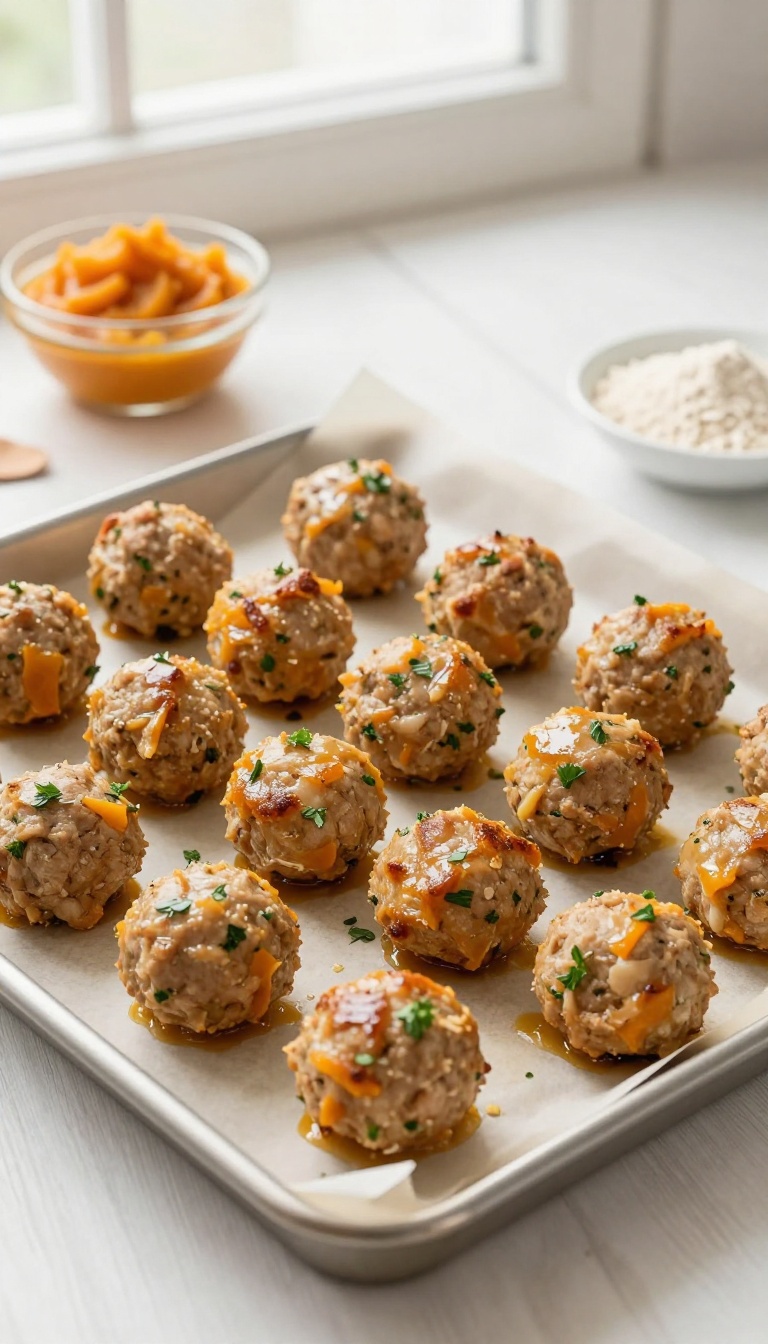
These pork and pumpkin meatballs are a fun twist on a classic treat, and they’re surprisingly easy to make. The pumpkin adds a gentle sweetness and a boost of fiber, while the pork brings a rich, meaty flavor that most dogs can’t resist. They’re baked, not fried, so they stay juicy without any extra oil, and you can serve them whole for a hearty snack or crumble them over your pup’s dinner for a special topper.
Ingredients
- 1 lb ground pork
- 1 cup canned pumpkin (unsweetened, not pumpkin pie filling)
- 1/2 cup oat flour (or rolled oats blended into a powder)
- 1 large egg
- 1/4 cup finely chopped fresh parsley (optional, for freshness)
Instructions
- Preheat your oven to 350°F (175°C) and line a baking sheet with parchment paper.
- In a large bowl, combine the ground pork, pumpkin, oat flour, egg, and parsley (if using). Mix until everything is evenly incorporated.
- Roll the mixture into small, bite-sized meatballs—about 1 inch in diameter—and place them on the prepared baking sheet, leaving a little space between each.
- Bake for 20-25 minutes, or until the meatballs are cooked through and lightly browned on the outside. Let them cool completely before serving.
Serving Tip
Store these meatballs in an airtight container in the fridge for up to 4 days, or freeze them for up to 3 months. For a quick snack, serve them whole; for a fun dinner topper, crumble a couple over your dog's regular kibble. Always check that the meatballs are cool to the touch before giving them to your pup.
7. Duck and Blueberry Bites
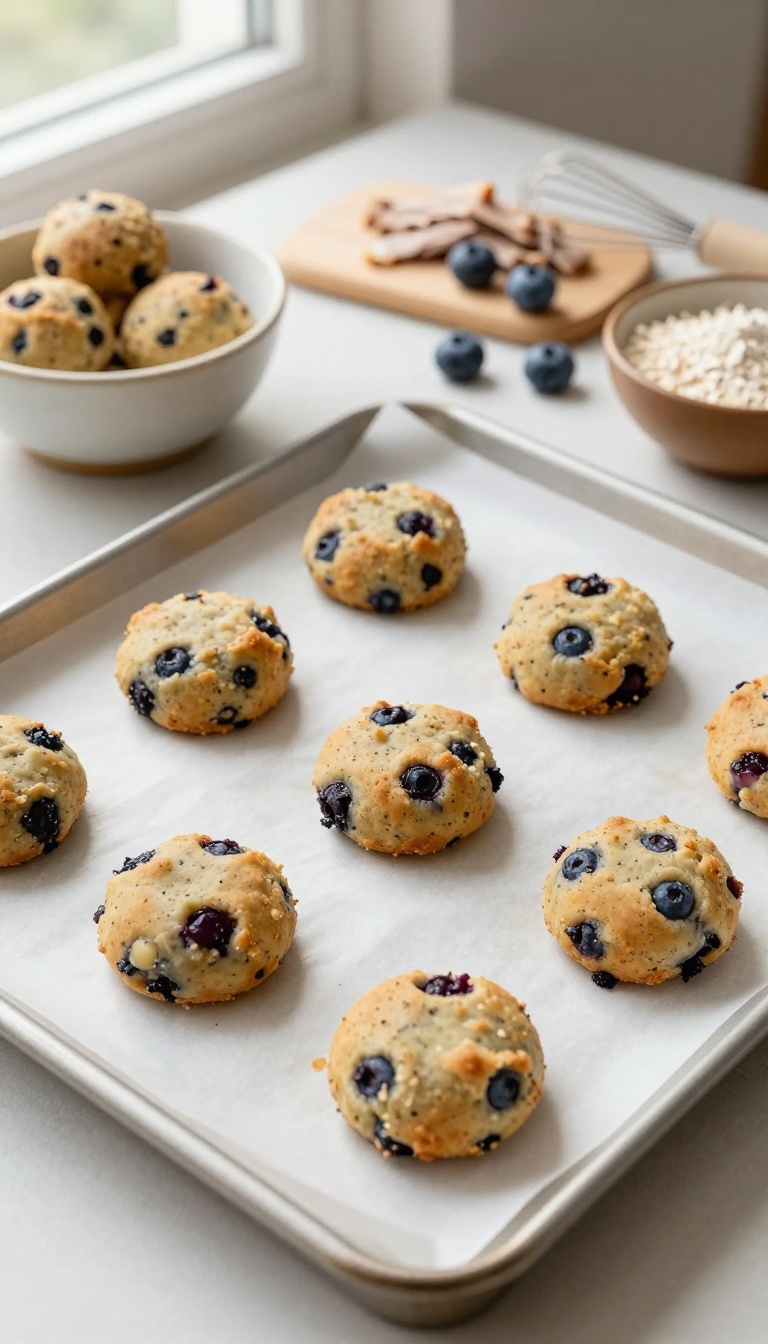
If your dog is a true meat lover, these duck and blueberry bites are a fun way to mix things up. Duck is a rich, novel protein that many pups go wild for, and the blueberries add a touch of sweetness along with a boost of antioxidants. They’re simple to make, bake up fast, and are perfect for dogs who deserve something a little special.
Ingredients
- 1 cup cooked duck, finely chopped or shredded
- 1/2 cup fresh or frozen blueberries (thawed if frozen)
- 1 cup oat flour (or more as needed)
- 1 large egg
- 2 tablespoons unsweetened applesauce
Instructions
- Preheat your oven to 350°F (175°C) and line a baking sheet with parchment paper.
- In a large bowl, mix the chopped duck, blueberries, oat flour, egg, and applesauce until a dough forms. If the dough is too sticky, add a little more oat flour; if too dry, add a splash of water.
- Roll the dough into small bite-sized balls (about 1 inch) and place them on the prepared baking sheet, slightly flattening each one with your hand.
- Bake for 12–15 minutes until the bites are firm and lightly golden. Let them cool completely before serving.
Serving Tip
Store these bites in an airtight container in the fridge for up to 5 days, or freeze them for up to 3 months. For smaller dogs, break a bite in half; for larger dogs, you can serve 2–3 as a treat. Always check with your vet before introducing new proteins, especially if your dog has food sensitivities.
8. Lamb and Mint Crunchies
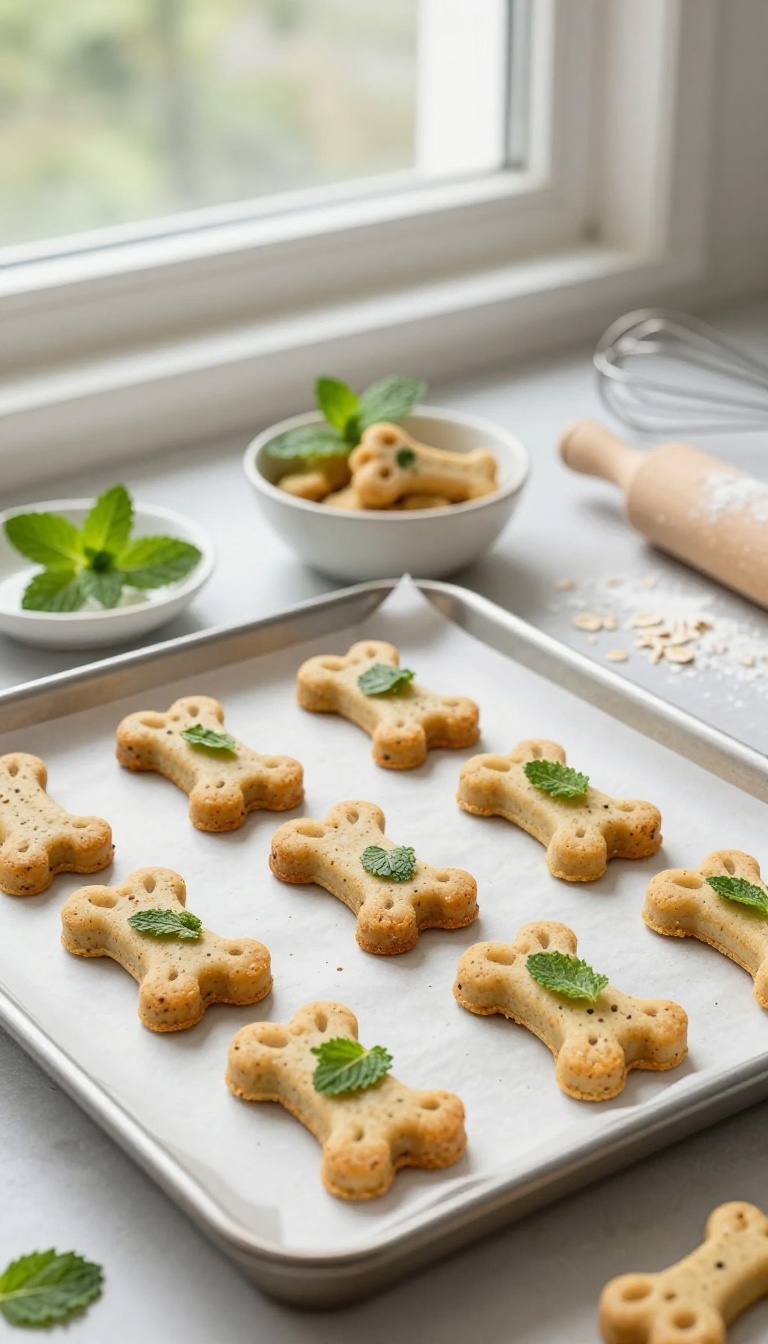
These crispy little bites bring together the rich flavor of lamb with a fresh hint of mint, making them a crowd-pleaser for dogs who love savory snacks. The mint isn't just for taste—it can help freshen your pup's breath naturally, which is a bonus for close snuggle sessions. They're simple to whip up with just a few ingredients, and the crunchy texture is perfect for dogs who enjoy a satisfying crunch.
Whether you're stocking the treat jar or looking for a training reward, these crunchies are a quick and practical option that your furry friend will go wild for.
Ingredients
- 1 pound ground lamb
- 1 large egg, beaten
- 1/2 cup oat flour (or more as needed)
- 1/4 cup finely chopped fresh mint leaves
- 1 tablespoon olive oil
Instructions
- Preheat your oven to 350°F (175°C) and line a baking sheet with parchment paper.
- In a large bowl, combine the ground lamb, beaten egg, oat flour, chopped mint, and olive oil. Mix until everything is well incorporated and forms a cohesive dough.
- Roll the dough out to about 1/4-inch thickness on a floured surface. Use a small cookie cutter or a knife to cut into bite-sized shapes.
- Place the treats on the prepared baking sheet, leaving a little space between each. Bake for 20-25 minutes, or until they are golden brown and firm to the touch.
- Let the treats cool completely on a wire rack before serving. Store in an airtight container in the refrigerator for up to one week.
Serving Tip
These crunchies are perfect for portion control—give your dog one or two depending on their size. Because they're baked with real lamb, they can be a bit rich, so start with a small amount to make sure your pup's tummy is happy. Keep them in the fridge to maintain crispness, and they're great for training sessions or as a special afternoon snack.
9. Venison and Carrot Sticks
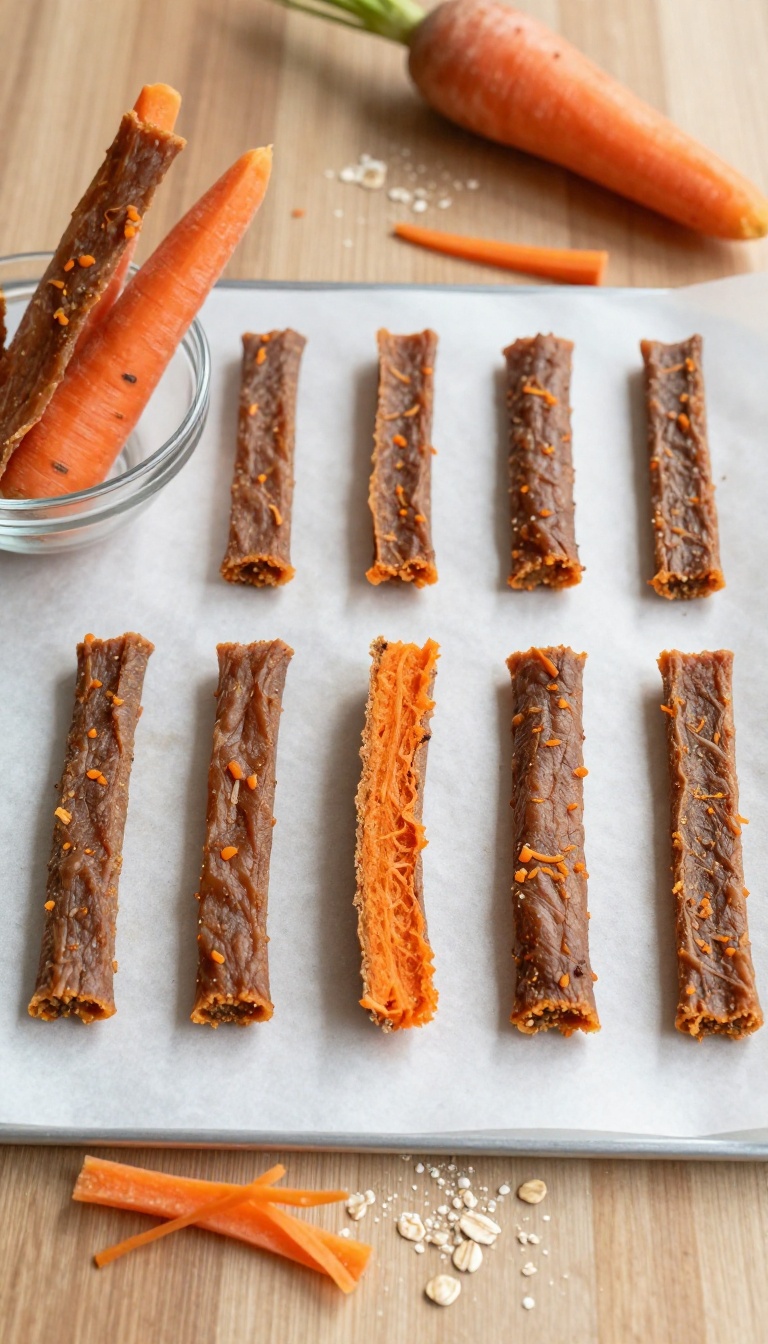
These venison and carrot sticks are a lean, protein-packed twist on the classic jerky treat. Venison is a great option for dogs with sensitive stomachs or those who need a novel protein, and it pairs perfectly with the natural sweetness of carrots. The result is a chewy, satisfying snack that keeps your pup busy and happy, whether you're training or just rewarding good behavior.
Plus, making them at home means you control every ingredient, so you know exactly what's going into your dog's treat jar.
Ingredients
- 1 lb lean ground venison
- 2 medium carrots, finely grated
- 1 large egg
- 1/4 cup oat flour (or more if needed)
- 1 tablespoon coconut oil, melted
Instructions
- Preheat your oven to 175°F (80°C) if you're going for a dehydrated texture, or 350°F (175°C) for a baked version. Line a baking sheet with parchment paper.
- In a large bowl, combine the ground venison, grated carrots, egg, oat flour, and melted coconut oil. Mix until everything is well incorporated. If the mixture feels too wet, add a bit more oat flour.
- Roll the mixture into thin logs about 1/2 inch thick, or press it into a rectangle on the baking sheet and slice into strips. For chewy jerky-style sticks, keep them thin and uniform.
- If baking at 350°F, bake for 20-25 minutes, then flip and bake for another 10-15 minutes until firm. If dehydrating at 175°F, bake for 2-3 hours, flipping halfway, until the sticks are dry and chewy but not brittle.
- Let the sticks cool completely on a wire rack before serving. Store in an airtight container in the fridge for up to a week, or freeze for longer storage.
Serving Tip
These venison and carrot sticks are perfect for training sessions because they're chewy and can be broken into smaller pieces. For a long-lasting chew, dehydrate them longer until they're really firm. Always supervise your dog when giving any treat, and adjust the size to your pup's breed and chewing style.
10. Chicken Liver and Cheese Puffs
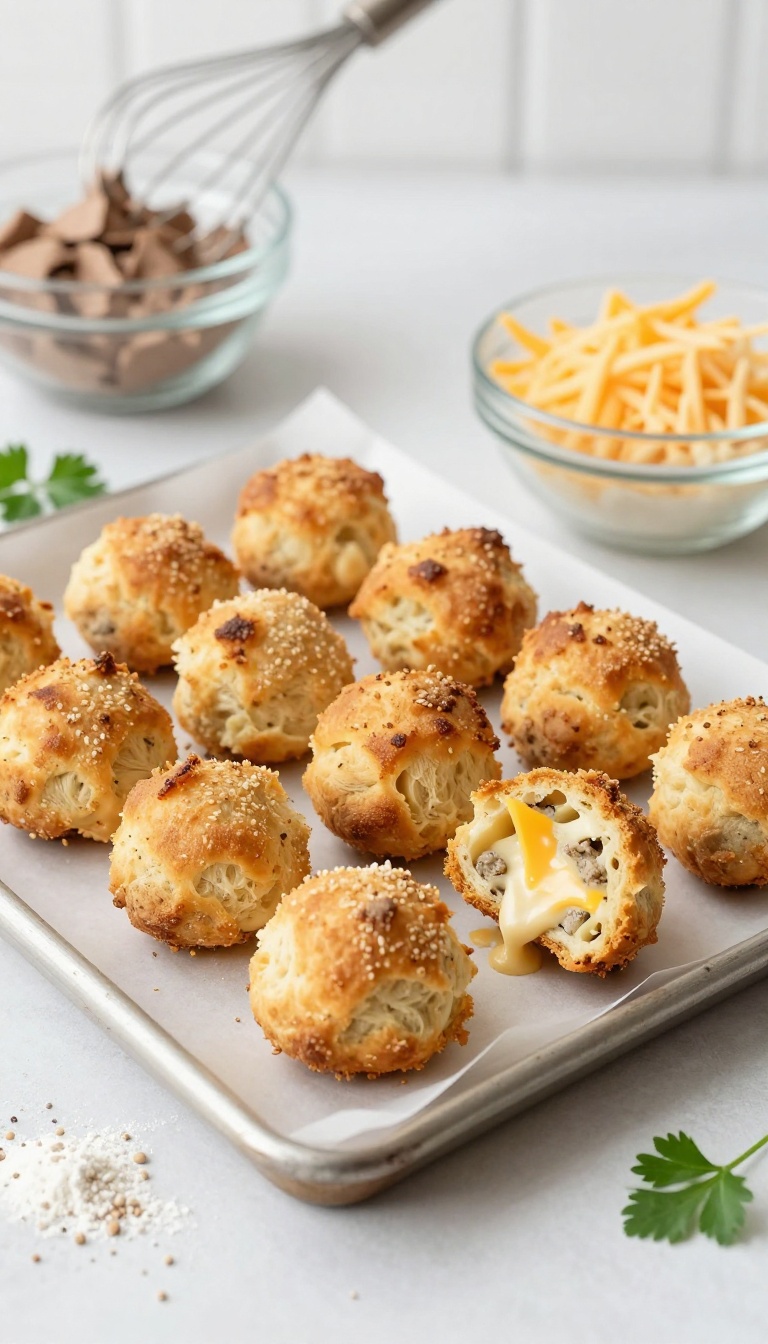
These little puffs are a fun way to change up your dog's treat routine without much fuss. They come together in about 20 minutes, so you can whip up a batch while dinner is in the oven. The chicken liver gives them a rich flavor that most dogs find irresistible, while the cheese adds a savory note that makes them feel extra special.
If your pup has had trouble with other proteins, chicken liver is often a gentle option that still packs a punch.
Ingredients
- 1/2 cup chicken liver, finely chopped
- 1 cup whole wheat flour (or oat flour for sensitive tummies)
- 1/2 cup shredded cheddar cheese
- 1 large egg
- 1/4 cup plain unsweetened applesauce
- 1 tablespoon olive oil
Instructions
- Preheat your oven to 350°F (175°C) and line a baking sheet with parchment paper.
- In a mixing bowl, combine the chopped chicken liver, flour, shredded cheese, egg, applesauce, and olive oil. Stir until a soft dough forms.
- Drop small spoonfuls of the dough onto the prepared baking sheet, spacing them about an inch apart. They don't need to be perfect—rustic is fine.
- Bake for 12 to 15 minutes, until the puffs are lightly golden and firm to the touch. Let them cool completely before serving.
Serving Tip
These puffs are best stored in an airtight container in the fridge for up to a week, or you can freeze them for up to three months. For smaller dogs, break a puff into bite-sized pieces. They make a great training treat because they're soft enough to break apart easily but sturdy enough to hold up in a pocket.
FAQ
Are these meat dog treat recipes safe for all dogs?
Most are safe for healthy dogs, but always check with your vet if your dog has allergies or health conditions. Introduce new treats gradually.
How should I store homemade meat dog treats?
Store in an airtight container in the refrigerator for up to a week, or freeze for up to three months. Always thaw before serving.
Can I substitute ingredients in these recipes?
Yes, you can swap meats or veggies as long as they are dog-safe. Keep proportions similar for best results.
How many treats can I give my dog per day?
Treats should make up no more than 10% of your dog's daily calories. Adjust meal portions accordingly.
What if my dog has a sensitive stomach?
Start with a small amount and watch for any digestive upset. Choose recipes with simple, easily digestible ingredients like chicken and rice.
Conclusion
These 10 savory meat dog treat recipes are a fantastic way to spoil your meat-loving pup with homemade goodness. They're quick, practical, and made with ingredients you can trust. Your dog will appreciate the effort, and you'll love seeing their tail wag with every bite.
Remember to always consider your dog's individual needs and consult your vet if you have any concerns. Happy treat-making, and enjoy those happy, slobbery kisses!

I’m Pallab Kishore, the owner of Little Pets Realm — an animal lover and pet care enthusiast sharing easy tips, healthy recipes, and honest advice to help every small pet live a happy, healthy, tail-wagging life.