Last updated on March 24th, 2026 at 07:39 am
Dogs usually prefer treats with strong smell and soft texture, yet many store-bought options rely on fillers that add little real value. Homemade recipes solve that problem by keeping ingredients simple and recognizable.
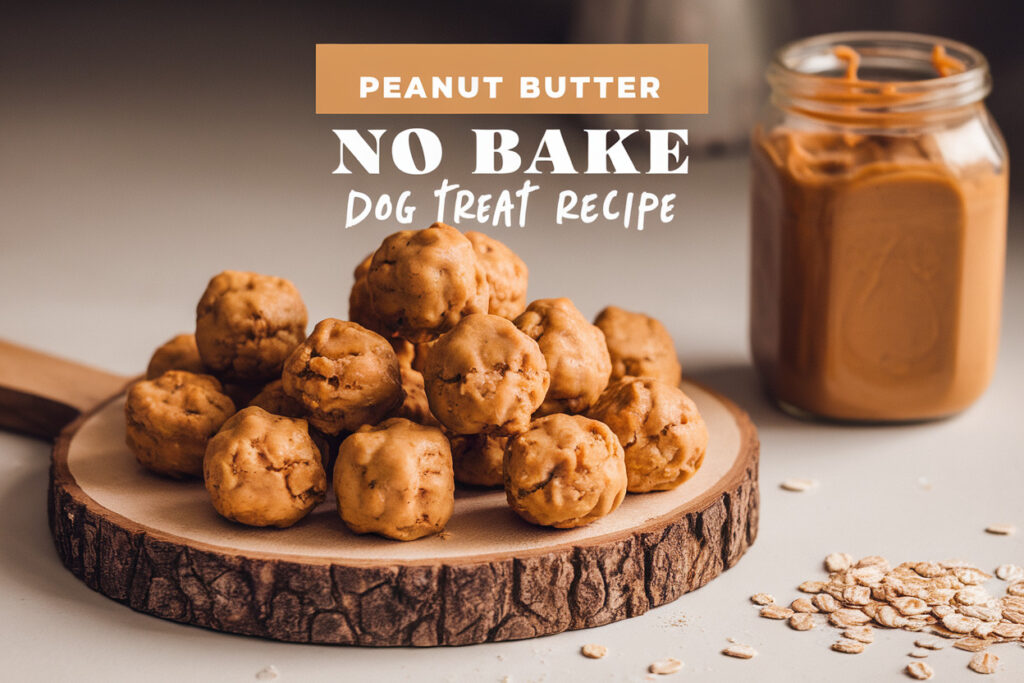
This peanut butter no bake dog treat recipe does exactly that. It uses basic pantry ingredients, skips unnecessary additives, and comes together faster than most baked dog treats.
I’ve made a lot of homemade dog snacks over the years, and this one stays in regular rotation because it’s simple, reliable, and dogs tend to go absolutely nuts for it.
What Makes This Recipe Shine
Some homemade dog treats look great on paper but fall apart the moment you try to make them. Others turn out too dry, too crumbly, or so hard that you start wondering if your dog needs dental insurance before taking a bite. This recipe avoids all of that by focusing on texture first.
The combination of peanut butter, oats, and a natural binder creates a dough that holds together easily without needing baking. That matters more than people realize because dogs usually prefer soft, chewy treats over crunchy ones, especially as they get older.
Peanut butter does most of the heavy lifting here. Dogs love the smell, the flavor is naturally rich, and it blends smoothly with other ingredients, which helps create that dense, rollable dough. As long as you use unsweetened peanut butter without xylitol, it’s a perfectly safe and popular ingredient in homemade dog treats.
Oats bring balance to the recipe. They add fiber, help absorb moisture, and give the treats a slightly chewy bite instead of turning them into sticky blobs. Ground oats also digest easily for most dogs, which makes them a common base ingredient in homemade dog food and treats.
Another thing I like about this recipe is how fast it comes together. You mix everything in one bowl, shape the treats, and let them chill in the fridge. No oven, no complicated steps, and no waiting around for trays to bake.
The smell alone usually gets my dog pacing around the kitchen like a tiny food detective. The moment the peanut butter jar opens, he knows something good is happening.
Start With These Easy Dog Treat Recipes:
- Pumpkin, Egg & Oat Dog Cake Recipe (3 Ingredients)
- Long Lasting Sweet Potato Dog Chews Recipe
- Peanut Butter, Banana & Oat Dog Treats
- Crunchy Baked Dog Treats Recipe for Training
Ingredients You’ll Need
• Natural Peanut Butter (1 cup) – Use unsweetened peanut butter with no xylitol. Dogs love the flavor and it helps bind the mixture together.
• Old-Fashioned Rolled Oats (2 cups) – Ground oats create the base of the treat and give it structure while remaining gentle on digestion.
• Mashed Banana (1 medium) – Adds natural sweetness and moisture while helping the dough stick together.
• Ground Flaxseed (2 tablespoons) – Provides healthy omega-3 fats and helps stabilize the texture of the mixture.
• Unsweetened Applesauce (¼ cup) – Adds moisture and mild flavor while keeping the treats soft.
• Coconut Oil (1 tablespoon) – Supports skin and coat health while helping the mixture firm up slightly when chilled.
• Water (as needed) – Used in small amounts if the dough feels too thick.
All of these ingredients are commonly used in homemade dog recipes and are generally considered safe when used in normal treat portions.
Step-by-Step Instructions
Step 1: Grind the Oats
Place the rolled oats into a blender or food processor and pulse them until they resemble coarse flour. The texture should look slightly grainy rather than powdery.
Grinding the oats helps the dough hold together more smoothly. Whole oats can still work, but the treats tend to crumble more easily.
Step 2: Combine the Wet Ingredients
Add the peanut butter, mashed banana, applesauce, and coconut oil to a mixing bowl. Stir everything together until the mixture looks smooth and evenly blended.
This stage usually smells strong enough to attract every dog within a ten-foot radius. Mine always shows up halfway through mixing like he suddenly remembered I exist.
Step 3: Mix in the Dry Ingredients
Add the ground oats and flaxseed into the bowl with the peanut butter mixture. Stir slowly at first so the oats absorb the moisture evenly.
The mixture should start forming a thick dough after a minute or two of mixing. If it feels too dry, add a tablespoon of water and mix again.
Step 4: Knead the Dough
Use your hands to knead the mixture gently inside the bowl. The dough should feel soft and slightly sticky but still easy to shape.
If the mixture sticks heavily to your hands, sprinkle in a small amount of additional ground oats. That usually fixes the texture quickly.
Step 5: Shape the Treats
Roll the dough into small balls about the size of a marble or walnut depending on your dog’s size. You can also flatten them slightly with your fingers to create bite-sized discs.
Uniform sizing helps you control portion sizes later. Smaller dogs benefit from smaller treats, while large breeds can handle bigger ones.
Step 6: Chill the Treats
Place the shaped treats on a parchment-lined tray and move them into the refrigerator for about 45–60 minutes. The coconut oil firms up slightly during chilling and helps the treats hold their shape.
After chilling, the texture becomes soft but stable enough for easy handling.
Step 7: Serve or Store
Once chilled, the treats are ready to serve. Most dogs don’t hesitate even for a second before inhaling the first one.
Store leftovers in an airtight container in the refrigerator for up to one week, or freeze them for longer storage.
Start With These Easy Dog Treat Recipes:
- Pumpkin, Egg & Oat Dog Cake Recipe (3 Ingredients)
- Long Lasting Sweet Potato Dog Chews Recipe
- Peanut Butter, Banana & Oat Dog Treats
- Crunchy Baked Dog Treats Recipe for Training
Common Mistakes to Avoid
One of the biggest mistakes people make with homemade dog treats is choosing the wrong peanut butter. Many brands add artificial sweeteners, and xylitol is extremely dangerous for dogs. Always double-check the label before using it.
Another issue shows up with dough texture. If the mixture turns too dry, the treats crumble when you try to shape them. Adding a small spoonful of applesauce or water usually fixes that immediately.
Some people also go overboard with treat size. Large treats might seem fun, but dogs digest smaller portions much better, especially when peanut butter is involved.
Skipping the chilling step can also cause problems. The dough holds together best after the coconut oil firms up, which is why the fridge time matters.
Finally, avoid adding salt or sugar to homemade dog treats. Dogs don’t need extra seasoning, and their taste preferences lean heavily toward simple flavors anyway.
Alternatives & Substitutions
Peanut butter works great here, but some dogs have allergies or sensitive stomachs. In those cases, you can replace it with natural almond butter or sunflower seed butter as long as the product contains no artificial sweeteners.
If your dog struggles with grains, swap the oats for finely ground unsweetened coconut flakes or oat-free dog-safe flour alternatives. Texture changes slightly, but the treats still hold together well.
Banana acts as a natural binder, though unsweetened pumpkin puree can replace it easily. Pumpkin also brings extra fiber, which some dogs tolerate better than fruit sugars.
Flaxseed adds healthy fats, but chia seeds can perform the same role if that’s what you have available. Both ingredients help support coat health and digestion.
Some owners also like to add a tablespoon of plain Greek yogurt for extra creaminess. I personally skip it most of the time, but it does work if your dog handles dairy well.
FAQ
Can puppies eat these treats?
Yes, puppies can usually eat these treats in small amounts. Because the ingredients are simple and natural, they’re generally gentle on young stomachs.
Just keep the portions tiny and avoid overfeeding, since puppies still need balanced meals from proper puppy food.
How long do these dog treats last?
These treats stay fresh in the refrigerator for about one week. Because they contain fresh ingredients and no preservatives, refrigeration is important.
If you want them to last longer, freezing works perfectly.
Can I freeze these treats?
Absolutely. Place the treats in a freezer-safe container and freeze them for up to three months.
Many dogs enjoy them slightly frozen, especially during warmer months.
How many treats should I give my dog?
Treats should stay below about ten percent of your dog’s daily calorie intake. That rule helps maintain a healthy weight.
For most medium-sized dogs, one or two small treats per day works well.
Can I use crunchy peanut butter?
Crunchy peanut butter technically works, but it changes the texture of the dough. The peanut pieces can make shaping the treats slightly harder.
Smooth peanut butter blends much more evenly.
Are oats safe for dogs?
Yes, plain oats are safe and commonly used in homemade dog food recipes. They provide fiber and gentle carbohydrates that most dogs digest easily.
Just avoid flavored or sweetened oatmeal products.
What if my dog doesn’t like banana?
Some dogs turn their nose up at bananas, which honestly surprises me every time. In that case, pumpkin puree or unsweetened applesauce can replace it easily.
Both options still help bind the mixture and keep the treats soft.
Final Thoughts
Homemade dog treats don’t need complicated ingredients or fancy techniques to work well. A simple mix of peanut butter, oats, and natural binders usually delivers exactly what dogs enjoy most.
This no bake recipe stays in my regular rotation because it’s quick, reliable, and easy to customize depending on what’s sitting in the pantry.
If your dog reacts anything like mine, the hardest part of making these treats will be convincing them to wait until they finish chilling.

I’m Pallab Kishore, the owner of Little Pets Realm — an animal lover and pet care enthusiast sharing easy tips, healthy recipes, and honest advice to help every small pet live a happy, healthy, tail-wagging life.