
Last updated on September 1st, 2026 at 04:43 pm
There's something special about reaching into a jar of homemade treats and watching your dog's eyes light up. When you make treats yourself, you control every ingredient, ensuring each bite is fresh, wholesome, and made with love.
Plus, the aroma of baking fills your kitchen with a cozy, welcoming scent that your pup will associate with delicious rewards. These 10 recipes are all about indulgence—think rich peanut butter, savory bacon, and creamy pumpkin.
They're designed to be simple enough for busy weeknights but special enough for birthdays or just because. Each treat is packed with flavor and texture that will have your dog doing happy dances.
1. Peanut Butter & Banana Swirl Bites
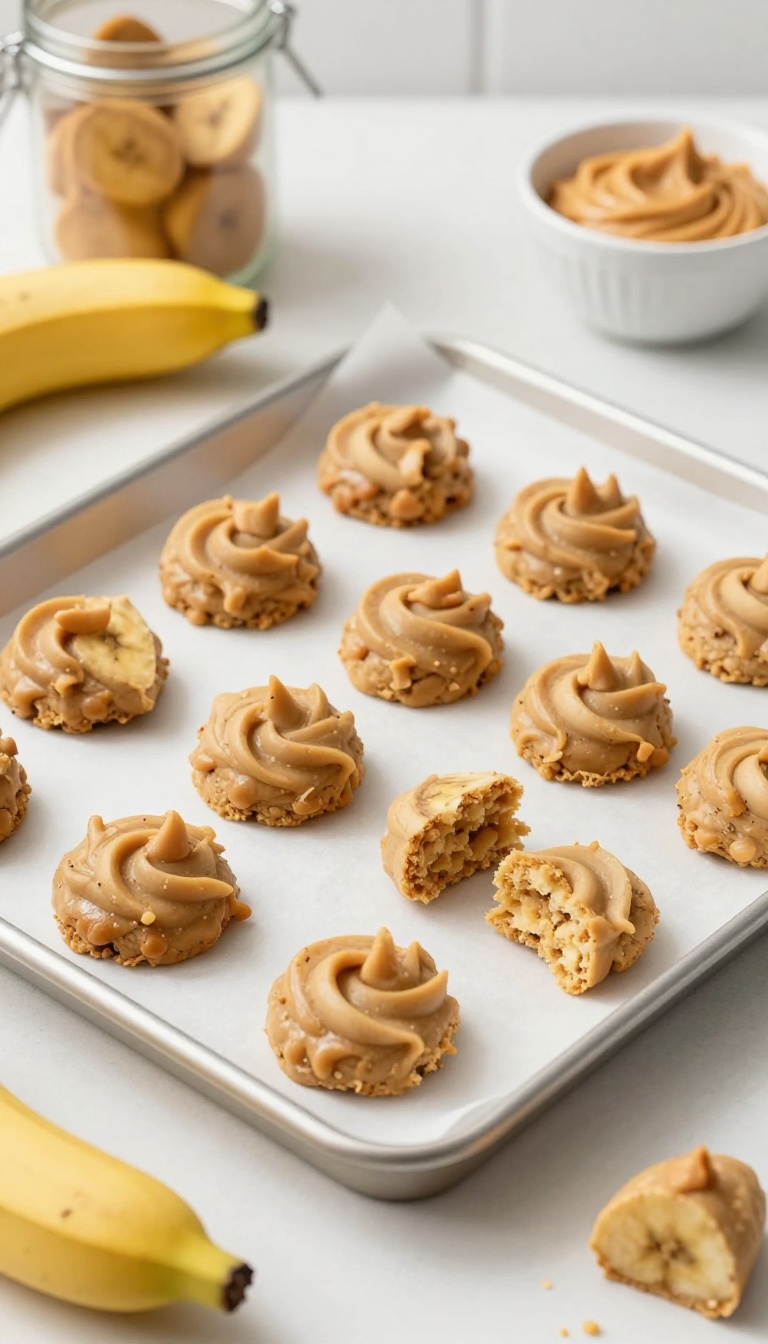
These soft, chewy bites are the kind of treat that makes your dog's tail spin in happy circles. The rich, nutty flavor of peanut butter meets the natural sweetness of ripe banana in a swirl that's as fun to look at as it is to gobble up. They're simple to mix together, bake quickly, and keep well in the fridge, so you can have a ready supply of indulgent little rewards for training sessions or just because.
Your pup will think they've hit the jackpot.
Ingredients
- 1 ripe banana, mashed
- 1/2 cup creamy peanut butter (xylitol-free)
- 1 cup oat flour
- 1/4 cup rolled oats
- 1 egg, beaten
Instructions
- Preheat your oven to 350°F (175°C) and line a baking sheet with parchment paper.
- In a medium bowl, mix the mashed banana and peanut butter until smooth.
- Add the oat flour, rolled oats, and beaten egg, stirring until a soft dough forms.
- Drop spoonfuls of dough onto the prepared baking sheet, then use a fork to gently swirl the tops for a marbled look.
- Bake for 12–15 minutes, until the edges are lightly golden and the centers are set.
- Let cool completely before serving or storing.
Serving Tip
Store these bites in an airtight container in the fridge for up to a week, or freeze for up to three months. For training, break them into smaller pieces—they're soft enough to crumble easily. Always check that your peanut butter contains no xylitol, which is toxic to dogs.
2. Bacon & Cheddar Cheese Biscuits
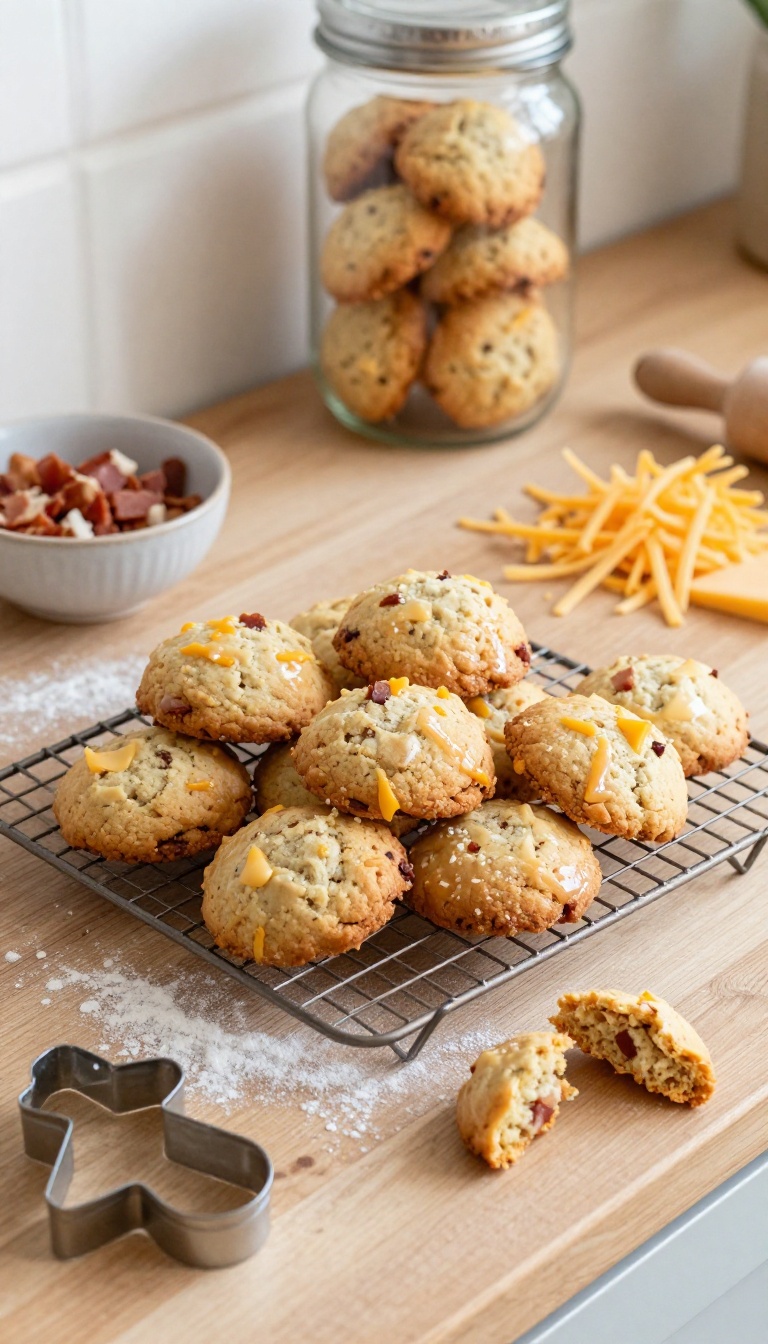
These aren't your average boring biscuits. We're talking about a crunchy, savory snack that's packed with real bacon bits and sharp cheddar, baked until golden and irresistibly fragrant. Your dog will do the happy dance the moment they catch a whiff of these coming out of the oven.
They're perfect for training sessions, stuffing into puzzle toys, or just rewarding your best friend for being, well, the best.
Ingredients
- 2 cups whole wheat flour (or oat flour for a grain-free option)
- 1/2 cup cooked bacon bits (ensure no added salt, sugar, or artificial preservatives; pat dry and crumble)
- 1 cup shredded sharp cheddar cheese
- 1 large egg, beaten
- 1/2 cup chicken or beef broth (low-sodium, no onion or garlic)
Instructions
- Preheat your oven to 350°F (175°C) and line a baking sheet with parchment paper.
- In a large bowl, whisk together the flour, bacon bits, and shredded cheddar. Pour in the beaten egg and broth, then stir until a dough forms. If it's too dry, add a splash more broth; if too sticky, add a little flour.
- Turn the dough out onto a lightly floured surface and roll to about 1/4-inch thickness. Use dog-bone-shaped cookie cutters to cut out biscuits, or simply slice into small squares.
- Place the biscuits on the prepared baking sheet and bake for 20-25 minutes, or until golden brown and firm to the touch. Let them cool completely on a wire rack before serving – they'll crisp up as they cool.
Serving Tip
Store these biscuits in an airtight container at room temperature for up to a week, or pop them in the fridge for longer freshness. For a crunchy texture, you can bake them a few extra minutes. Break into small pieces for training treats or give one as a special snack – always supervise your dog and adjust portions based on their size and dietary needs.
3. Sweet Potato & Carob Chip Cookies
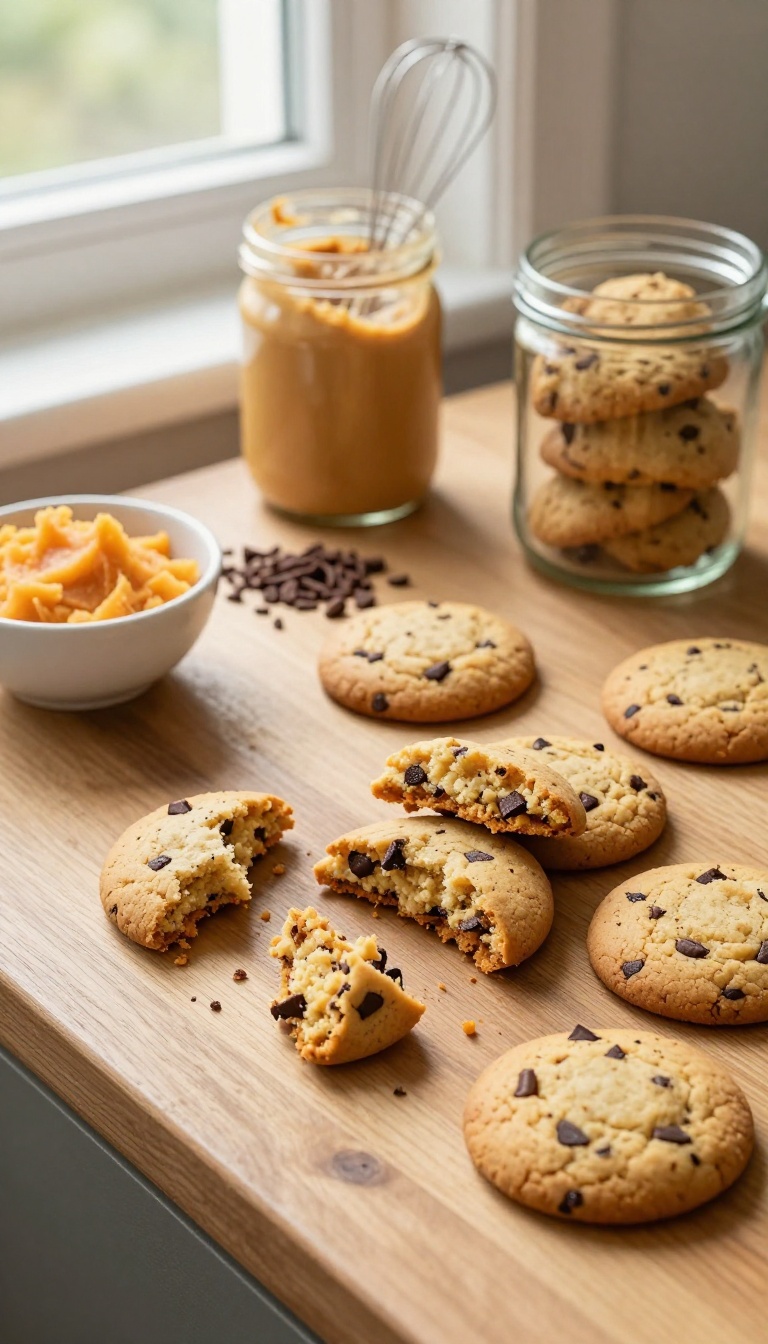
These soft, cake-like cookies are a dessert-worthy indulgence your dog can actually enjoy. Mashed sweet potato brings natural sweetness and a moist crumb, while carob chips mimic the look of chocolate without any of the danger. It's a treat that feels decadent but is packed with fiber, vitamins, and dog-safe flavor.
Ingredients
- 1 cup mashed sweet potato (about 1 medium sweet potato, cooked and cooled)
- 1/4 cup creamy peanut butter (xylitol-free)
- 1/4 cup unsweetened applesauce
- 1 large egg
- 1 1/2 cups oat flour
- 1/2 cup carob chips (unsweetened, dog-safe)
Instructions
- Preheat your oven to 350°F (175°C) and line a baking sheet with parchment paper.
- In a large bowl, mix the mashed sweet potato, peanut butter, applesauce, and egg until smooth and creamy.
- Stir in the oat flour until a soft dough forms, then gently fold in the carob chips.
- Drop rounded tablespoons of dough onto the prepared baking sheet, spacing them about 2 inches apart.
- Bake for 12–15 minutes, until the edges are lightly golden and the centers are set. Let cool completely before serving.
Serving Tip
Because these cookies are soft, they're perfect for senior dogs or pups who prefer gentler treats. Store them in an airtight container in the fridge for up to 5 days, or freeze for up to 3 months—just thaw a few at a time for a quick, indulgent snack.
4. Frozen Yogurt & Blueberry Pupsicles
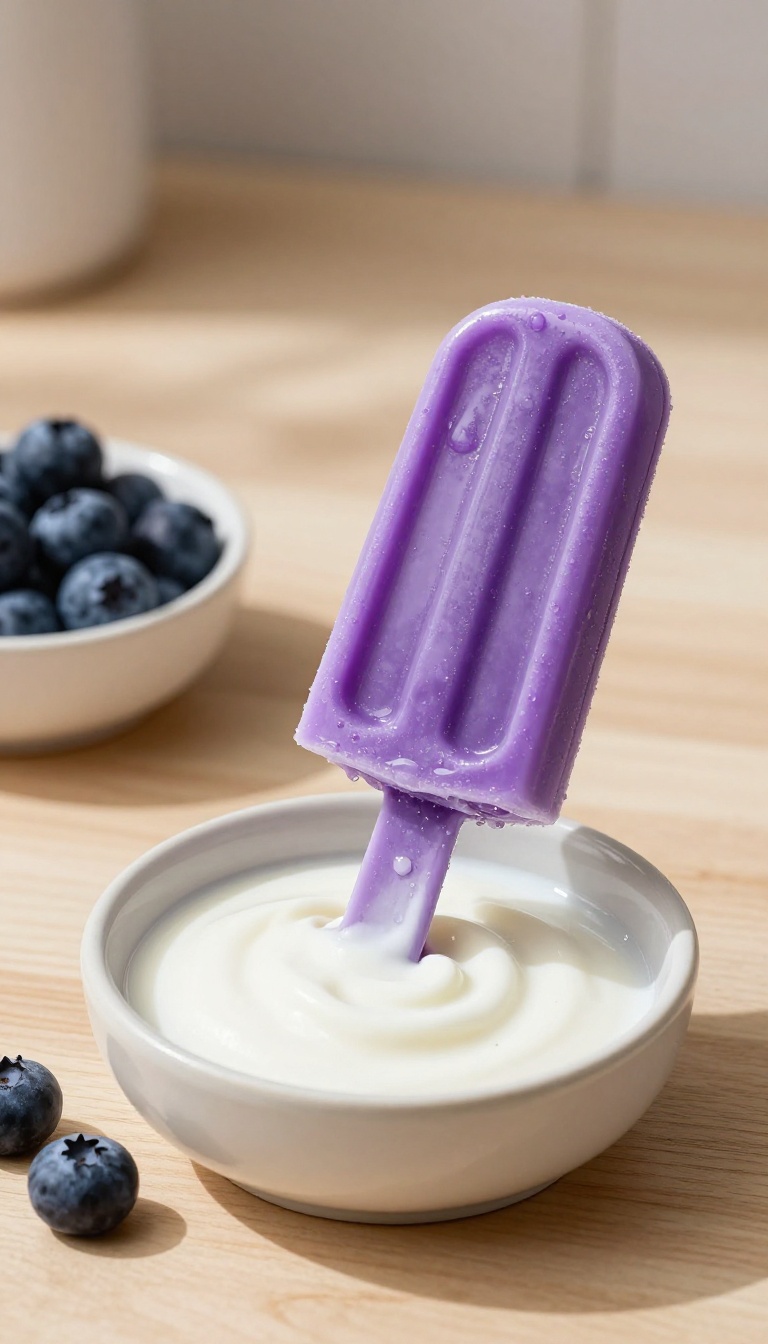
When the sun beats down and your pup is sprawled on the cool kitchen floor, nothing says 'I love you' like a frosty, creamy pupsicle that’s practically dripping with indulgence. These frozen yogurt and blueberry treats are the ultimate hot-weather luxury—a swirl of silky plain yogurt loaded with juicy, antioxidant-rich blueberries that burst with every lick. They’re not just a snack; they’re a moment of pure bliss for your four-legged best friend.
Ingredients
- 2 cups plain, unsweetened yogurt (Greek or regular, no xylitol)
- 1 cup fresh or frozen blueberries (rinsed if fresh)
- 1 tablespoon honey (optional, for extra sweetness, but skip if your dog is diabetic)
- 1 tablespoon coconut oil (melted, for a glossy finish and healthy fats)
Instructions
- In a blender or food processor, combine the yogurt, blueberries, honey (if using), and melted coconut oil. Blend until the mixture is smooth and the blueberries are completely pureed, leaving no large chunks that could be a choking hazard.
- Pour the mixture into silicone molds or an ice cube tray. If you don’t have molds, you can use small paper cups or a mini muffin tin lined with parchment paper. Fill each cavity about three-quarters full to leave room for expansion.
- Tap the molds gently on the counter to release any air bubbles, then place them in the freezer for at least 4 hours or until completely solid. Once frozen, pop the pupsicles out of the molds and store them in a freezer-safe zip-top bag or airtight container.
Serving Tip
Serve one pupsicle at a time as a special treat, especially after a walk or on a scorching afternoon. Because they’re frozen, they can be messy, so offer them outside or on a washable mat. They’ll keep in the freezer for up to two months—just make sure to let them sit for a minute or two before serving if they’re rock-hard, so your pup doesn’t break a tooth.
5. Pumpkin & Oatmeal Crunch Bars
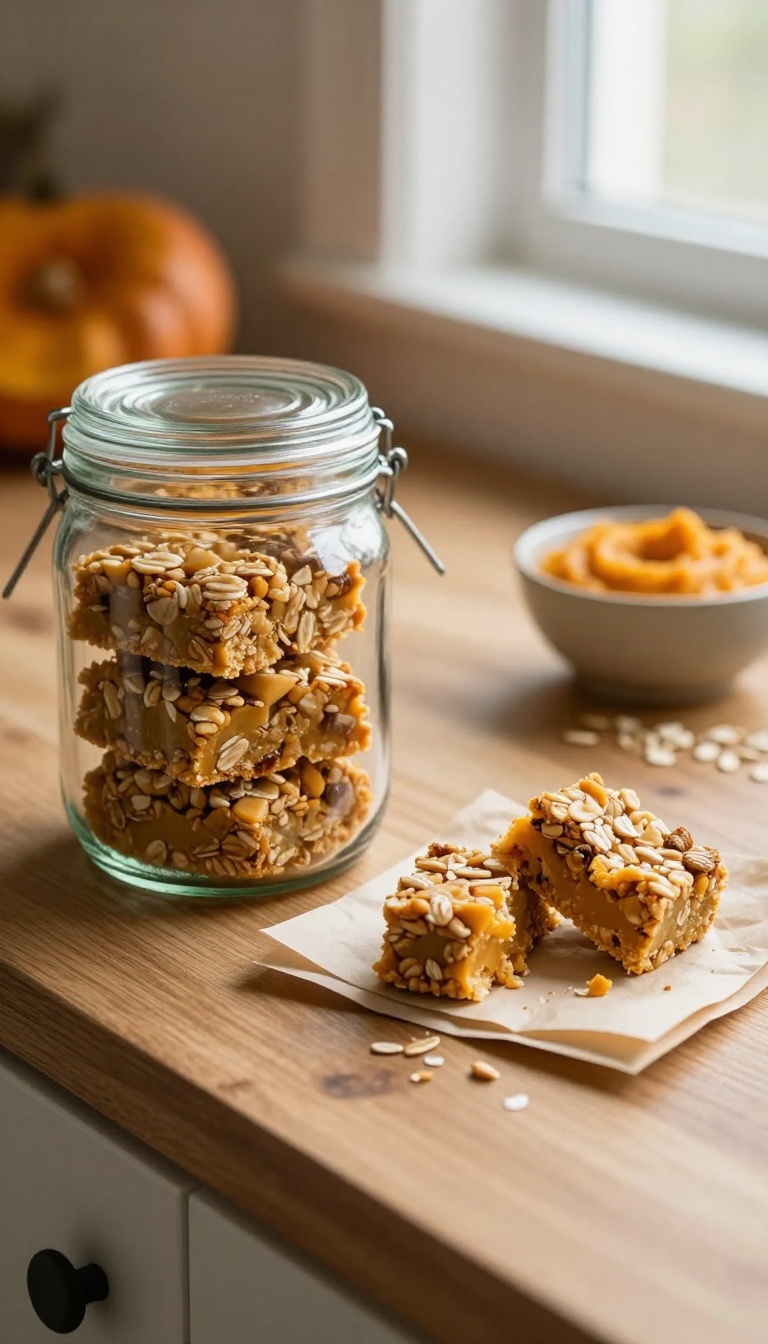
These bars are a crunchy, golden-brown snack that feels like a bakery treat but is packed with dog-friendly goodness. The pumpkin puree brings a touch of natural sweetness and a boost of fiber, while the oats add a hearty texture that dogs love to sink their teeth into. They're baked until crisp, so every bite gives that satisfying snap that makes snack time feel extra special.
Whether you're rewarding a good sit or just filling the jar, these bars are a bold and indulgent way to show your pup some love.
Ingredients
- 2 cups rolled oats
- 1 cup pumpkin puree (unsweetened)
- 1/2 cup unsweetened applesauce
- 1 teaspoon ground cinnamon
- 1 egg (for binding)
Instructions
- Preheat your oven to 350°F (175°C) and line a baking sheet with parchment paper.
- In a large bowl, mix the rolled oats, pumpkin puree, applesauce, cinnamon, and egg until well combined. The mixture should be thick and slightly sticky.
- Press the mixture evenly onto the prepared baking sheet, about 1/4-inch thick. Use a spatula to smooth the top.
- Bake for 25-30 minutes, or until the edges are golden and the top feels firm. Let it cool completely.
- Once cool, cut into bar-shaped pieces. Store in an airtight container in the fridge for up to a week.
Serving Tip
These bars are crunchy, so they're great for dogs who enjoy a little resistance while chewing. Break them into smaller pieces for smaller pups or use them as a training reward. Keep them in the fridge to maintain that crisp texture, and always supervise your dog when giving treats.
6. Apple & Cinnamon Soft Chews
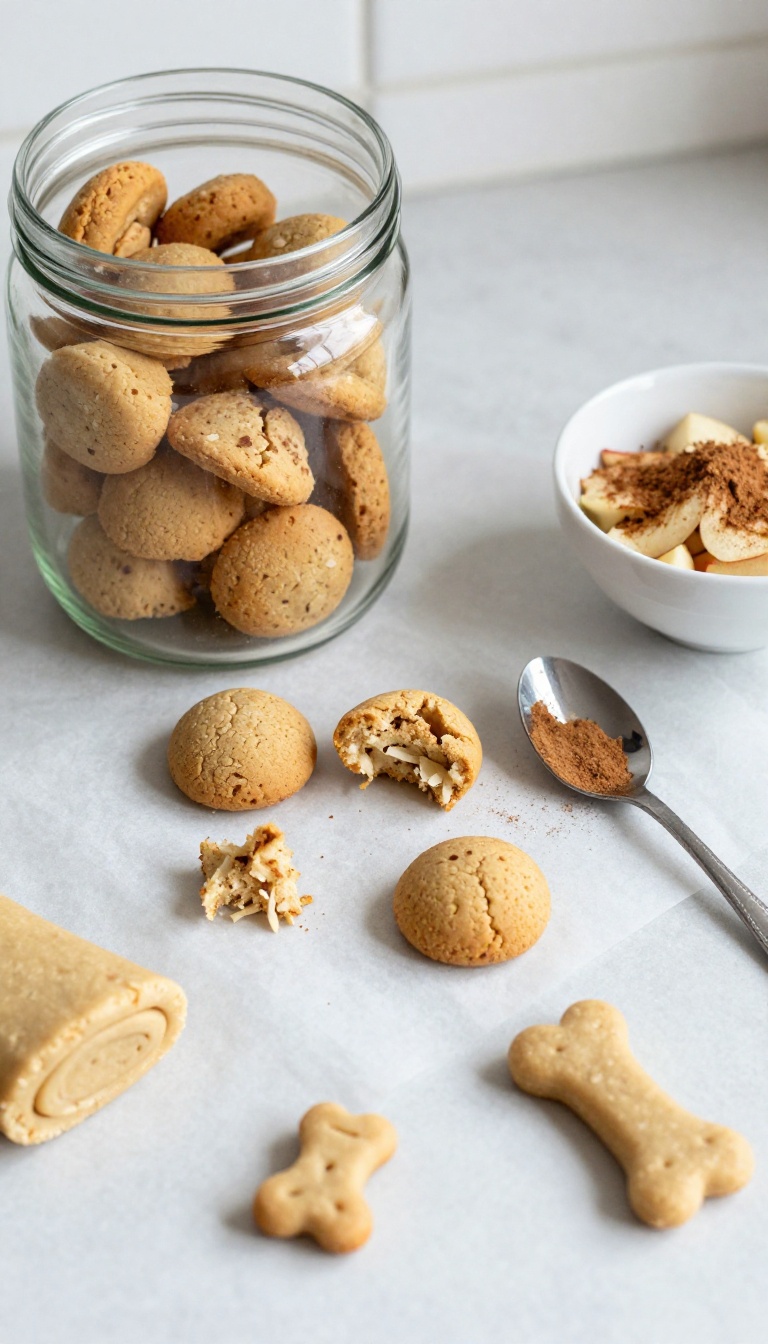
These soft chews are like a warm hug for your pup's taste buds. The natural sweetness of grated apple meets a gentle dusting of cinnamon, creating a treat that feels decadent without any added sugar. Baked low and slow, they come out tender and chewy, perfect for dogs who prefer a softer bite or for senior pups with sensitive teeth.
Plus, the aroma that fills your kitchen while they bake is absolutely irresistible—your dog will be doing happy circles around the oven.
Ingredients
- 1 large apple, peeled and grated
- 1 ½ cups oat flour (or finely ground rolled oats)
- 1 teaspoon ground cinnamon
- 1 large egg, beaten
- 2 tablespoons unsweetened applesauce
Instructions
- Preheat your oven to 325°F (160°C) and line a baking sheet with parchment paper.
- In a large bowl, combine the grated apple, oat flour, and cinnamon. Stir in the beaten egg and applesauce until a soft dough forms.
- Roll the dough out on a lightly floured surface to about ¼-inch thickness. Use a small cookie cutter or a knife to cut into bite-sized shapes.
- Place the treats on the prepared baking sheet and bake for 20–25 minutes, until the edges are just golden and the centers feel firm but springy.
- Let cool completely on a wire rack before serving. Store in an airtight container in the refrigerator for up to a week.
Serving Tip
These chews are soft enough for puppies and older dogs, but they're still sturdy enough for a little crunch on the outside. For extra freshness, keep them in the fridge and give your dog one or two as a special snack. If you want a slightly firmer texture, bake for an extra 5 minutes—just keep an eye on them so they don't dry out.
7. Beef Liver & Parsley Training Bites
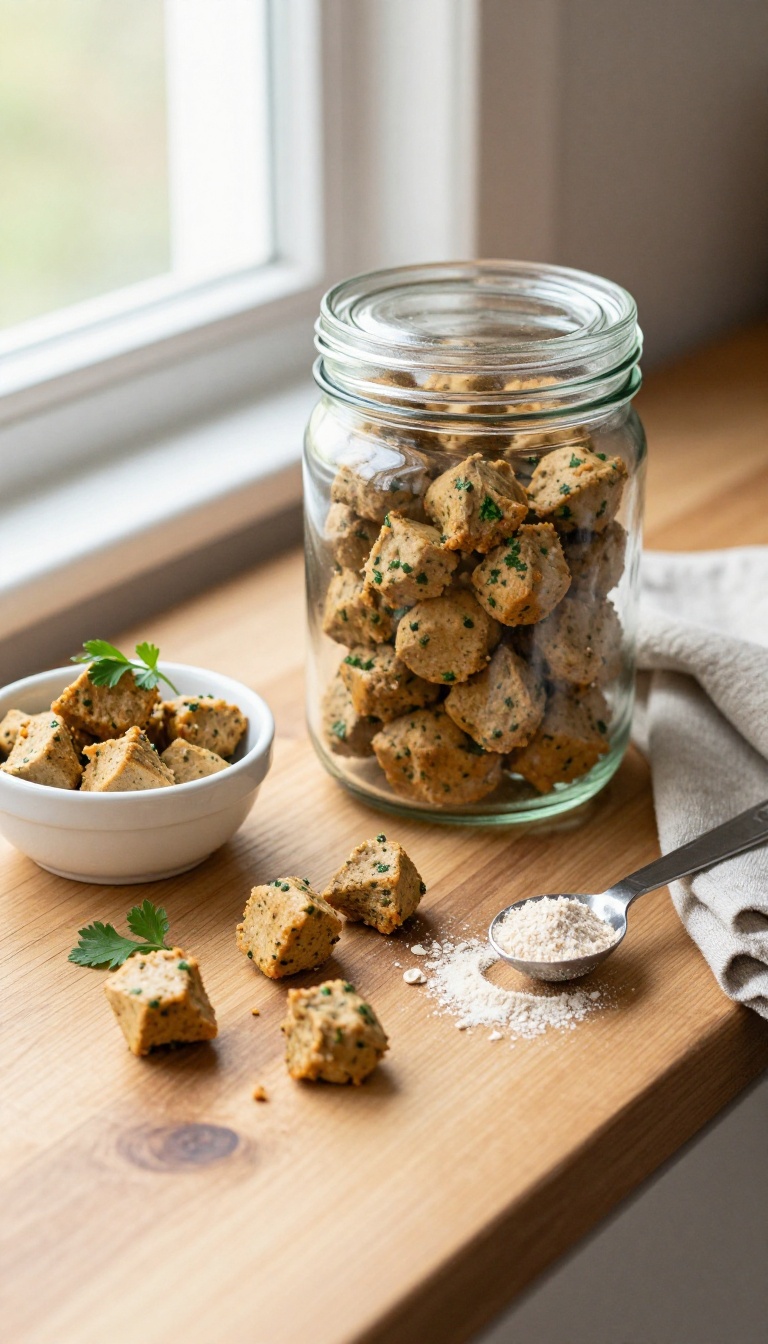
When you need a treat that commands attention, these beef liver and parsley bites deliver. The rich, savory aroma of liver is like gold to most dogs, and the fresh parsley adds a bright note that helps freshen breath. These little morsels are soft enough to break into smaller pieces for quick rewards, yet sturdy enough to carry in a treat pouch without crumbling.
They're the ultimate high-value currency for training sessions or for celebrating those extra-special moments.
Ingredients
- 1 pound beef liver, trimmed and cut into chunks
- 1 cup oat flour (or finely ground rolled oats)
- 1 large egg
- 1/4 cup fresh parsley, finely chopped
- 1 tablespoon coconut oil, melted
Instructions
- Preheat your oven to 350°F (175°C) and line a baking sheet with parchment paper.
- In a food processor, pulse the beef liver until it forms a smooth paste. You may need to scrape down the sides a few times.
- Add the oat flour, egg, parsley, and coconut oil to the liver paste. Pulse until everything is well combined into a thick, sticky dough.
- Scoop teaspoon-sized portions of the dough and roll them into small balls. Place them on the prepared baking sheet, spacing them about an inch apart.
- Bake for 15–18 minutes, until the bites are firm to the touch and slightly browned on the edges. Let them cool completely on a wire rack before serving.
Serving Tip
Store these bites in an airtight container in the refrigerator for up to a week, or freeze them for up to three months. For training, break them into pea-sized pieces to keep rewards small and frequent. Always supervise your dog when giving any treat, and adjust portion sizes based on your dog's size and dietary needs.
8. Coconut & Honey Energy Balls
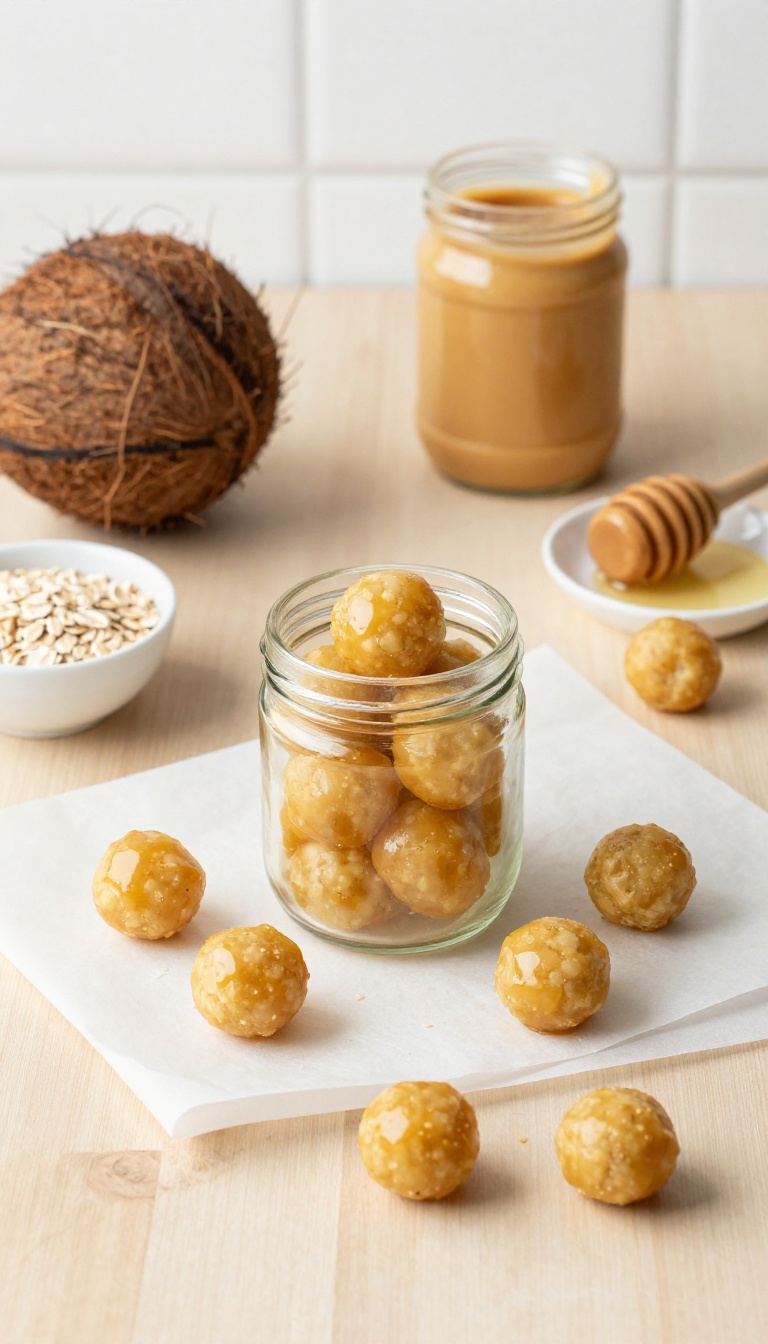
These little nuggets are like a power-up for your pup's day. Packed with natural sweetness from honey and the satisfying chew of coconut, they're perfect for training sessions or a midday pick-me-up. No oven required, so you can whip up a batch in minutes and keep them handy in the fridge.
Ingredients
- 1 cup unsweetened shredded coconut
- 1/2 cup rolled oats
- 1/4 cup natural peanut butter (xylitol-free)
- 2 tablespoons honey
- 1 tablespoon coconut oil, melted
Instructions
- In a food processor, pulse the shredded coconut and oats until they form a coarse flour.
- Add the peanut butter, honey, and melted coconut oil. Pulse until the mixture starts to clump together.
- Roll the mixture into small, bite-sized balls (about 1 inch in diameter).
- Place the balls on a parchment-lined tray and refrigerate for at least 30 minutes to firm up.
Serving Tip
Store these energy balls in an airtight container in the fridge for up to a week, or freeze for up to three months. Give your dog one or two as a treat, adjusting for size and activity level. They're great for stuffing into a puzzle toy for extra mental stimulation.
9. Carrot & Cream Cheese Frosted Cupcakes
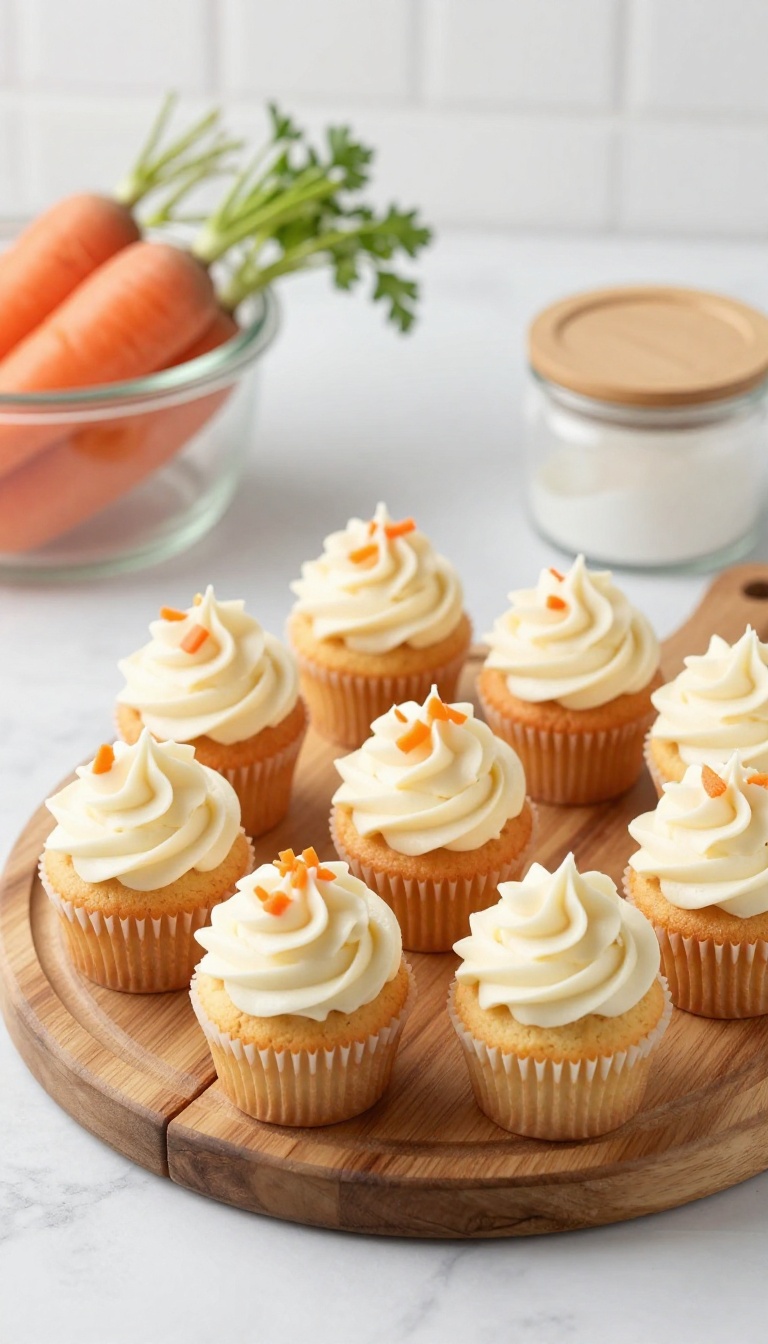
Got a birthday pup or just want to make an ordinary Tuesday feel extra special? These mini carrot cupcakes with a swirl of creamy frosting are the doggy equivalent of a bakery splurge. The carrot keeps them moist and naturally sweet, while the cream cheese topping adds a rich, indulgent finish that dogs absolutely adore.
They're a celebration in every bite, and you'll feel like a rock star chef every time you pull a batch out of the oven.
Ingredients
- 1 cup whole wheat flour
- 1/2 teaspoon baking soda
- 1/4 teaspoon cinnamon (optional)
- 1/2 cup unsweetened applesauce
- 1/4 cup plain Greek yogurt
- 1/4 cup grated carrot (about 1 small carrot)
- 1 tablespoon honey (optional)
- 1 egg
- For the frosting: 4 oz cream cheese, softened
- 2 tablespoons plain Greek yogurt
Instructions
- Preheat your oven to 350°F (175°C) and line a mini muffin tin with paper liners or lightly grease it.
- In a medium bowl, whisk together the flour, baking soda, and cinnamon if using. In another bowl, mix the applesauce, yogurt, grated carrot, honey (if using), and egg until well combined.
- Pour the wet ingredients into the dry and stir until just moistened. Spoon the batter into the mini muffin cups, filling each about 3/4 full.
- Bake for 12–15 minutes, or until a toothpick inserted in the center comes out clean. Let the cupcakes cool completely on a wire rack.
- While the cupcakes cool, make the frosting: beat the softened cream cheese, yogurt, and honey (if using) until smooth and fluffy.
- Once the cupcakes are cool, spread or pipe a small dollop of frosting onto each one. Store in the fridge until serving.
Serving Tip
- These cupcakes are rich, so keep portions small—one mini cupcake is plenty for a medium-sized dog. Store any leftovers in an airtight container in the fridge for up to 4 days, or freeze them (without frosting) for up to 2 months. Thaw in the fridge before serving.
- Perfect for a birthday party or a special 'just because' celebration!
10. Salmon & Spinach Grain-Free Bites
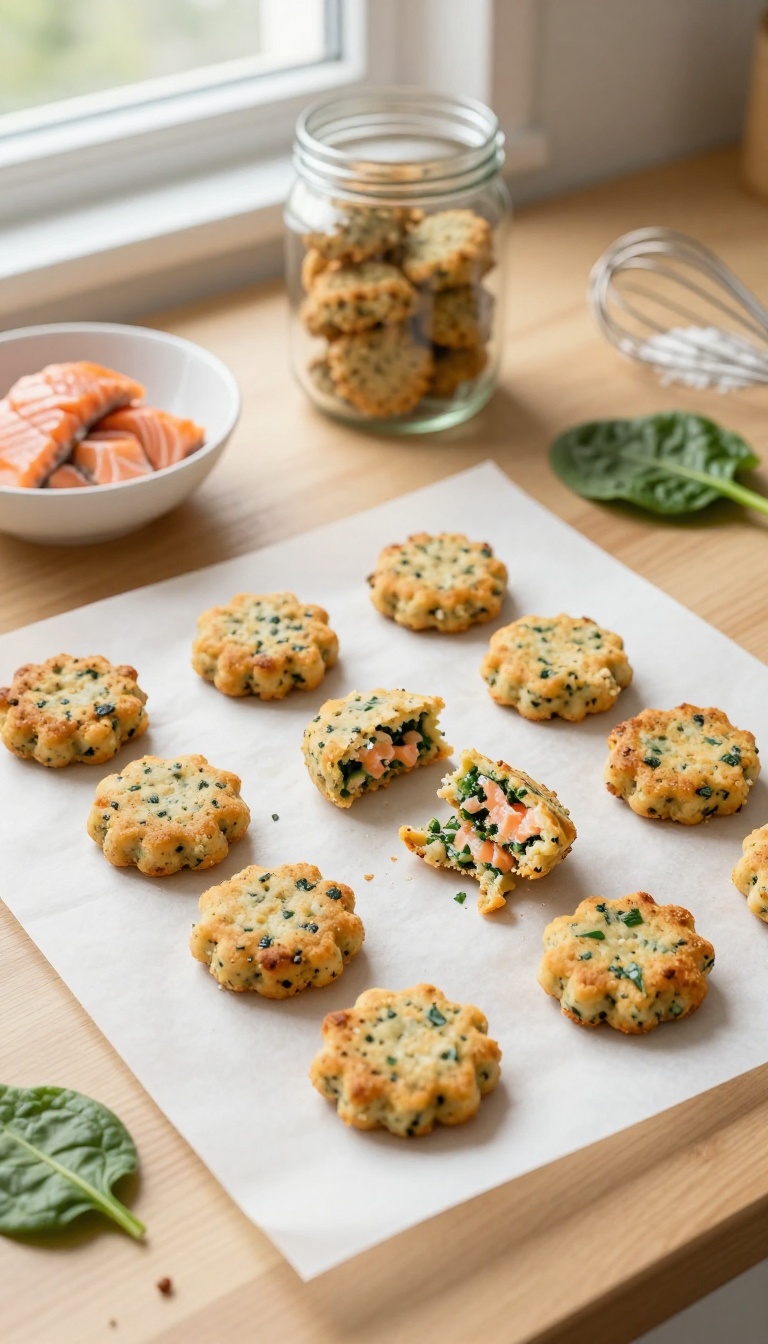
These little green-flecked nuggets are the snack-jar equivalent of a gourmet splurge, but they're made entirely with dog-safe ingredients. Flaked salmon brings a rich, savory punch that most pups can't resist, while spinach adds a subtle earthy note and a boost of vitamins. Because they're grain-free, they're a great option for dogs with sensitive stomachs or those on a grain-avoidant diet — and the crispy texture makes them feel like a real treat, not just another boring biscuit.
Ingredients
- 1 cup cooked salmon, flaked and bones removed
- 1 cup fresh spinach, finely chopped
- 1 large egg
- 1/4 cup coconut flour (or more as needed)
- 1 tablespoon coconut oil, melted
Instructions
- Preheat your oven to 350°F (175°C) and line a baking sheet with parchment paper.
- In a mixing bowl, combine the flaked salmon, chopped spinach, egg, melted coconut oil, and coconut flour. Stir until a thick, slightly sticky dough forms. If the dough is too wet, add a little more coconut flour, a teaspoon at a time.
- Roll the dough into small, bite-sized balls (about 1 inch in diameter) and place them on the prepared baking sheet. Gently flatten each ball with your palm or a fork to create a small patty shape.
- Bake for 12–15 minutes, until the bites are firm to the touch and lightly golden on the edges. Let them cool completely before serving — this helps them crisp up even more.
Serving Tip
Store these bites in an airtight container in the refrigerator for up to a week, or freeze them for up to three months. For smaller dogs, break a bite into halves or quarters. As a rule of thumb, give one to two bites per 10 pounds of body weight per day as a treat, and always adjust based on your dog's overall diet.
FAQ
How long do homemade dog treats last?
Most baked treats last 1-2 weeks in an airtight container at room temperature, or up to 3 months in the fridge. Frozen treats should be kept in the freezer and used within 3 months for best freshness.
Can I substitute ingredients in these recipes?
Absolutely! Many ingredients can be swapped, like using pumpkin instead of sweet potato or chicken instead of beef liver. Just ensure any substitute is dog-safe and adjust cooking times if needed.
Are these treats suitable for puppies?
Yes, but introduce new treats gradually and in small amounts. Puppies have sensitive stomachs, so it's best to wait until they're at least 8 weeks old and always supervise when giving treats.
How many treats can I give my dog per day?
Treats should make up no more than 10% of your dog's daily caloric intake. For most dogs, 1-3 small treats per day is plenty, depending on size and activity level.
What if my dog has food allergies?
Always check with your vet if you suspect allergies. Many of these recipes can be adapted, but avoid common allergens like chicken, beef, or dairy if needed. Introduce new treats one at a time to monitor reactions.
Conclusion
Filling your homemade snack jar with these indulgent treats is a wonderful way to show your dog how much you care. Each recipe is crafted with love and dog-safe ingredients, ensuring every bite is both delicious and nutritious.
Whether you're baking for a special occasion or just want to spoil your pup, these treats are sure to become favorites. Remember to store them properly and always consider your dog's individual dietary needs.

I’m Pallab Kishore, the owner of Little Pets Realm — an animal lover and pet care enthusiast sharing easy tips, healthy recipes, and honest advice to help every small pet live a happy, healthy, tail-wagging life.